Best Selling Products

Adobe Photoshop Copyright - Full App
120 USD

Genuine Cheap Canva Pro
39 USD

Capcut Pro 1 Year
39 USD

Upgrade genuine Capture One account
120 USD

Freepik Premium Account
59 USD

Autodesk All App Account Copyright
120 USD

Plugin Retouch4me
69 USD

Genuine Adobe Illustrator account
99 USD

Windows 10 & 11 Pro Key
36 USD

MidJourney Account
29 USD

Copyright Adobe Lightroom Account
59 USD

Upgrade Duolingo Super
29 USD

ChatGPT Plus Account (GPT-4)
16 USD

Upgrade Genuine Office 365
49 USD

Adobe Premiere Pro Account
99 USD
When Should You Shoot Vertical Landscapes and How to Create an Impressive Composition?
Nội dung
When it comes to landscape photography, most of us immediately think of vast, expansive horizontal frames. This is understandable, as the word "landscape" refers both to the genre of landscape photography and to the horizontal orientation of the frame. But what if you rotate your camera 90 degrees and photograph landscapes vertically? It sounds counterintuitive, but in reality, many scenes benefit significantly from this method.
1. Why should you photograph landscapes vertically?
The biggest reason many photographers choose vertical format is proportion and scale. When shooting street scenes in large cities, vertical format helps capture towering skyscrapers, making people appear small and giving viewers a sense of being in the heart of the city. This principle applies perfectly to landscapes when you want to emphasize the height and grandeur of nature.
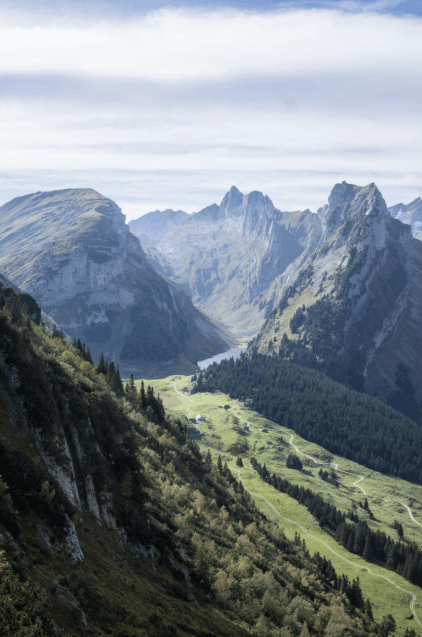
In addition, vertical format is very supportive of many other compositional elements such as leading lines, overlapping scenes, or simply providing a fresh perspective compared to the usual. When everyone else is shooting horizontally, a vertical photo naturally stands out more.
It's also worth acknowledging that current photo-viewing habits have changed. Most of us view photos on our phones held vertically, and platforms like Instagram, Pinterest, TikTok, and Facebook favor vertical content. A traditional horizontal photo only occupies a small strip of the screen, while a vertical photo fills almost the entire display space. This makes it easier for viewers to see details and surface textures, and the photo has a greater chance of keeping them engaged while scrolling.
2. Situations where vertical constraints are effective
Below are some situations where shooting vertically often yields significantly better results. You can keep these in mind and try them out in your next photoshoot.
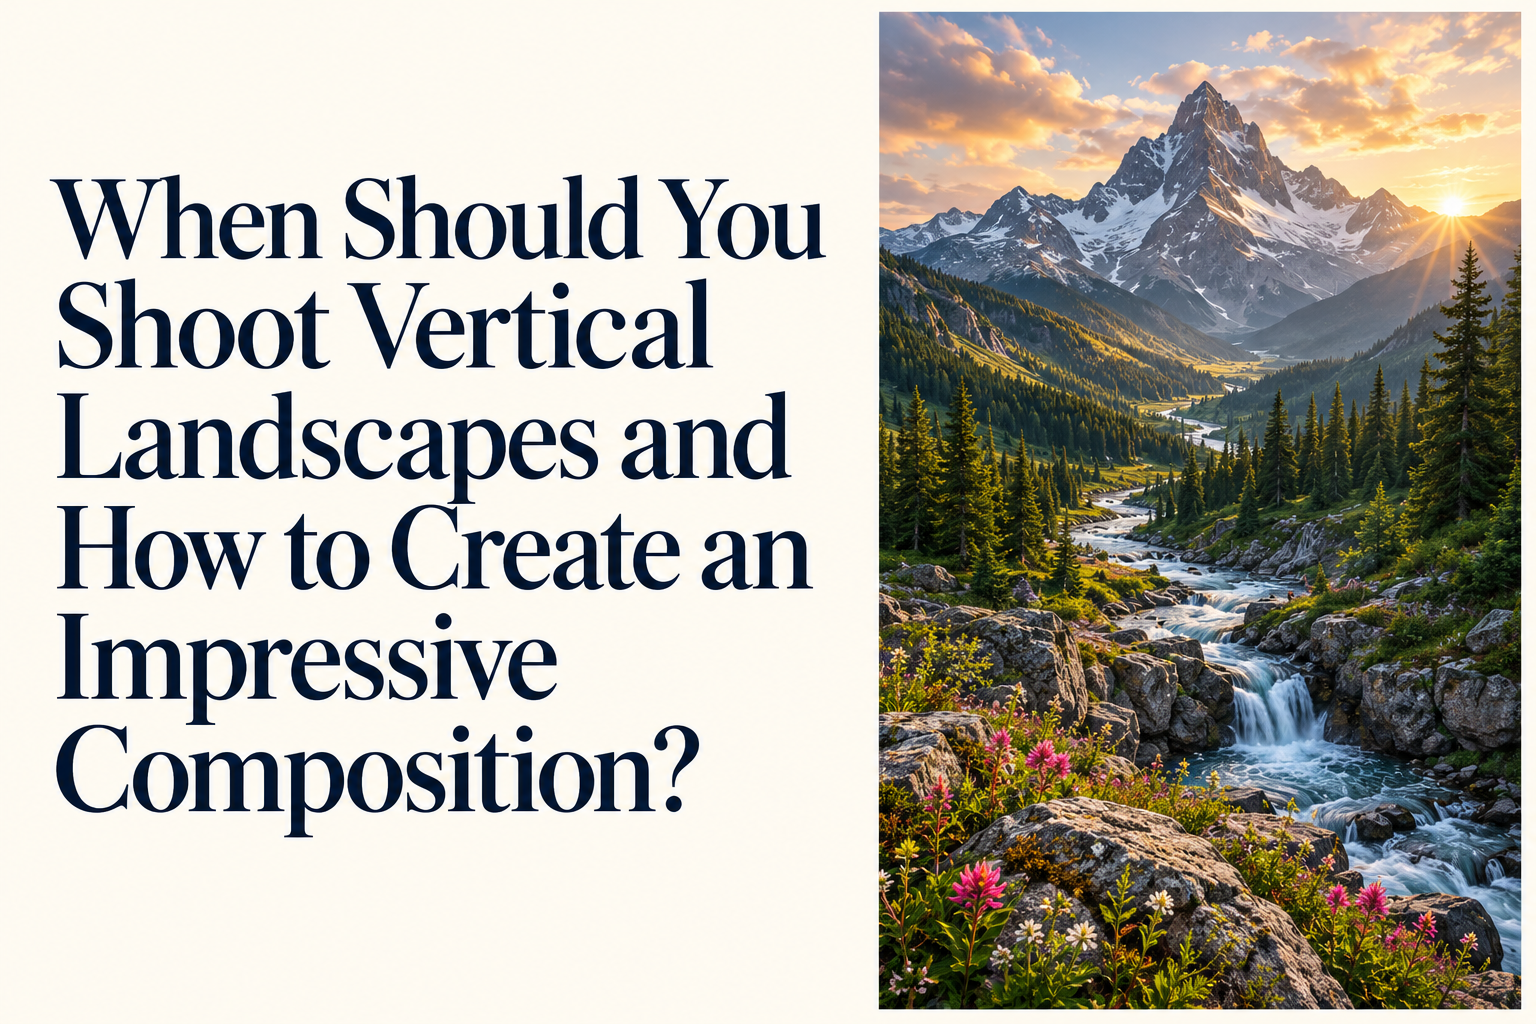
The subject has a striking height. Waterfalls, ancient trees, mountain peaks, or any tall object benefit from being photographed vertically. The goal is to convey scale, and vertical orientation does this naturally. The effect is even more pronounced if there is a smaller object in the frame for comparison, such as a person standing next to a large tree trunk, a small hut at the foot of a mountain range, or a flock of sheep grazing at the bottom of a valley. Place the smaller object in the bottom third of the frame; the size contrast will immediately highlight the grandeur of the main subject.
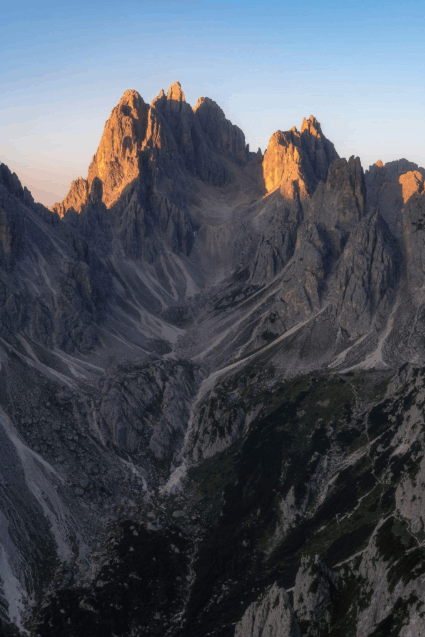
Directional paths. Forest trails, winding rivers, or valleys stretching into the distance all become more impressive when photographed vertically. Simply position them running through the center of the frame so the viewer's eye is naturally guided through the entire image. The effect is stronger if there is a destination at the end of the path, such as a person walking in the distance, a canoe downstream, or a tent pitched at the end of the valley. Without a stopping point, the viewer may wonder where the path leads. A popular composition is a path running straight towards a mountain, as it combines both a directional path and a sense of scale in a single frame.
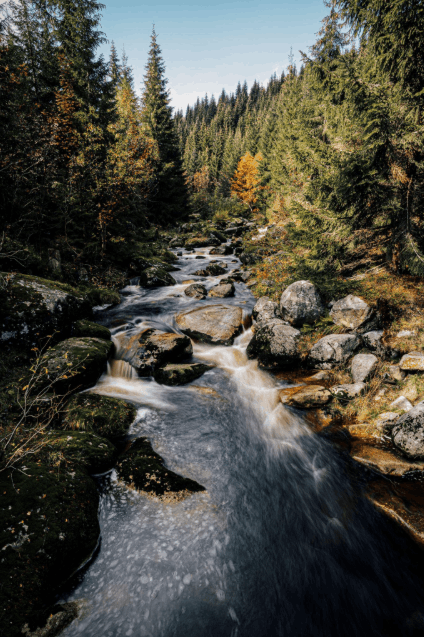
Minimize distractions. A wide horizontal frame captures more of the scene, meaning more unnecessary details like lampposts, pedestrians, or chaotic areas of light and shadow can get into the frame. When you rotate the camera to vertical, the composition becomes more compact and the viewer's attention is focused on the subject. If the expanded frame doesn't contribute to the photo, or worse, distracts the viewer's gaze, try rotating the camera.
The foreground is captivating. One of the easiest ways to add depth to a landscape photograph is to include a strong foreground element. Instead of leaving the bottom of the frame as bare grass or boring ground, find something captivating like a flower, a beautifully textured rock, a driftwood log, or a lone pedestrian. Vertical format allows you to include the foreground while still having enough room for the main subject. The viewer's gaze will start from the foreground and gradually move through the layers behind it, making the photograph feel more engaging and vibrant.
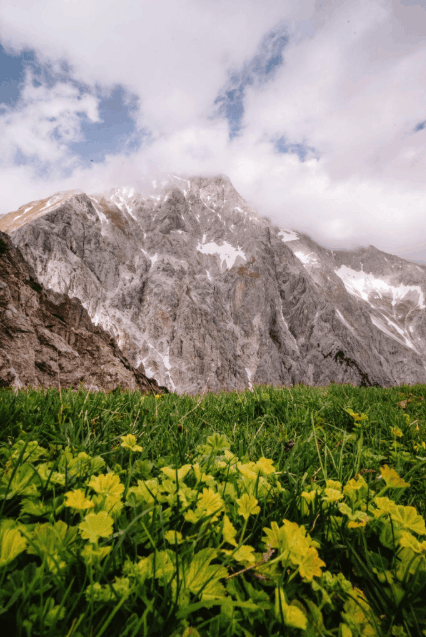
Build multiple layers of scenery. Vertical composition is also very suitable for creating distinct layers of space. Imagine a scene with flowers in the foreground, a deer grazing in the background, followed by a log cabin, a forest, a mountain, and finally the sky. Each layer adds a layer of depth and contributes to telling the story of that area. If using a telephoto lens, you can even compress these layers closer together, creating the feeling that they are tightly stacked, and this effect is especially beautiful in a vertical composition.
3. Don't forget the sky.
When shooting vertically, it's easy to let the sky take up half the frame without realizing it. Instead, ask yourself if the sky actually contributes anything to the composition. If the sky features a vibrant sunset, a striking deep blue, or dramatic storm clouds that suit the mood of the photo, keep it in the upper third of the frame. If the sky is bland and doesn't add any value, you can remove it entirely.
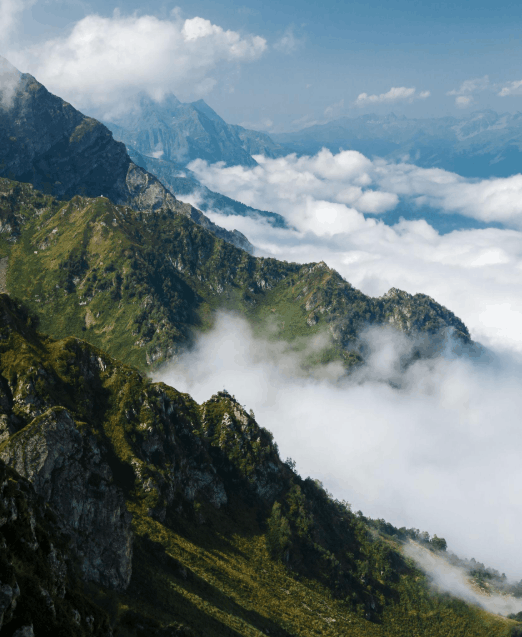
There are two simple ways to handle this. One is to crop out the excess sky in post-processing. The other is to point the camera lower right from the start so that the landscape fills the frame. Alternatively, if the sky isn't captivating enough but you still want to keep it in the composition, you can use editing software to replace or enhance it—a point we'll revisit in the editing section below.
4. Utilize empty space in the layout.
From the issue of the sky, we move to the concept of negative space, an important compositional element that many beginners don't immediately grasp. Negative space refers to areas in an image with very little visual detail, such as the sky, fog, or calm water. It may sound boring, but it allows the image to "breathe." Imagine a giant ancient tree whose top is pushed to the very edge of the frame; the viewer would feel suffocated, and the image would feel uncomfortable.
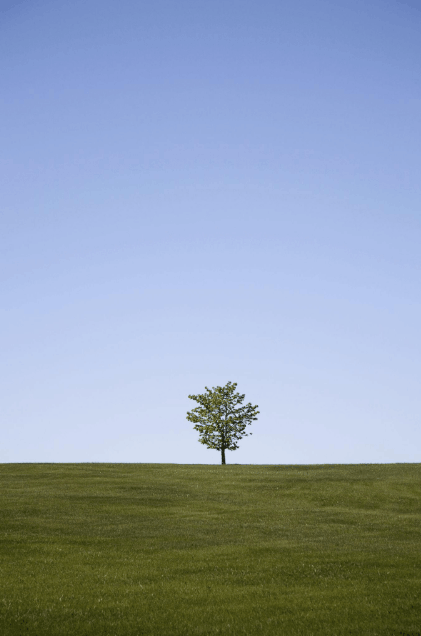
Open space is also key to creating minimalist layouts. A solitary pedestrian, a tree, or a small house surrounded by vast open space can convey a sense of solitude, tranquility, and isolation in a way that cramped layouts cannot.
You can even turn the empty space into the main subject of the photograph. For example, let the sky occupy more than two-thirds of the frame while a small mountain range lies silently below. The subtle transition of the sky's color as it touches the horizon is sometimes enough to create a striking photograph. Vertical format is very suitable for this type of composition because it allows the empty space to extend vertically across the frame.
5. Take a horizontal shot first, then crop later.
Thanks to cropping capabilities, you can absolutely get both. Shoot horizontally first, then crop to a vertical layout in post-processing. This way, you retain the full frame for printing or display, while also creating a full-screen vertical version for social media posting.
This approach is similar to that used by video content creators who shoot in a way that allows them to use the same footage for a full-length YouTube video and then edit it into shorter, vertical content. The result is a flexible content source that can be used across multiple platforms.
However, for this to be effective, you need to keep a few things in mind right from the start. Leave plenty of space on either side of the subject so that there's still enough room for composition when cropping vertically. Shooting in RAW format and at high resolution will help you retain more pixels after cropping. Pay attention to the subject's position, as the vertical crop usually only captures a narrow strip in the middle or off to one side of the horizontal frame. If you're worried about choosing between two shooting directions, there's no need to.
6. Editing vertical landscape photos
Post-processing plays a crucial role in perfecting vertical landscape photos, especially when cropping from horizontal images. Most modern editing software offers tools to meet the following needs.
Crop the image and change the aspect ratio. In the Crop tool, you can choose standard ratios such as 4:5, 3:4, 2:3, or 9:16 depending on the uploading platform, then switch the cropping frame from horizontal to vertical with a simple twist. Then, drag the corners to fine-tune the composition so that the subject, leading lines, and empty space are in the desired position. Apply the rule of thirds and try several cropping options before finalizing.
Sharpen details. When cropping a horizontal image vertically, you're working with fewer pixels than the original. If you crop too deeply, areas that appear softer can become more apparent, especially if you plan to print or post it at a large size. This is where AI-powered sharpening, noise reduction, and zooming tools can help restore sharpness to the vertical crop. Use them sparingly to avoid an artificial look or halo effect.
Replace or enhance the sky. If the sky in your photo lacks appeal but you still want to keep it in the frame, the sky replacement feature can be the solution. The tool will automatically identify the sky area and replace it with a more impressive sky, such as a vibrant sunset or dramatic thunderstorms, while adjusting the lighting and color of the rest of the photo to make it look natural. If you don't want to completely replace the sky, you can use gradient filters and masks to increase the contrast and saturation of the original sky.
Adjust the lighting for depth of field. For photos with multiple layers of scenery, adjusting the brightness and contrast of the foreground and background separately will help guide the viewer's gaze in the desired direction. A common trick is to slightly darken the foreground and keep the background brighter, allowing the viewer's eye to travel through the image from bottom to top. You can achieve this using circular filters, gradient filters, or hand-painted masks. These subtle adjustments add depth and a more polished feel to the image.
7. Conclusion
Next time you're out shooting landscapes, try rotating your camera and creating a vertical composition. Vertical composition not only reinforces elements like scale, direction, foreground, and layers of space, but it also aligns well with how people view photos on platforms today. At the same time, remember to consider the role of the sky and utilize the empty space to give the photo its own rhythm.
And if you're still undecided between the two shooting angles, just shoot horizontally first and then crop vertically; you'll have both versions in your hands. I hope you have an enjoyable experience with this new perspective on landscape photography.





















VIP Products








Best Selling Products
Adobe Photoshop Copyright - Full App
120 USD
Genuine Cheap Canva Pro
39 USD
Capcut Pro 1 Year
39 USD
Upgrade genuine Capture One account
120 USD
Freepik Premium Account
59 USD
Autodesk All App Account Copyright
120 USD
Plugin Retouch4me
69 USD
Genuine Adobe Illustrator account
99 USD
Windows 10 & 11 Pro Key
36 USD
MidJourney Account
29 USD
Copyright Adobe Lightroom Account
59 USD
Upgrade Duolingo Super
29 USD
ChatGPT Plus Account (GPT-4)
16 USD
Upgrade Genuine Office 365
49 USD
Adobe Premiere Pro Account
99 USD