Best Selling Products

Upgrade Genuine Office 365
49 USD

ChatGPT Plus Account (GPT-4)
16 USD

Upgrade Duolingo Super
29 USD

Plugin Retouch4me
69 USD

Adobe Photoshop Copyright - Full App
120 USD

Upgrade genuine Capture One account
120 USD

Capcut Pro 1 Year
39 USD

Windows 10 & 11 Pro Key
36 USD

MidJourney Account
29 USD

Copyright Adobe Lightroom Account
59 USD

Genuine Cheap Canva Pro
39 USD

Adobe Premiere Pro Account
99 USD

Autodesk All App Account Copyright
120 USD

Freepik Premium Account
59 USD

Genuine Adobe Illustrator account
99 USD
11 Figma shortcuts help reduce unnecessary actions by 50%.
Nội dung
- 1. Select the Scale tool.
- 2. Select the Frame tool.
- 3. Switch between Design and Prototype modes.
- 4. Select the innermost element with a single click.
- 5. Move up one layer level after selecting the deepest element.
- 6. Collapse all layers
- 7. Show or hide the layout grid
- 8. Place multiple photos at once.
- 9. Copy the image as a PNG.
- 10. Choose a color from anywhere.
- 11. Open the Resources tab
Eliminating unnecessary steps and replacing them with keyboard shortcuts is the most efficient design approach.
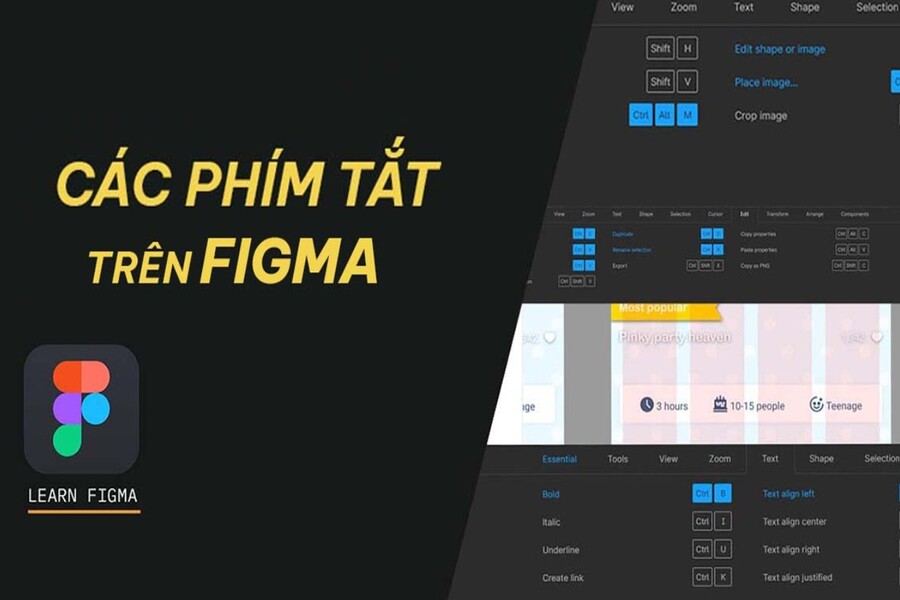
Besides creative thinking, designers must also master the ability to work quickly and optimize even the smallest steps to save time and maintain the flow of inspiration. The popular interface design tool Figma has built an extremely powerful system of keyboard shortcuts to support this. Many designers may spend hours each day interacting with layers, manipulating frames, adjusting sizes, importing images, or selecting colors. When these actions are repeated dozens, even hundreds of times, shortening each operation to just 1–2 seconds can save tens of minutes or even hours on the entire project.
This article compiles 11 truly useful Figma keyboard shortcuts , frequently used by industry professionals. This isn't just a list of basic shortcuts; it includes lesser-known but highly effective ones that help you work more accurately, quickly, and smoothly when doing UI/UX work, prototyping, or collaborating in teams on Figma.
1. Select the Scale tool.
For many designers, the Scale tool is familiar yet often overlooked due to the numerous resizing options available in Figma. However, using the Scale tool correctly can help you maintain the object's proportions while still adjusting its size as desired.
With just a single K key press , you can instantly activate the Scale tool. Once the tool is enabled, simply select the object you want to resize, then drag an anchor point at a corner or edge. Figma will automatically maintain the correct aspect ratio, preventing distortion or imbalance, which is especially important for icons, logos, or vector elements.
.jpg)
Another notable advantage is that Figma allows simultaneous scaling of both physical dimensions and internal values, such as stroke size, corner rounding, or shadow. This helps you avoid having to manually adjust each small attribute after zooming in or out on a group of objects.
Once you get used to the K key, you'll realize that instead of having to open the toolbar or adjust each value individually, you can complete the desired changes with just a single action.
2. Select the Frame tool.
Frames are the foundation of the design process in Figma. Any project, whether a landing page, a mobile app, or a UI kit, is built upon a Frame. Therefore, quick access to the Frame tool is almost a given for any professional designer.
The F key will immediately open the Frame tool, allowing you to draw a new frame directly onto the canvas. In addition to manual drawing, you can also enter the exact desired dimensions in the properties panel on the right. This speeds up the process of creating standard artboards for various devices, such as iPhone, Web, Android, or even custom frames for specific content.
.jpg)
Working with Frames also helps manage layouts more efficiently. Figma treats each Frame as an independent layout, capable of containing child objects, making it easy for designers to group, move, manage, or export files. When working frequently with Frames, the F key becomes one of the shortcuts you'll use most often throughout your UI/UX development process.
3. Switch between Design and Prototype modes.
Shift + E
For interactive projects, switching back and forth between Design and Prototype is a constant occurrence. You might create a new interface, then immediately switch to Prototype to test the workflow. Therefore, this shortcut will save you a significant amount of time.
The simplest way is to press Shift + E , which allows you to switch between the two modes regardless of which one you're currently in. Figma instantly changes the control panel interface so you can continue working without having to move your mouse to the top tab.
Additionally, Figma offers two other key combinations if you want to change to a specific direction:
Press Alt/Option + 8 to switch from Prototype to Design mode.
Press Alt/Option + 9 to switch from Design to Prototype.
Although Shift + E is more convenient, knowing these additional key combinations gives you more flexibility, especially when working with tablets or keyboards with different layouts.
4. Select the innermost element with a single click.
Cmd/Ctrl + Click
In a complex design, you'll encounter situations with dozens of layers stacked on top of each other. If you have to constantly click to go down through each layer, it will be very time-consuming and you're more likely to select the wrong layer.
Figma allows you to use Cmd (Mac) or Ctrl (Windows) + Click to skip the layers above and click directly on the deepest element at that location. This is an extremely important shortcut, especially when working with images, vector paths, or nested object groups.
You no longer have to open the layers panel to find each layer with a long name or click repeatedly until you find the right object. Instead, simply hold down Cmd/Ctrl and click, and you'll directly access the desired element.
5. Move up one layer level after selecting the deepest element.
Shift + Enter
Conversely, sometimes you've reached the deepest layer but want to go back to the parent layer directly above it. In that case, Shift + Enter is the perfect shortcut.
After selecting the innermost element using Cmd/Ctrl + Click, simply press Shift + Enter to move up one level. This action can be repeated multiple times until you reach the desired object.
This combination is very useful in complex UIs such as cards, nested components, or when you're dealing with SVG icons that are grouped with multiple paths inside.
6. Collapse all layers
Alt/Option + L
Many designers often encounter the problem of the layer panel becoming too long and difficult to manage after working for a while. When all groups or frames are open, it's hard to see the overall structure of the design.
.jpg)
Now, pressing Alt + L on Windows or Option + L on Mac will allow you to collapse the entire layer with a single action. This makes the control panel cleaner and easier to navigate.
If you have an object selected, Figma will keep the group containing that object open so you don't lose context. To collapse everything completely, simply click outside the drawing area to deselect it and then press the shortcut key again.
7. Show or hide the layout grid
Layout grids play a crucial role in aligning and building a precise layout. However, there are times when you want to focus on images or typography without being distracted by the grid.
Figma allows you to quickly toggle the grid on and off using keyboard shortcuts:
Mac: Ctrl + G
Windows: Ctrl + Shift + 4
This difference can sometimes be a little confusing for new designers, but you'll remember it after a few uses. When enabled, the grid will display differently for each frame. When disabled, it doesn't affect the internal settings; you just change the display to better focus on the design.
.jpg)
8. Place multiple photos at once.
Cmd/Ctrl + Shift + K
If you're designing a layout that contains many images—for example, a gallery, profile list, or presentation mockup—importing each image individually would be time-consuming.
Figma supports pressing Cmd + Shift + K (Mac) or Ctrl + Shift + K (Windows) to open the image selection dialog box, allowing you to place multiple images at once. Once you've selected images, simply click on each placeholder or any empty area, and Figma will automatically distribute each image in order.
This shortcut is extremely valuable when:
Make a wireframe with a placeholder.
Replace the image in the template.
Product mockups with various images.
Create presentation layouts in Figma.
.jpg)
With just a few steps, you can import dozens of images without interrupting your design workflow.
9. Copy the image as a PNG.
Cmd/Ctrl + Shift + C
Many designers often need to quickly export images to send to clients, include in slides, or use outside of Figma. Instead of manually exporting, you can directly copy images as PNGs using:
Cmd + Shift + C on Mac
Ctrl + Shift + C on Windows
Regardless of whether the original image is JPG, SVG, or WebP, Figma will convert it to PNG instantly. You can then paste it directly into emails, PowerPoints, instruction manuals, or anywhere else you need to use it.
This feature is especially useful for designers working in marketing environments or who need to submit reports multiple times a day.
10. Choose a color from anywhere.
Eyedrop: Cmd + C (Mac) or Ctrl + I (Windows)
Eyedrop is an essential tool for maintaining color consistency throughout your design. Figma allows you to access Eyedrop using a quick keyboard shortcut:
Mac: Cmd + C
Windows: Ctrl + I
Once activated, you simply move the cursor to pick a color from any location, including bitmap images, vector images, or even the background color in another frame.
Thanks to Eyedrop, you can quickly synchronize colors, work with brand guidelines, or pick colors from reference images. This eliminates the need to manually open the Color Picker or slowly enter hex codes.
11. Open the Resources tab
Shift + I
.jpg)
The Resources tab focuses on key components including Components, Plugins, and Widgets . This is where you'll frequently access it when building your design library or installing new plugins.
The keyboard shortcut Shift + I opens Resources instantly without needing to move the mouse cursor to the menu bar.
Once you become familiar with this shortcut, you will be able to work much faster when:
Calling components in the Design System
Insert icons from Material or Feather.
Enable plugins like Autoflow, Remove BG, Lorem Ipsum
Find the widget that will be used for the Prototype section.
Mastering Figma isn't just about understanding the tool; it's about optimizing your workflow. These shortcuts, though simple, offer exceptional results when used regularly. Every second saved adds up to minutes, even hours, helping you maintain an uninterrupted creative flow and achieve higher productivity.


VIP Products


Best Selling Products
Upgrade Genuine Office 365
49 USD
ChatGPT Plus Account (GPT-4)
16 USD
Upgrade Duolingo Super
29 USD
Plugin Retouch4me
69 USD
Adobe Photoshop Copyright - Full App
120 USD
Upgrade genuine Capture One account
120 USD
Capcut Pro 1 Year
39 USD
Windows 10 & 11 Pro Key
36 USD
MidJourney Account
29 USD
Copyright Adobe Lightroom Account
59 USD
Genuine Cheap Canva Pro
39 USD
Adobe Premiere Pro Account
99 USD
Autodesk All App Account Copyright
120 USD
Freepik Premium Account
59 USD
Genuine Adobe Illustrator account
99 USD