Best Selling Products

Upgrade Genuine Office 365
49 USD

Genuine Cheap Canva Pro
39 USD

Windows 10 & 11 Pro Key
36 USD

Capcut Pro 1 Year
39 USD

Adobe Photoshop Copyright - Full App
120 USD

Plugin Retouch4me
69 USD

Adobe Premiere Pro Account
99 USD

Upgrade genuine Capture One account
120 USD

Genuine Adobe Illustrator account
99 USD

Freepik Premium Account
59 USD

Upgrade Duolingo Super
29 USD

Autodesk All App Account Copyright
120 USD

Copyright Adobe Lightroom Account
59 USD

ChatGPT Plus Account (GPT-4)
16 USD

MidJourney Account
29 USD
A beginner''s guide to using Camera Raw Filters in Photoshop.
Nội dung
- 1. What is a Camera Raw Filter in Photoshop?
- 2. Key Benefits of Raw Camera Filters
- 3. How to open Camera Raw Filter in Photoshop
- 4. Familiarize yourself with the Camera Raw Filter interface.
- 5. Adjust brightness and color using the Basic tab.
- 6. Control contrast with the Tone Curve
- 7. Increase sharpness and reduce noise with the Detail tab.
- 8. Advanced color correction with Color Mixer
- 9. Create a color style with Color Grading
- 10. Remove blemishes using Spot Removal
- 11. Effective photo editing process using Camera Raw Filter
- 12. How do Camera Raw filters and editing directly on layers differ?
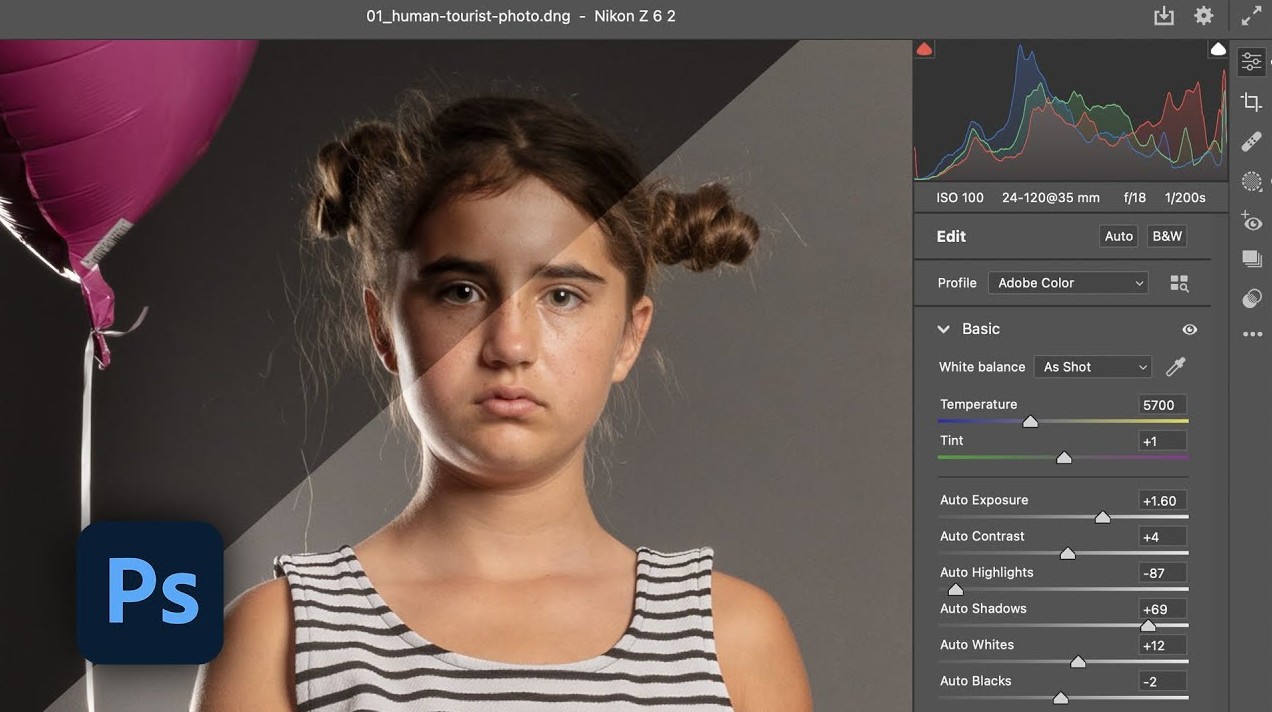
Camera Raw Filter is one of the most powerful photo editing tools integrated into Photoshop, allowing users to manipulate lighting, color, contrast, sharpness, and noise reduction all within a single interface.
1. What is a Camera Raw Filter in Photoshop?
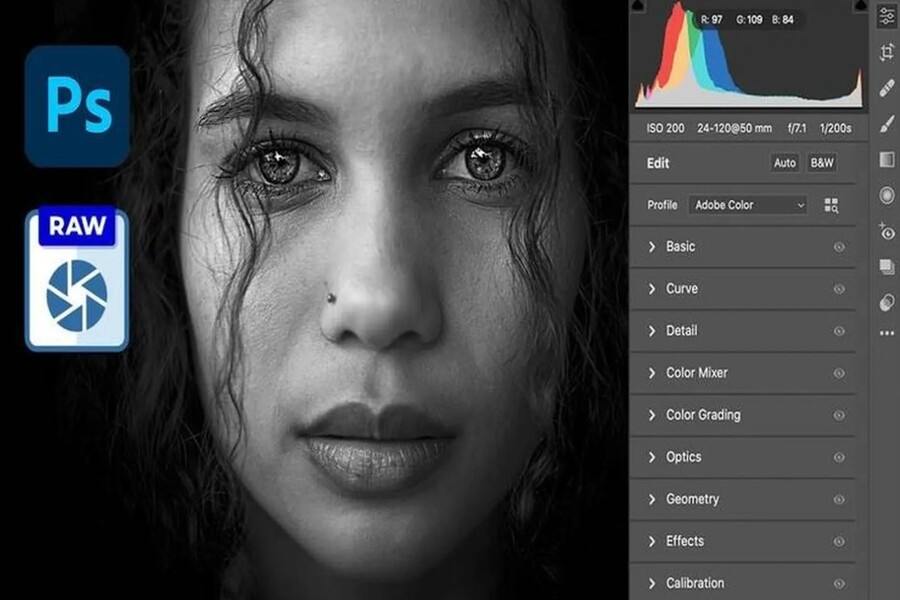
Camera Raw Filter is a powerful image editing tool integrated directly into Photoshop. This tool allows users to perform many important post-processing operations such as adjusting brightness, white balance, increasing contrast, color correction, noise reduction, and sharpening images. Initially, Camera Raw was developed to support processing RAW files created from digital cameras. This format contains all the unprocessed image data, offering highly flexible editing capabilities. However, over time, Adobe has expanded Camera Raw's compatibility to support many different image formats, allowing users to utilize professional editing tools even with JPG or PNG images. The biggest strength of Camera Raw Filter is its ability to consolidate many editing tools into a single intuitive interface. Instead of using multiple separate adjustment layers, users can perform most basic and advanced operations in a single window. This optimizes the workflow and significantly saves post-production time.
2. Key Benefits of Raw Camera Filters
Camera Raw Filter is considered one of the most important tools in Photoshop thanks to its comprehensive image processing capabilities. This tool allows users to quickly adjust lighting and color without using too many layers. Overexposed bright areas or dark areas lacking detail can be easily restored through specialized adjustment sliders. Additionally, Camera Raw enhances image sharpness and effectively reduces noise in photos taken in low light conditions or at high ISO. Another notable advantage is its ability to perform in-depth color correction through tools like Color Mixer and Color Grading. This allows users to create their own unique color style instead of relying on pre-set presets. For professionals, Camera Raw Filter significantly shortens post-processing time by processing multiple parameters simultaneously in a single, centralized interface.
3. How to open Camera Raw Filter in Photoshop
Before starting to edit photos, users need to know how to access the Camera Raw Filter. This is a fairly simple operation, but it is very important for the post-processing stage.
On Windows, you can open Camera Raw Filter by pressing the Ctrl + Shift + A key combination.
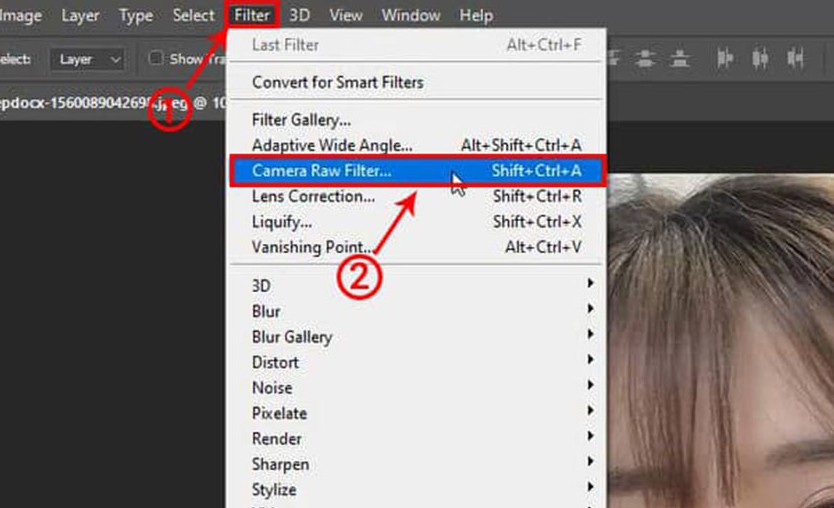
For macOS, the corresponding keyboard shortcut is Cmd + Shift + A. This is the quickest way to directly access the tool without using the mouse.
In addition to keyboard shortcuts, users can also open the Camera Raw Filter through Photoshop's menu bar. First, select the image layer you want to edit in the Layers Panel. Then, click on the Filter option in the toolbar at the top of the screen and select Camera Raw Filter from the list that appears. The Camera Raw interface will immediately appear and be ready for editing.
4. Familiarize yourself with the Camera Raw Filter interface.
When first opening Camera Raw Filter, many people may find the interface quite complex due to the numerous tabs and adjustment sliders. However, the tools are actually arranged very logically. The center displays the image being edited. To the right is the area containing functional tabs such as Basic, Tone Curve, Detail, Color Mixer, and Color Grading. Above are supporting tools such as cropping, rotating, removing blemishes, and adjusting perspective. Below is a control bar to zoom in or out of the image for detailed observation. Once users understand the tool layout, they can easily perform the editing process more efficiently.
5. Adjust brightness and color using the Basic tab.
The Basic tab is the most frequently used area in Camera Raw Filter. It contains the most basic editing tools, yet these have the greatest impact on image quality. Typically, all post-processing begins from this tab.
Exposure is a tool for adjusting the overall brightness of a photograph. Increasing Exposure makes the image brighter, and vice versa. This is the first adjustment slider often used to bring the image's brightness to a balanced level.
Contrast helps to increase or decrease the difference between bright and dark areas. A photograph with proper contrast will look more striking and have more depth.
Highlights allow you to reduce the brightness of overexposed areas such as the sky or strong light sources. Meanwhile, Shadows help restore detail in dark areas that are difficult for the naked eye to see.
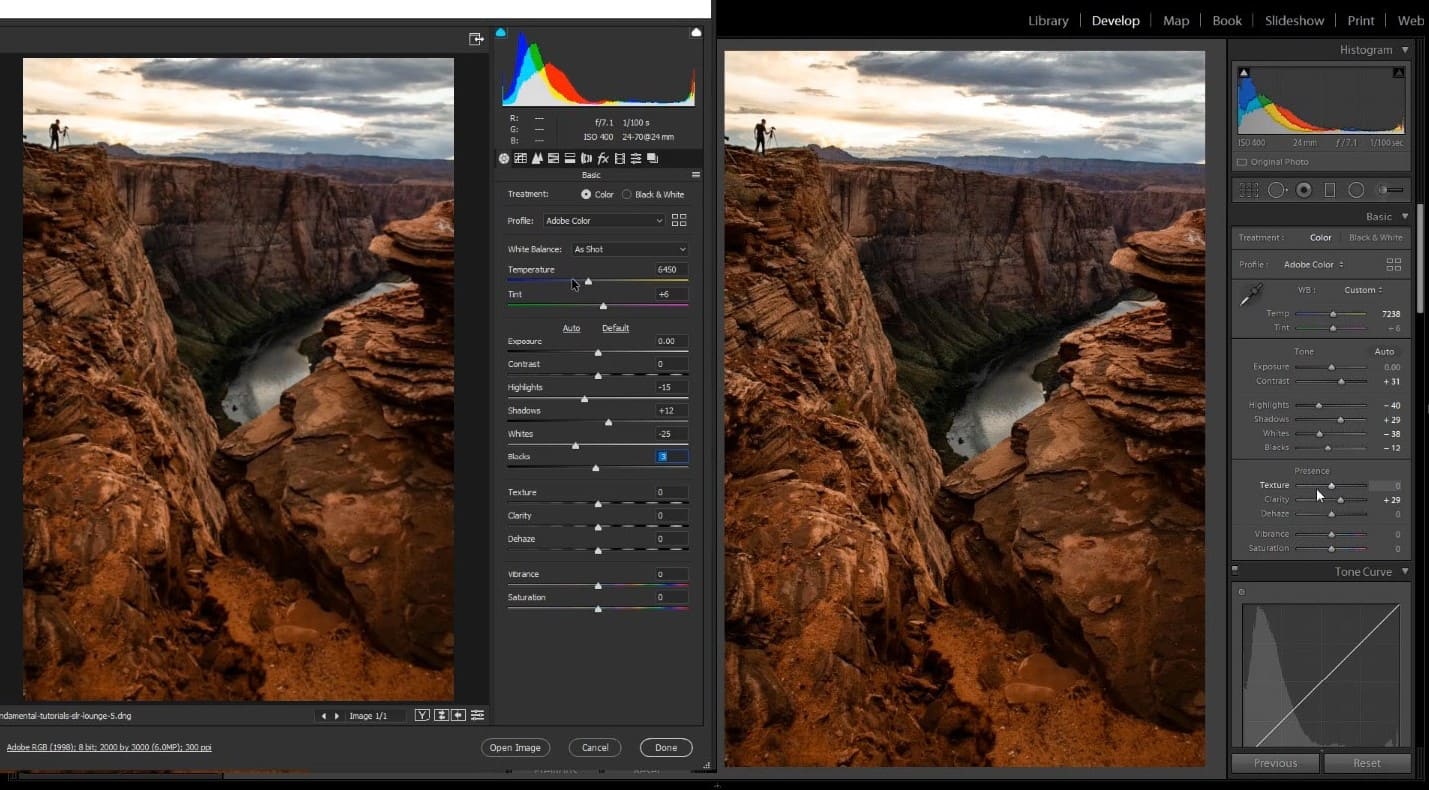
Whites and blacks help identify the white and black points in an image. Accurately adjusting these two parameters results in an image with better depth and contrast.
Texture is a tool that enhances the surface detail of an object. It's especially useful when editing portraits or product photos. Clarity increases sharpness in the mid-range, making the image appear sharper and more three-dimensional.
Vibrance and Saturation both relate to color but work differently. Vibrance intelligently enhances color and prioritizes lighter areas, while Saturation increases the overall color saturation of the image. For beginners, Vibrance is often the safer choice as it minimizes harsh or unnatural-looking colors.
6. Control contrast with the Tone Curve
After completing the basic adjustments, the next step is to use the Tone Curve to fine-tune the contrast in more detail. This is a tool frequently used by photographers and post-production professionals to create a unique image style.
Unlike the Contrast slider, which only affects the entire image, the Tone Curve allows for individual adjustments to highlights, mid-range, and shadows. Users can drag the curve to increase brightness in highlights or darken shadows to create depth in the image.
A common technique is to create a subtle S-shaped curve. This method naturally increases contrast and makes the image look more vibrant. Additionally, the Tone Curve is used to create film color effects, vintage tones, or other artistic photo editing styles.
7. Increase sharpness and reduce noise with the Detail tab.
After adjusting the lighting and color, users should switch to the Detail tab to further improve image quality.
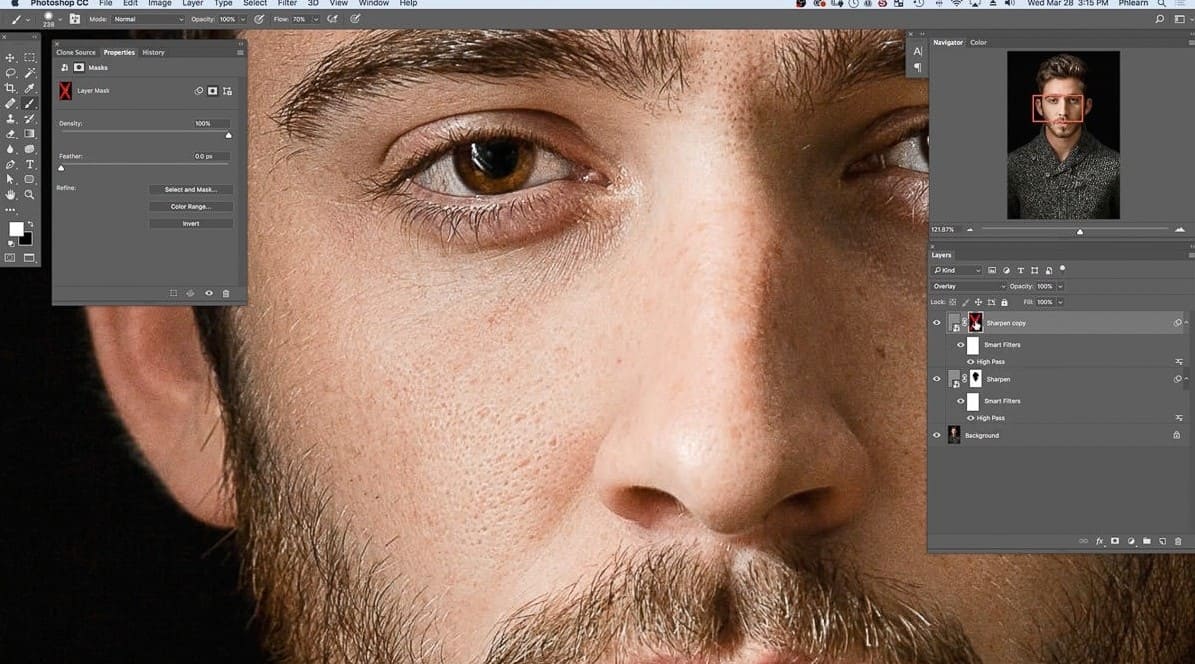
Sharpening is a tool that helps increase the sharpness of images. When used correctly, details such as hair, eyes, eyelashes, or surface textures will become more prominent. However, if overused, the image may appear frayed or harsh and unnatural.
Noise reduction is a tool used to reduce noise that often appears in photos taken at high ISO or in low-light environments. Balancing sharpening and noise reduction is crucial because increasing sharpness too much can reveal noise, while reducing noise too drastically can cause a loss of detail.
8. Advanced color correction with Color Mixer
Color Mixer is one of the most powerful tools in Camera Raw Filter. While the tools in the Basic tab only adjust the overall color, Color Mixer allows you to individually affect specific color groups.
Hue helps to change the hue of a color. For example, green can be changed to blue or vice versa depending on the editing intention.
Saturation allows you to increase or decrease the intensity of individual colors. This is a very useful tool when you want to highlight skin tones, the sky, or trees without affecting the overall image.
Luminance helps adjust the brightness of individual color ranges. For example, you can brighten skin tones without changing the brightness of other areas in the image.
Thanks to its ability to control each color individually, Color Mixer has become an indispensable tool for those who want to create a professional color style.
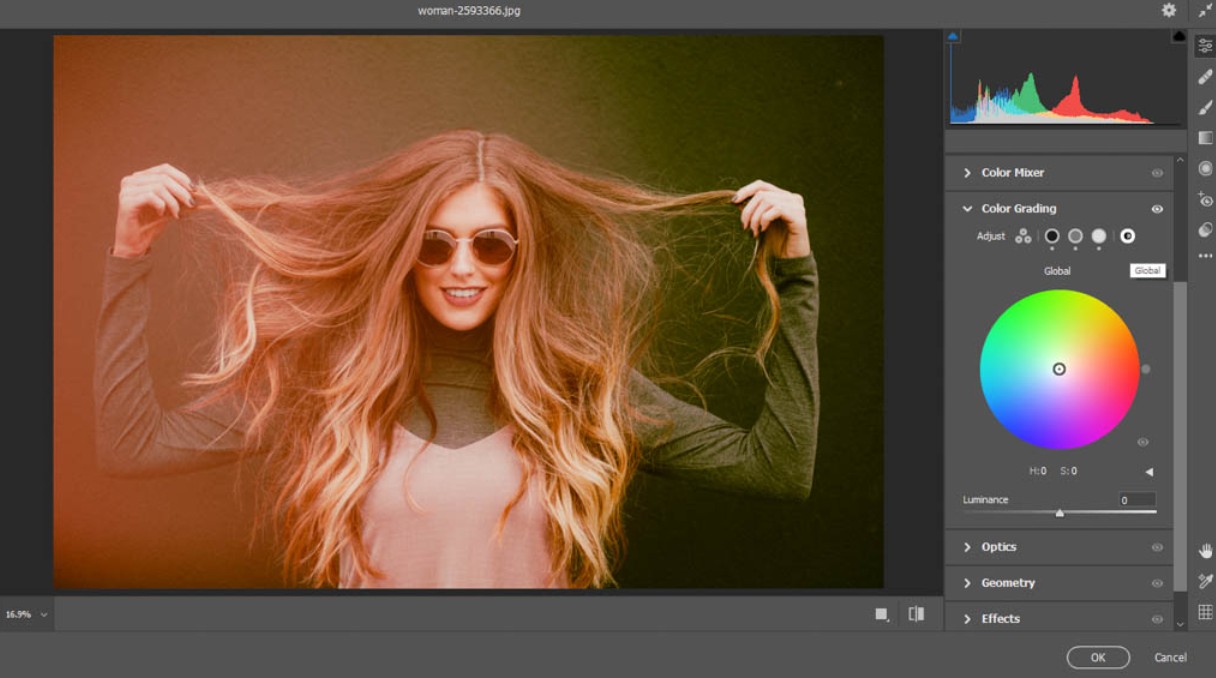
9. Create a color style with Color Grading
Color Grading is an advanced tool that allows users to create artistic and cinematic color tones.
Unlike Color Mixers, which only affect individual colors, Color Grading allows you to add color to the highlights, shadows, and intermediate areas of an image. This helps create color harmony and depth.
Many photographers use color grading to create a cinematic effect by adding blue tones to dark areas and yellow-orange tones to bright areas. This combination gives a modern and professional feel.
In addition, Color Grading helps to build a unique color grading style, creating a personal touch for each photo set and enhancing the aesthetic value of the work.
10. Remove blemishes using Spot Removal
Spot Removal is an incredibly useful tool for processing portrait or product photos. With just a few simple steps, users can remove unwanted details such as blemishes, dirt, scratches, or distracting objects.
To use it, simply select the Spot Removal icon on the toolbar, adjust the brush size to fit the area you want to remove, and then click on the area you want to erase. Photoshop will automatically draw data from the surrounding area to replace it and create a natural-looking result.
This tool saves a lot of time compared to using the Clone Stamp or Healing Brush in Photoshop.
11. Effective photo editing process using Camera Raw Filter
To achieve optimal results, users should perform edits in a logical sequence. First, adjust the basic lighting and color in the Basic tab. Then, use the Tone Curve to control contrast. Next, process sharpness and noise in the Detail tab. Once the image quality is stable, switch to Color Mixer and Color Grading to refine the color style. Finally, use Spot Removal to remove unwanted details. This process ensures a scientific editing process and avoids the need for multiple rework.
12. How do Camera Raw filters and editing directly on layers differ?
Camera Raw Filter is particularly powerful in handling overall image processing such as white balance, brightness, color, contrast, and detail. All of this is done within a single interface, making it faster and more time-efficient. Meanwhile, editing directly on layers is suitable for complex tasks such as cropping, creating special effects, or editing specific areas using masks. Layers offer a high degree of control but require more manipulation. For beginners, Camera Raw Filter is often more accessible due to its intuitive interface and quick editing capabilities. Conversely, experienced Photoshop users often combine both methods for optimal results in post-production.





















VIP Products








Best Selling Products
Upgrade Genuine Office 365
49 USD
Genuine Cheap Canva Pro
39 USD
Windows 10 & 11 Pro Key
36 USD
Capcut Pro 1 Year
39 USD
Adobe Photoshop Copyright - Full App
120 USD
Plugin Retouch4me
69 USD
Adobe Premiere Pro Account
99 USD
Upgrade genuine Capture One account
120 USD
Genuine Adobe Illustrator account
99 USD
Freepik Premium Account
59 USD
Upgrade Duolingo Super
29 USD
Autodesk All App Account Copyright
120 USD
Copyright Adobe Lightroom Account
59 USD
ChatGPT Plus Account (GPT-4)
16 USD
MidJourney Account
29 USD