Best Selling Products

Windows 10 & 11 Pro Key
36 USD

Capcut Pro 1 Year
39 USD

MidJourney Account
29 USD

Autodesk All App Account Copyright
120 USD

Upgrade Genuine Office 365
49 USD

Genuine Cheap Canva Pro
39 USD

Upgrade genuine Capture One account
120 USD

Genuine Adobe Illustrator account
99 USD

Upgrade Duolingo Super
29 USD

Freepik Premium Account
59 USD

Adobe Photoshop Copyright - Full App
120 USD

Copyright Adobe Lightroom Account
59 USD

ChatGPT Plus Account (GPT-4)
16 USD

Adobe Premiere Pro Account
99 USD

Plugin Retouch4me
69 USD
A Guide to Setting Keyframes in CapCut PC for Beginners
Nội dung
- 1. What is a keyframe in CapCut?
- 2. What are keyframes used for in CapCut?
- 3. 6 Keyframe Types in CapCut PC You Need to Know
- 3.1 Keyframe Position
- 3.2 Keyframe Scale
- 3.3 Keyframe xoay (Rotation)
- 3.4 Keyframe Opacity
- 3.5 Keyframe Effects
- 3.6 Audio Keyframes
- 4. Detailed steps for setting Keyframes in CapCut PC
- 4.1 Step 1: Create a new project and import the video
- 4.2 Step 2: Add and adjust keyframes
- 4.3 Step 3: Export the completed video
- 5. Practical applications of Keyframes in CapCut video editing
- 6. Frequently Asked Questions
- 6.1 How to delete keyframes in CapCut?
- 6.2 Is it necessary to upgrade to CapCut Pro to use Keyframe?
- 6.3 Is it possible to set keyboard shortcuts for Keyframes in CapCut PC?
- 6.4 Where should I get my CapCut P ro upgraded?
- 7. Conclusion
Looking to make your videos more dynamic and engaging? Let''s explore how to use keyframes in CapCut PC! This article from Sadesign not only provides detailed step-by-step instructions but also helps you understand the power of keyframes in creating smooth motion effects. Whether you''re a beginner or have some experience, the ability to use keyframes is key to elevating the quality of your videos, from short TikTok clips to inspiring personal vlogs.
1. What is a keyframe in CapCut?
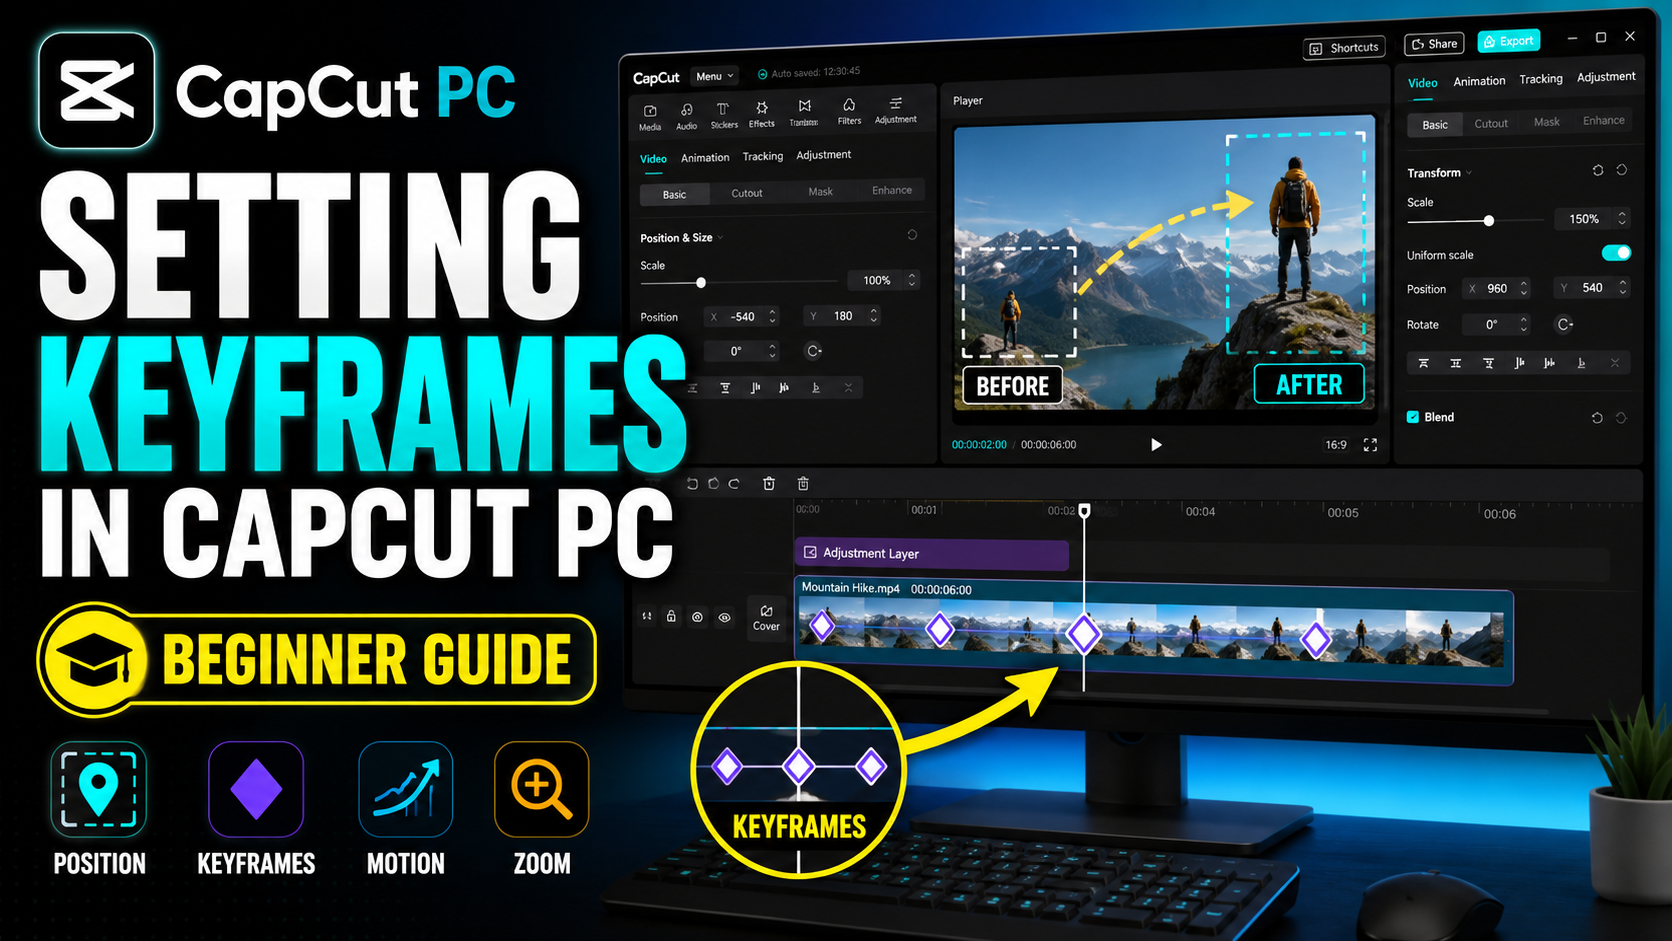
Keyframes in CapCut are a powerful tool that allows users to precisely control aspects of their video over time. When you set a keyframe, you're establishing a "landmark" at which the video will change, such as position, size, or blur. This not only helps you create smooth motion but also opens up countless creative possibilities. You can see keyframes as focal points in your video, where every change is meticulously calculated.
More than just a tool, keyframes are a bridge between ideas and reality. When you work with keyframes, you're participating in a fascinating creative process where you can express your unique style and personality. This helps make your videos not only unique but also provides an engaging experience for viewers.
Furthermore, keyframes save you time during the editing process. Instead of manually creating each movement, CapCut automatically calculates the transitions between keyframes. This allows you to focus on developing your video ideas and content without being constrained by complex procedures.
2. What are keyframes used for in CapCut?
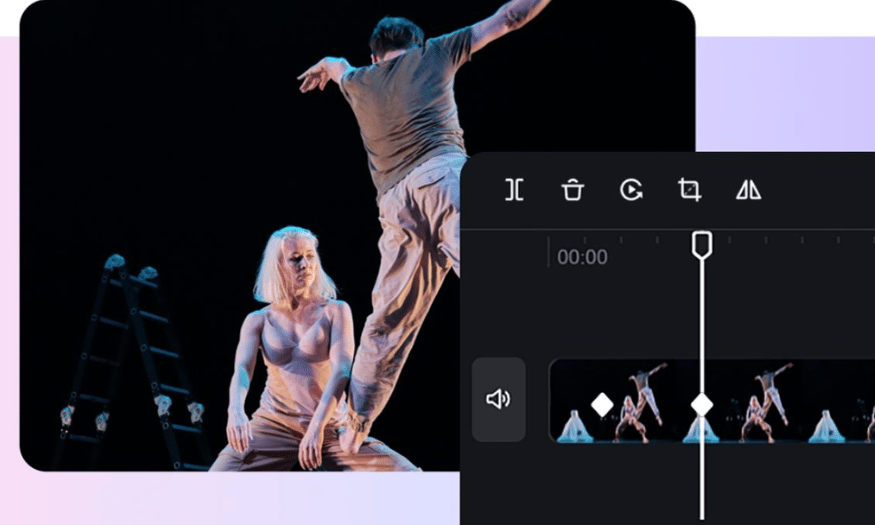
Keyframes in CapCut are used to create smooth and professional motion effects for your videos. With this feature, you can adjust elements such as position, size, and color at specific points, making your videos more dynamic and engaging. This is especially useful when you want to create fast-paced videos or require rapid transitions between shots.
Beyond simply creating motion, keyframes allow for subtle adjustments. You can modify the opacity of an object, create zoom effects, or even rotate the object as desired. These changes can be made precisely and smoothly, giving the final product a professional feel.
The versatility of keyframes makes it easy to be creative and experiment with different styles. Whether you're making videos for TikTok or personal vlogs, using keyframes will help you improve the quality of your content, making it more engaging for viewers. By skillfully applying keyframes, you'll find that your videos are not just images, but vibrant works of art.
3. 6 Keyframe Types in CapCut PC You Need to Know
If you want your videos to be more dynamic and professional, understanding the different types of keyframes in CapCut PC is essential. Below are 6 common keyframe types that beginners should understand to easily control motion, effects, and sound during editing. Each keyframe type not only offers unique features but also opens up unlimited creative opportunities for you.
3.1 Keyframe Position
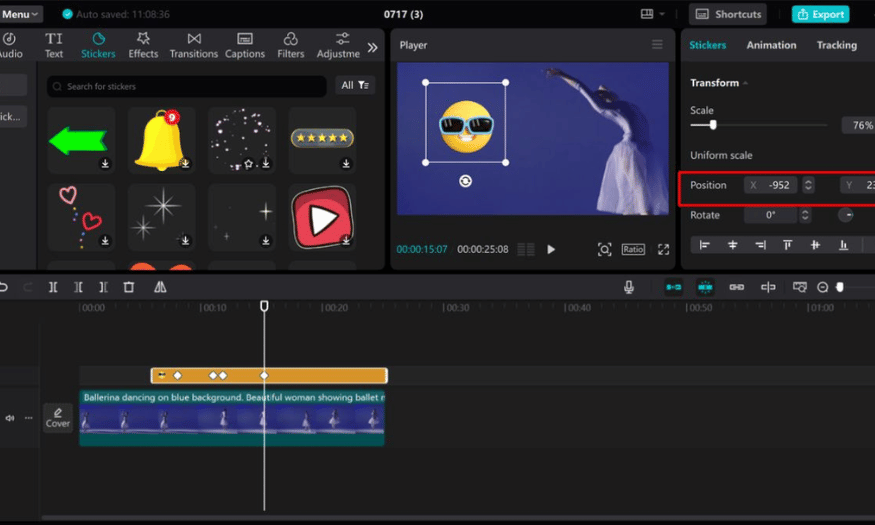
Position keyframes allow you to change the position of objects within the frame over time, creating a smooth motion effect such as sliding left, right, up, or down. When adding this type of keyframe, images, text, or stickers will move rhythmically with the video's tempo. This not only makes the video more dynamic but also helps viewers easily follow the content you want to convey.
Combining multiple keyframe positions allows you to freely and creatively control the object's movement. You can create complex and interesting movements, thereby enhancing the video's appeal and keeping viewers captivated.
3.2 Keyframe Scale
Keyframe scaling allows you to zoom in or out on an object at specific points in the video. This feature is very useful when you want to emphasize a detail, create the illusion of moving closer or further away from the lens. Smoothly adjusting the scaling between keyframes not only maintains high aesthetic appeal but also provides a more enjoyable viewing experience.
Additionally, using aspect ratio keyframes allows you to create impressive dynamic zoom effects, making your video content more engaging. This makes it easier to capture attention and keep viewers watching for longer.
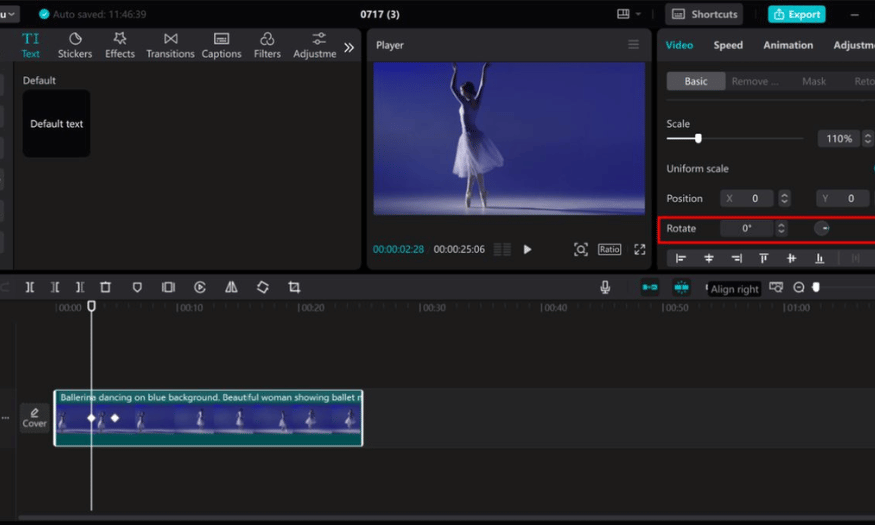
3.3 Keyframe xoay (Rotation)
Rotating keyframes allow you to change the angle of an object over time, creating a natural-looking rotation, tilt, or flipping motion. When cleverly placed, these keyframes can enhance the dynamism of your content, especially in intros and transitions. This makes your video more engaging and interesting than just static images.
Rotating the subject in various directions also contributes to making the video more unique and dynamic, helping you create memorable and impressive moments for viewers.
3.4 Keyframe Opacity
Keyframe opacity allows you to control the visibility of objects, creating a natural, gradual appearance or disappearance effect. It's an indispensable tool when you want to combine multiple layers of images or text while maintaining visual harmony. Adjusting the opacity between keyframes also creates a smooth and professional transition, often seen in video openings or endings.
Cleverly using keyframe opacity will help you create deeply emotional moments, allowing viewers to more clearly feel the message you want to convey.
3.5 Keyframe Effects
Keyframe effects allow you to control the intensity and timing of applying special effects such as blurring, waveforms, or color overlays. By setting this keyframe, you can adjust the effect in stages throughout the video, creating smooth movement without abrupt changes. This type of keyframe is ideal for highlighting important moments or adding artistic flair to your visuals.
Skillfully using keyframe effects not only makes your video unique but also helps it easily leave a lasting impression on viewers.
3.6 Audio Keyframes
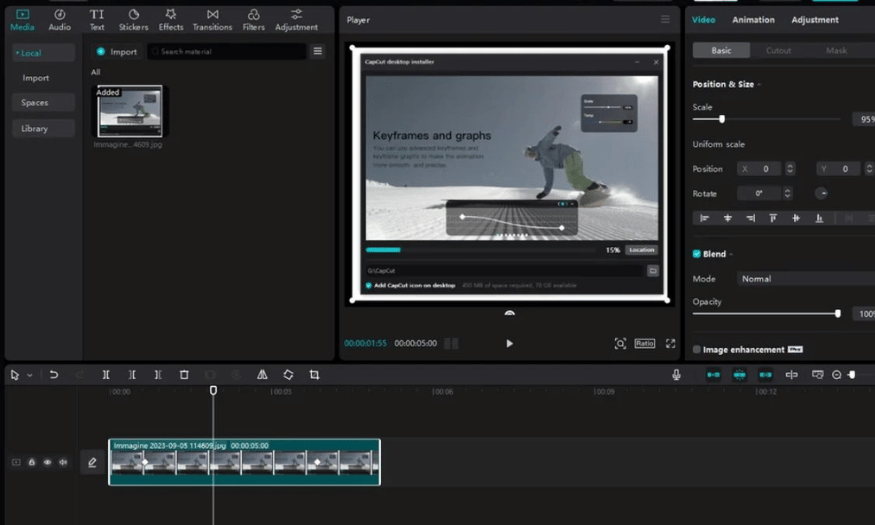
Audio keyframes allow you to precisely control the volume at different points in time. You can increase or decrease the volume, create fade-in and fade-out effects accurately, making the sound more seamless and immersive. Using keyframes for audio is also essential when dubbing, adding background music, or sound effects without affecting the main voice or important sections.
Using audio keyframes effectively will help your video achieve a great balance between visuals and sound, creating an enjoyable and perfect viewing experience for the user.
Upgrade to CapCut Pro at a low price.
4. Detailed steps for setting Keyframes in CapCut PC
4.1 Step 1: Create a new project and import the video
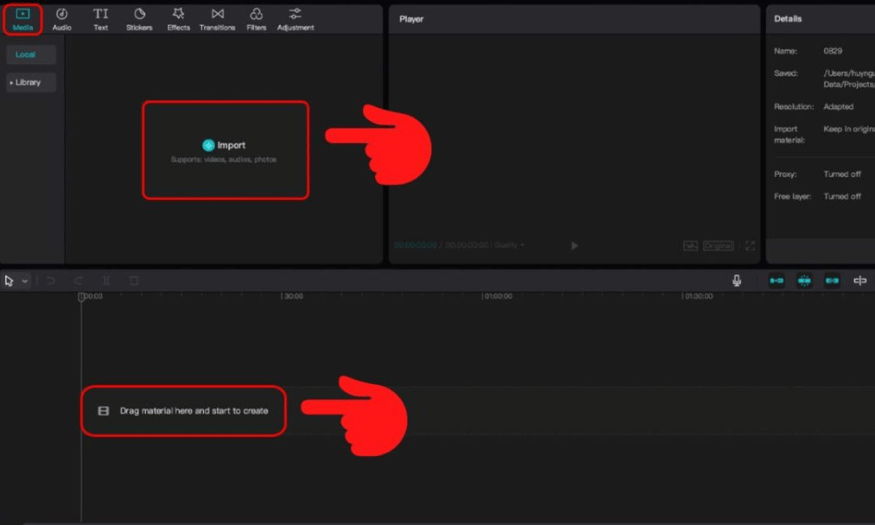
First, open CapCut on your computer and select “Create new project.” CapCut’s user-friendly interface will make it easy to get started. Next, you need to import the video by clicking the “Import” button. After the video is added, drag the files onto the timeline to prepare for editing. This allows you to organize the clips in the order you want, creating a solid foundation for the editing process.
Once the video has been added to the timeline, you can preview the content and decide where to start the keyframes. This is a crucial step to ensure you can create smooth and impressive motion effects in your video.
4.2 Step 2: Add and adjust keyframes
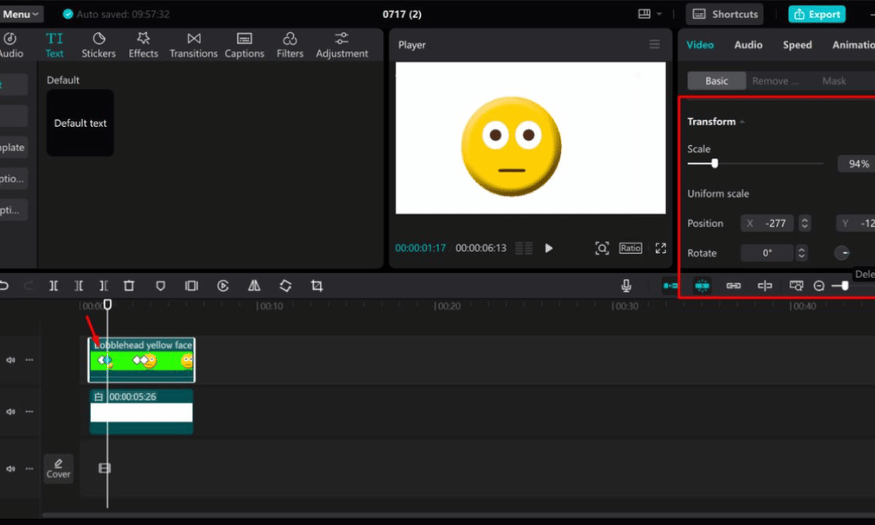
After selecting the clip on the timeline, open the control panel on the right. You'll see options like position, aspect ratio, rotation, and opacity, each with a diamond icon. Place the playback head at the point where you want to start the effect, then tap the diamond icon to create the first keyframe. Next, adjust parameters like position or opacity to your liking to create the desired effect.
After creating the first keyframe, move the player to a different point in the video and add a new keyframe. Change the values of the parameters at this point to create motion, making your video more dynamic. Repeat this process to build a continuous motion sequence, thereby creating unique effects for your video.
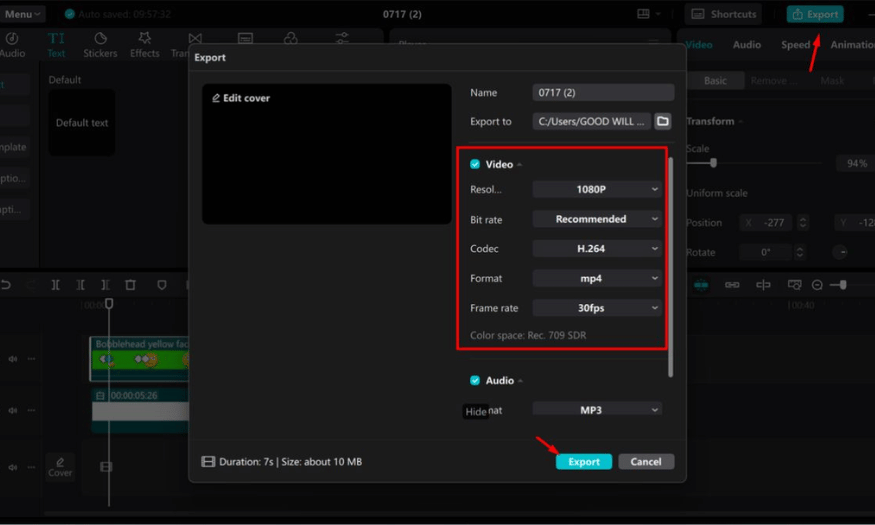
4.3 Step 3: Export the completed video
Once you've finished editing and are satisfied with the keyframes you've created, click the "Export" button. Here, you can choose the video format and quality that suits your needs. CapCut allows you to save the video to your computer or upload it directly to platforms like YouTube, TikTok, and many other social media sites.
Publishing a video isn't just about completing the editing process; it's also an opportunity to share your creative work with others. Make sure your video is thoroughly checked before publishing to provide the best possible viewing experience.
5. Practical applications of Keyframes in CapCut video editing
Keyframes in CapCut offer many practical applications, helping users create more dynamic and professional video products. Below are some ways keyframes can be effectively applied:
-
One of the standout applications of keyframes is their ability to create smooth motion effects. Users can easily make images, text, or stickers move along specific trajectories, such as scrolling across the screen, flying upwards, or zooming in and out. These movements not only make videos more engaging but also create a lively and captivating experience from the very first seconds.
-
Keyframes are also very useful when you want to emphasize an important detail in a video. Instead of a static frame, you can use keyframes to subtly zoom in on the area you want to highlight, such as a face, product, or a particular expression. This not only draws attention but also makes the video content more dynamic and engaging, helping viewers easily grasp the message you want to convey.
-
By combining keyframes with opacity, you can create smooth and natural transitions. Instead of abrupt cuts that can be jarring to the viewer, the fading or gradual appearance effect provides a more pleasant viewing experience. This is crucial for maintaining the rhythm of the video and keeping the viewer focused on the main content.
6. Frequently Asked Questions
6.1 How to delete keyframes in CapCut?
To remove a keyframe in CapCut, first, open your project and select the clip with the inserted keyframe on the timeline. Move the player to the location of the keyframe you want to remove; a diamond icon will then appear on the clip's timeline.
Next, click the keyframe icon at that location to select it. Then, simply press the Delete key on your keyboard or click the keyframe icon again to remove it from the editing section. This process is quick and easy, allowing you to adjust the video as desired.
6.2 Is it necessary to upgrade to CapCut Pro to use Keyframe?
Yes, you should upgrade to CapCut Pro to use the keyframe feature most effectively. The Pro version allows users to add, edit, and delete keyframes for attributes such as position, aspect ratio, rotation, and opacity. This helps you create professional and smooth motion effects, enhancing the quality of your videos.
In addition, CapCut Pro offers many other features to support users, making the editing process simpler and more enjoyable. Owning a Pro account will bring many valuable benefits to those who love video editing.
6.3 Is it possible to set keyboard shortcuts for Keyframes in CapCut PC?
Caps Cut on a computer supports several keyboard shortcuts that make manipulating keyframes easier. You can press Alt + K to open the keyframe panel and use Shift + Click to add adjustment points at the desired location.
If you want to check or change quick commands, access the Shortcuts section in Settings. Here, you'll find all the options to assist with operations, making video editing more convenient than ever.
6.4 Where should I get my CapCut P ro upgraded?
You can easily upgrade your CapCut Pro account at Sadesign. Sadesign is a trusted provider of genuine licensed accounts with many attractive offers. Sadesign is committed to providing quality products, dedicated installation support, and ensuring user rights. Contact Sadesign today to experience the superior features of CapCut Pro!
7. Conclusion
In summary, using keyframes in CapCut PC is not just a simple editing technique, but an art form that helps you express your ideas vividly. Through these step-by-step instructions, we hope you will confidently apply and create many unique effects for your videos. Start today to discover the limitless possibilities that CapCut offers you!





















VIP Products








Best Selling Products
Windows 10 & 11 Pro Key
36 USD
Capcut Pro 1 Year
39 USD
MidJourney Account
29 USD
Autodesk All App Account Copyright
120 USD
Upgrade Genuine Office 365
49 USD
Genuine Cheap Canva Pro
39 USD
Upgrade genuine Capture One account
120 USD
Genuine Adobe Illustrator account
99 USD
Upgrade Duolingo Super
29 USD
Freepik Premium Account
59 USD
Adobe Photoshop Copyright - Full App
120 USD
Copyright Adobe Lightroom Account
59 USD
ChatGPT Plus Account (GPT-4)
16 USD
Adobe Premiere Pro Account
99 USD
Plugin Retouch4me
69 USD