Best Selling Products

Capcut Pro 1 Year
39 USD

ChatGPT Plus Account (GPT-4)
16 USD

Adobe Premiere Pro Account
99 USD

Upgrade Duolingo Super
29 USD

Adobe Photoshop Copyright - Full App
120 USD

Genuine Adobe Illustrator account
99 USD

Genuine Cheap Canva Pro
39 USD

Copyright Adobe Lightroom Account
59 USD

Autodesk All App Account Copyright
120 USD

Freepik Premium Account
59 USD

Upgrade Genuine Office 365
49 USD

Plugin Retouch4me
69 USD

MidJourney Account
29 USD

Windows 10 & 11 Pro Key
36 USD

Upgrade genuine Capture One account
120 USD
Adobe Bridge: The Golden Tool In The Design Village
Nội dung
- 1. What is Adobe Bridge?
- 2. What is Adobe Bridge used for?
- 3. How to use Adobe Bridge software
- 4. Important features of Adobe Bridge
- 4.1 File Browser
- 4.2 File Management System
- 4.3 Image Previews
- 4.4 Image Review Mode
- 4.5 Add keywords and copyright information
- 4.6 Filtering Images
- 4.7 Batch rename files
- 4.8 Quick access to Photoshop
- 5. Adobe Bridge Interface
- 5.1 Folders and Favorites panels
- 5.2 Content Panel
- 5.3 Path Bar
- 5.4 Back and forward buttons
- 5.5 Full screen preview
- 6. Conclusion
In design, the use of software tools to optimize the creative process is indispensable. There are many famous design software such as Adobe Photoshop, Illustrator, and InDesign, each with its own unique features to serve different user needs. However, among them, Adobe Bridge stands out as an extremely powerful support tool, helping users manage and organize creative assets effectively. Let's explore Adobe Bridge with Sadesign and the benefits it brings to designers.
In design, the use of software tools to optimize the creative process is indispensable. There are many famous design software such as Adobe Photoshop, Illustrator, and InDesign, each with its own unique features to serve different user needs. However, among them, Adobe Bridge stands out as an extremely powerful support tool, helping users manage and organize creative assets effectively. Let's explore Adobe Bridge with Sadesign and the benefits it brings to designers.
1. What is Adobe Bridge?
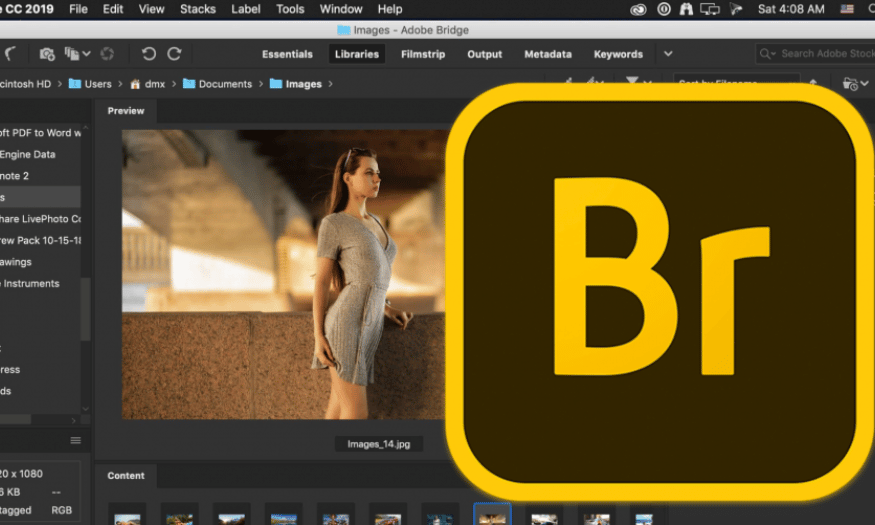
Adobe Bridge is a standalone tool in the Adobe suite designed to help users intelligently manage and organize their digital assets. Unlike other apps that focus solely on editing, Adobe Bridge acts as a command center, allowing you to easily access and organize files from multiple Adobe apps, such as Photoshop, Illustrator, and InDesign.
With Adobe Bridge, you can create a flexible and efficient file management system. You can organize files into folders, tag them, and categorize them according to various criteria. This not only makes it easy to find, but also helps you grasp information quickly. Furthermore, Adobe Bridge supports a wide range of file types, from images to videos, helping you manage everything in a single platform.
Adobe Bridge's interface is intuitive and user-friendly, making it simple and easy to understand even for beginners. The preview feature allows you to quickly check the contents of a file without opening each file, saving time and increasing work efficiency.
.png)
2. What is Adobe Bridge used for?
Adobe Bridge helps you organize and manage your files in a scientific way. If you have difficulty finding a specific file, Adobe Bridge allows you to preview the contents of each file right in the main interface. This helps you quickly identify the necessary file without having to open each file as before.
In addition to searching, Adobe Bridge also allows you to perform basic editing operations. You can quickly delete unnecessary information or rename files. Moving files between folders is also easier, saving you time and increasing your efficiency. This is especially important in busy work environments where creative asset management is a key factor.
Furthermore, Adobe Bridge allows you to create favorites lists for important files. You can organize and store these files the way you want by simply dragging and dropping. This makes work management more convenient and scientific, helping you focus on creativity without worrying about finding important files.
.png)
3. How to use Adobe Bridge software
To use Adobe Bridge software effectively, you just need to follow the simple steps below:
Step 1: Download and install Adobe Bridge
Go to Adobe's official website and search for Adobe Bridge software.
Download the version that suits your operating system. If you are new, you can choose the free version to experience.
Once downloaded, open the setup file and follow the instructions to complete the installation process.
Step 2: Start Adobe Bridge
Open the menu on your computer and select "Start".
Click "All Programs" and navigate to the Adobe folder.
Here, select “Adobe Bridge” to open the application. If you have Photoshop installed, you can also launch Adobe Bridge from that application.
Step 3: Create a new folder
In the Adobe Bridge interface, find and click the "Create" button on the toolbar.
Select "New Folder" from the drop-down menu.
Name your new folder and press "OK" to finish.
Step 4: Move the files into the folder
Find the files you want to manage in Adobe Bridge.
Select the file by clicking on it, then drag and drop it into the folder you just created.
Double check to make sure the file was successfully moved to the new folder.
.png)
4. Important features of Adobe Bridge
When working with Adobe Bridge, users can take advantage of many powerful features that help optimize digital asset management processes. Below are the important features that you should master to maximize the effectiveness of this software.
4.1 File Browser
Adobe Bridge acts as a powerful file browser, similar to File Explorer on popular operating systems. This feature allows you to perform many file management operations such as creating new folders, renaming, moving or deleting files easily. A highlight of the File Browser in Adobe Bridge is the ability to display thumbnails for unopened files, along with detailed information about each file. This is very useful when you just want to find and open a specific file without wasting time opening each file one by one.
The File Browser user interface is intuitive, making it easy to navigate through folders and find files quickly. Being able to preview the contents of a file without opening it is a huge advantage, saving time and improving productivity.
4.2 File Management System
Adobe Bridge has a complete file management system that allows you to organize and sort your creative assets efficiently. All images are displayed as thumbnails, making it easy to view and manage your entire file collection. You can customize the sorting based on different criteria such as file name, creation date, or assigned keywords, making it easier to search and retrieve information.
This file management system not only helps you organize your assets, but also keeps everything at your fingertips. You can quickly switch between different views to find the best way to organize your workflow.
(1).png)
4.3 Image Previews
Adobe Bridge’s Image Previews feature is highly rated, allowing you to examine the image content in detail. You can adjust the thumbnail size to suit your needs, and even view the image in full screen mode. This helps you easily evaluate the image quality before deciding to perform further editing operations.
This preview not only helps you quickly identify which images need to be edited, but also facilitates the process of selecting and organizing files in your collection.
4.4 Image Review Mode
Image Review Mode is a great feature that allows you to visually review a series of images or entire document ranges. This makes it easy to compare and evaluate different images, and choose the best ones for your project.
Additionally, you can sort images by various criteria, creating impressive and easily accessible image collections. This is especially useful when you need to work with multiple images at once, making management more convenient.
4.5 Add keywords and copyright information
If you're looking to protect your creative assets, Adobe Bridge makes it easy to add copyright information to your images. This feature is especially important for designers and photographers, helping them manage their intellectual property effectively.
You can also add keywords to your images, making searching faster and more convenient. When you need to find a specific file, just type in the relevant keywords and Adobe Bridge will display the relevant results, saving you time and effort in the search process.
.png)
4.6 Filtering Images
Adobe Bridge lets you filter images based on specific criteria, helping you quickly find the files you need. You can set filters based on date created, keywords, or other file properties. This feature is useful when you have a large number of images and need to find a specific group on demand.
Filtering images not only saves you time, but also helps you organize your collection systematically, making it easier to manage and access important assets.
4.7 Batch rename files
Another great feature of Adobe Bridge is the ability to rename multiple files at once. The Batch Rename feature allows you to make name changes to multiple files with just a few clicks. This is extremely useful when you need to reorganize files without having to spend time renaming each file individually.
You can customize the way you rename, add prefixes, suffixes, or even change the format with ease. This makes file management more efficient, especially in large projects with many assets that need to be organized.
4.8 Quick access to Photoshop
Adobe Bridge provides quick access to Photoshop and other editing tools. With Quick Access, you can open an image in Photoshop with just one click. You can also use powerful image processing commands like Lens Correction, Merge to HDR Pro, and Photomerge directly from Adobe Bridge.
This feature makes it easy to switch between applications without having to search for files in multiple windows. Opening images into the Camera Raw editor in Photoshop is also simpler than ever, helping you quickly get started with editing.
.png)
5. Adobe Bridge Interface
Adobe Bridge’s interface is designed to be intuitive and familiar to those who have used other software in the Adobe suite. With a structure similar to Photoshop, Adobe Bridge provides users with a collection of panels that help optimize workflow. These panels not only assist in file management but also facilitate quick search for digital assets.
Users will easily notice that the Adobe Bridge interface is very easy to use, with elements arranged logically. This makes navigating through features and tools smoother, allowing users to focus on creative work without being distracted by the complexity of the interface.
5.1 Folders and Favorites panels
When you open Adobe Bridge, the first thing you’ll usually do is find an image to work with. You’ll immediately see two main panels appear in the upper left: Folders and Favorites. The Favorites panel gives you quick access to file locations you use frequently, like Documents or Pictures. This can save you a lot of time when looking for important assets.
The Folders panel, on the other hand, lets you dig deeper into your computer's folder structure. You can easily navigate between folders and find the image you want. The combination of the two panels creates a very efficient file search and management experience, making it easier to stay organized.
5.2 Content Panel
The Content Panel is one of the most important parts of Adobe Bridge, located in the middle of the interface. This is where all the images you have selected from the Folders or Favorites panels are displayed. These images will be presented as thumbnails, allowing you to quickly preview and select the file you want to work with.
More than just viewing images, the Content Panel also provides detailed information about each file, such as size, format, and creation date. This feature is useful when you need to compare images to find the most suitable files for your project, making your workflow more efficient.
5.3 Path Bar
The Path Bar is located at the top of the interface, allowing you to keep track of the current location of files in the folder structure. Thanks to the Path Bar, you can easily go back to previous folders by simply clicking on the elements within them. This helps you keep track of where your files are and navigate flexibly.
Using the Path Bar not only helps you find things quickly, but also makes it easier to organize your digital assets. You won't have to worry about getting lost in a pile of folders, but instead can focus entirely on your creative work.
5.4 Back and forward buttons
Adobe Bridge provides two Back and Forward buttons, allowing you to easily move between folders and images. This operation is very convenient, helping you not to have to return to the Path Bar every time you want to find another file. You can also use the shortcut Ctrl + Z to perform this function quickly, saving time for work.
This feature is especially useful when you are working with many different files and folders. Being able to quickly return to it helps you maintain the flow of your work without interruption, thereby improving your productivity.
5.5 Full screen preview
One of the highlights of Adobe Bridge is the full-screen preview feature. This feature allows you to easily check the quality of the image in detail, without being distracted by other elements in the interface. You can access this feature from the Preview panel, or simply press the Spacebar when the thumbnail is selected.
Full-screen previews give you a better overview of your creative assets. You can evaluate image quality and decide if any editing is needed, optimizing your workflow.
.png)
6. Conclusion
Overall, Adobe Bridge is not just a regular file management tool but also a great assistant in the creative and design process. With powerful and convenient features, this software helps you organize, search and edit digital assets effectively. If you are a designer or photographer, mastering the features of Adobe Bridge will help you optimize your workflow and improve the quality of your final product.


VIP Products


Best Selling Products
Capcut Pro 1 Year
39 USD
ChatGPT Plus Account (GPT-4)
16 USD
Adobe Premiere Pro Account
99 USD
Upgrade Duolingo Super
29 USD
Adobe Photoshop Copyright - Full App
120 USD
Genuine Adobe Illustrator account
99 USD
Genuine Cheap Canva Pro
39 USD
Copyright Adobe Lightroom Account
59 USD
Autodesk All App Account Copyright
120 USD
Freepik Premium Account
59 USD
Upgrade Genuine Office 365
49 USD
Plugin Retouch4me
69 USD
MidJourney Account
29 USD
Windows 10 & 11 Pro Key
36 USD
Upgrade genuine Capture One account
120 USD