Best Selling Products
Batch editing function in Photoshop
If you have a series of photos and want to edit them with the same parameters and effects, you should use the batch editing method in Adobe Photoshop software. It will help you quickly apply the same effect to many photos at the same time. This helps your photo editing process save a lot of time.

1. How to batch edit in Photoshop
When you want to apply the same effect and size to many different photos, batch editing in Photoshop is the best choice. To be able to batch edit photos, let's follow these steps:
Step 1: If you want to apply the same effect, size to multiple photos, you need to have this effect as an Action first. To create an Action, go to Window => Action (Alt +F9).
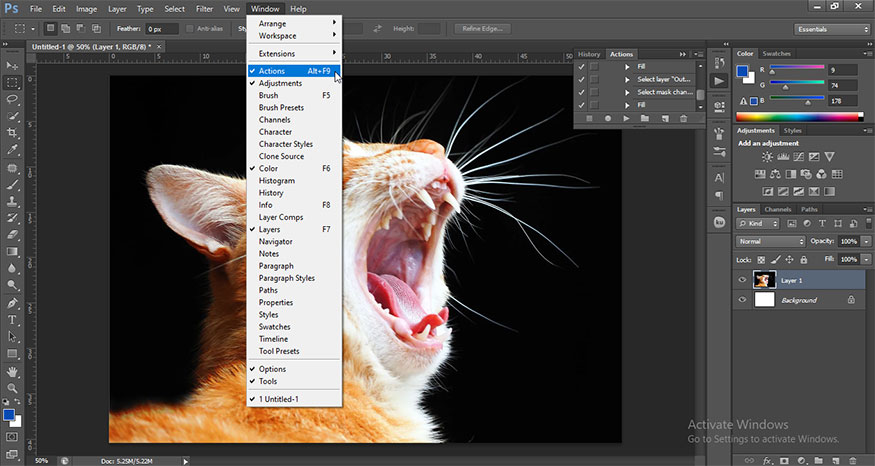
Then create a new New Action, name it, press Record. The Action will now start recording the actions. Apply the effects you want to the photo, they will be recorded, saved in a file to apply to all other photos later.
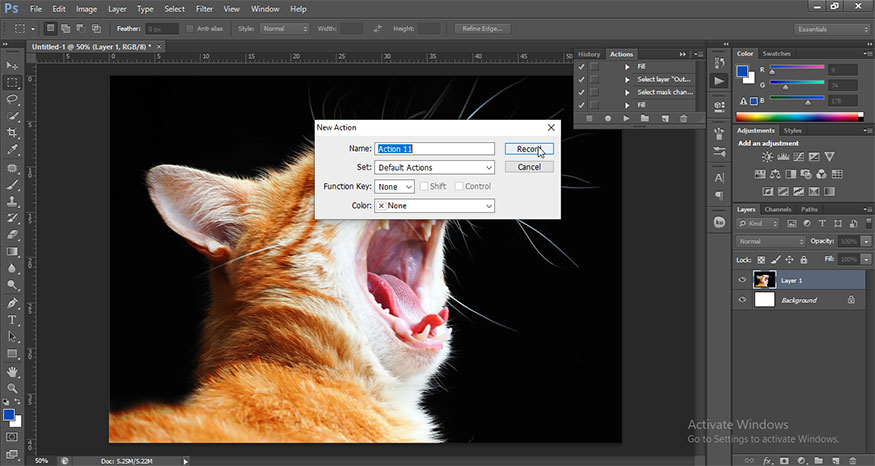
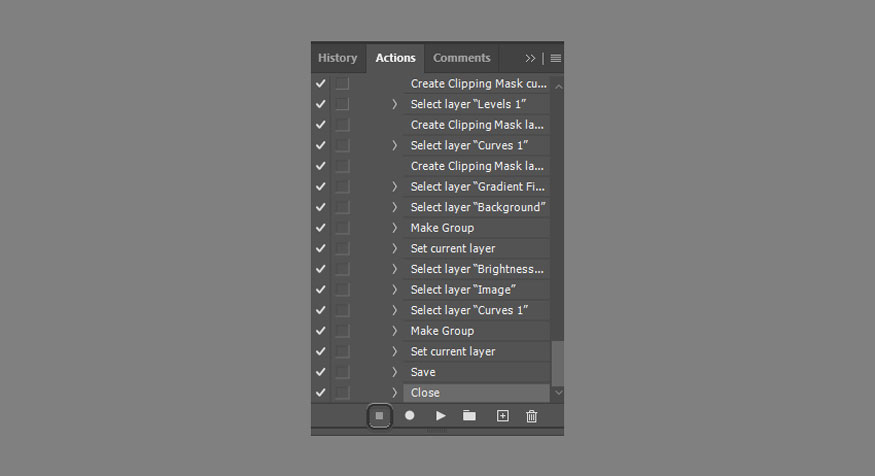
After creating the effects, let's click on the Stop Recording button in the Action panel. Now the effects are done.
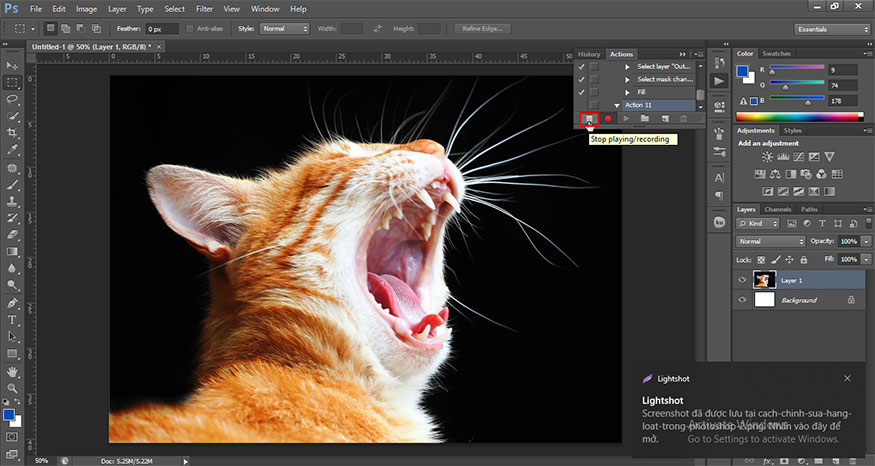
If you do not create Action yourself, you can completely download available Actions online to use. It is much more convenient and saves time.
Step 2: Next, create two folders: photos before and photos after. Put the photos you want to edit in bulk into the photos before folder.
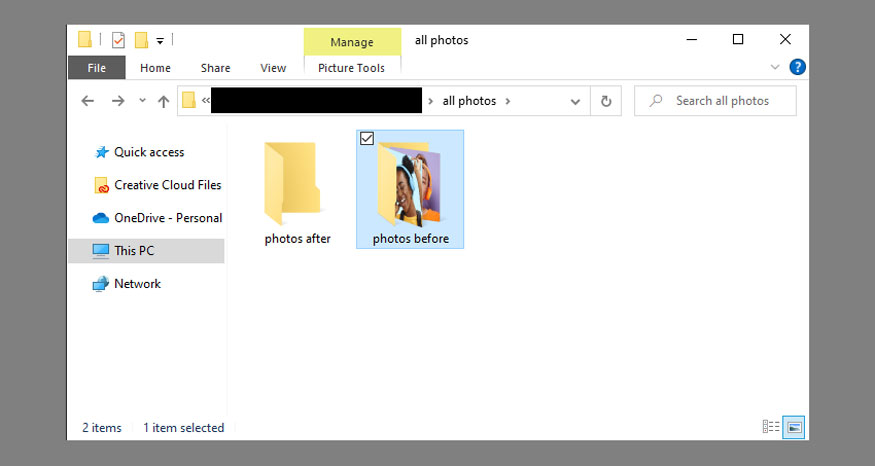
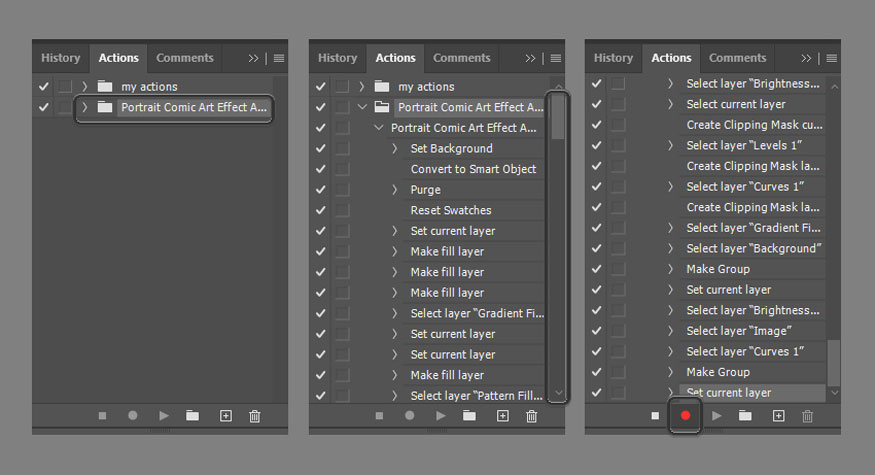
Step 3: If you want to save the image automatically, you need to add a Save step to your Action. To do this, create a new File (any random file). Create a new Layer. Then, go to Window > Actions to open the Actions window, expand your action, and scroll to the bottom of the list. Click the dot icon to Begin Recording.
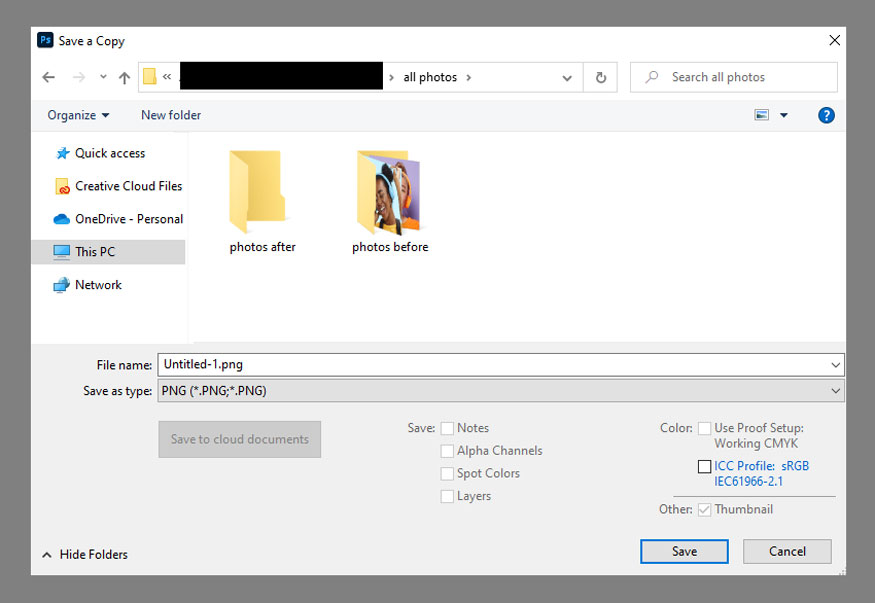
Step 4: Now let's save your file using the settings you want to use for all the images in the Batch. Save it to any random temporary location.
Step 5: Close your photo. In the prompt that appears, select No (this selection will also be saved to Actions, so you don't have to click it again for each modified file). Then, click Stop Recording.

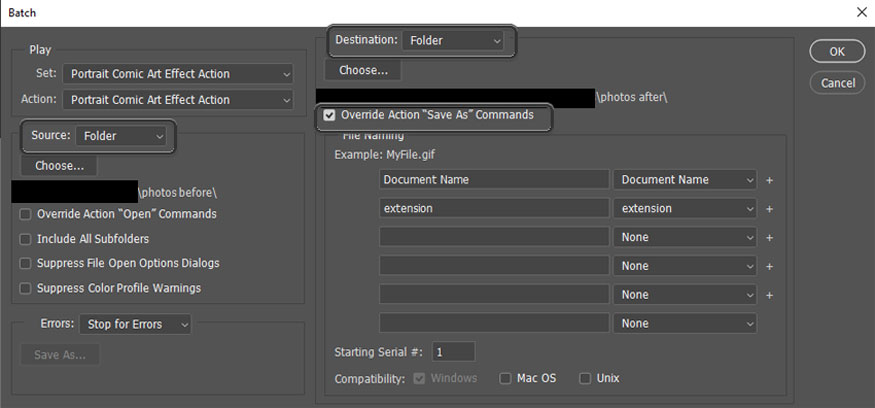
Step 6: Now we are ready to batch edit photos with Action filter. On the menu bar go to File => Automate => Batch.
In the Play section, select your Action.
For Source, set Folder and select the photos folder first.
For Destination, set Folder and select the photos after folder.
Then select Override Action "Save As" Command (to ensure the image will be in the selected destination instead of the temporary destination) and click OK.
Now all you have to do is wait! After Photoshop does its math, all the photos will be edited with one effect. This new batch of photos will be in the photos after folder. Try opening this file to see the surprising results.
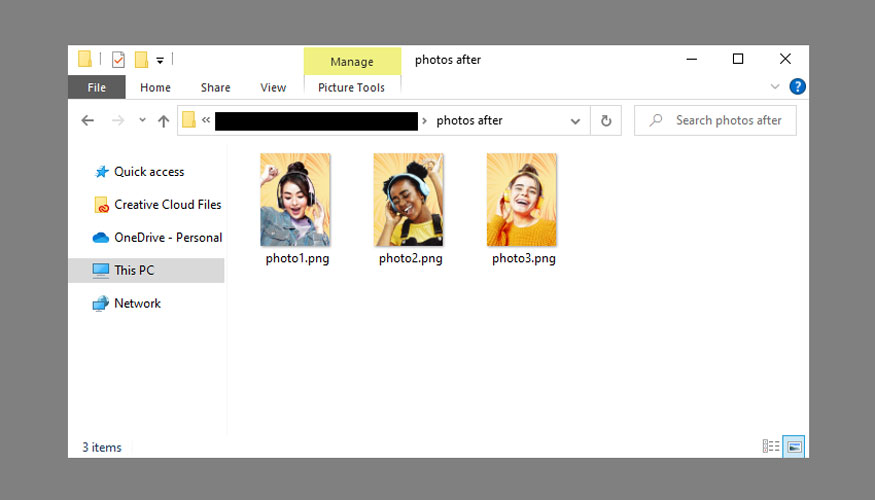
So you have completed the batch editing in Photoshop, the photos now all have the same effects. The editing work becomes much simpler and saves time, right?
2. Conclusion
Above is a summary of information on how to batch edit in Photoshop. In fact, the implementation is not difficult, it only takes a few minutes for you to edit dozens to hundreds of photos at the same time. If you cannot perform Action filters yourself, you can completely download Action sets online to use. Hopefully, the above sharing of Sadesign can help your design work become somewhat easier.
---------------------------
Installation and support contact information:
🏡 SADESIGN Software Company Limited
📨 Email: phamvansa@gmail.com
🌍 Website: https://sadesign.ai


