Best Selling Products
Canva's Quick Background Removal Trick In Seconds
Nội dung
- 1. What you need to prepare to separate the background with Canva
- 2. Instructions on how to separate the background using Canva on the computer
- 3. How to separate background with Canva on phone
- 4. Things to note when editing photos with background separation
- 4.1. Cannot add new background to split image immediately
- 4.2. Canva background separation error
Discover how to remove backgrounds fast with Canva, where all your photos can be perfect in just a few steps. With unprecedented speed and ease, this tool will help you create professional designs without waiting. Try it now to experience the convenience and difference in an instant

Canva makes it easy for anyone to design graphics, including removing backgrounds from images. It's as easy as a few clicks with the Background Remover. In this article, SaDesign will show you how to remove backgrounds with Canva to create outstanding designs.
You don't need to be a professional graphic designer, nor do you need to know how to use complex photoshop tools.
This guide is for everyone, including you! Let's dig deeper!
1. What you need to prepare to separate the background with Canva
I can assure you that removing backgrounds with Canva is actually simpler than you might imagine. But this software also has a downside.
That’s right, Canva’s background removal feature is only available to Canva Pro users. So if you’re using the free version of Canva, you’re out of luck.
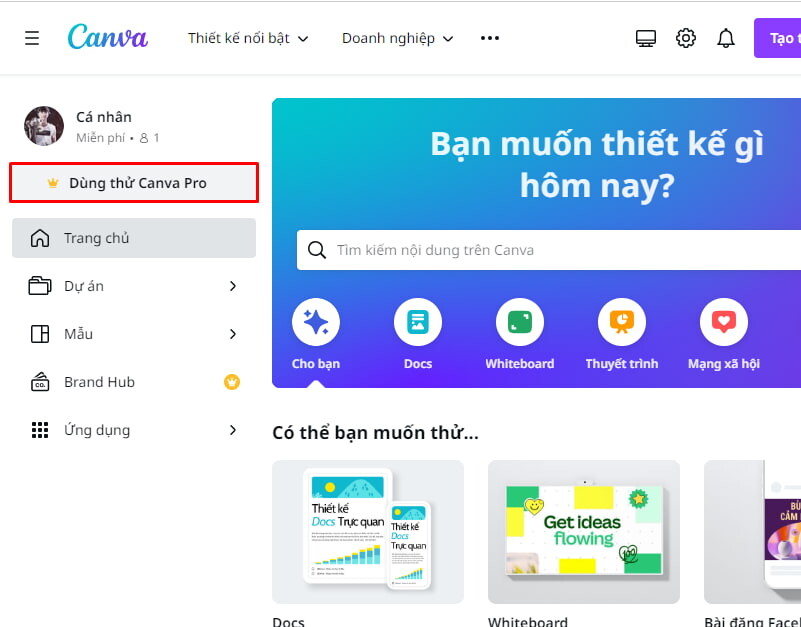
2. Instructions on how to separate the background using Canva on the computer
Step 1: On the Canva homepage, select Create new design > Select Edit photo.
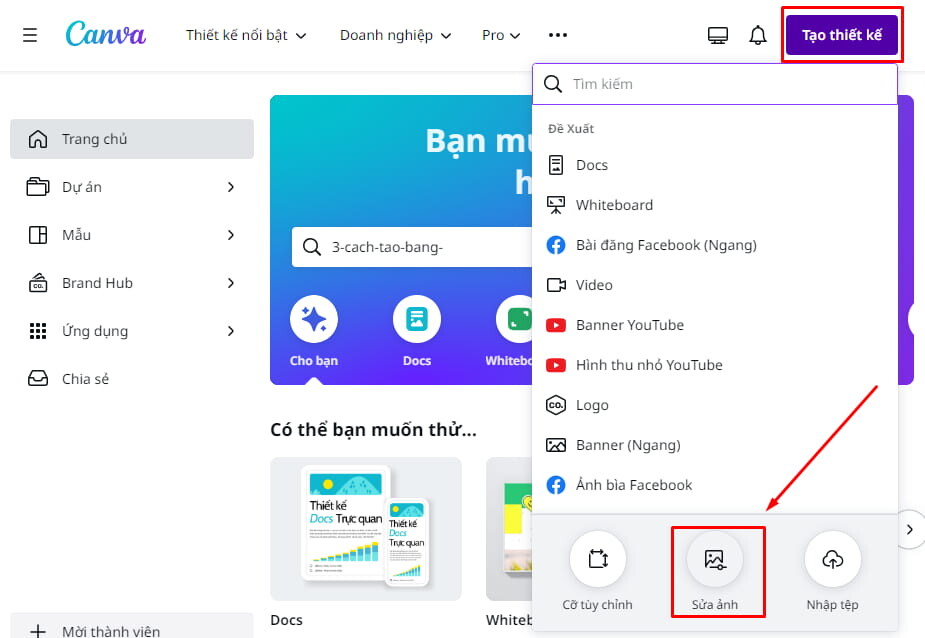
Step 2: Upload the photo you want to remove the background from your device > Click Open.
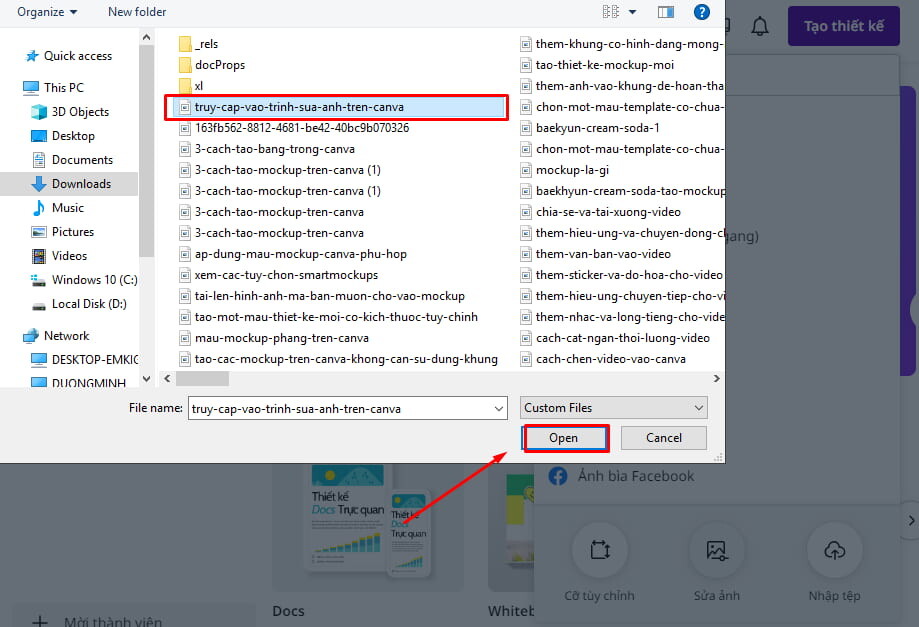
Step 3: In the photo editor on the left, you will find the Remove Background function. Just click on it and let Canva do the rest. This process takes about 10-20 seconds depending on its complexity.
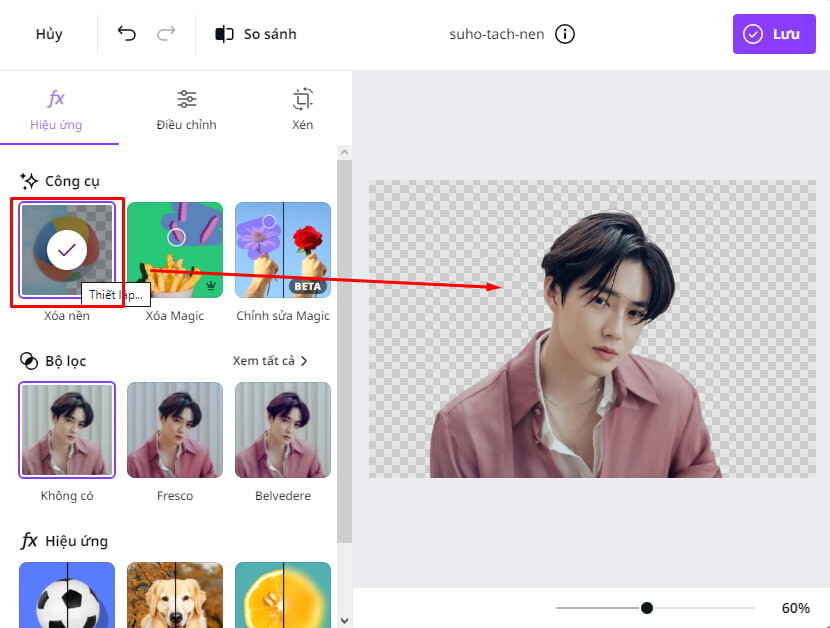
Step 4: Save the background removed image to Canva or Download it to your computer.
To download the image with the background removed (transparent background), you need to download it in PNG format, then select Transparent Background and Download
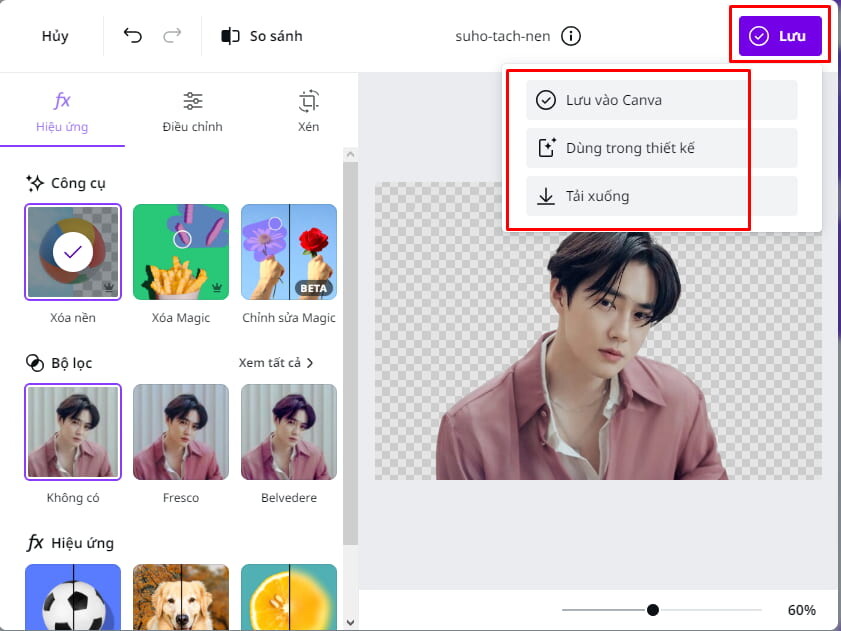
Alternatively, you can use the background removed photo directly in your design. Click Use in Design, a new designer will open. Now you can add any new background you want to the removed photo and edit it.
3. How to separate background with Canva on phone
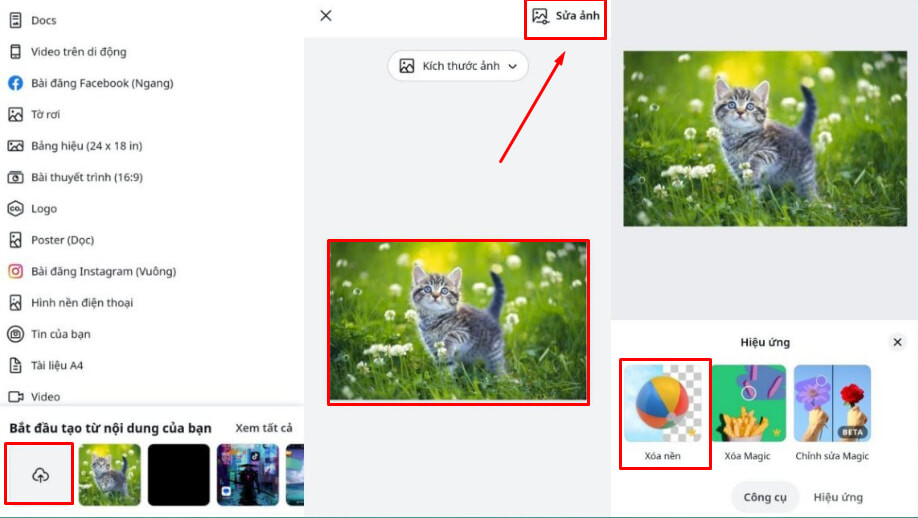
Canva supports users to use Canva to design everything including separating images from Canva backgrounds. If you just need to quickly design simple products that are not too sophisticated, you can operate directly on your phone. Here are simple steps to separate the background with Canva on Smartphone:
Step 1: On the Canva home screen, select the image whose background you want to remove.
Step 2: Click on the image you want to remove the background from on the editing screen > Edit photo > Select Remove background on the toolbar.
Step 3: Save the background separation image or download it to your device.
4. Things to note when editing photos with background separation
Canva is a tool that helps you remove the background quickly and simply, but it is not perfect. There will be some notes and troubles that you may encounter when removing the background of an image with Canva. Therefore, we have compiled some notes and solutions for you below:
4.1. Cannot add new background to split image immediately
When you remove the background of an image and use it as a background for a new design, Canva automatically turns that background into a background. So you can't add a new background to an image if the image itself is the background.
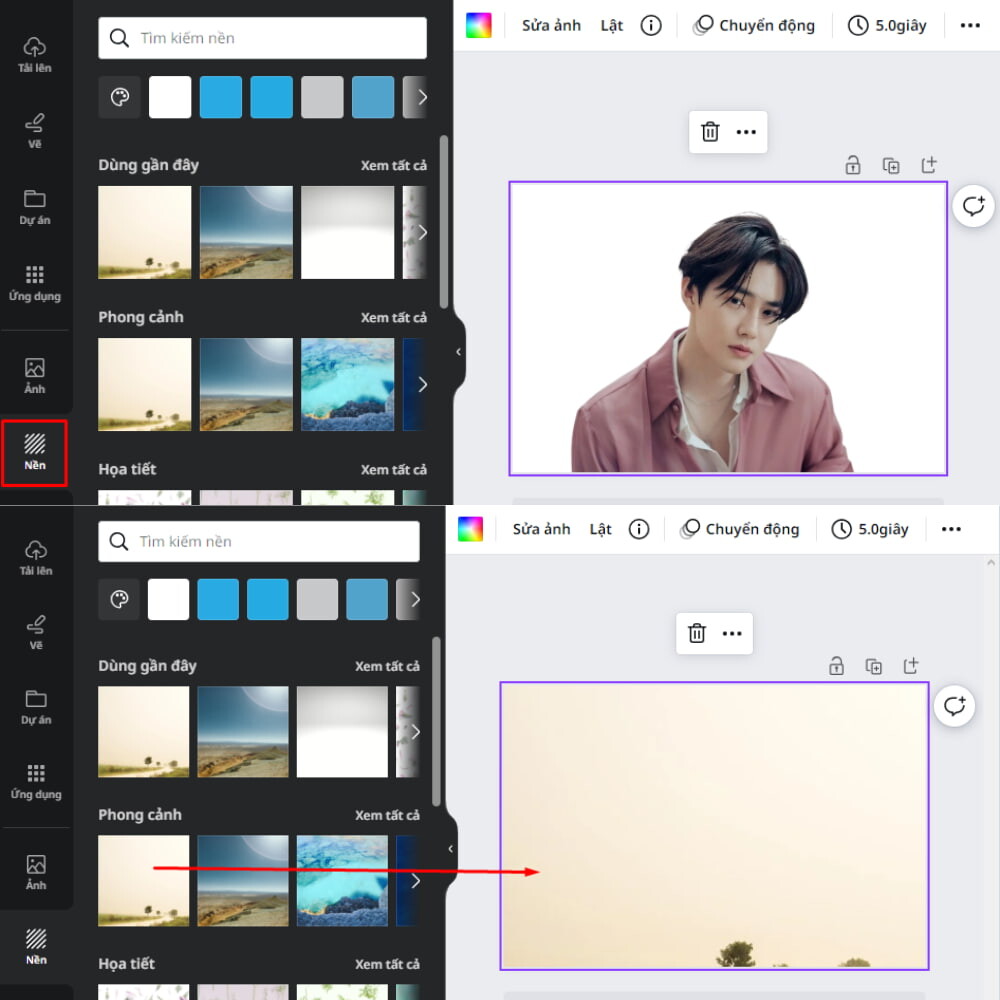
To fix this, right-click on the image > select Separate Image from Background . This will separate your image from the background and shrink your image a bit.
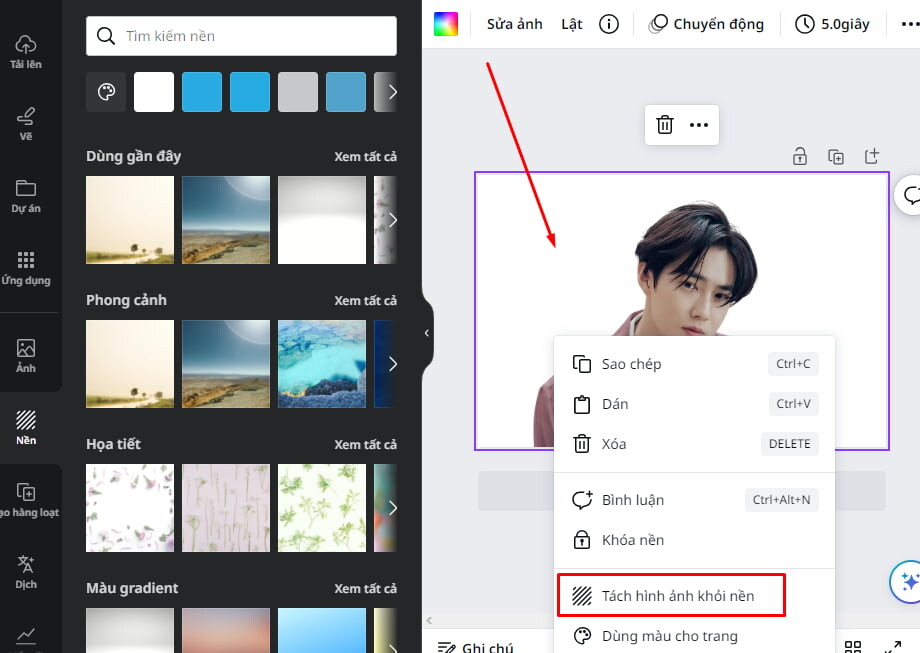
Now you can add the image you want as your background. Use the Corner Handles on your cropped image to resize it to your liking.
4.2. Canva background separation error
While Canva's background removal capabilities are pretty good, it can still make mistakes. Like accidentally erasing a part of your subject. When big mistakes like this happen, that's when the Undo and Erase Tools come in handy.
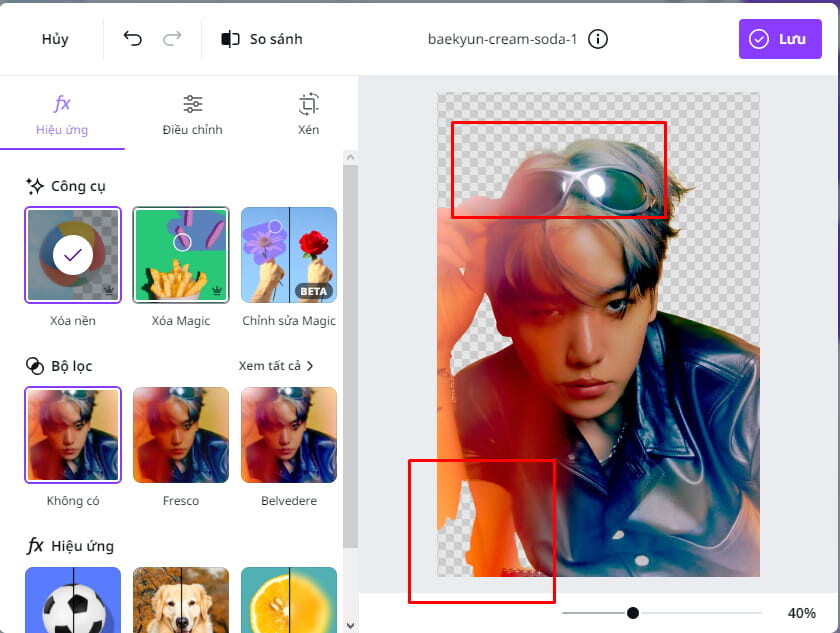
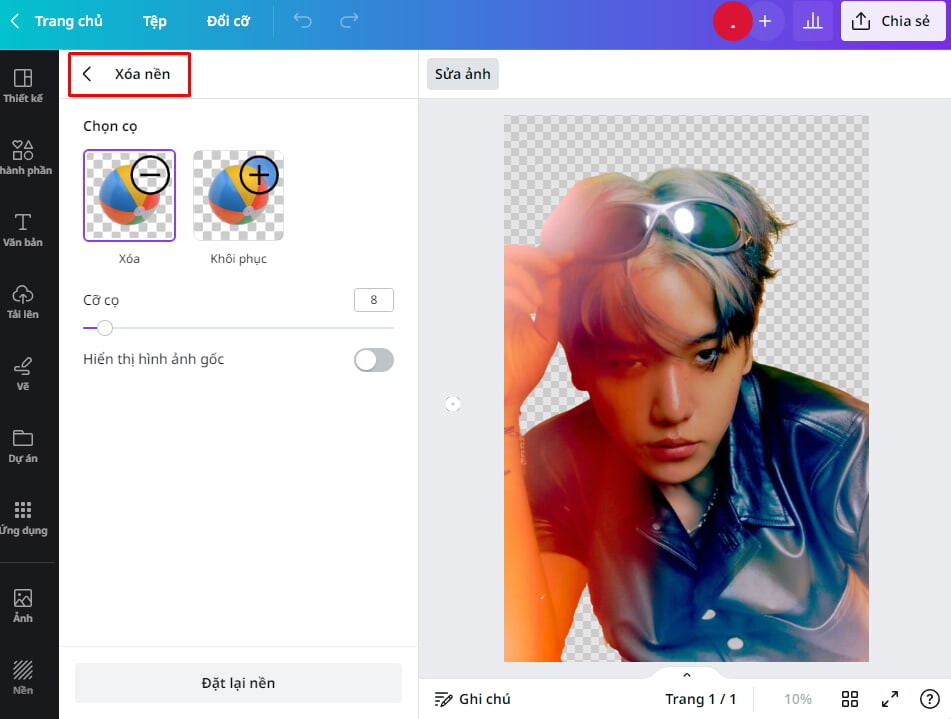
To access them, reselect the image you want to remove the background from and click Edit Photo > Remove Background (Tap Remove Background twice).
At this time, the screen will display 2 tools Erase and Restore to erase the excess parts and restore the erased main image parts along with the background.
Move the mouse pointer to the area you want to paint or erase. You can also make the mouse pointer smaller or larger by adjusting the Brush Size.
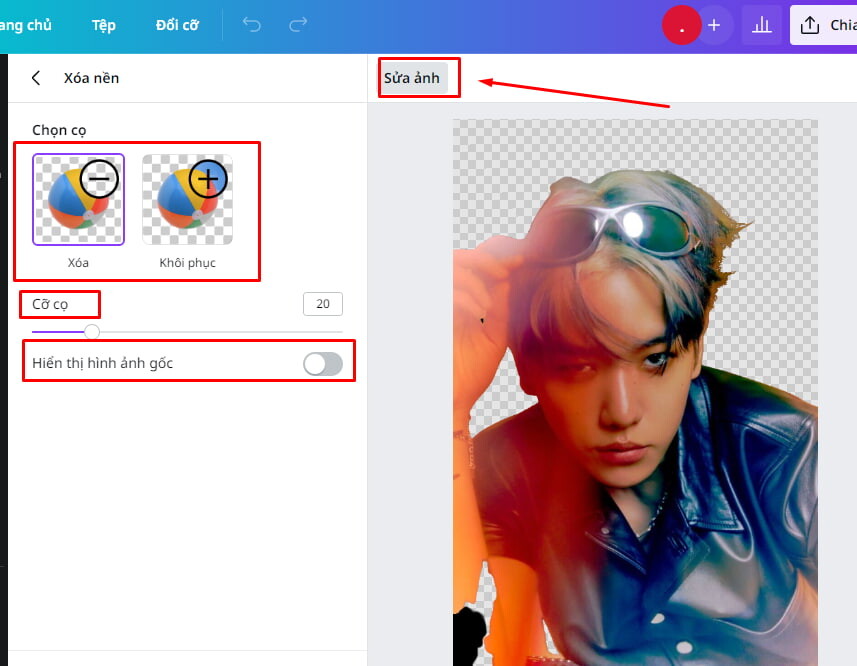
Note: Click Show original image when deleting or restoring an image. This will help you see the original image and perform mouse movements most accurately.
Once you're happy with your choices, exit Photo Editor to complete your design.
The instructions for separating the background using Canva that SaDesign presented above are extremely simple and anyone can follow. Hopefully you will have impressive designs with the good ideas we provide.
To have “super cool” designs with sharp background separation photos, just knowing how to separate the background is not enough. You can refer to photoshop software from SaDesign to create great design products, excellent media publications.


