Best Selling Products
Colorful Explosion Text Effect in Photoshop
Nội dung
- 1. Resources needed
- 2. Create Background and Text for Colorful Explosion Text Effect in Photoshop
- 3. Create a Colorful Explosion Text Effect in Photoshop
- 4. How to Save and Load Selection for effects
- 5. Use the Sandstorm Effect for a Colorful Explosion Text Effect in Photoshop
- 6. Run action to create a colorful explosion text effect in Photoshop
- 7. Add Smoke to Colorful Explosion Text Effect in Photoshop
The text in your design will look more attractive if it has unique color effects instead of just monochrome. We can completely create it through a combination of many tools and textures. Let's refer to Photoshop's colorful explosive text effects right after SaDesign.

1. Resources needed
To create a colorful explosion text effect in Photoshop, we need some resources. You can use the following resources or you can download your own from similar sources.
Landscape photo
Sandstorm Photoshop Action
Branden Casual Sans Serif Font
Teal Color Ink in Water
Orange Ink in Water
Pink Splash
Smoke Texture

2. Create Background and Text for Colorful Explosion Text Effect in Photoshop
To get the colorful text explosion effect in Photoshop, we first need to create a background layer and a text layer for the design. To create the background and text, we follow these steps:
Step 1: Create a new document with the size of 1500 x 1000 px. Then click on the Create new fill or adjustment layer icon at the bottom of the Layers panel, choose Solid Color and set the fill color to Black.
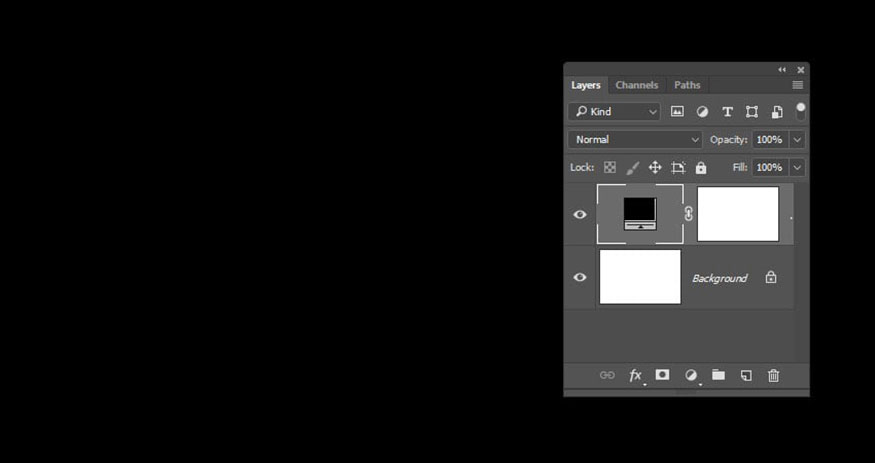
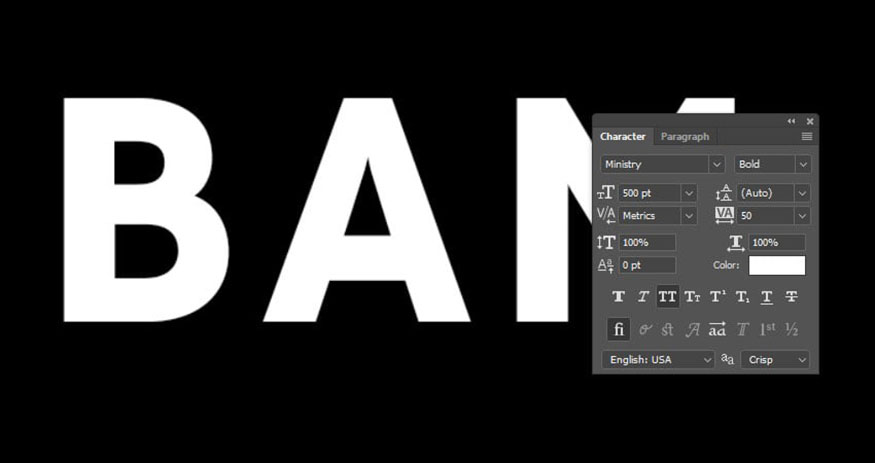
Step 2: On the toolbar select the Type Tool to create the text you want in all caps using the Branden font, set the Size to 500 pt and Tracking to 50. Here we create the text with the content BAM.
You can increase the Canvas Size if your text doesn't fit.
3. Create a Colorful Explosion Text Effect in Photoshop
Now it’s time to start adding some textures to create colorful text in Photoshop. These texture images are already downloaded, we just need to insert them into the text.
Step 1: On the menu bar, go to File => Place Linked and open the downloaded Teal colors and ink in water image. Press the Return key and right-click on the layer to select Create Clipping Mask.
Then press Ctrl+T to enter Free Transform Mode, resize, rotate and move the image inside the first letter you have until the image is filled with the pattern.
Press the Return key to confirm the change.

Step 2: Hold down the Ctrl key and click on the text layer thumbnail to load the selection.

Step 3: Select the Rectangular Marquee Tool, hold down Shift+Alt to intersect the selection and draw a rectangle around the first letter you have.
After you drop all, only the first letter is selected as shown below.

Step 4: Make sure the texture image layer is selected, press Ctrl+J to copy the selection in a new layer and delete the original image layer.
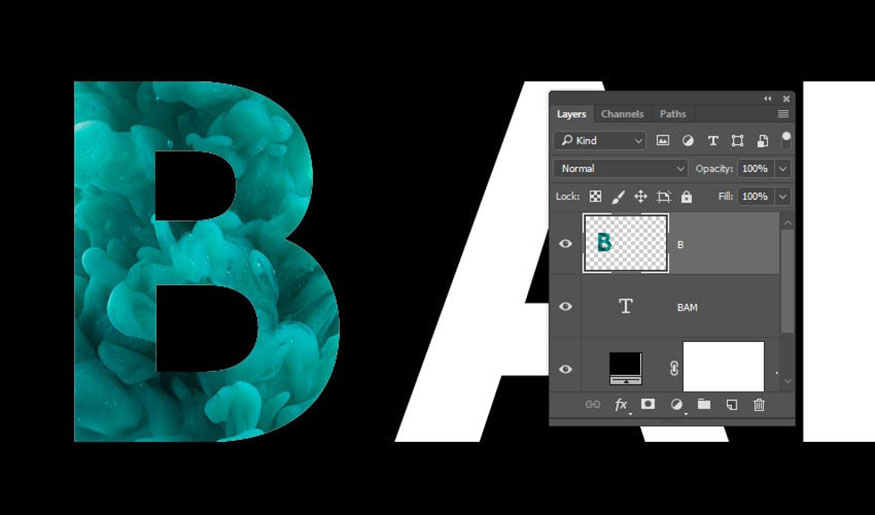
Step 5: Repeat the same steps to add other graphic motifs to the remaining letters. When finished, hide the text layer.
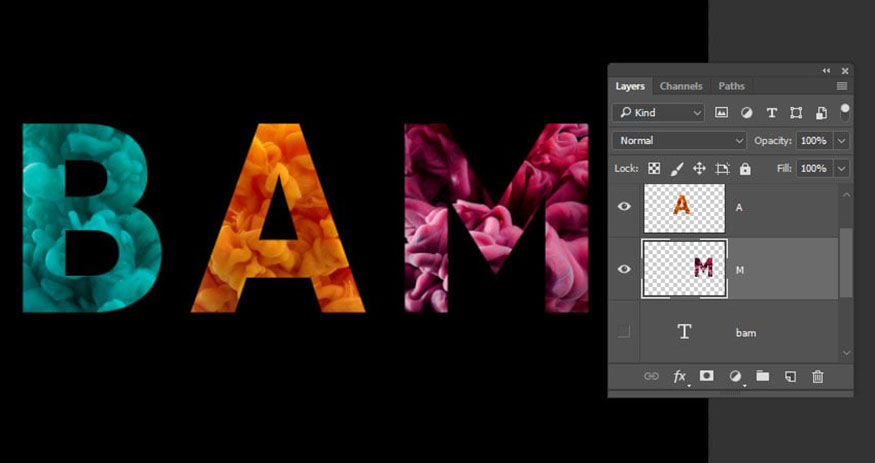
4. How to Save and Load Selection for effects
We have basically seen the color effect in the text. However, we still need to do more steps to complete it.
Step 1: Select all the layers you have except the text layer and go to Layer => Merge Layers to merge them.

Step 2: Hold down the Ctrl key and click on the text layer to load the selection.
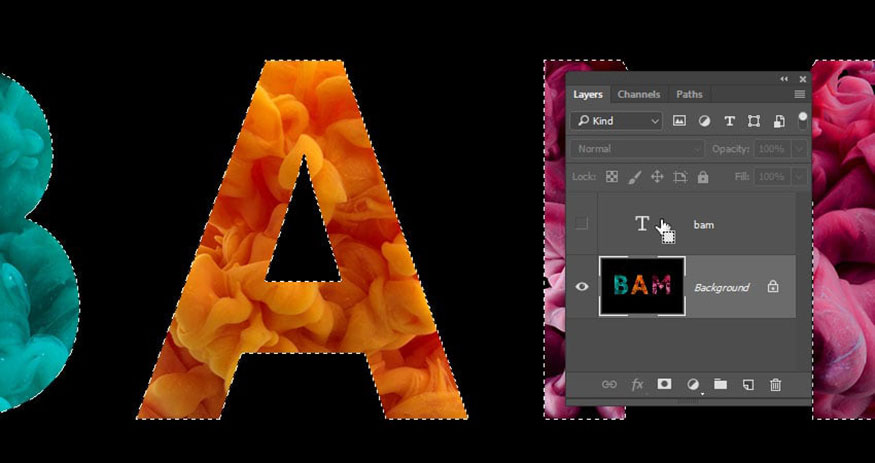
Step 3: Go to Select => Save Selection and enter Text in the Name field.
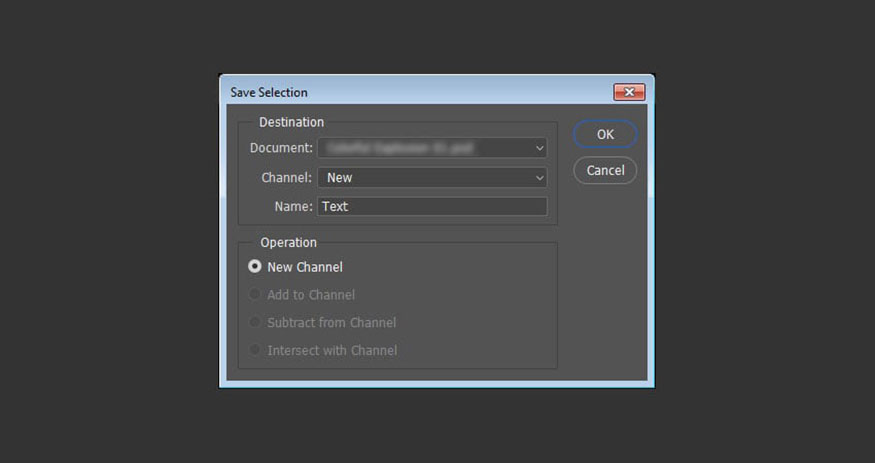
Step 4: Delete the text layer.
We'll be using the selection to paint within the text area, so if at any time you need to re-select, simply go to Select => Load Selection and choose the Text selection from the Channel menu.
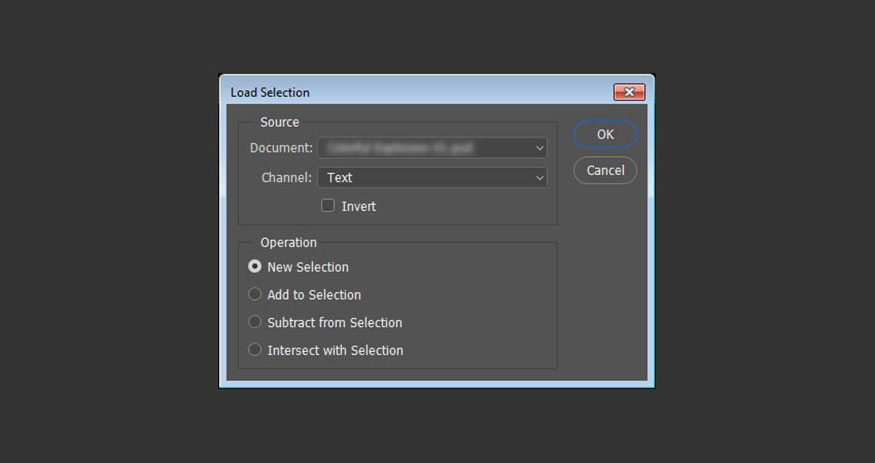
5. Use the Sandstorm Effect for a Colorful Explosion Text Effect in Photoshop
Next, let's try the Sandstorm effect for our text.
Step 1: Select the Brush Tool on the toolbar, create a new layer above all layers and name it brush.
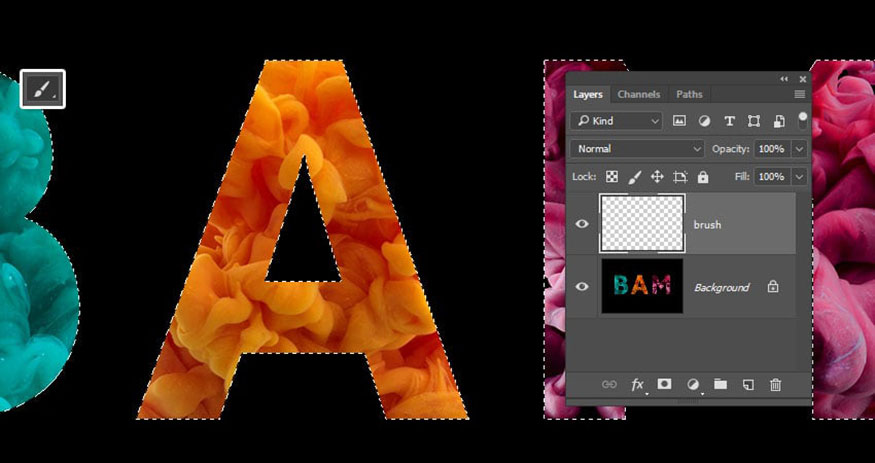
Step 2: This is an optional step, but it helps create more dynamic results. Open the Brush panel and use these settings for the Brush Tips Shape and Shape Dynamics tabs.
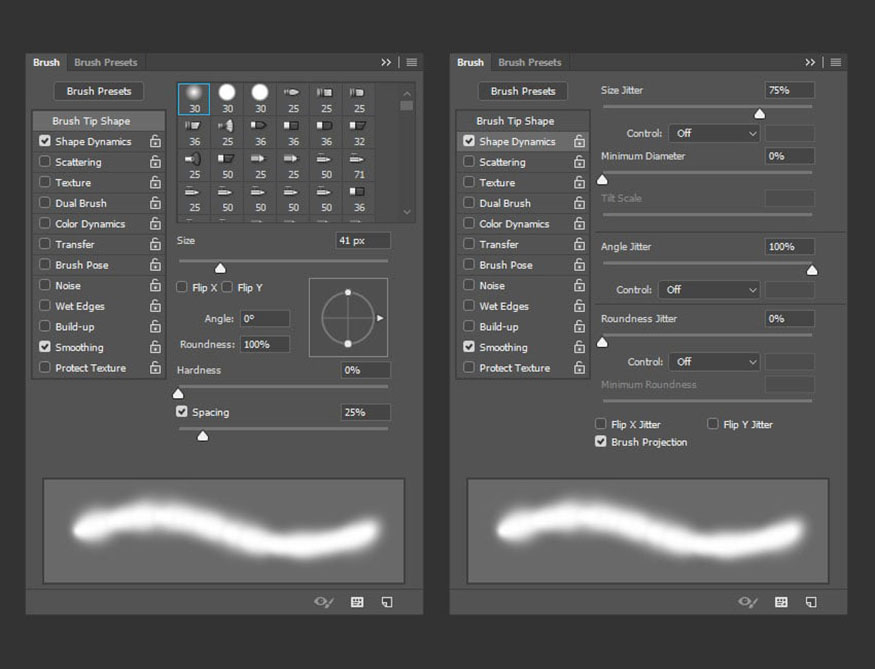
Step 3: Set the Foreground Color to whatever color you like and start painting over the areas you want to isolate.
This action has multiple direction options (Left, Right, Up, Down and Middle). So keep in mind the direction you want the parts to shatter.
Also, remember that the parts will be created from within the painted areas, which means the brush size also affects the result.

6. Run action to create a colorful explosion text effect in Photoshop
We downloaded a sandstorm action at the beginning of the post and now we’re going to launch it. This action will add some uniqueness to your design.
Step 1: After you finish painting, press Ctrl+D to deselect.
Select Window => Action, load the action. Click the Play selection icon at the bottom of the Action panel to run the action and wait for it to run. This may take a few minutes.
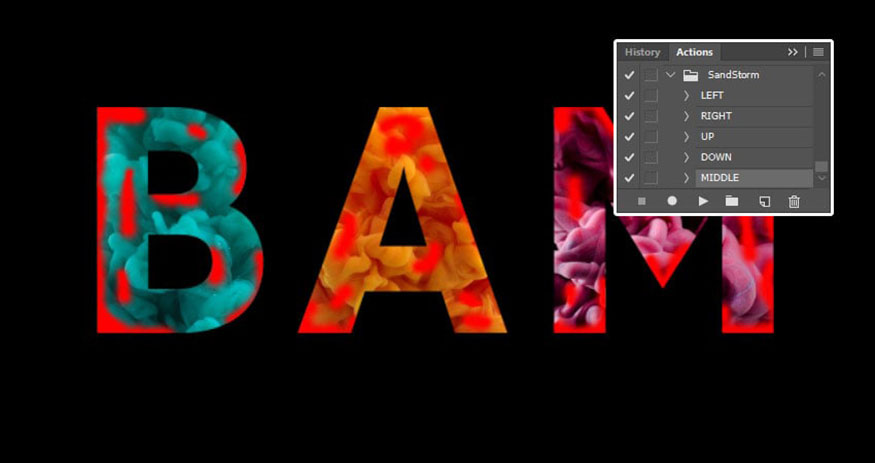
Step 2: After getting the result, you can see that you still have the Background and brush layers. If you don't like the result, you can delete the action layers, make some changes to the brush layer and run the action again.
There is no right or wrong in this process - it's a process of trial and error until you get the results you want.

Step 3: Once you have the desired result, you can check all the action folders and layers, and adjust any of them.
For example, here I have scaled down the Particle Groups evenly. You can go ahead and make any other changes, erase unwanted areas with a mask, and try out the different options available in the COLOR group.
7. Add Smoke to Colorful Explosion Text Effect in Photoshop
Now we will add a smoke overlay to the text.
Step 1: Place one of the smoke images on top of one of the letters, transform it if needed, and change the blend mode of that layer to Screen.
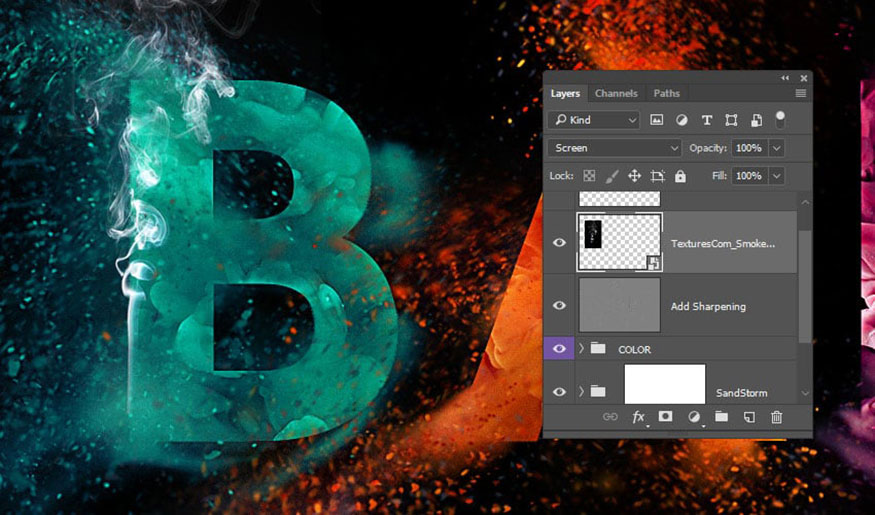
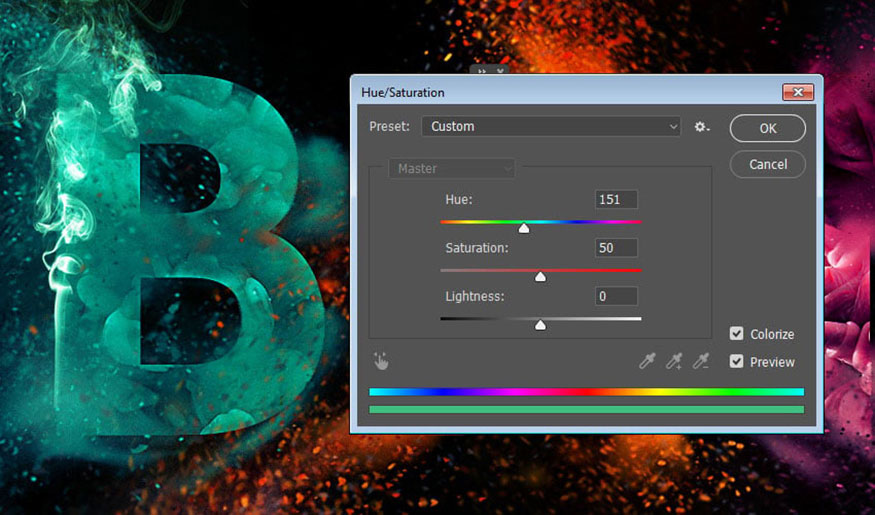
Step 2: Go to Image => Adjustments => Hue/Saturation, check the Colorize box and change Saturation to 50.
Then drag the Hue slider until you get a color similar to the letter's texture color, and click OK.
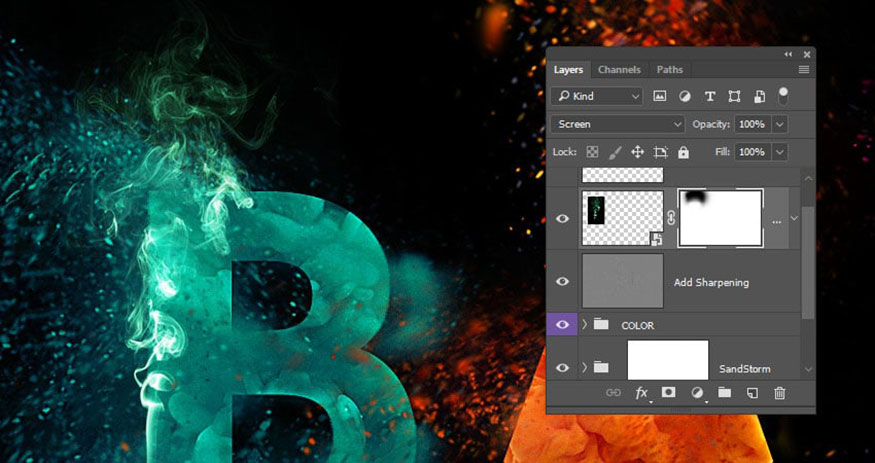
Step 3: Add a mask to the smoke layer and paint over the areas you don't like.
Step 4: Add more smoke images to the remaining letters, with different colors based on the letter's texture color.
Put all the smoke texture layers into a group and name it Smoke.
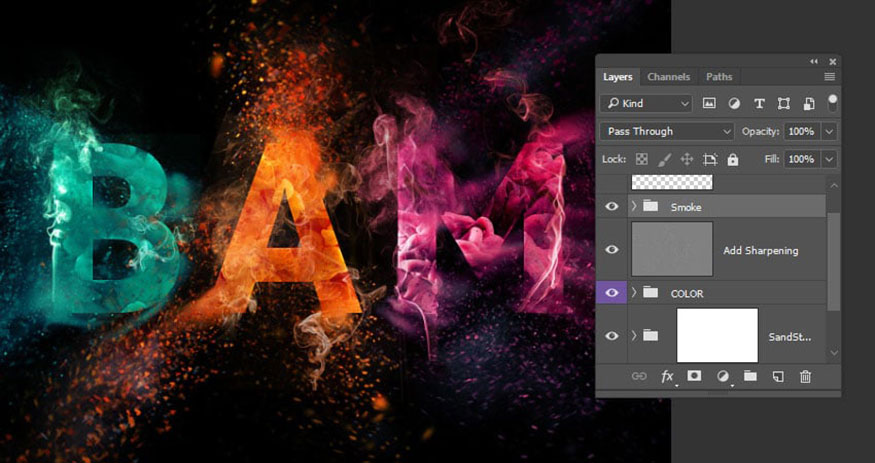
Step 5: Place the Landscape image on top of all layers, resize it to fill the document, and change the layer's blend mode to Soft Light and Opacity to 50%
.jpg)
So you have created a colorful explosion text effect in Photoshop. The text is extremely cool with unique color patterns.

Above is a summary of the steps to create a colorful text explosion effect in Photoshop. The implementation is not too difficult but requires you to try many times to get the most satisfactory results. Hopefully, the above sharing of Sadesign can help you have unique and impressive designs.
Installation and support contact information:
🏡 SADESIGN Software Company Limited
📨 Email: phamvansa@gmail.com
🌍 Website: https://sadesign.ai


.png)


