Best Selling Products

Capcut Pro 1 Year
39 USD

MidJourney Account
29 USD

Upgrade genuine Capture One account
120 USD

Adobe Photoshop Copyright - Full App
120 USD

Upgrade Duolingo Super
29 USD

Adobe Premiere Pro Account
99 USD

Plugin Retouch4me
69 USD

Upgrade Genuine Office 365
49 USD

Genuine Cheap Canva Pro
39 USD

Windows 10 & 11 Pro Key
36 USD

ChatGPT Plus Account (GPT-4)
16 USD

Copyright Adobe Lightroom Account
59 USD

Autodesk All App Account Copyright
120 USD

Genuine Adobe Illustrator account
99 USD

Freepik Premium Account
59 USD
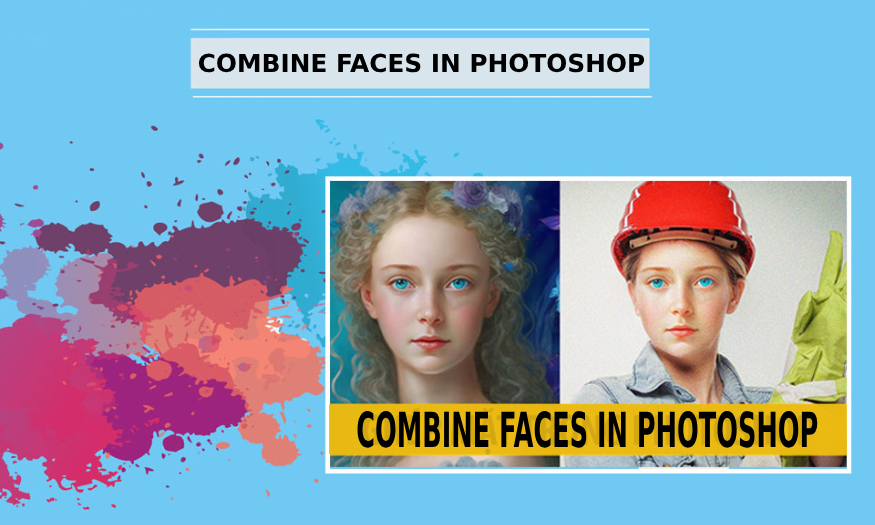
How to combine faces in Photoshop
Nội dung
Are you looking for the simplest and fastest way to combine faces in Photoshop? Then you absolutely should not ignore the following useful shares. In this tutorial, we will introduce to readers how to automatically combine photos using Auto Blend Layers. You will be very surprised with the results.
Are you looking for the simplest and fastest way to combine faces in Photoshop? Then you absolutely should not ignore the following useful shares. In this tutorial, we will introduce to readers how to automatically combine photos using Auto Blend Layers. You will be very surprised with the results.

1. How to perform face swaping in Photoshop
To perform face swaping, in this tutorial we use Photoshop 2023, you can also do the same in older versions. To help perform face swaping in Photoshop most effectively, download illustrations from Valuavitaly, this is a free site you can refer to.
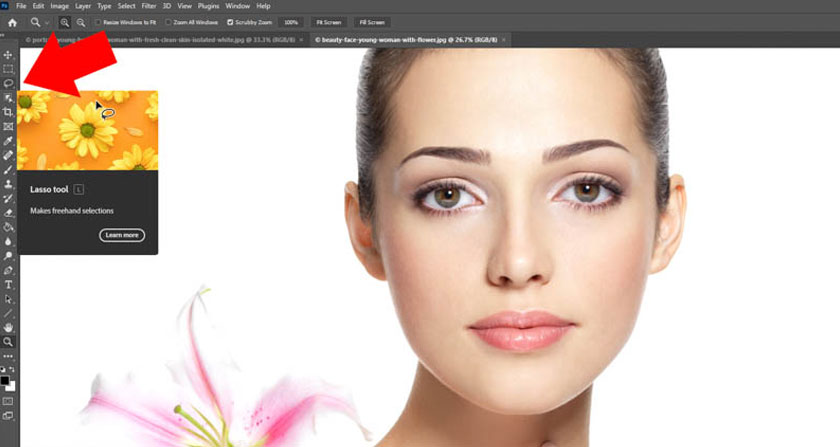
Next, click on the Lasso Tool or use the keyboard shortcut L. Lasso Tool is a tool that helps create free selections in Photoshop. To create a selection on the model's face, hold down the left mouse button.
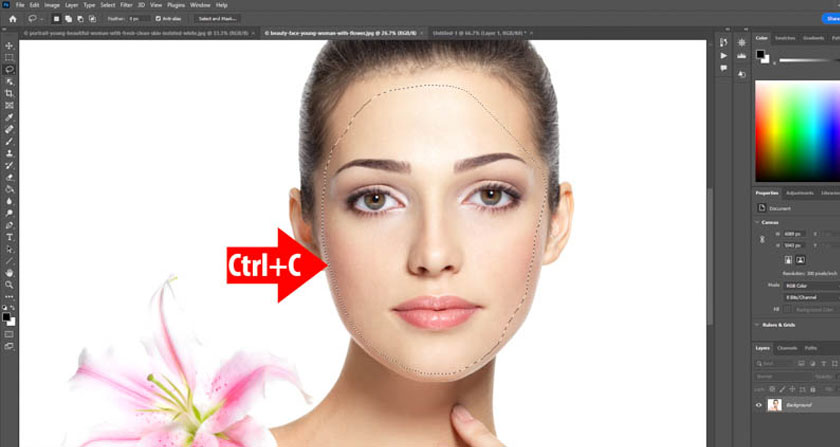
You will see dashed lines after connecting the start and end points of the Lasso Tool. Click Edit => select Copy to copy the model's face or you can press the shortcut Ctrl + C. If you are using Photoshop for Mac OS, press the keyboard shortcut Command+C.
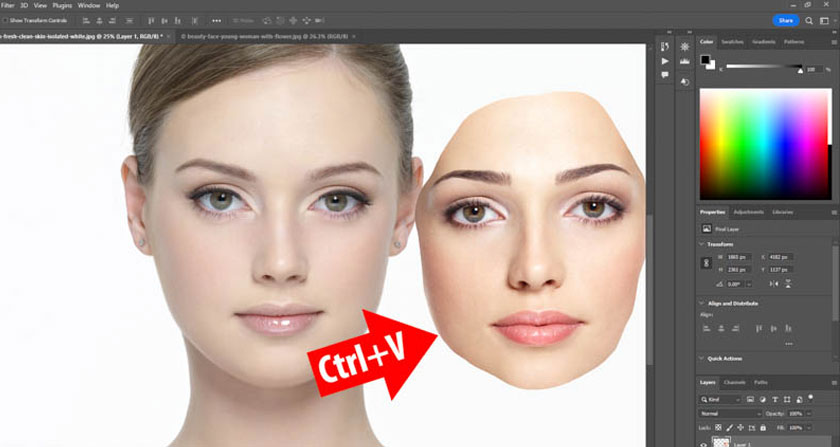
Open the photo you want to swap the face into Photoshop, here we use the photo of Valuavitaly => select Edit => select Paste to paste the copied face in the previous section. You can press Ctrl + V to paste in Photoshop for Windows or Mac OS, press Command + V in Photoshop.
Next, we reduce the Opacity, use the Move Tool (V) => click on the face, then move to match the image to be merged. In most cases, the two faces will not match because the size and structure of the faces are different.
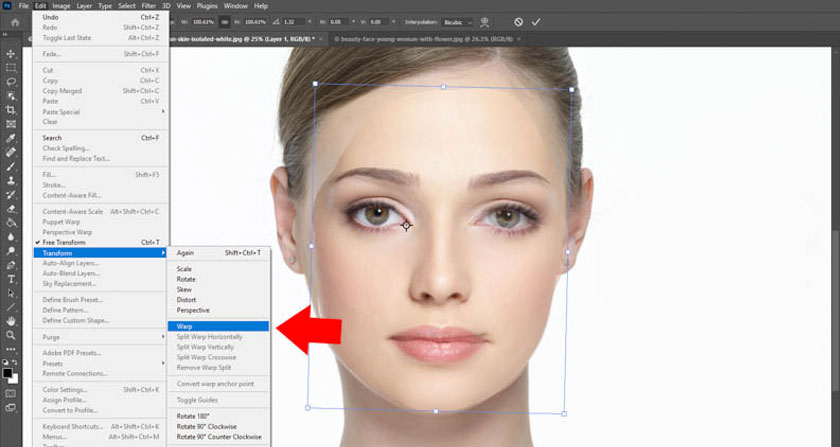
To achieve better results, you need to click Edit => select Free Transform (Ctrl + T) so that the frame surrounds the model's face => click on the anchor point on the corner => change the size to match the face below .
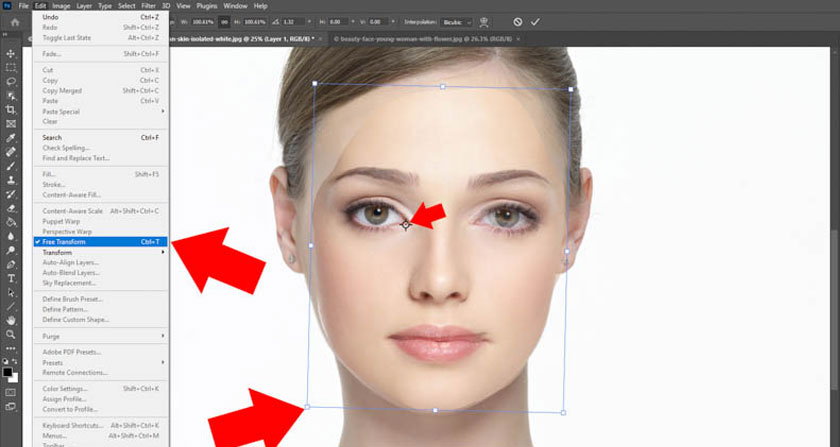
You can adjust the face rotation to achieve better results. However, the right eye and nose are still a bit off. To fix it, click Edit => select Warp or right-click to select Warp.
A frame with many grid lines appears, you can click Split in the left corner to create more grid lines => click on the anchor points to adjust the two faces to be matched together.
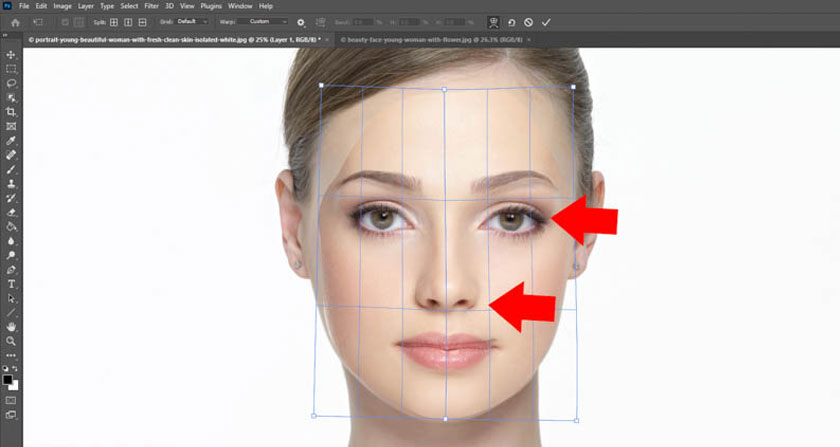
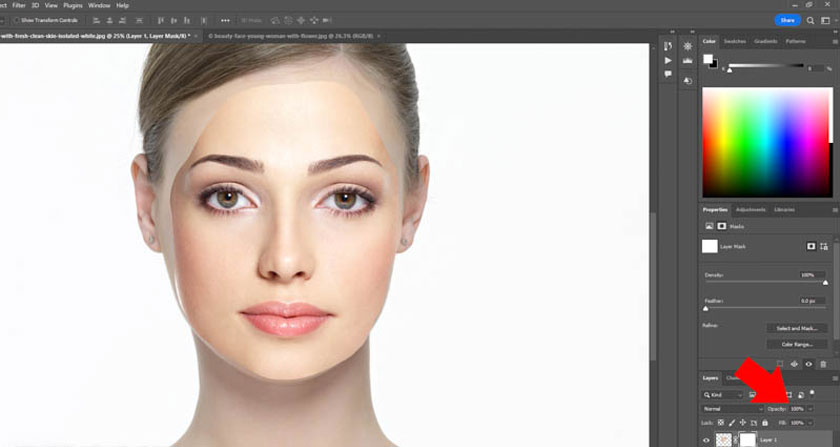
So, the model's right eye and nose have been matched, but the mouth has different expressions so it hasn't been matched yet. Next, you need to click on Layer 1 and increase the Opacity to 100%, then click Add a Layer Mask => Layer Mask works to control the part you want to display on the image.
Once you have created the Layer Mask, click on the Brush or press the shortcut B, adjust the size of the Brush to suit your needs => increase Hardness to 100%.
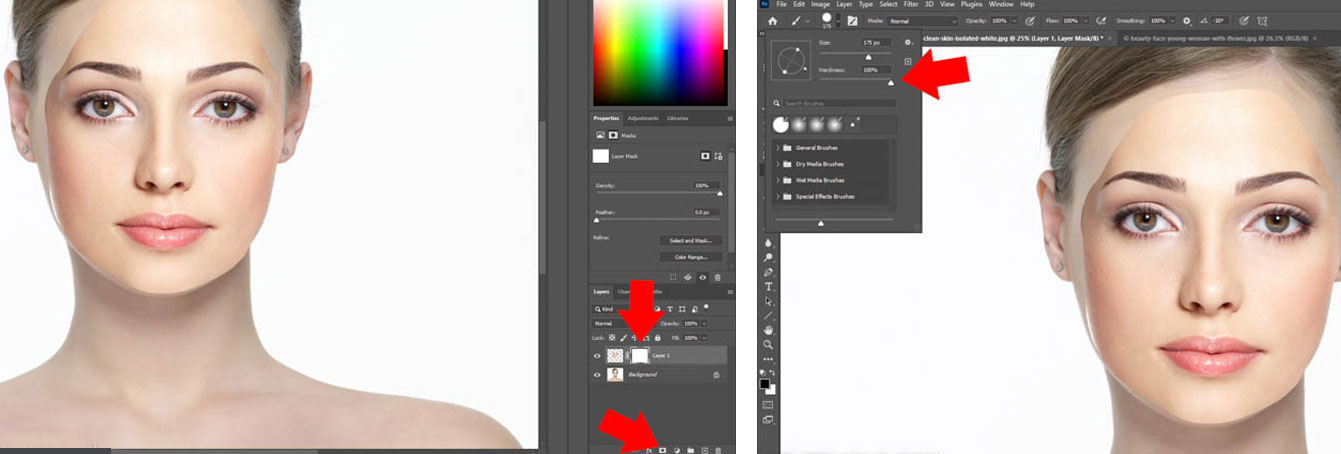
Next, select the white Layer Mask => select the black Brush to paint on the areas surrounding the face. This action helps remove excess on the model's face to make face swaping in Photoshop more effective.
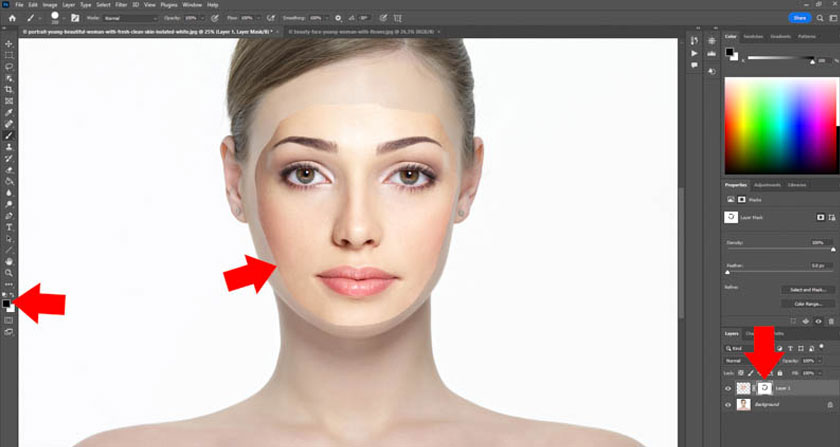
After surrounding the model's face, right-click on Layer Mask => Apply Layer Mask, this operation is to apply the effect of Layer Mask to the original layer, you will see the Layer Mask disappear.

Next, right-click on the Background Layer => press Ctrl + J to duplicate the layer => Layer Background Copy is above.
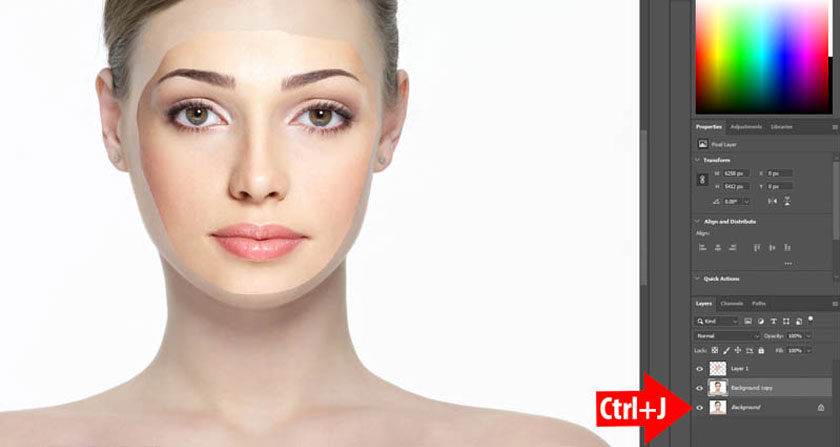
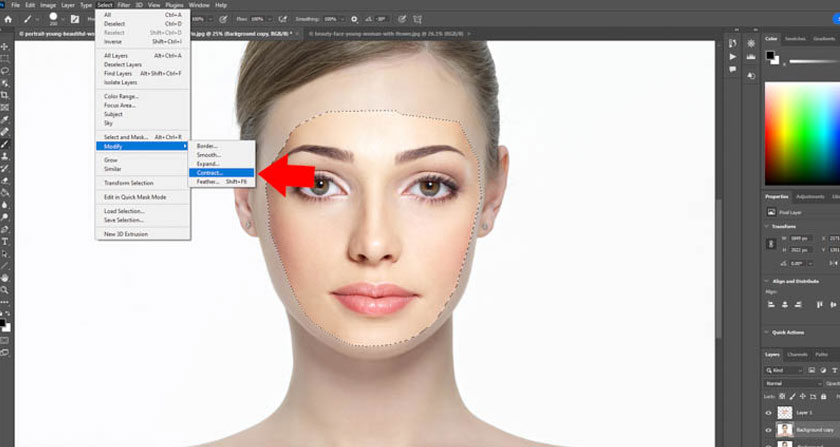
Click to select Layer Background Copy => hold down the Ctrl key => left click on Layer 1 above so that the selection area surrounds the model's face. After you have a selection, press Select => select Modify => Contract.
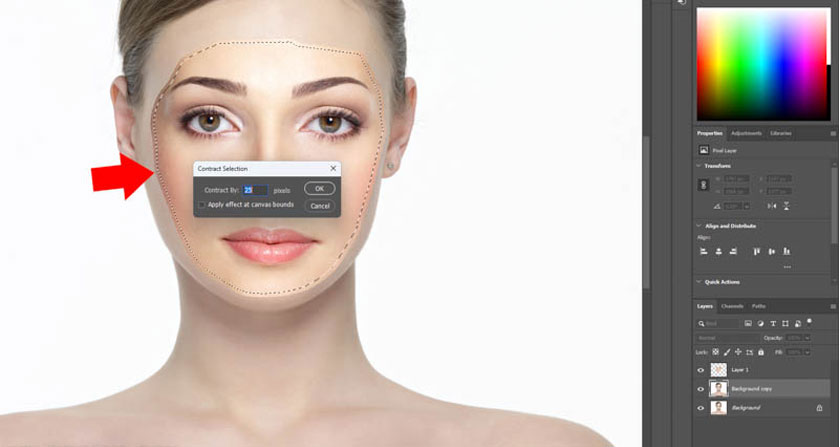
In this tutorial, we will select the parameter 25 Pixels in Contract Selection => Enter. We can see that the dashed line is 25 pixels back from the original selection. This operation is to let Photoshop understand that we want to create a 25-pixel transition area from the face on the original image and the image to be merged. If the parameter is too low, you will see a sudden transition from the original image to the merged face, making the image not real. Try different Contract values to choose the best result.
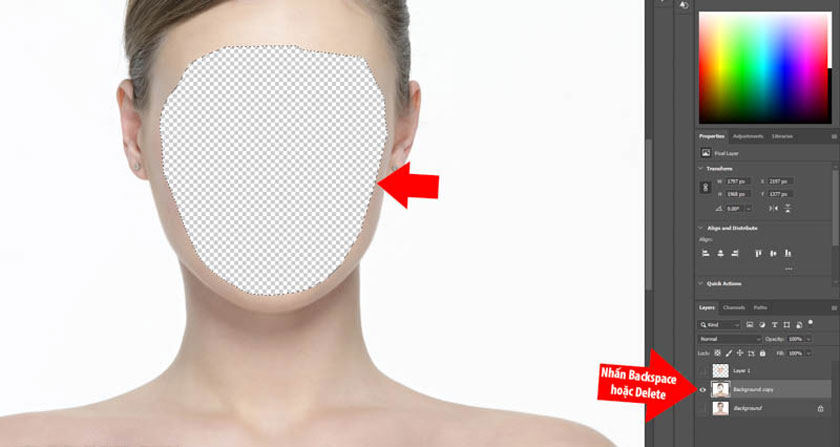
Once you have created a selection and adjusted the Contract, press the Backspace or Delete on the keyboard to delete the selection in the Background Copy Layer. Then turn off the display of Layer 1 and the Background Layer, if you see the empty area above the Background Copy, it is correct. This deletion must be done before face swaping can be performed in Photoshop.
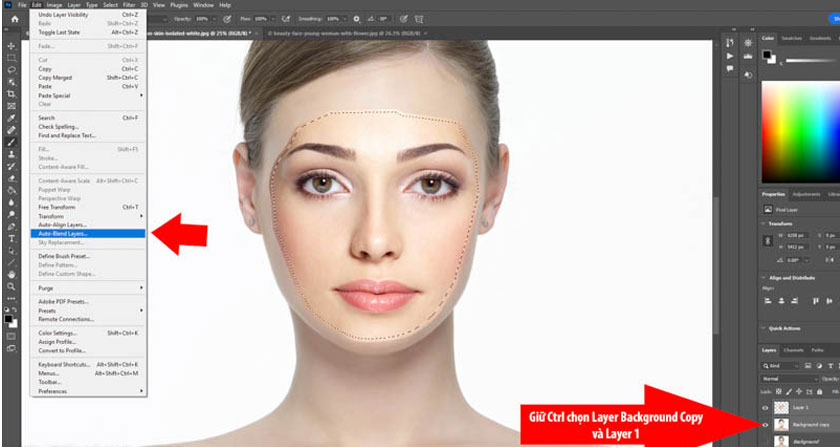
Next you need to click on the eye icon to turn on the display of Layer 1 => hold down the Ctrl key to select Layer Background Copy and Layer 1 => click on Edit => select Auto Blend Layers.
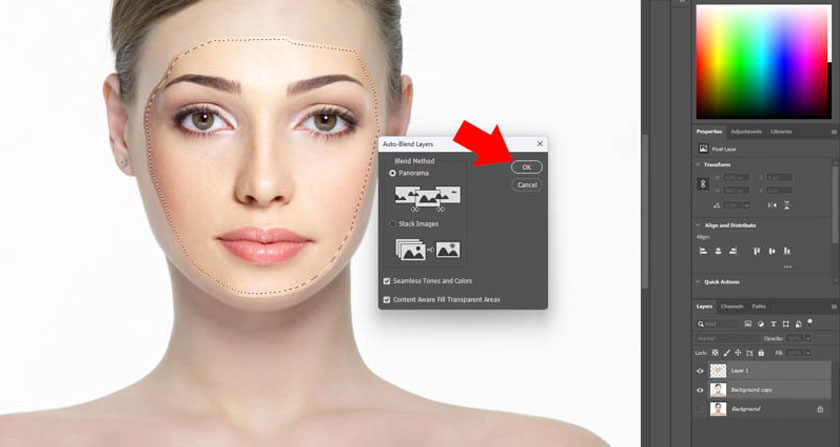
Select Panorama then mark the following items: Seamless Tones and Colors and Content Aware Fill Transparent Areas. Specifically:
● Auto Blend Layers to combine multiple images into 1 image.
● Seamless Tones and Colors: to automatically adjust the color and brightness on the face with the original photo.
● Content Aware Fill Transparent Areas: to automatically add details to empty spaces in the photo, helping to perfect the photo.
Then you press OK and wait Photoshop for a few seconds to combine the face.
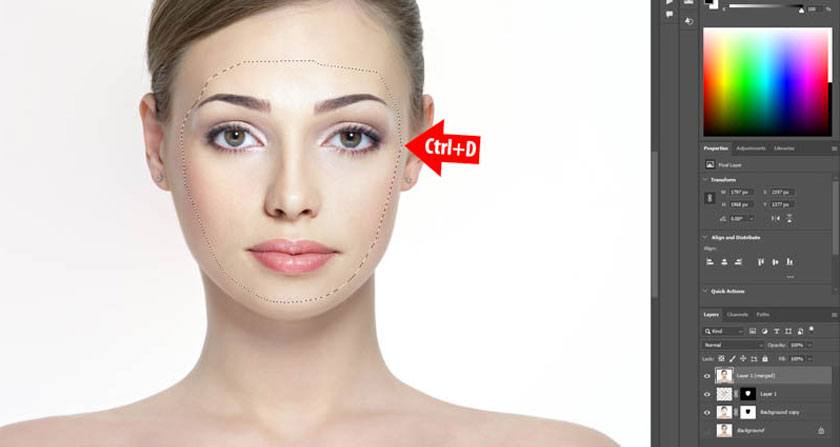
As a result, we can see that Photoshop performs a very beautiful face swap. In addition, Photoshop also adjusts skin color and brightness to help the photo achieve the best results. Once completed, press Ctrl+D to remove the dashed line around the model's face. In some cases, choosing Panorama does not bring the expected effect, you can try choosing Stack Images.
2. Solve problems when merging faces into photos in Photoshop
2.1. Is it difficult to perform face swap in Photoshop?
In fact, combining faces in Photoshop is quite simple with the Auto Blend Layers function.
2.2. Which version of Photoshop should I use for the fastest face swap?
You should use Photoshop 2023 or newer versions. Because new versions are often intelligent, they give more accurate results, making face swap the most beautiful and natural.
2.3. How to swap faces in Photoshop to achieve the best results?
To achieve good face swap results, you should choose two faces with the same resolution, same viewing angle, and possess many similarities. Besides, you should use Seamless Tones and Colors to help Photoshop automatically adjust the color and brightness to help the two faces match each other.
So, we have learned how to combine faces in Photoshop quickly and easily. SaDesign hope they are useful to readers.


VIP Products


Best Selling Products
Capcut Pro 1 Year
39 USD
MidJourney Account
29 USD
Upgrade genuine Capture One account
120 USD
Adobe Photoshop Copyright - Full App
120 USD
Upgrade Duolingo Super
29 USD
Adobe Premiere Pro Account
99 USD
Plugin Retouch4me
69 USD
Upgrade Genuine Office 365
49 USD
Genuine Cheap Canva Pro
39 USD
Windows 10 & 11 Pro Key
36 USD
ChatGPT Plus Account (GPT-4)
16 USD
Copyright Adobe Lightroom Account
59 USD
Autodesk All App Account Copyright
120 USD
Genuine Adobe Illustrator account
99 USD
Freepik Premium Account
59 USD