Best Selling Products

Genuine Adobe Illustrator account
99 USD

Copyright Adobe Lightroom Account
59 USD

Plugin Retouch4me
69 USD

Windows 10 & 11 Pro Key
36 USD

Genuine Cheap Canva Pro
39 USD

Upgrade Duolingo Super
29 USD

MidJourney Account
29 USD

ChatGPT Plus Account (GPT-4)
16 USD

Adobe Photoshop Copyright - Full App
120 USD

Autodesk All App Account Copyright
120 USD

Capcut Pro 1 Year
39 USD

Upgrade Genuine Office 365
49 USD

Freepik Premium Account
59 USD

Adobe Premiere Pro Account
99 USD

Upgrade genuine Capture One account
120 USD
How to create simple photo frames in Photoshop
Nội dung
Creating frames for photos is not as complicated and time-consuming as many people think. The following article Sadesign will introduce to readers 3 very simple and easy ways to create photo frames in Photoshop that anyone can apply, even those who do not have much experience.

Creating frames for photos is not as complicated and time-consuming as many people think. The following article Sadesign will introduce to readers 3 very simple and easy ways to create photo frames in Photoshop that anyone can apply, even those who do not have much experience.

1. Create photo frames in Photoshop using Actions
How to create photo frames in Photoshop using Actions is the easiest way to do it, in this article we will show you how to do it in Photoshop 2023, you can apply it to use for older versions .
First, open the image in Photoshop by pressing File => select Open => Window => select Actions or you can use the keyboard shortcut Alt+F9.
.jpg)
On the right side, click the Actions icon to open the Actions panel. By default, Photoshop will not display Actions to create photo frames. So you need to click on the Actions => Frames settings icon to ask Photoshop to download Actions to create photo frames.
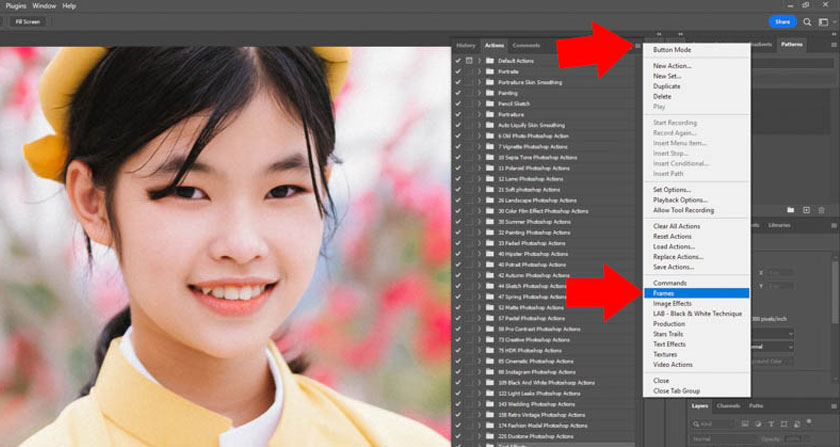
Look in the Actions panel on the left, find the Frames folder and select this folder to see the small Actions inside. There will be many Actions to create photo frames, depending on your preferences you can choose the appropriate model.
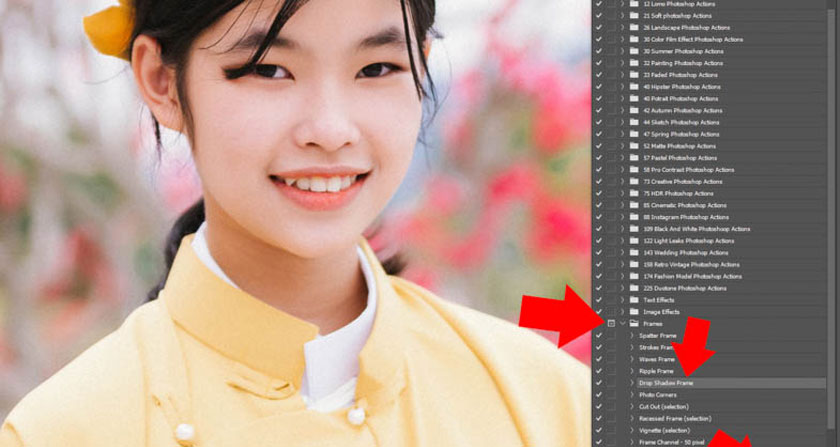
For example, to create a photo frame with shadow, click Drop Shadow Frame => run Actions and wait for Photoshop to return the results.
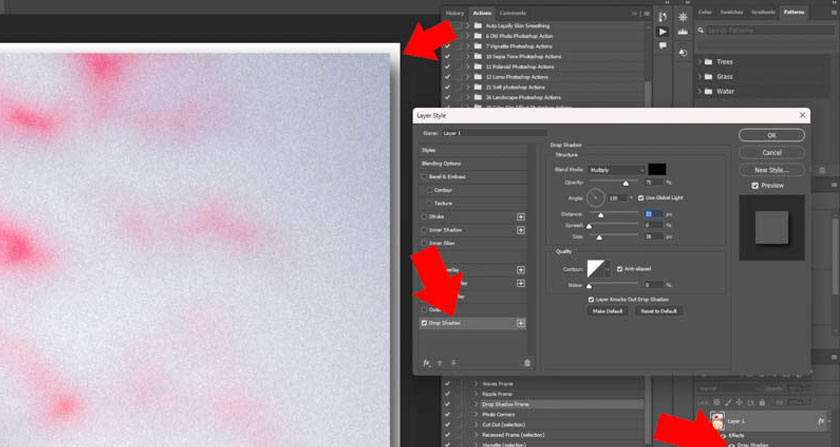
It can be seen that creating photo frames is extremely simple and easy with Photoshop. Actions have pre-programmed steps so everything is done in just a few seconds instead of taking time and requiring a lot of editing experience like the traditional way.
You can click Effects => select Drop Shadow and adjust the color, lighting angle, as well as photo frame size in Layer Style.
If you are not satisfied with the selected photo frame, you can press the shortcut key F12 to return to the original photo. Next, try running Actions to create the remaining image frames. Besides, you can make small adjustments in Actions to create a photo frame that you feel satisfied with.
By default, when using Actions to create a Photoshop photo frame, the layer will be duplicated and converted to Smart Objects. The changes will be on the Smart Objects Layer and can be adjusted, you just need to change accordingly.
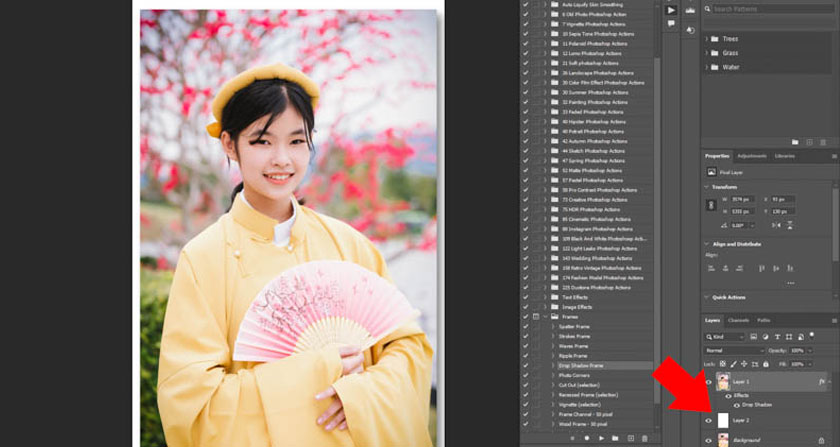
You can also create a background layer below, then adjust the Smart Objects Layer ruler above to help create a photo frame with more beautiful colors and effects.
2. Use Picture Frame to frame a photo in Photoshop.
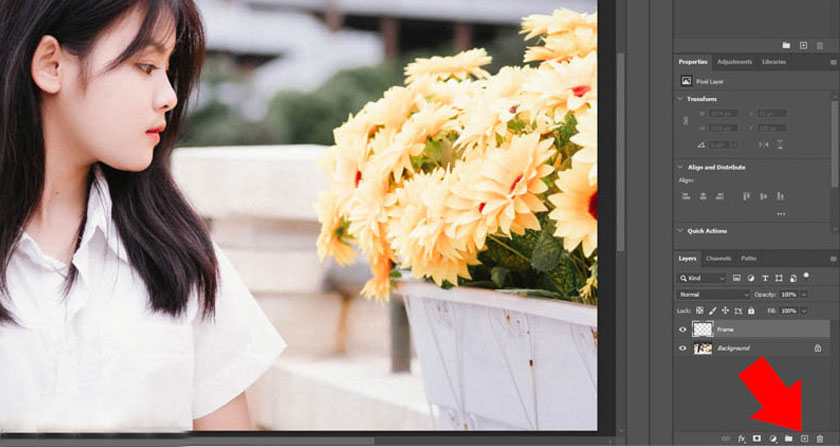
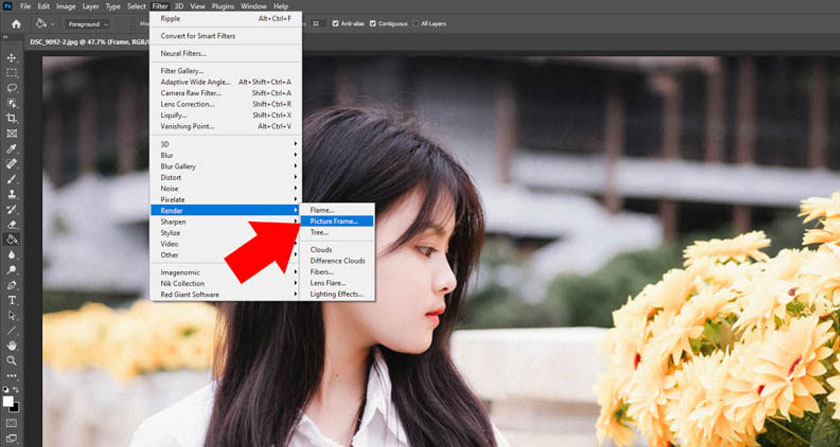
Open the photo by clicking File => select Open or pressing the keyboard shortcut Ctrl+O. Next click on the + icon to create a new Layer and rename it so that it's easy to remember, in this example, we named it “Frame”
Next, click on Filter => select Render => Picture Frame. This is the feature that helps create Photoshop's default photo frame, which we can find in most versions of Photoshop.
Here, click on Frame to choose a photo frame model, you will see many different suggestions such as wooden frames, flowers and many other things. If you like, you can also download additional photo frames.
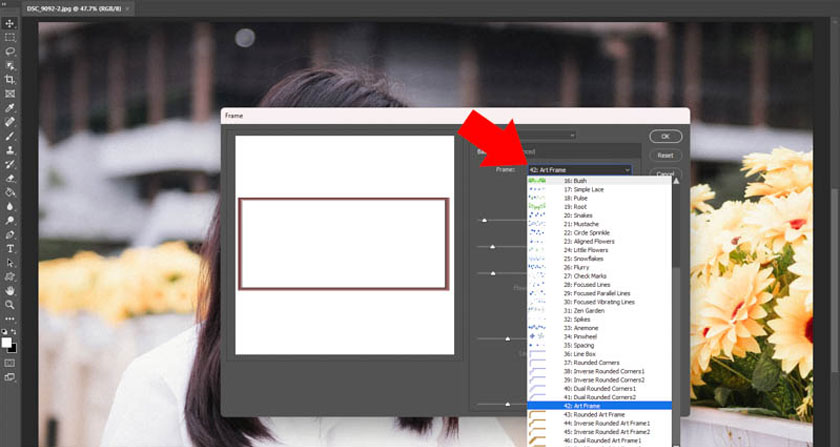
After selecting the model, click Color to select the color, then change the size in the Size section. You can change the edges and details on the photo frame according to your wishes. After a few minutes, you will understand more about the features in Picture Frame.
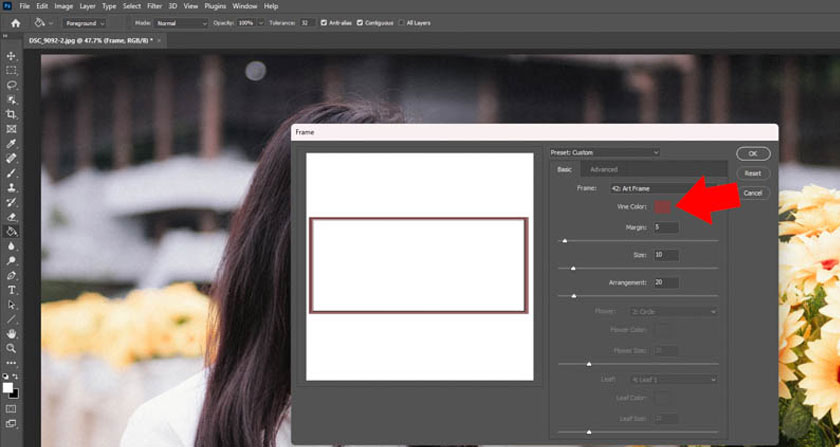
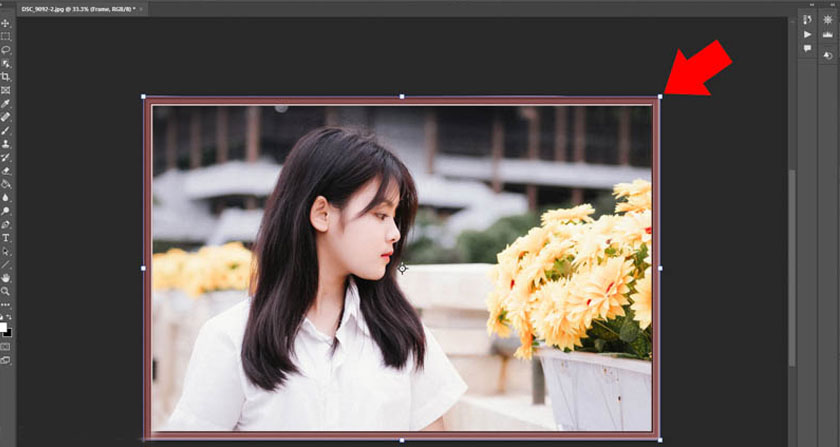
After choosing the model, size and color, click Ok to create the photo frame. You can see that the frame is on the Layer Frame created in the previous section => press Free Transform (Ctrl + T) to change the size of the image frame => press Enter to complete.
3. Use Google Nik Collection to create photo frames in Photoshop.
With this method, you first need to install Google Nik Collection into Photoshop.
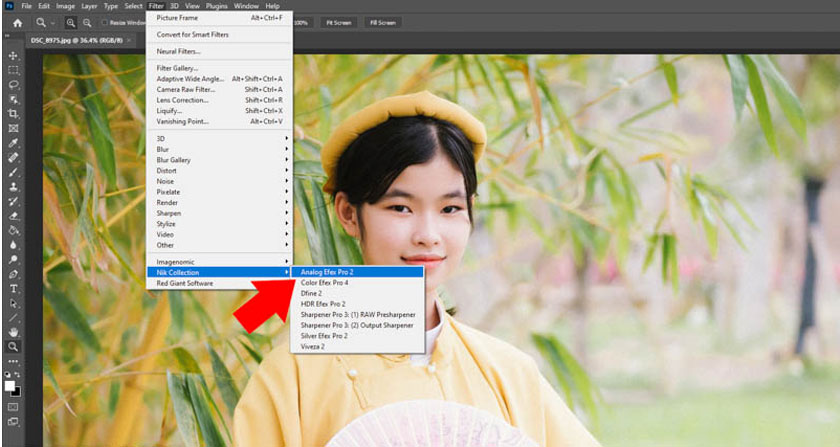
Next, open the photo and click Filter => Nik Collection => select Analog Efex Pro 2.
This is a function that helps create movie effects and photo frames in Plug in Nik Collection.
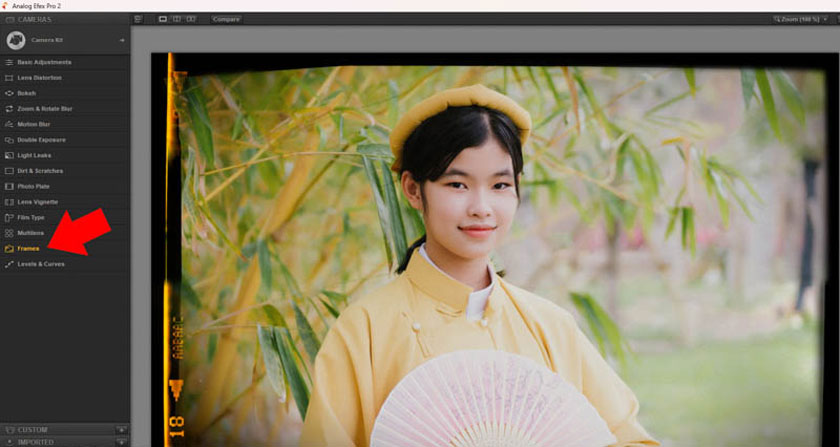
Here you click on Frames to create a photo frame.
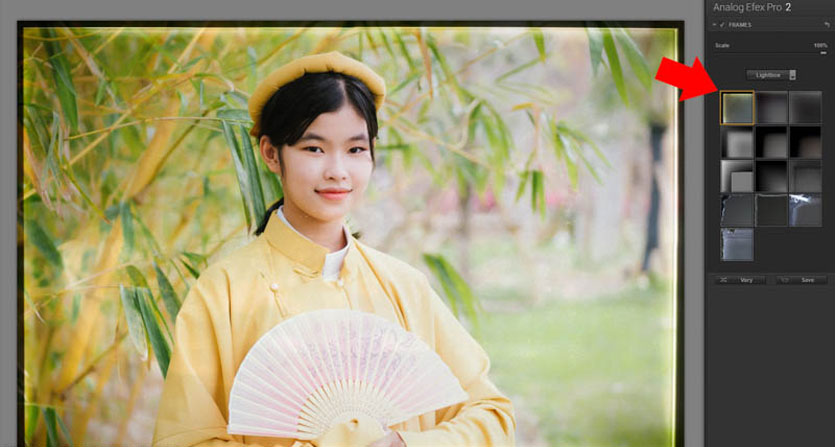
Analog Efex Pro 2 divides the photo frame into different themes, you just need to click on the down arrow, select the theme and see the templates here => Click on the template you want to use.
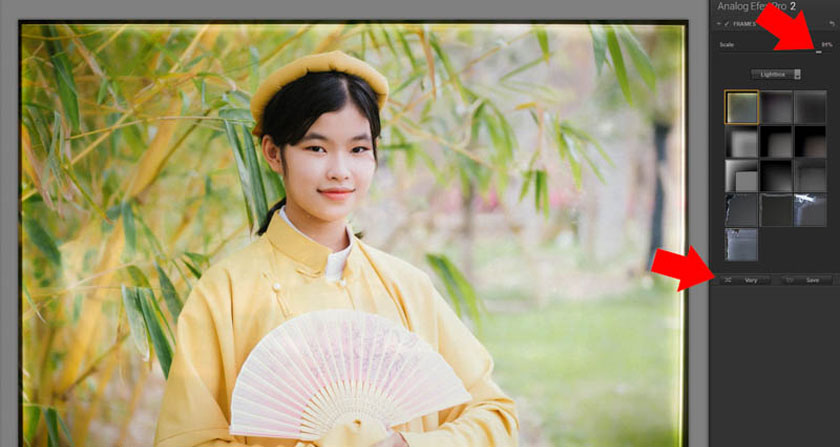
If you do not want to use the default photo frame template, you can click Vary to create a random one, as well as to adjust the photo frame size using the Scale slider. This is considered the simplest and most beautiful way to create photo frames in Photoshop.
4. Address to download beautiful photo frames for Photoshop
To download beautiful photo frames for Photoshop, you need to go to the Freepik page and enter the search box Photo Frame Mockup => select the PSD file and tick Free to find free photo frames in PSD format on Freepik.
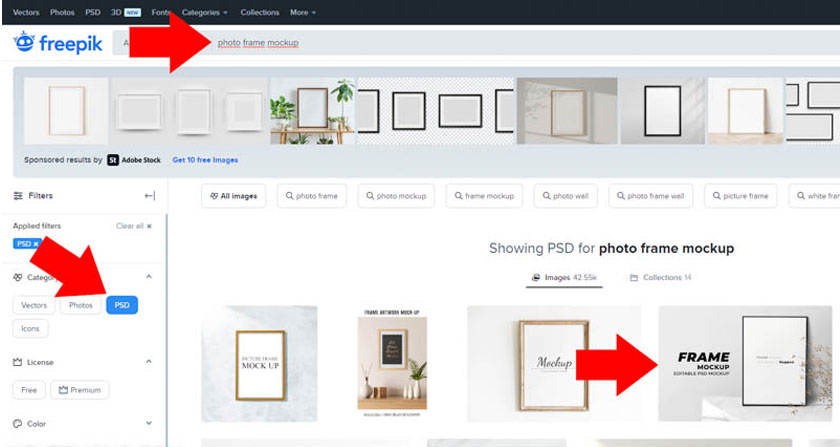
Select the photo frame displayed on the main screen, you will also see beautiful photo frames from Adobe Stock located below the search bar. If necessary or possible, you can buy on Adobe Stock, there are many beautiful and impressive templates.
In this tutorial we will choose RawPixel's free photo frame => click Free Download to download to your computer.

Choose a storage location and click Save
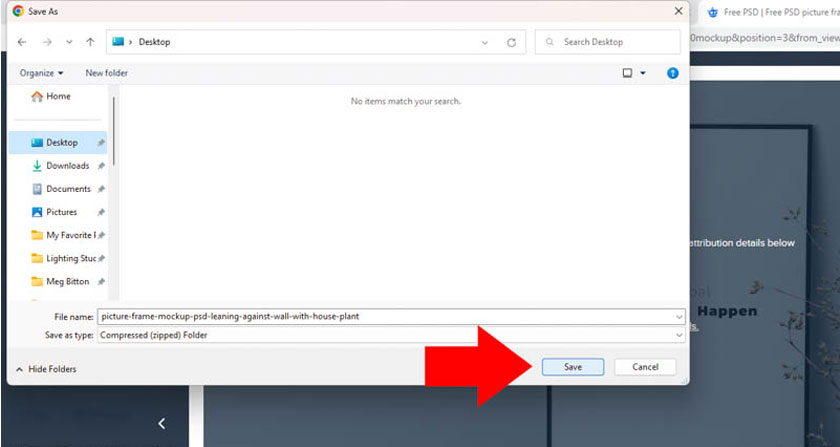
By default, files on Freepik use Zip compression, so you need to right-click and select Open to open this file. If you use old Windows, you need to decompress with Winrar.
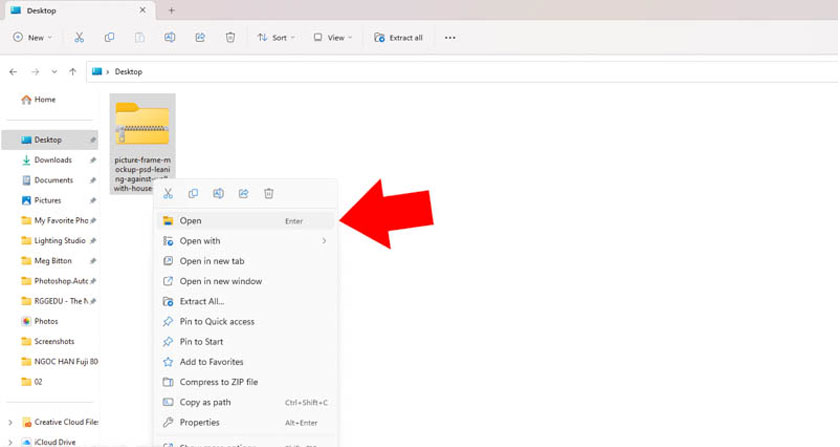
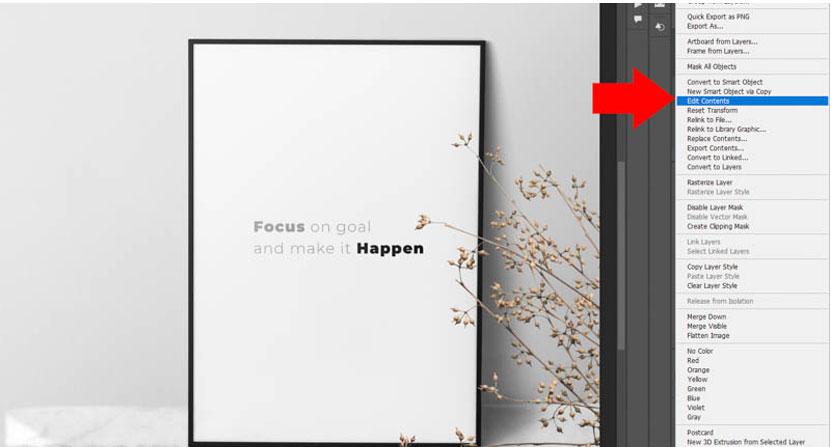
Right-click and select Open to open the photo frame in Photoshop. The photo frame includes many layers. The most important layers often have special colors and are accompanied by the text “Your image here”, you should select these layers.
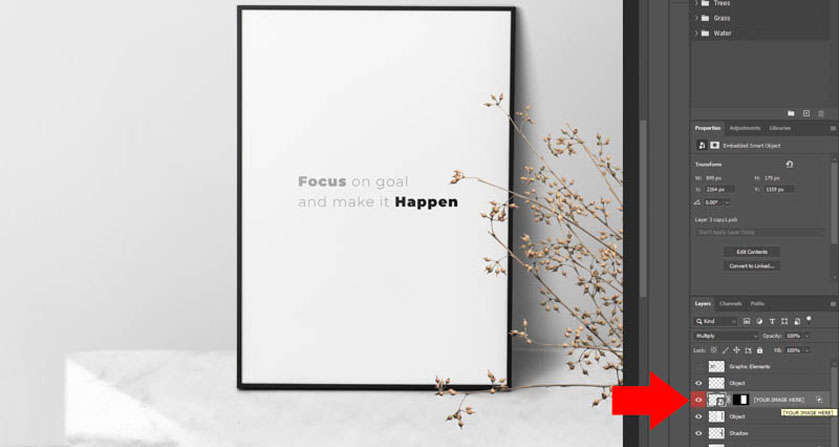
Right-click and select Edit Contents to change the default image in the design to your own photo.
Next, click File => select Place Embedded => select the photo on your computer and then click Place.
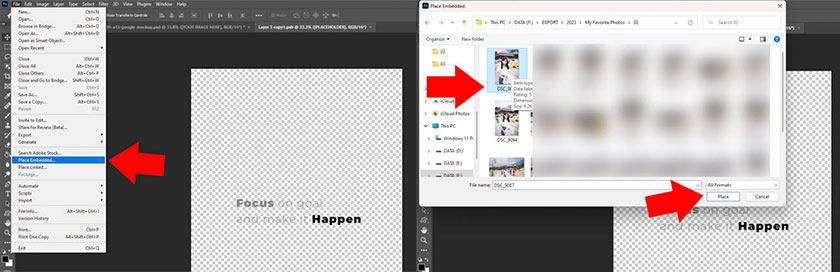
Immediately your image will replace the original image => press Free Transform (Ctrl + T) to change the size to suit the photo frame.

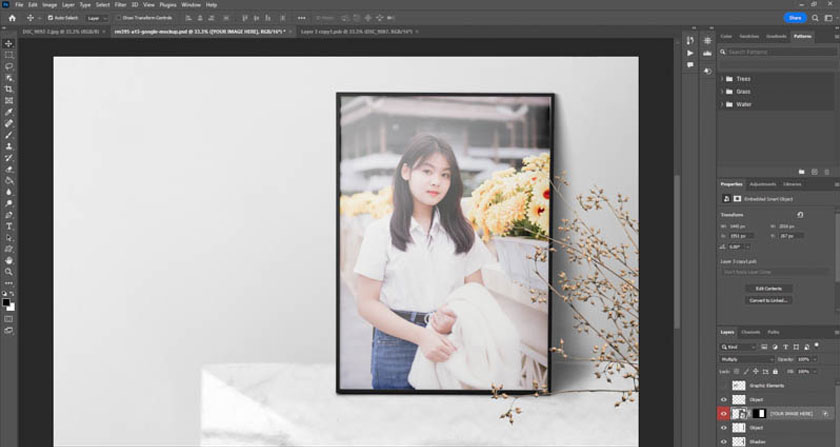
When finished adjusting the size, click File => select Save, the changes will be applied to the photo frame. If you skip this step, nothing will happen.
So, Sadesign has introduced to you 3 ways to create photo frames in Photoshop, as well as how to download beautiful photos for Photoshop. Wishing you success with your photos!


VIP Products


Best Selling Products
Genuine Adobe Illustrator account
99 USD
Copyright Adobe Lightroom Account
59 USD
Plugin Retouch4me
69 USD
Windows 10 & 11 Pro Key
36 USD
Genuine Cheap Canva Pro
39 USD
Upgrade Duolingo Super
29 USD
MidJourney Account
29 USD
ChatGPT Plus Account (GPT-4)
16 USD
Adobe Photoshop Copyright - Full App
120 USD
Autodesk All App Account Copyright
120 USD
Capcut Pro 1 Year
39 USD
Upgrade Genuine Office 365
49 USD
Freepik Premium Account
59 USD
Adobe Premiere Pro Account
99 USD
Upgrade genuine Capture One account
120 USD