Best Selling Products
Create a warped text effect in Photoshop with SaDesign
Nội dung
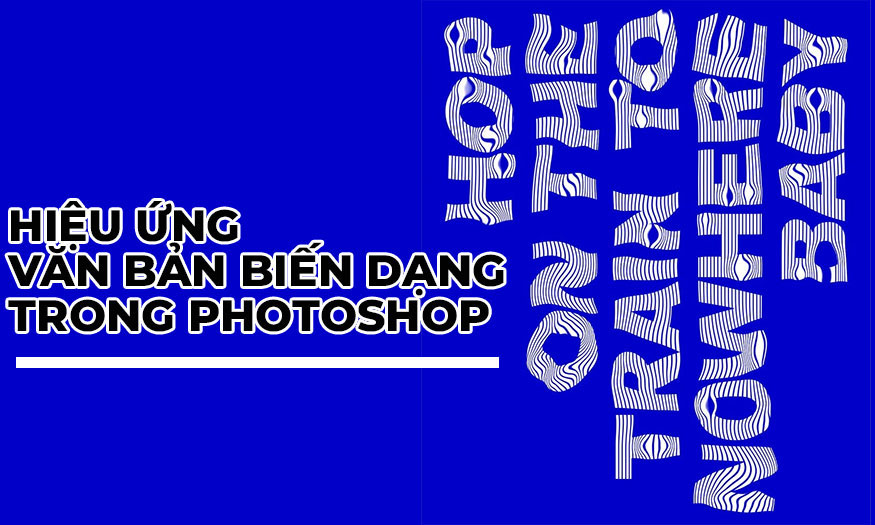
The letters are deformed in different directions, curved, tilted, ... will make your design much more unique. Now you can completely do it by combining many tools in Photoshop. Join SaDesign to learn how to create a deformed text effect in Photoshop through the following shares.

1. Create a new document and add Guides for the warped text effect in Photoshop
To create a distorted text effect in Photoshop, we first need a new document and some guides. Follow the detailed steps below.
Step 1: First we need Photoshop software then go to File => New to create a new document. Name the document Wobbly Effect and set Width to 1270 px and Height to 1600 px, Resolution to 72 dpi and Background Contents to White. Click OK to create the document.
.jpg)
Step 2: At the bottom of the Layers panel, click Create a New Fill or Adjustment Layer => Solid Color and use a blue color with the color code #0100c8.
.jpg)
Step 3: We need to create a 1-inch margin around the document. On the menu bar, select View => New Guide. Set Orientation to Horizontal and Position to 1 inch. Do the same for the Vertical orientation. For the right margin, subtract 1 inch from the final document size.
(1).jpg)
Note, you can also set arbitrary parameters and colors.
2. Add and set up text for warped text effect in Photoshop
Once we have a satisfactory background, we will add the text and start installing the text.
Step 1: Let’s add some text using the Type Text Tool (T). Here I want to write “Hop on the train to nowhere baby”. I’m using the font Archivo Black in white and all caps. I’m setting the size to 260 pt, leading to 235 pt, tracking to -40 and aligning it right.
.jpg)
Step 2: Select the text layer, press Ctrl+T to align the layer. Rotate by hovering over one of the corners until the rotate icon appears. Press the Shift key to rotate evenly, rotate -90 degrees. Align the text frame to the top margin. Press Enter to continue.
.jpg)
Step 3: Next, we need to create vertical lines in the document. On the toolbar, select the Line Tool (U), then change the settings on the Options bar. For Fill, select No Color. For Stroke, select the blue color we used above (#0100c8), set the Stroke to 3 px, and set the Weight to 3 px. Click on the document and draw a vertical line as shown. You can hide the underlying layers to see the line.
Step 4: Now, we need to duplicate this line in the document. Select the line layer that we created in the previous step. Press Alt+Ctrl+T to transform and duplicate the object. The Transform pane will appear. To move the line, just hold Shift and press the right arrow key. Press Enter to place the object.
.jpg)
Step 5: Normally to transform we can press Shift+Ctrl+T, but in this case, we want to multiply the object, so we need to add the Alt key.
Press Shift+Alt+Ctrl+T repeatedly until the document is filled with lines. This method will duplicate the lines on a layer.
(1).jpg)
3. Use Liquify Tool for warped text effects in Photoshop
The Liquify tool is an incredibly powerful way to deform text.
Step 1: In the Layers panel, select the text layer, line layer, and color fill layer. Right-click => Duplicate layers and in Destination, make sure the name of the file we are working on is selected. Click OK. While these two duplicate layers are selected, Right-click => Merge Layers. Hide the original layers.
(1).jpg)
Step 2: With the newly copied layer selected, go to Filter => Liquify (Shift+Ctrl+X). The Liquify window will pop up. Let’s start with the Bloat Tool (B), which will expand the selection of where you place the brush, almost like a fisheye effect. I set the Brush size to 90 and the Brush Density to 20. Click between the lines to open the lines. For this window, you can use Ctrl+Z to go back a step.
.jpg)
Step 3: Use the Twirl Clockwise Tool (C) to swirl the lines around, like waves. I set the Brush size to 300, Brush Density to 20, and Brush Pressure to 82. Brush pressure is the intensity with which we want to edit the layer.
.jpg)
Step 4: While the Liquify tool is a fun technique, I wanted to keep this poster legible. We can use the Forward Warp Tool (W) to move the text back into shape. There is no set amount, you can add as much or as little detail as you like. Click OK when you are done.
.jpg)
Step 5: When using the Photoshop Liquify tool, the layer we are working on may have moved, causing the edges to move towards the center. Simply activate the original Color Fill layer.
.jpg)
So you have completed the warped text effect in Photoshop. The text transforms with impressive wavy curves.
Above is a summary of information on how to distort text effects in Photoshop. The implementation is not too complicated, you can customize the parameters to have unique results.


