Best Selling Products
Create Double Exposure Effects Easily With Photoshop
Nội dung
The Double Exposure effect not only brings magical beauty but also makes your design work more creative and professional. In this article, SaDesign will guide you how to create this unique photo overlap effect in Photoshop.
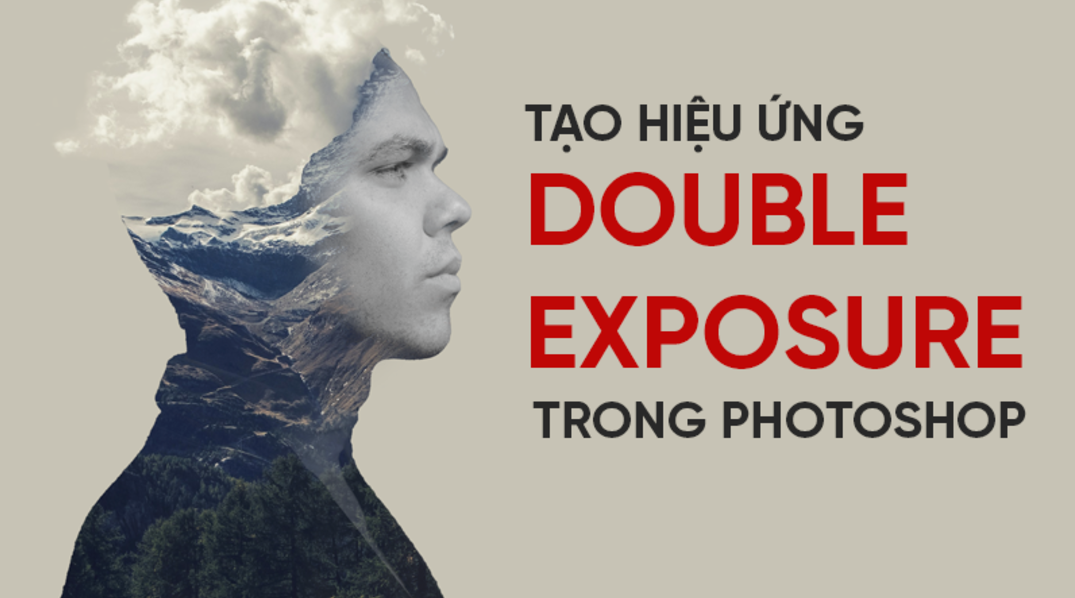
Do you want to create an artistic photo with a unique overlapping effect? Double Exposure is not only a simple combination of two images but also a way to convey ideas in a subtle and creative way. With Photoshop, you can easily perform this technique in just a few simple steps. Let's get started with SaDesign right away!
1. What is the Double Exposure effect?
The Double Exposure effect, also known as double exposure, is an exposure technique that combines two photos at two different exposures into one. The performer can perform double exposure directly on the camera or through editing software. You will have a photo that possesses two different spaces and two different worlds but subtly intertwined.
2. Prepare the image
Step 1: Choose the right photo
In this article, I will use a picture of a man. You can choose any photo of a person or a photo of yourself. However, a small note is that you should choose a photo with a monochrome background, not too complicated. This will make the process of practicing the effect easier in the next steps.
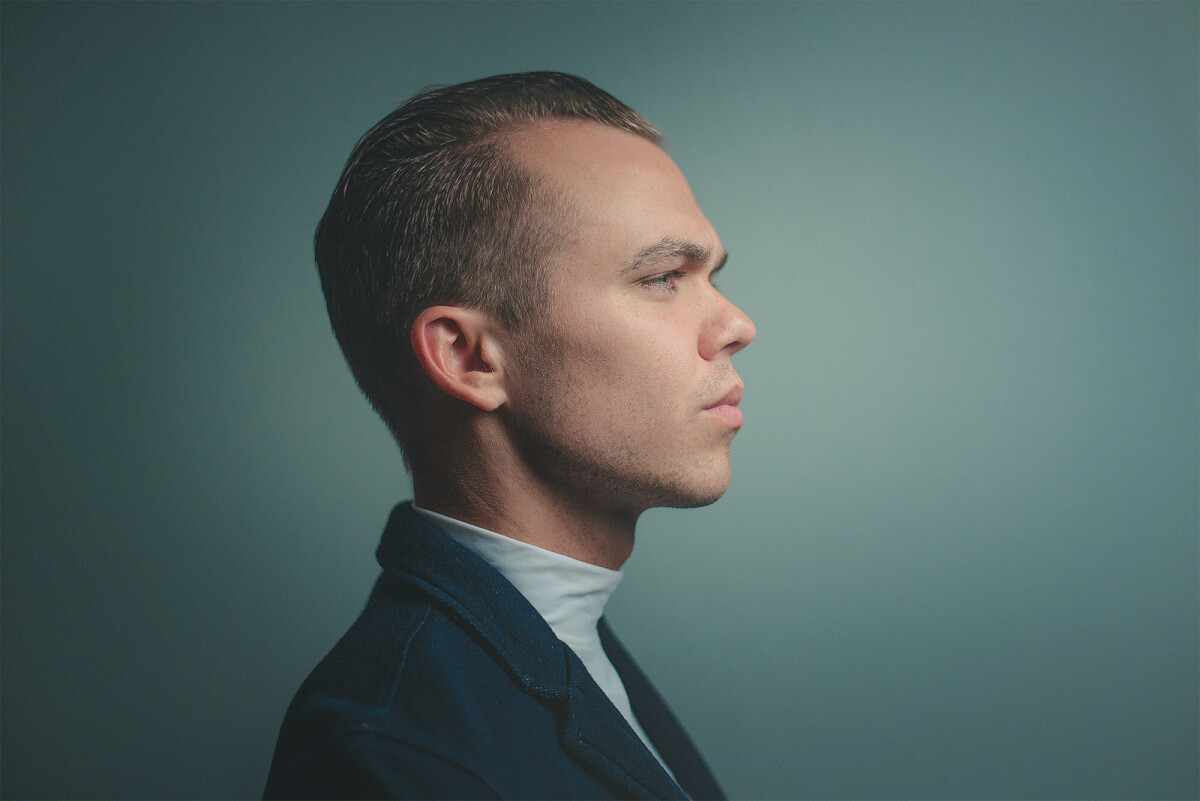
Step 2: Separate the subject from the background
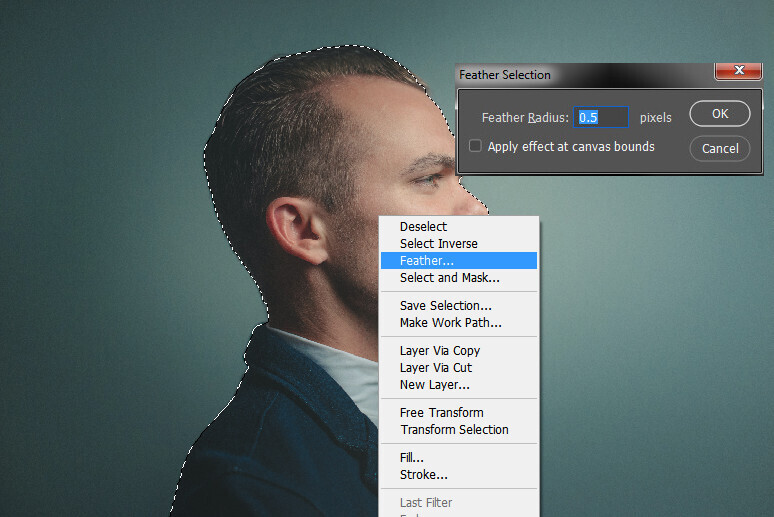
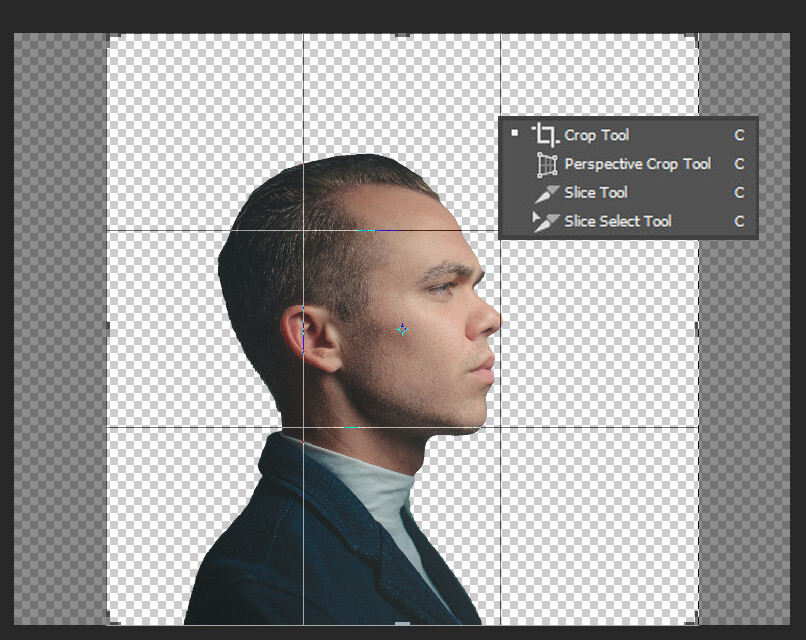
To quickly separate the background in Photoshop, select the Quick select tool (W) and move the mouse until the object is completely covered. Next, right-click, select Feather and adjust 0.5px to cover the object's border more accurately.
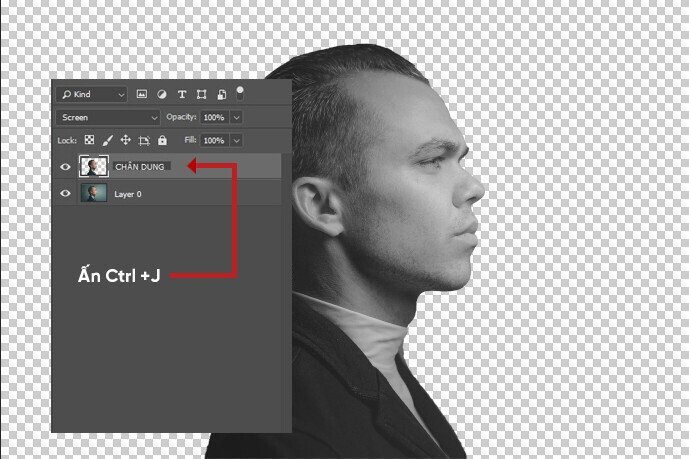
Continuing with the object layer, press Ctrl + J to separate the object from the background. I will name this separated background layer " portrait ". Then you can delete the original image if you want.
Use the Crop tool (C) to increase the size of the image, this will give you more space for the effect. Go to Adjustment , choose Solid color to create a new image background. Here I will choose white.
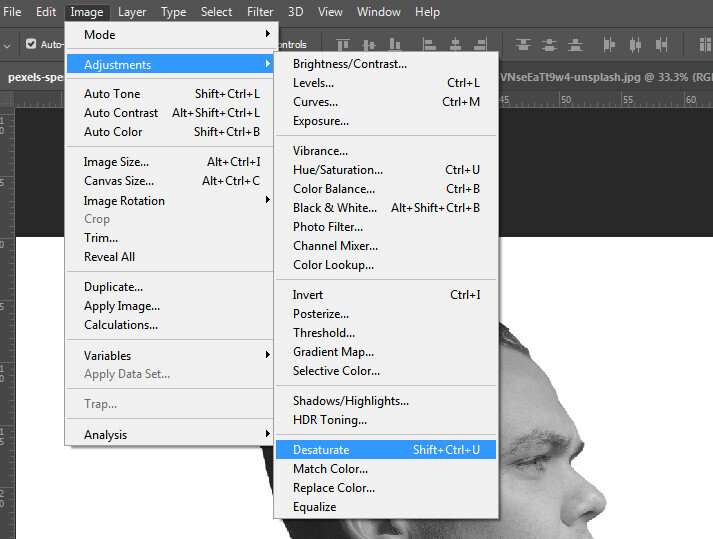
Select the " portrait " layer and desaturate to gray using the shortcut Ctrl + Shift + U or go to Image > Adjustment > Desaturate.
3. Create Double Exposure effect
Step 1: Choose the right photo
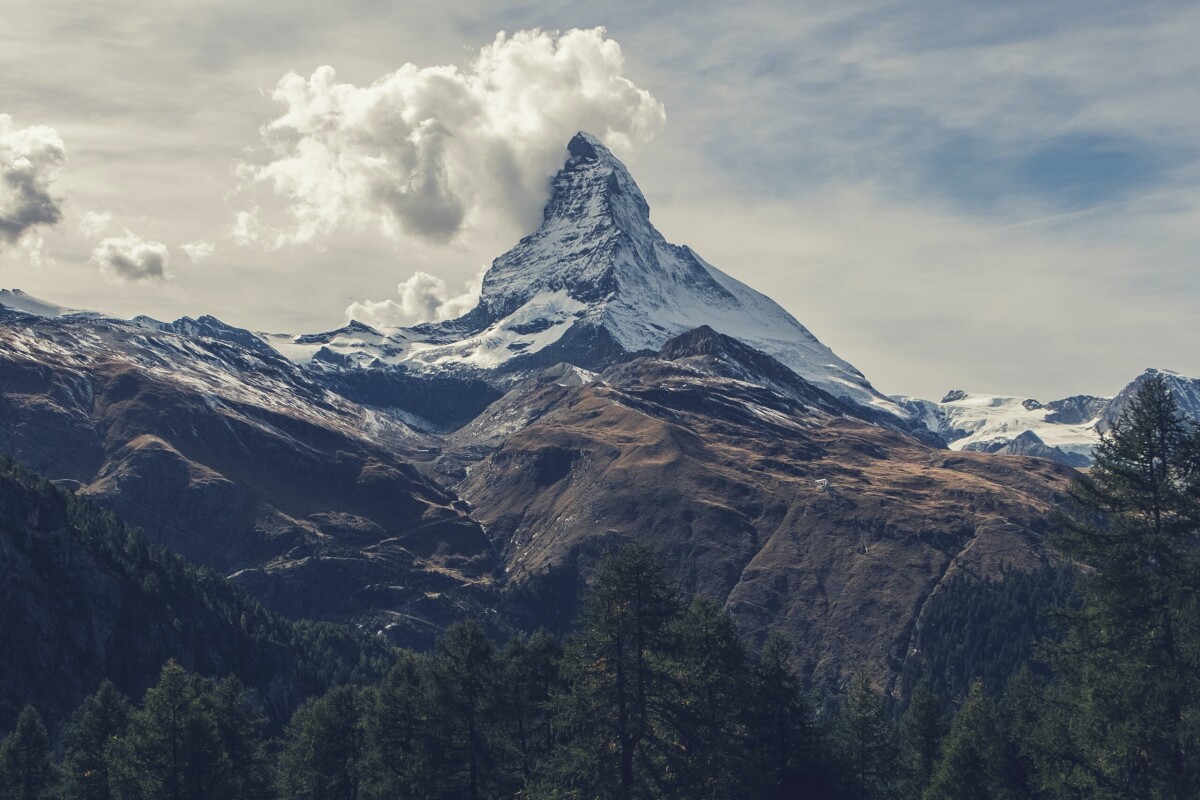
For the second image, you can choose a photo of your choice. You can choose nature, mountains, rivers, streets, or anything abstract and complex to create the effect. In this tutorial, I will choose a mountain nature image.
Step 2: Create a shadow for the object
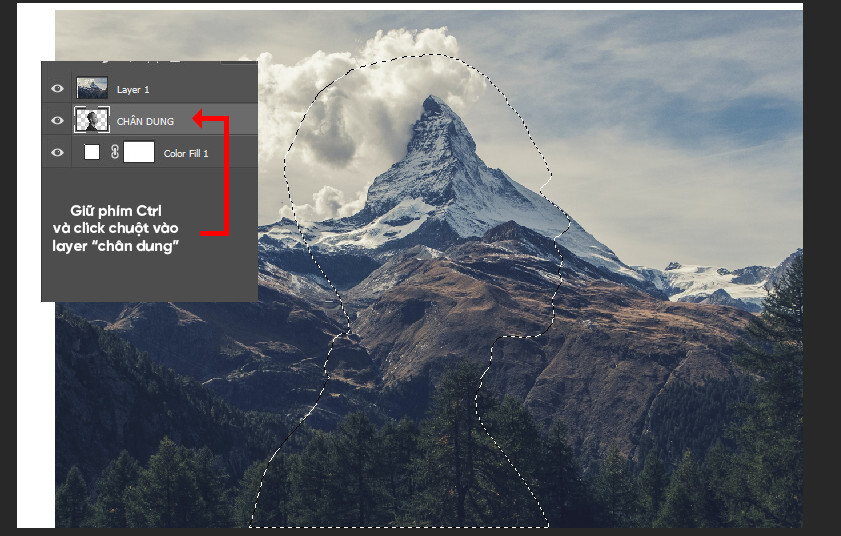
To create the Double Exposure effect, place the mountain image on top of the "Portrait" image. On the "Portrait" layer, hold down the Ctrl key and click on the layer to identify the object in the background of the image. Once completed, you will see a "Portrait" selection appear on the photo layer. Select the landscape image layer and click on the Layer Mask icon at the bottom of the Layer Panel, this will create a shadow of the "Portrait" layer.
.jpg)
You duplicate the "portrait" layer with Ctrl + J and bring the copied "portrait" image to the top, then set it to Lighten mode . From here you will have a rather magical effect of Double Exposure. But this is not the final step to get the finished product.
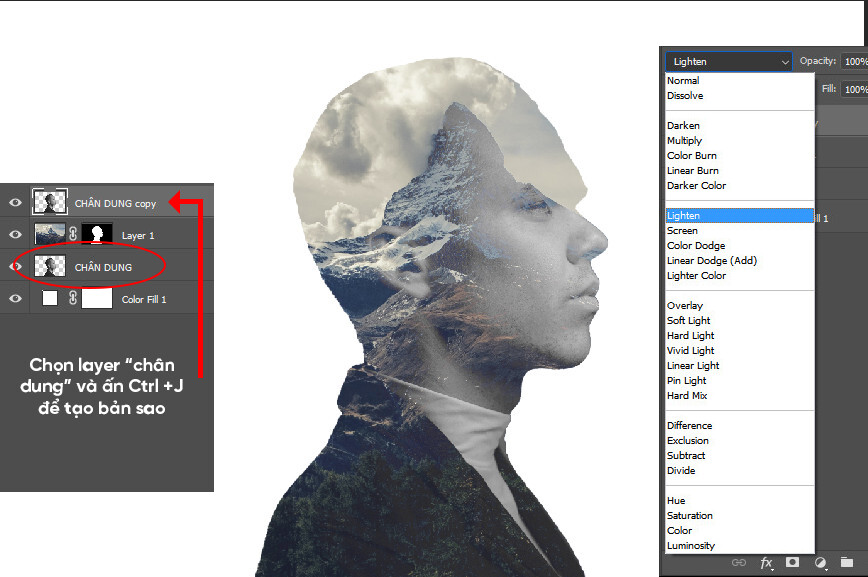
Step 3: Use Layer Mask
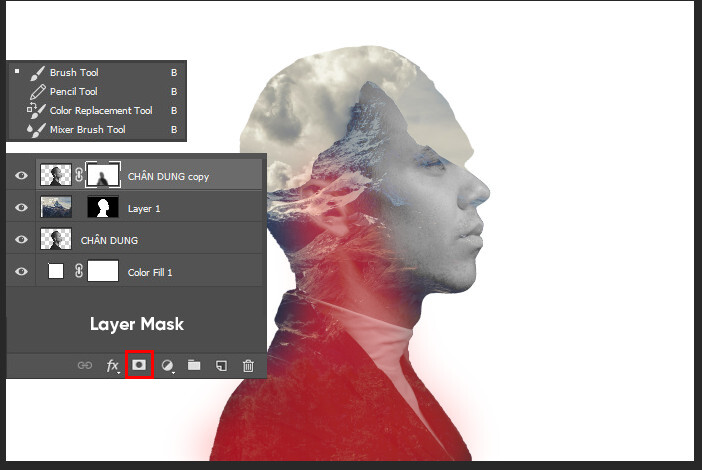
Select the "portrait copy" layer and continue to create a Layer Mask. Grab the Brush tool (B) and change the Fill color to black. Since the default layer mask is white, black will hide the parts you don't want. Here I'm painting the body of the subject (shown in red) to reveal the mountain scene effect behind.
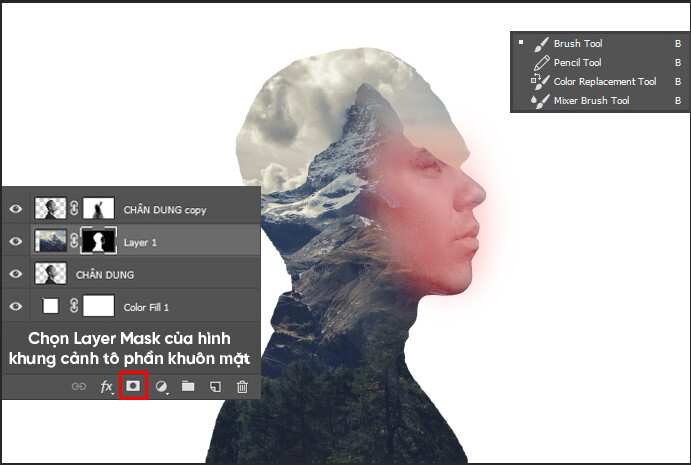
Switch to the Layer Mask of the "portrait" layer you shaded, continue using the Brush Tool (B) to paint to reveal the subject's face (shown in red).
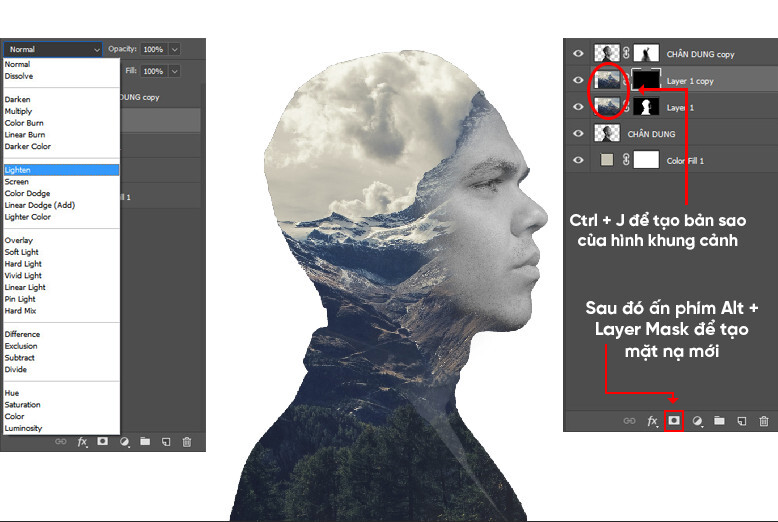
Next, create a copy of the landscape image with the shortcut Ctrl + J and set it to Lighten mode . With this copy, hold down the Alt key and press Layer Mask to create a new mask layer. At this step, you can see that the effect is almost complete. Just two more steps and you have successfully applied the Double Exposure effect. Let's try!
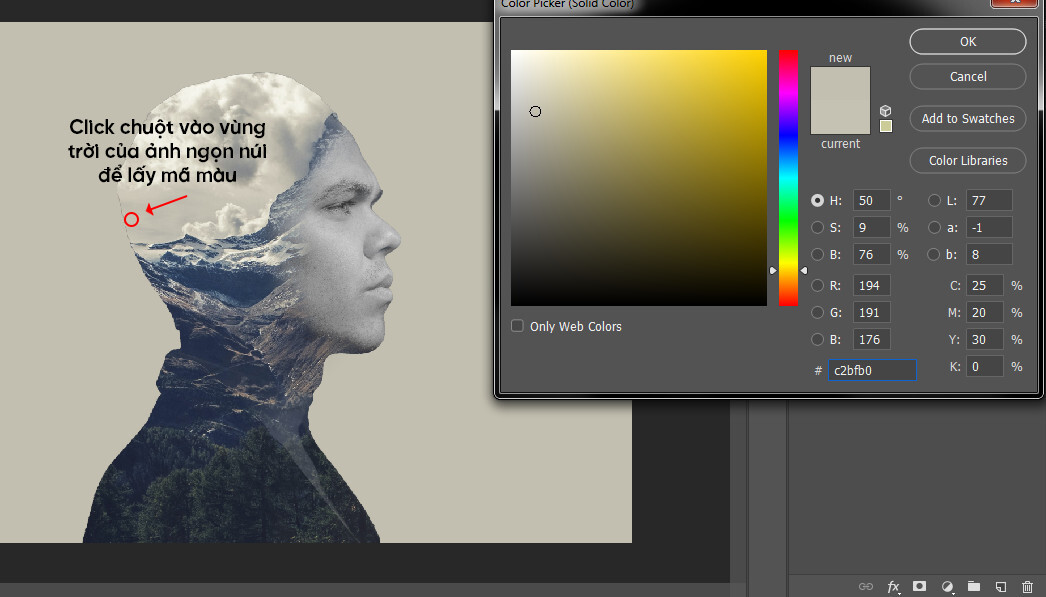
Next is a simple but very important operation to create the uniqueness of your effect. First, double click on the white Solid Color background that we adjusted in step 2, then point the mouse to the sky in the mountain scene image to get the color. You will see the color of the background now blends with the sky color of the mountain image.
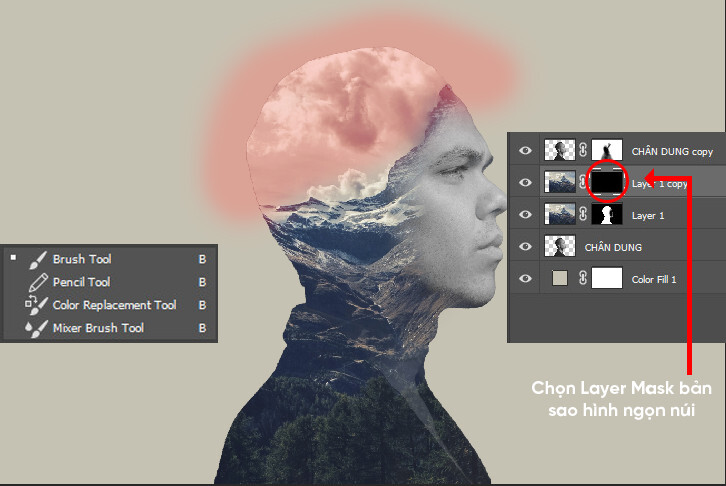
Let’s make the effect more realistic by editing the head of the portrait. Select the Layer Mask of the scene copy, use the Brush Tool (B) and erase the top of the subject’s head (the red highlight) to create a realistic effect. It will look like the clouds are actually floating above the man’s head.
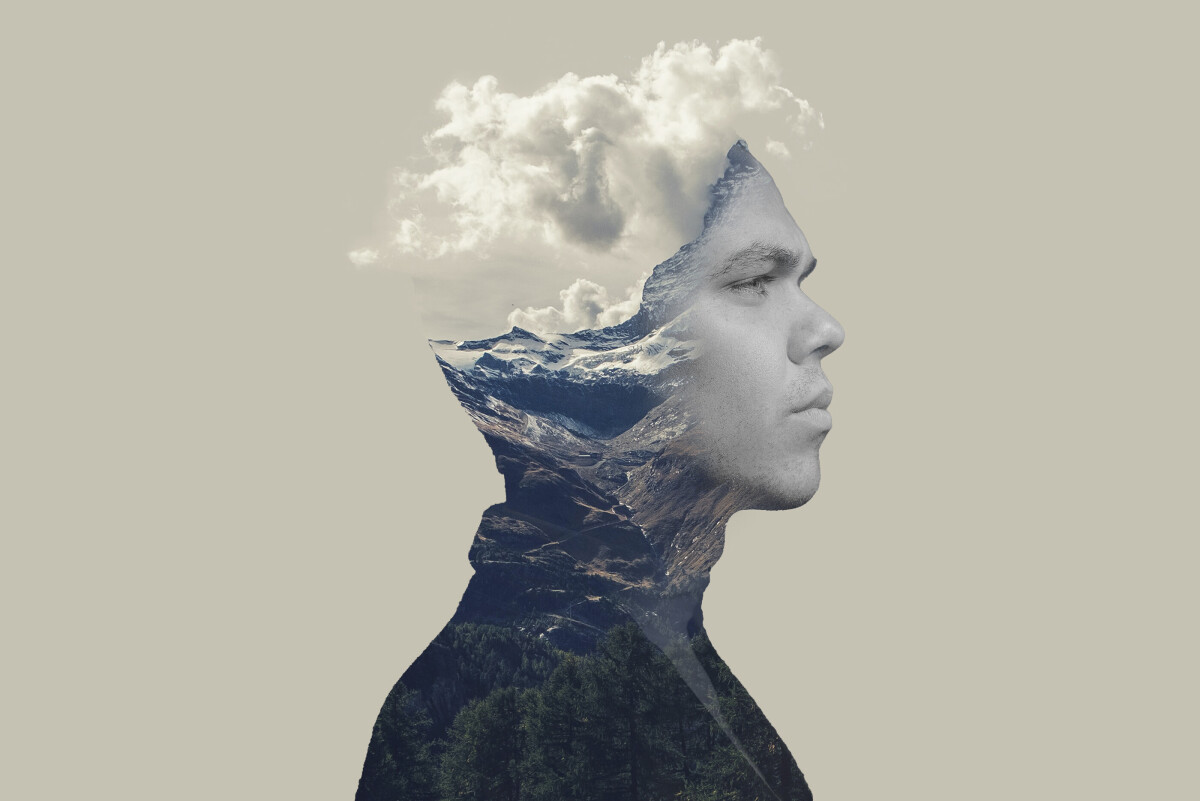
And here is the final product after performing the steps to create the Double Exposure effect.
With the above instructions, you can easily create a unique Double Exposure effect in just a few minutes. This is not only a fun technique but also opens up countless creative ideas for photography and design projects. If you want to explore more great tips or find quality Photoshop resources, visit our website right away. Don't forget, SaDesign is always ready to support you with the most professional tools and services.


