Best Selling Products
How to Adjust Colors Beautifully on CapCut Super Simple
Nội dung
Color correction is not just a technical operation but also an art that creates emotions and unique marks for your videos. With detailed instructions from how to use filters to unique color correction formulas on CapCut, are you ready to turn ordinary photos into attractive works of art? Follow the article with SaDesign.

The color of a video can be considered the soul of a clip, an important highlight to evoke emotions for viewers. When we carefully edit each color tone, adjust the contrast, we are creating a great visual experience.
If you are using Capcut, we will guide you on how to adjust color on Capcut to help you create videos with outstanding colors and leave a unique impression on the audience. Let's try it with SaDesign right away!
1. Why do you need to color correct videos on Capcut?
Do you believe that one color scheme can make your video bright and vibrant, while another color scheme can create a dark and mysterious atmosphere for your video? By changing the color of your video, you can convey the content exactly as you want.
And thanks to color grading, an ordinary video can be transformed into a unique, personal work. Every little detail and adjustment in the color grading process can create a beautiful work.
2. Instructions on how to adjust color on Capcut using filters
Step 1: Open the Capcut app on your mobile phone and create a new project.

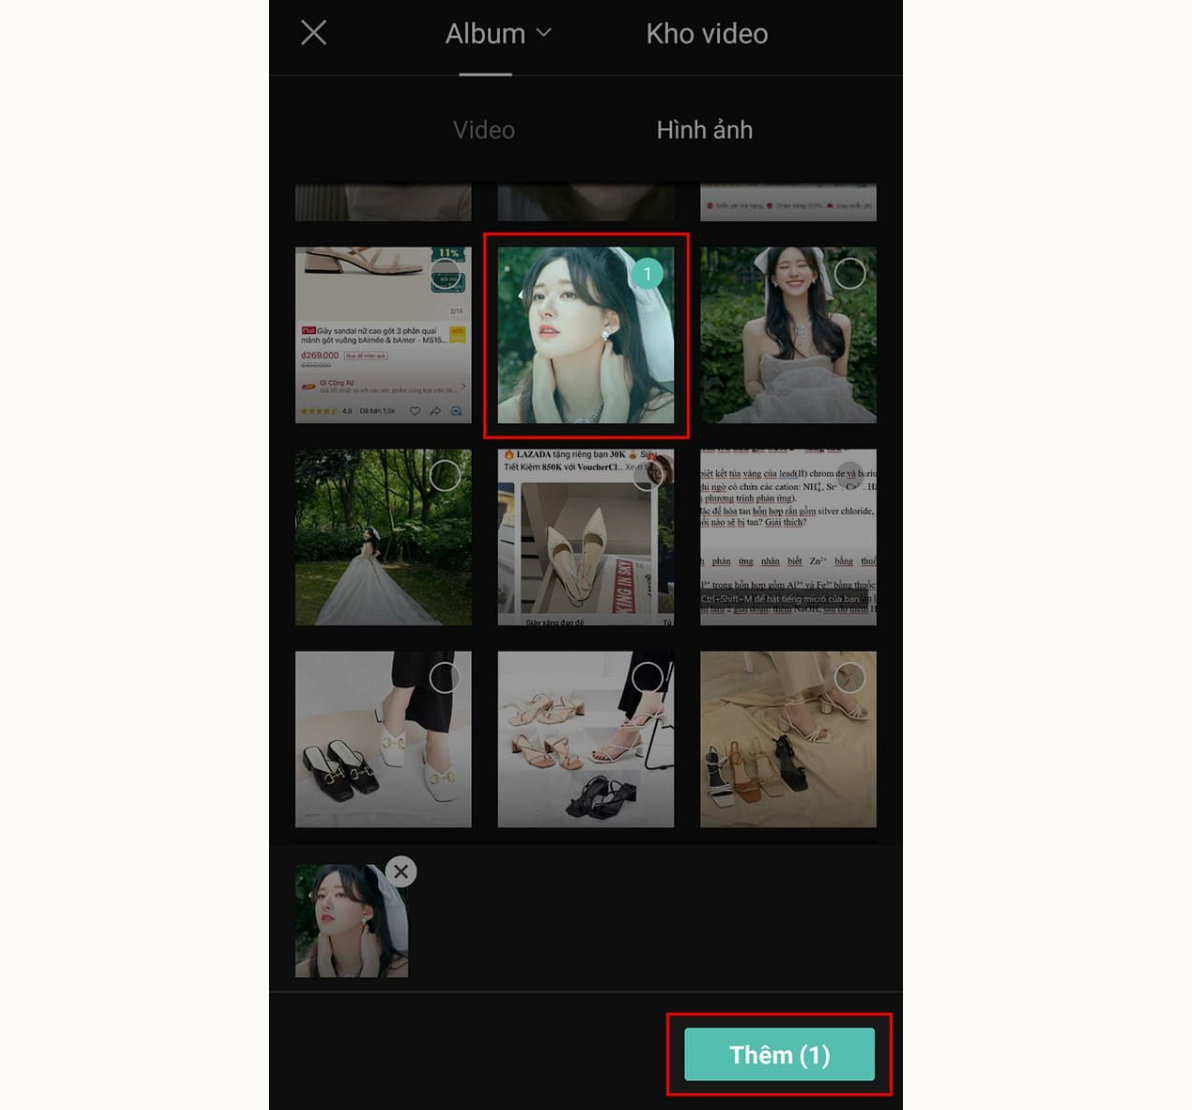
Step 2: Select the video to be color corrected from the library > Click Add.

Step 3: Go to Color Filters on the toolbar > Find and select the filter you want to use > Click the check mark icon (v) on the toolbar to apply the filter to the video.

Step 4: Click the arrow icon to save and export the video or upload a new video template to Capcut.

3. How to adjust color on Capcut using custom tools
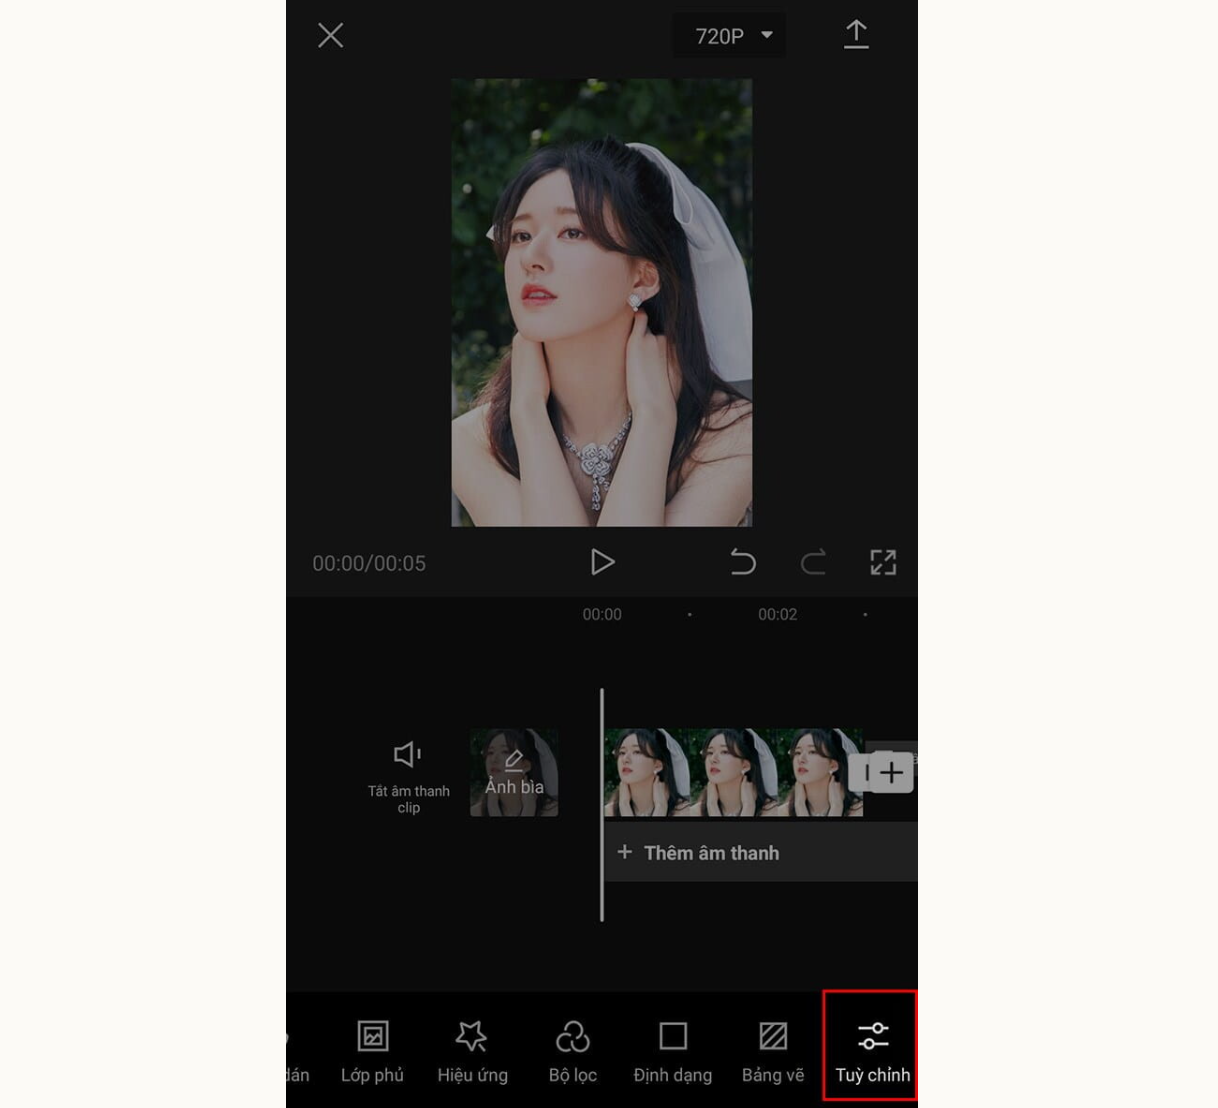
Step 1: On the video customization toolbar, select Customize.

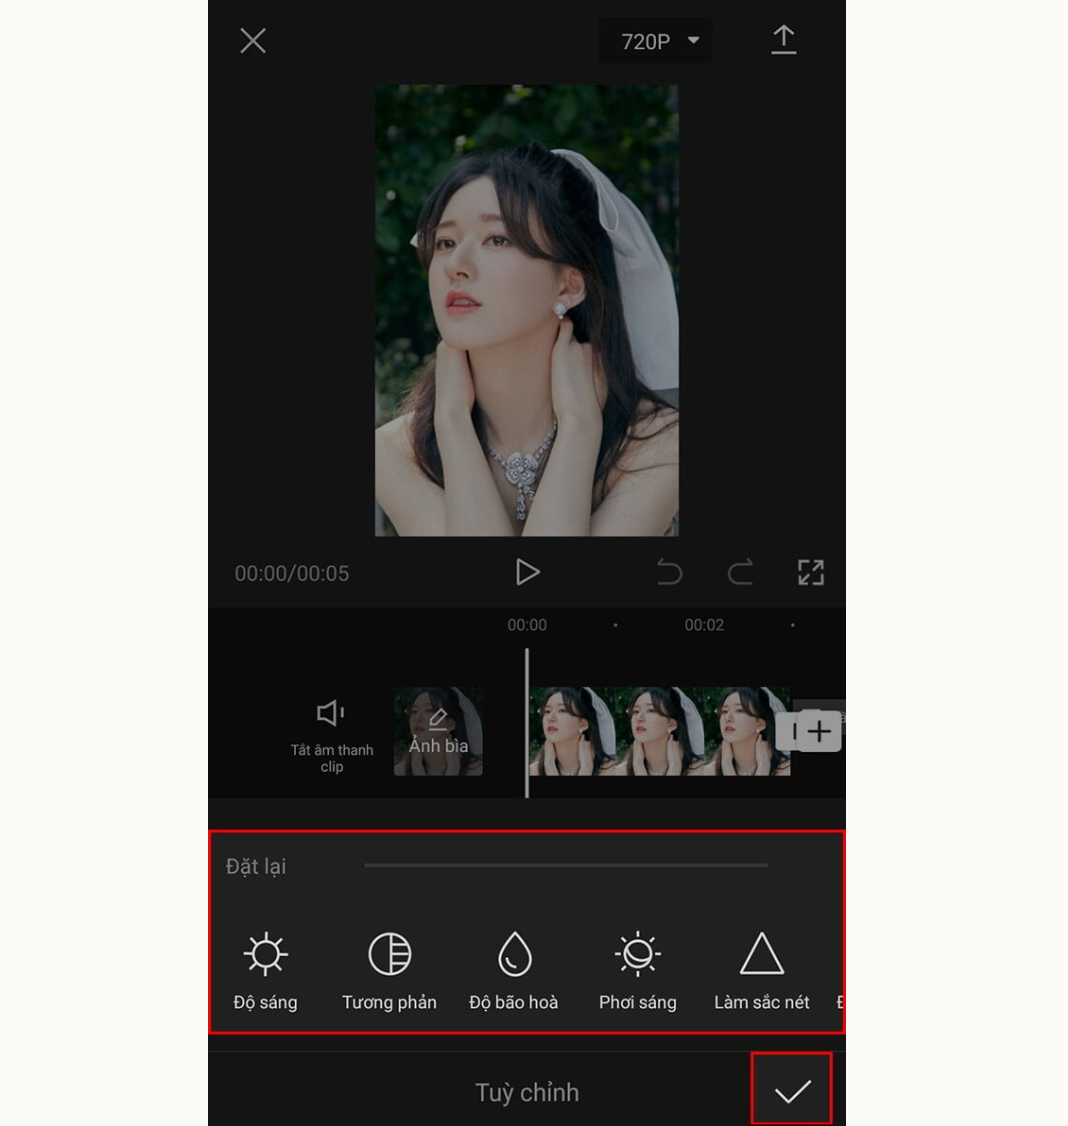
Step 2: Adjust the Brightness, Contrast, Saturation, Exposure , etc. parameters using the adjustment bars to best suit > Click the check icon (v) to save the settings.

Step 3: Review the results and edit the video on Capcut if necessary. When satisfied, save the project and export the video with the adjusted color effects.
4. Beautiful color correction formulas on Capcut
· Retro color correction formula:
Retro color is a color style inspired by a past period, usually the 1960s, 1970s or 1980s. You can adjust the parameters according to the following formula:
Brightness: Reduce 40
Brightness: Increase 40
Brightness: Decrease by 20
Dark Area: Reduced by 20
Contrast: Increase 45
Brightness: Increase 50
Black Point: Reduced by 60
Saturation: Decrease by 25
Freshness: Increase by 20
Warmth: Increase by 100
Tone: Reduce 44

· Vintage color correction formula:
This is a color correction formula that creates a nostalgic, vintage effect inspired by years gone by. This formula often creates a soft, smooth, and vintage feel, like old photos that have been stored for a long time.

Here's how to adjust the color on Capcut to create a Vintage effect:
Brightness: Decrease 20
Brightness: Decrease by 40
Dark Area: Increase by 45
Contrast: Reduce 45
Brightness: Decrease by 10
Saturation: Decrease by 5
Freshness: Increase by 20
Warmth: Increase by 30
· Cinematic color correction formula:
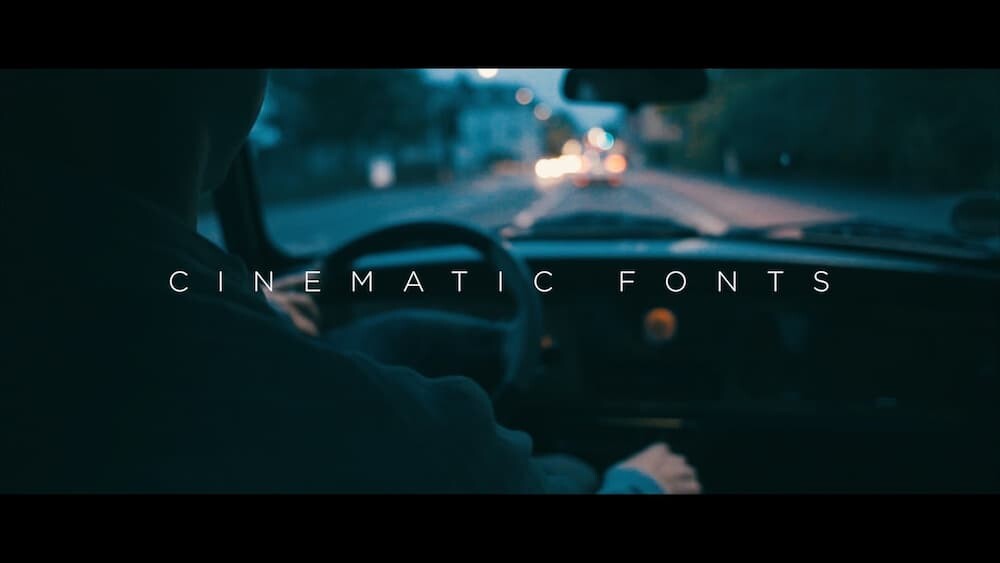
This is a color correction method on Capcut applied to videos or images to create a cinematic color effect. This effect makes the video similar to scenes shot in professional movies.

Some of the key elements in the Cinematic color grading formula include:
Brightness: Decrease 20
Brightness: Decrease by 40
Dark Area: Increase by 45
Contrast: Reduce 45
Brightness: Decrease by 10
Saturation: Decrease by 5
Freshness: Increase by 20
Warmth: Increase by 30
· Pastel color correction formula:
This color correction formula helps to bring a fresh, gentle and soft color effect like pastel colors. It makes the video gentle, feminine and creates a youthful, dynamic feeling.
Here's how to adjust colors on Capcut to create a Pastel effect:
Brightness: Decrease 15
Brightness: Increase 85
Brightness: Reduce 80
Dark Area: Decrease by 28
Contrast: Decrease 20
Brightness: Increase 30
Black Point: Increase by 28
Saturation: Decrease by 10
Freshness: Increase by 25
Warmth: Increase by 20
Tone: Increase 25
Sharpness: Increase 15
Sharpness: Increase 20
Decontamination: Increase by 15

5. Notes when adjusting video color on Capcut
· Use colors that match the content: Make sure the colors you choose match the content and emotions you want to convey.
· Keep colors natural: Avoid over-adjusting colors, which results in unnatural and unprofessional color effects.
· Color consistency: If you have multiple shots in your video, make sure the color is consistent between shots to create cohesion and stability in the video.
· Save the formula: You can save the original color correction to use for editing videos on Capcut later, faster and easier.
· Note when using online formulas: The formulas we mention are sometimes only relative. Whether your video can be colored beautifully or not depends on many factors such as the original video. The solution is to customize based on the formula to get the perfect color.
· Check before publishing: Before completing color grading, view your video on a large screen and double-check your adjustments to ensure that colors are displayed accurately and beautifully on all devices.
The color correction methods on Capcut that we mentioned above will hopefully help you turn simple videos into works of art. Don't forget to use color filters and customization tools to create unique and impressive color effects.


