Best Selling Products
Create Graffiti effect in Photoshop SIMPLE with Sadesign
Nội dung
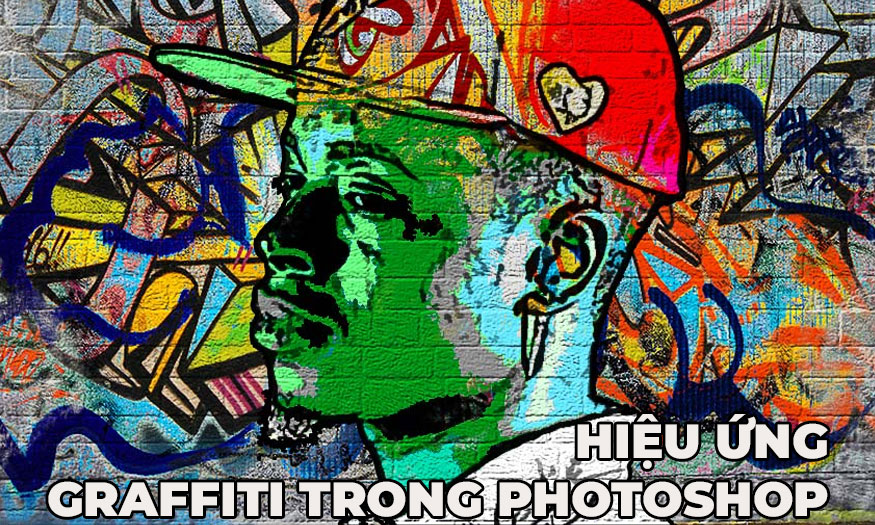
Graffiti is a type of street art that stands out with colorful drawings on walls. Instead of drawing directly on the walls, you can create your own Graffiti effect in Photoshop. Just by combining a few tools, you can create extremely impressive drawings
1. Create a Brick Wall Background for Graffiti Effect in Photoshop
Graffiti is painted on walls, so we need to have a suitable wall background.
The first step to creating your own Graffiti effect in Photoshop is to create a new document that is 850 x 630 px in size.
Add the brick wall to a new layer. Resize the image if needed, to fit your canvas size.
.jpg)
2. Add artistic Graffiti drawings
Once we have a satisfactory background, we will add graffiti to the design.
Step 1: Create a new layer and add your graffiti or graffiti pattern of choice. Resize the image if needed, according to your canvas size.
.jpg)
Step 2: Click the Add layer mask icon at the bottom of the Layers panel to add a mask to the Graffiti Wall layer.
.jpg)
Set the Foreground Color to #000000 and select the Brush Tool. Use the Grunge Brush to paint inside the mask to hide some of the graffiti effect and reveal the brick wall.
.jpg)
3. Create a graffiti portrait effect
Each drawing is not enough, add emphasis with a character portrait.
Step 1: Add the man portrait to a new layer. Use the Magic Wand tool to select the background of this image. Set the Tolerance to 10 and check Contiguous. Hold down the Shift key to make multiple selections. Press Delete to remove the selected background.
.jpg)
Press Ctrl+D to deselect.
Step 2: Press the shortcut Ctrl+J to duplicate the Man Portrait layer twice and call the new layers Man Portrait 1 and Man Portrait 2. Hide the two newly created layers. Clicking the eye icon next to any layer on the Layers panel will hide/show that layer.
.jpg)
Step 3: Go back to the Man Portrait layer, double click to open the layer style panel. Select Stroke and set the following parameters:
Size: 4 px
Position: center
Color: #000000
.jpg)
Step 4: On the menu bar, go to Filter => Artistic => Cutout and select Number of Levels as 8, Edge Simplicity as 0 and Edge Fidelity as 3.
.jpg)
Step 5: On the menu bar go to Layer => New Adjustment Layer => Posterize and set Levels to 5. Click the third button from the left to add this adjustment as a Clipping Mask to the layer below.
.jpg)
Step 6: Go to Layer => New Adjustment Layer => Brightness/Contrast and set Brightness to 117 and Contrast to -50. Click the third button from the left to add this adjustment as a Clipping Mask to the layer below.
.jpg)
Step 7: Go to Layer => New Adjustment Layer => Hue/Saturation and set Hue to 129 and Saturation to 100. Click the third button from the left to add this adjustment as a Clipping Mask to the layer below.
.jpg)
Select the Brush Tools and use the Grunge Brush to paint inside the Hue/Saturation Mask using the color #000000 to reveal the original color underneath.
.jpg)
Step 8: Create a new layer. Copy and paste the Graffiti Wall image into this layer. Right click on the layer and select Create Clipping Mask.
.jpg)
Change the blend mode of the Graffiti Effect layer to Lighter Color.
.jpg)
Click the second icon at the bottom of the Layers panel to add a Layer Mask to the Graffiti Effect layer. Select the Brush Tool and use the Grunge Brush to paint inside the Layer Mask using the color #000000 to hide some of the details.
.jpg)
Step 9: Click the eye icon next to the Man Portrait 1 layer to make the layer visible. Set the Foreground Color to #000000 and the Background Color to #ffffff.
.jpg)
Step 10: On the menu bar go to Filter => Sketch => Photocopy and set Detail to 3 and Darkness to 50.
.jpg)
Step 11: Go to Filter => Artistic => Cutout and set Number of Levels to 3, Edge Simplicity to 3 and Edge Fidelity to 3.
.jpg)
Step 12: On the menu bar, go to Image => Adjustments => Levels and set Input Levels.
.jpg)
Step 13: Set the Blend Mode of the Man Portrait 1 layer to Multiply.
.jpg)
If you want, you can repeat the same process but with different settings for the Man Portrait 2 layer, but this step is optional.
4. Create a brick effect for the design
Make the bricks appear to float above the strokes for the most realistic Graffiti effect in Photoshop.
Step 1: Press the shortcut key Shift+Ctrl+N to create a new layer above all other layers.
Press Shift+Ctrl+Alt+E to merge all visible layers. Call this layer Brick Effect.
.jpg)
Step 2: Add a layer mask to the Brick Effect layer.
.jpg)
Step 3: On the menu bar go to Image => Trim and crop the canvas based on transparent pixels.
.jpg)
Step 4: Go to the Brick Wall layer and make a selection using the Rectangular Marquee tool. Press Ctrl+C to make a copy of the selection.
.jpg)
Step 5: Go back to the Brick Effect layer and on the Channels tab, click the eye icon next to the Brick Effect Mask to make it visible. Press Ctrl+V to paste the selection into this mask.
.jpg)
Step 6: Go back to the Layers tab and press Ctrl+D to Deselect. Also click on the Brick Effect Layer Thumbnail.
.jpg)
Step 7: Open the Layer Style window of the Brick Effect layer and add Bevel and Emboss.
.jpg)
Now we get the result as shown. Graffiti effect in Photoshop is extremely realistic as if painted on a brick wall.
.jpg)
Above is the summary information about the steps to create Graffiti effects in Photoshop. Try it now to see the surprising results.
.jpg)


