Best Selling Products
Create pre-engraved effects in Photoshop SUPER EASY with SaDesign
Nội dung
With the pre-engraving effect in Photoshop, you can quickly transform images. Combining Line Tools with a few other tools gives you a unique and impressive engraving effect. Let's refer to SaDesign's detailed steps in the following article.
1. Create a pre-etched effect in Photoshop
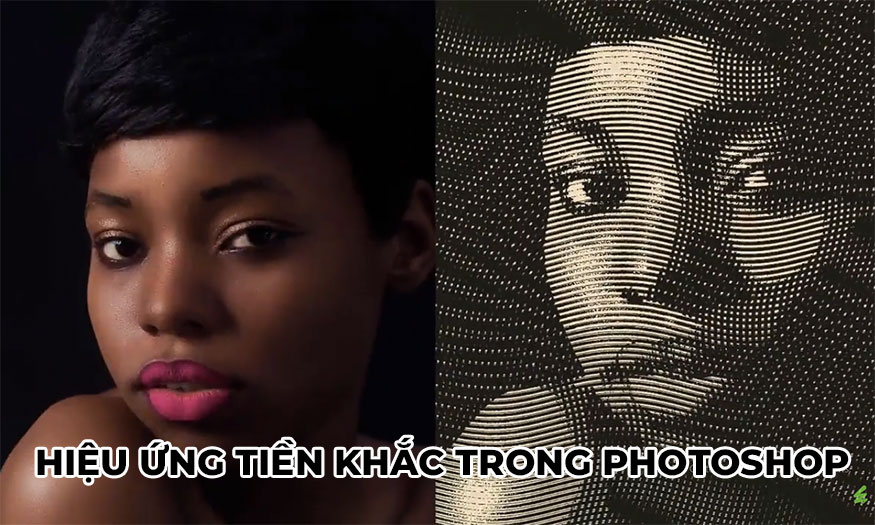
The engraving effect stands out with impressive wavy lines, the engraved images will be printed on paper for use as prints or illustrations. To create the pre-engraving effect in Photoshop, we will follow these steps:
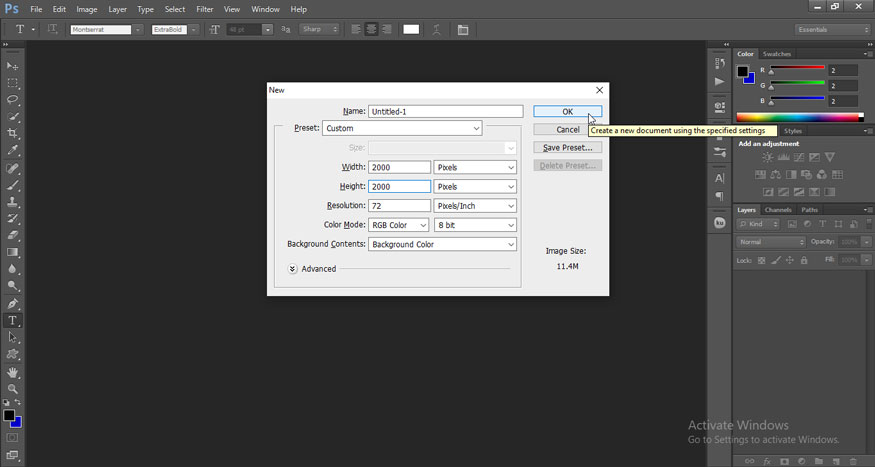
Step 1: To create a pre-engraved effect in Photoshop, we first create a new document. On the menu bar, select File => New => set the size to 2000 x 2000px => OK. Or you can press the shortcut key Ctrl + N => Set parameters => OK.
Step 2: On the toolbar, use the Line Tool (U) to create a line at the top of the canvas with a size of 1 pixel.
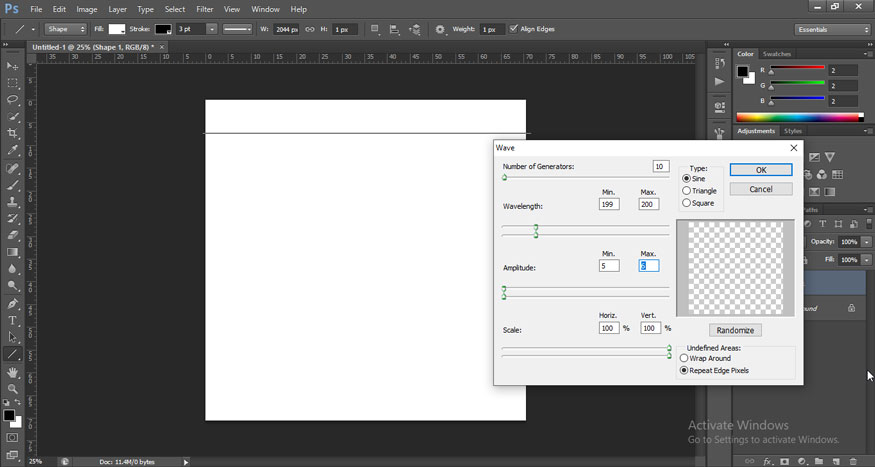
Then, on the menu bar go to Filter => Distort => Wave and use the following settings to create quick waves.
Number of Generators: 10
Wavelength Min/Max: 199, 200
Amplitude Min/Max: 5,6
Scale: 100%
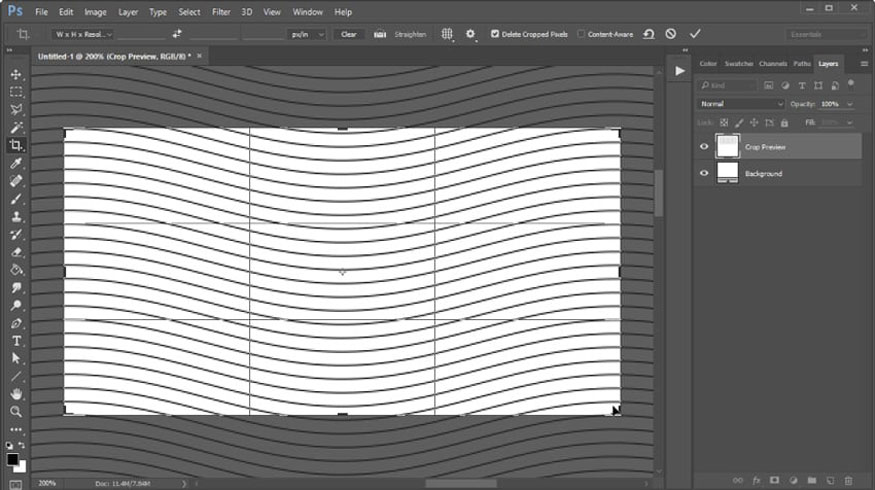
Step 3: Then, hold down the Alt-Shift-Down Arrow key combination to create multiple wave layers moving down. Merge all the wave layers together by selecting all the wave layers then press Ctrl+E.
Use the Crop Tool (C) to Crop the canvas so that you create a rectangular box with identical wave crests on both sides.
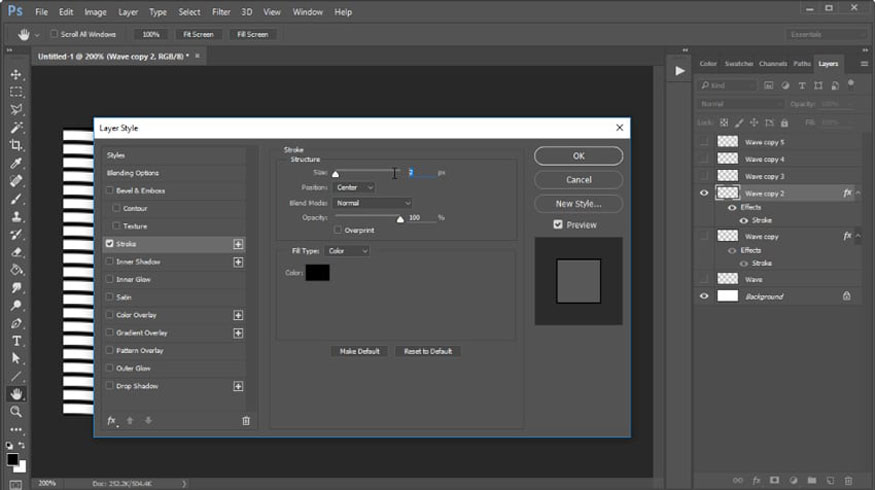
Step 4: Duplicate the wave layer five times.
For each layer, double-click to open the Layer Style panel then select Stroke to add a thicker Stroke (greater than 1 pixel. Then go to Edit => Define Pattern to save each wave as a separate pattern.
Step 5: Open the photo you want to create the money engraving effect in Photoshop. Here I will use a portrait of a woman.
On the menu bar select Window => Action. Proceed to create a quick Action Group and Action Set for your effect. Hit the Record button when you're ready to record the next steps. Hold Ctrl-J to duplicate your image five times.
For each layer, go to Image => Adjustments => Threshold. Start low for the first layer, then increase the Threshold for each copy by at least 20 pixels above the last layer.
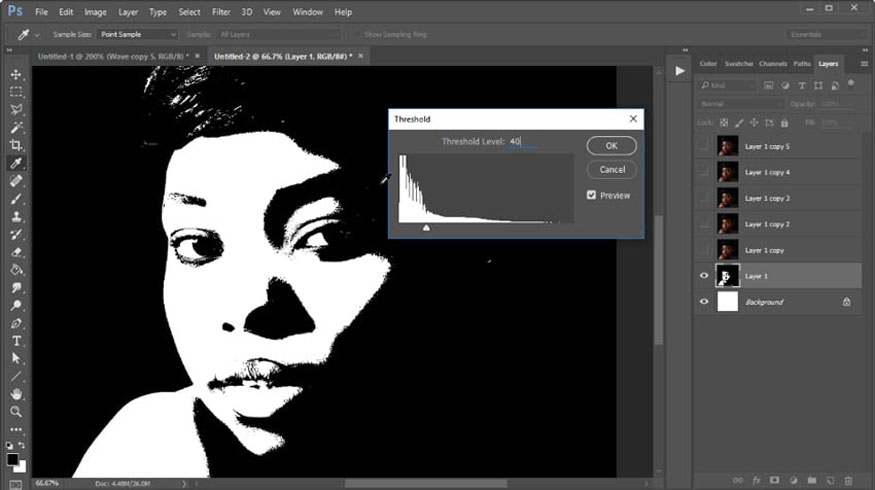
Step 6: Apply a Fill to each wave pattern you created earlier into its own New Layer. Rotate a few layers to get more wave patterns. Finally, select your first threshold layer and go to Select => Color Range, changing the main option to Shadows.
With the shadows selected, unhide one of the wave layers and hit the Layer Mask button to create the perfect Mask. Do this for each layer before deleting the threshold layers.
Remember to press the Stop button on the Actions panel to save this engraved Photoshop action for future photos.
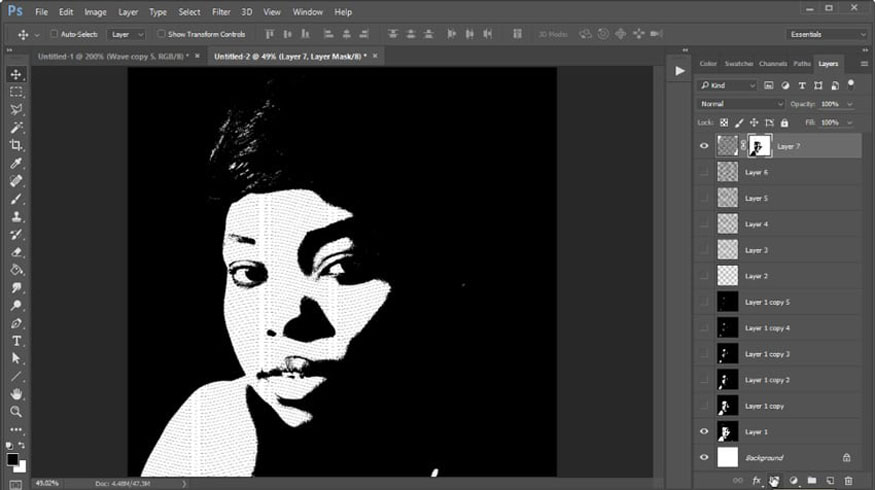
After running the Action, we get the result as shown in the image below. So you have transformed a normal photo into a pre-engraved effect in Photoshop very simply with just a few steps.
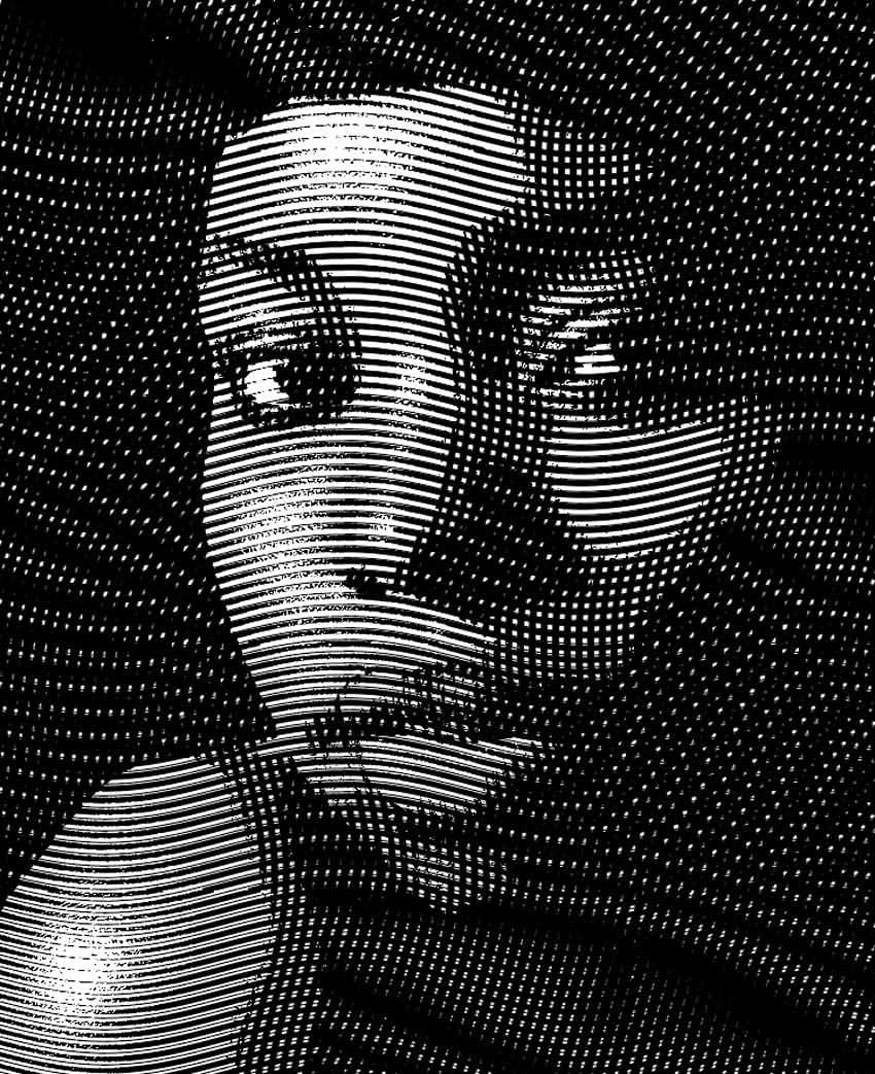
2. Some engraving effects in Photoshop are widely used today
In addition to creating your own engraving actions, you can also refer to the following available actions:
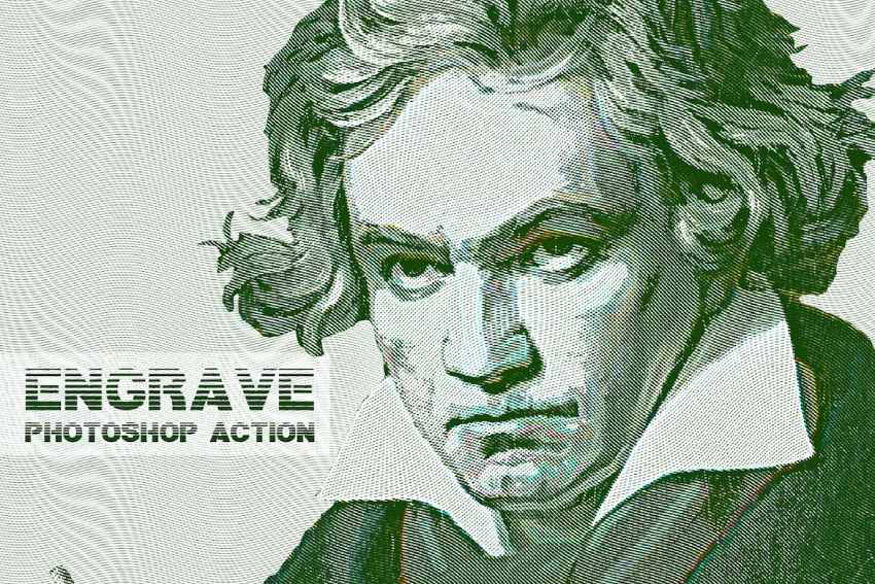
2.1. Engrave Photoshop Action Effect
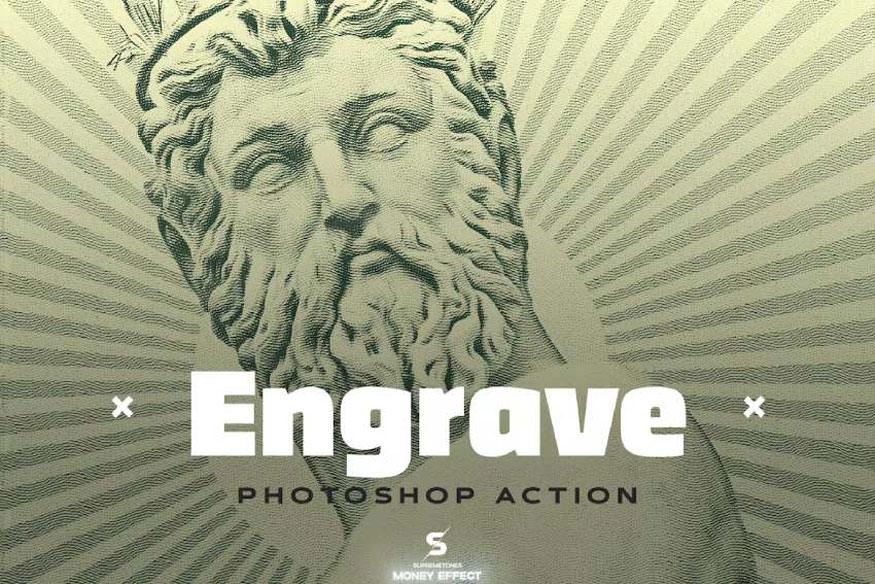
Engrave Photoshop Action is a set of extremely realistic engraving effects in Photoshop. This action set offers different levels, allowing users to choose the level of detail they like.
2.2. Halftone Pro Photoshop engraving effect
If you want more colorful money engraving effects in Photoshop instead of just black and white, you can refer to the Halftone Pro Photoshop Action set.
This action set applies to many formats from ATN, GRD, PAT and PDF. It stands out for its non-destructive actions, optimized layer arrangement, and customizable,...
.jpg)
2.3. Engrave Photoshop Action Kit & Duotone FX
To diversify the types of engraving effects in Photoshop, you should refer to this Engrave Photoshop Action Kit & Duotone FX action set. It is compatible with many versions of Photoshop, making it more flexible. In addition, it also includes a duotone Photoshop engraving effect, giving your photos a more special look.
Above is a summary of how to create a pre-engraved effect in Photoshop. In fact, this method is not too simple, it requires a combination of many steps. So you need to proceed meticulously, do it many times for the best results.
Sadesign Company Limited provides the number 1 quality cheap copyrighted software in Vietnam: Panel Retouch, Adobe Photoshop Full App, Capcut Pro, Canva Pro, Google Drive, Office 365, Retouch4me, Windows 10/11, Youtube Premium, Spotify Premium, Zoom Pro, Netflix, ELSA Speak...
️🎯 Genuine products, full-time warranty, free installation and dedicated support!


