Best Selling Products
Create vintage film frames and overlays in Photoshop EASY with SaDesign
Nội dung
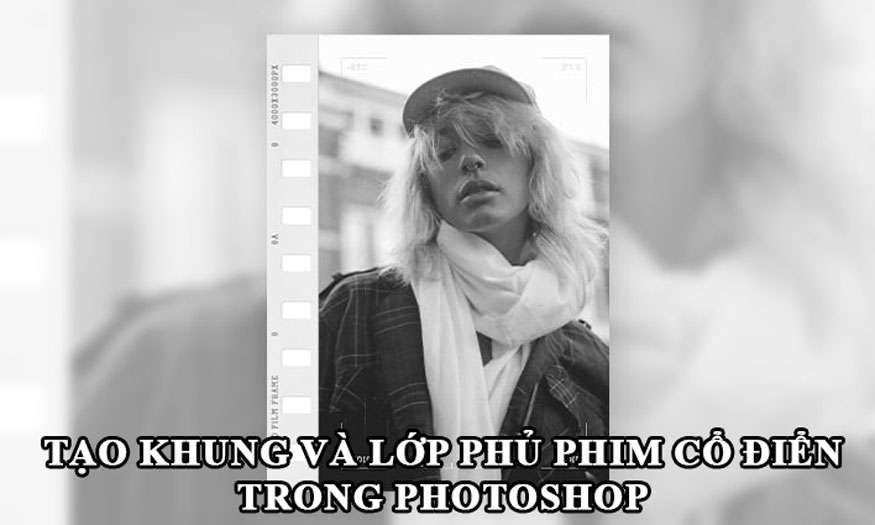
A photo with a classic film frame style frame will make your photo more artistic. Now you can completely create classic film frames and overlays in Photoshop with just a combination of many different tools. Let's refer to the implementation method below with SaDesign.

1. Create classic film frames in Photoshop
To create vintage film frames and overlays in Photoshop, we first need to create a film frame for the image. Follow these steps.
Step 1: Create a new document in Photoshop. On the menu bar go to File => New and set Width to 3000 px, Height to 4000 px and Resolution to 72 px/inch
(1).jpg)
Step 2: Next, we’ll create a vintage film frame. Select the Rectangle Tool (U), click anywhere inside the document to create a rectangle layer with a Width of 450 px and a Height of 4000 px. Then, set the Fill Solid Color to #e5e5e5, and position this layer so that it aligns with the left edge and vertical center of the document. Name this layer Frame.
(1).jpg)
Step 3: Select the Rectangle Tool (U) again, click anywhere inside the document to create a new rounded rectangle layer and set the Width to 255 px, Height to 150 px and Radius to 25 px. Then set the Fill Solid Color to #000000 and position this layer as shown below. Name this layer Temp.
(1).jpg)
Step 4: Press Ctrl+J to duplicate this layer and use the Move Tool (V) to drag this new layer down a bit. Repeat this step until you fill the frame as shown below.
(1).jpg)
Step 5: Hold down Ctrl and click on the thumbnail of the current layer to create a selection for this layer and hold Ctrl+Shift+click on the thumbnails of all the remaining Temp layers to create a selection for all of them.
Then, select the Frame layer and go to Layer => Layer Mask => Hide Selection to hide the selected area of the layer and reveal the rest. Finally, select the Temp layer and Shift+click on the Temp copy 8 layer to select all the layers in between. Right-click on any of them and select Delete Layers to delete them.
(1).jpg)
Step 6: Right-click on this layer and select Blending Options to open the Layer Style window. Then, select Bevel & Emboss and use the settings in the image below:
(2).jpg)
Step 7: Right click on this layer and select Blending Options again. Then select Drop Shadow and use the settings below.
(1).jpg)
Next, click on the plus icon of the Drop Shadow layer style tab to duplicate this style, select the bottom style and use the settings below.
(1).jpg)
Step 8: Press Ctrl+Shift+N to create a new layer and name it Frame_Texture. Set the foreground color to #e5e5e5, go to Edit > Fill and set Contents to Foreground Color, Mode to Normal and Opacity to 100% .
(1).jpg)
Step 9: Right click on this layer and select Convert to Smart Object. Then go to Filter => Noise => Add Noise and set the Amount to 5%, Distribution to Uniform and select the Monochromatic option. Then go to Filter => Blur => Gaussian Blur and set the Radius to 1 px.
(1).jpg)
Step 10: Double-click to edit the Add Noise filter blending options and set the Opacity to 75%. Then double click to edit the Gaussian Blur filter blending options and set the Opacity to 50%. Finally, press Ctrl+Alt+G to create a clipping mask.
(1).jpg)
2. Add text to film frame in Photoshop
Once we have the film frame, we will add text to make the photo more unique.
Step 1: Select the Horizontal Type Tool (T), set the Font to Retro Grade, Font Size to 75 px, Alignment to Left, Text Color to #808080 and Tracking to 100. Click anywhere inside the document and type the text "Retro Film Frame" (or any text you want). Next, go to Edit => Transform => Rotate 90° Counter Clockwise to rotate the text and position it as shown below:
(1).jpg)
Step 2: Now you can use the same method to create more text layers to get the film texture look. Here is my result:
(1).jpg)
3. Add photos to film frames in Photoshop
In this section, we will add an image to the movie frame in Photoshop.
Step 1: Select the Background layer, pick the Rectangle Tool (U), click anywhere inside the document to create a new rectangle layer, and set the Width to 2550 px and Height to 4000 px. Then, set the Fill Solid Color to #ffffff, and position this layer so that it aligns with the right edge and vertical center of the document. Name this layer Photo Placeholder.
(1).jpg)
Step 2: Now go to File => Place Embedded, select the image from the link and click Place. Adjust the Width and Height of the image to fit the Photo Placeholder layer. Then press Ctrl+Alt+G to create a clipping mask and name this layer Photo.
(1).jpg)
Step 3: Go to Filter => Noise => Add Noise and set Amount to 5% , Distribution to Uniform and select the Monochromatic option. Set the Opacity of this layer to 90% .
(1).jpg)
3. Add screen elements to the film frame
In this section, we will add screen components to the design.
Step 1: Select the Photo layer in the Layers panel, select the Line Tool (U), set the Stroke Solid Color to #000000, Stroke Height to 4 px, and click anywhere inside the document and drag to create a new line shape layer with a Width of 400 px. Then, Shift+click the starting point of the horizontal line to create a vertical line with a Height of 400 px and grab one corner of the border. Finally, position it as shown below:
(1).jpg)
Step 2: Press Ctrl+J to duplicate this layer. Then press Ctrl+T to bring up the options to transform, rotate, and position this new layer relative to a different corner. Repeat this process two more times to create a border in each corner of the image.
(1).jpg)
Step 3: Name this layer Border_1 and name the other border layers accordingly. Set the Stroke Solid Color of the top two borders to #bfbfbf and the bottom two borders to #ffffff. Finally, set the opacity of all border layers to 75%.
(1).jpg)
Step 4: Select the Horizontal Type Tool (T), set the Font to Retro Grade, Font Size to 75 px, Alignment to Left, Text Color to #ffffff, and Tracking to 100. Then, click anywhere inside the document and type the text "-3...2...1...0...1...2...3+" (or any text you want) and position it as shown below. Change the Opacity of this layer to 75%.
(1).jpg)
Step 5: Repeat this process to add more text layers. Please use a different text color if the text blends with the photo.
(1).jpg)
4. Add grain effect to film
Grain is the grain effect in film photography. To give your photo a realistic film coating, we must add rain particles.
Step 1: Select the top layer in the Layers panel and press Ctrl+Shift+N to create a new layer. Then, set the foreground color to #000000, go to Edit => Fill and set Contents to Foreground Color, Mode to Normal and Opacity to 100%. Then, go to Filter => Filter Gallery => Texture => Grain and enter the settings below:
For the first Grain Filter, set the Intensity to 50, Contrast to 50 and Grain Type to Regular.
For the second grain filter, set the Intensity to 40, Contrast to 50, and Grain Type to Vertical.
(1).jpg)
Step 2: Go to Image => adjustments => Levels and set the Shadow input Level to 15 and Highlight input Level to 105. Change the Blending Mode of this layer to Screen.
(1).jpg)
Step 3: Select the layer below and press Ctrl+Shift+N to create a new layer. Set the foreground color to #000000, go to Edit => Fill and set Contents to Foreground Color, Contents to Foreground Color, Mode to Normal, and Opacity to 100%. Then, go to Filter => Filter Gallery => Text => Grain and set the Intensity to 60, Contrast to 50, and Grain Type to Vertical.
(1).jpg)
Step 4: Now go to Filter => Blur => Motion Blur and set the Angle to 90° and Distance to 50 px . Then go to Layer => Adjustments => Levels and set the Shadow Input Level to 35 and Highlight Input Level to 55.
(1).jpg)
Step 5: Change the Blending Mode of this layer to Screen and set the Opacity to 50%. Then, Ctrl+click on Layer 1 to select both layers at once and press Ctrl+E to merge them into one layer. Next, press Ctrl+T to bring up the transform options and set the Width and Height to 250%. Finally, change the Blending Mode of this layer to Screen and name it Film Overlay. Feel free to use the Move Tool (V) to position the layer as you like.
(1).jpg)
5. Add a paper texture to a vintage film photo frame in Photoshop
You've basically created a vintage film frame and overlay in Photoshop. However, we can make it even more beautiful and unique by adding a paper texture layer.
Step 1: First we need to download the Old Paper Texture. This is a classic matte paper-style texture. Then go to File => Place Embedded select the texture from the link and click Place. Adjust the Width and Height of the image so that the paper texture covers the document. Then change the Blending Mode of this layer to Screen and name it Texture.
(2).jpg)
Step 2: Double click on this layer and in the newly opened file press Ctrl+Shift+U to desaturate this layer and Ctrl+S to save the changes. Close this file and go back to the original file. Then right click on the Texture layer and use the settings below the image:
(1).jpg)
We get the final result as shown in the picture. The photo has a frame like a film camera, the coating with special grain gives a very nostalgic feeling.
Above is a summary of the steps to create frames and vintage film overlays in Photoshop. These steps will help you have a photo with a cool vintage vibe. The actual implementation is not simple, it requires a combination of many stages and steps. So please try many times to get the best results. Hopefully, the above sharing of SaDesign can be useful for your photo editing process.
m posters


