Best Selling Products
Create Your Own Movie Poster in Photoshop
Nội dung
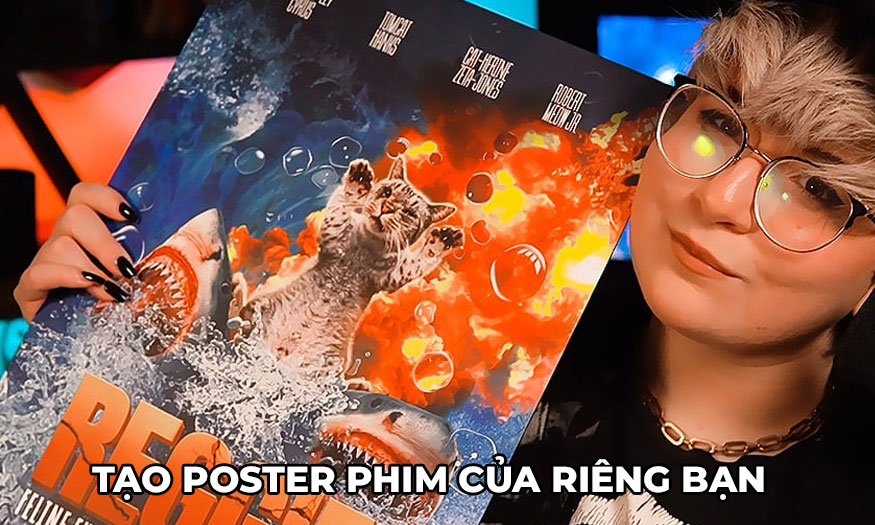
You can completely create your movie poster by combining many different tools in Photoshop. The self-made posters will have your style, clearly expressing your unique personality and vibe. Let's refer to SaDesign's way of creating your movie poster right below.

1. How to Make Your Movie Poster
In today's post, we will create a movie poster about cats and sharks.
Step 1: To create a collage poster, we need a 12 x 18 inch print. If we are going to print it, we should set the DPI to 300.
.jpg)
Step 2: Find an image of a cat. We will need both the body and the legs of the cat.
We will split the image in half, Duplicate, Flip, and Mirror the image side by side with the original image. We will completely ignore the head and focus on creating the base for the new body.
Group the two halves together and name it "Body".
.jpg)
Step 3: Extract and replace the feet, if needed. Use a combination of Layer Masks, Object Select, and Select and Mask to quickly extract and place the feet.
Use a Layer Mask and a soft round Brush set to black to gently blend out the sharp edges.
Place your feet outside the Body group, this will make the next steps easier.
.jpg)
Step 4: I want the cat's head to be more "powerful" so I'll choose another cat image. Use a combination of Layer Masks, Object Select and Select and Mask to separate the head and paste it onto the old cat's body to get the new head.
.jpg)
Step 5: Now, let's create a white Solid Color Fill below all current layers.
We will refine the body shape and mask out any unwanted parts. The remaining head of the original cat and the paws will be the main focus.
You can also Transform and Warp the body to better fit the proportions you want. I flattened the original cat's body vertically to make it look shorter and fatter.
.jpg)
Step 6: Do some final color correction. Darken the body using a Curves adjustment layer and desaturate the entire image using a Hue/Saturation adjustment layer.
.jpg)
Step 7: Flatten the image or turn it into a Smart Object by right-clicking => Smart Object.
Extract the image using Layer Mask, Object Select, and Select and Mask. Set this image aside for later use.
.jpg)
2. How to Make Your Movie Poster Background
For today's poster, we need an ocean background.
Step 1: Create a Solid Color Fill with the color code #648e94 blue. Then place this wave layer on top. The bottom left corner will be covered with splashes, so don't worry about the fabric layer underneath sticking out.
.jpg)
Step 2: Place a second wave on top of the first wave. Add a Layer Mask to the second wave and click on the mask to activate it. Go to Select => Color Range.
Check the Invert box. Use the Eyedropper and Fuzziness tools to select the color of the sky. We want the splashing water to show, with as little dark blue sky as possible. Finally, press OK.
.jpg)
Step 3: Use a soft white brush to mask out areas you want to see, like the top of the wave. Use a soft black brush to mask out sharp edges and blend the bottom of the wave into the existing wave below.
.jpg)
Step 4: Adjust the color with Hue/Saturation to match the blue of the water.
Step 5: Create a Solid Color Fill with light blue color with color code #346cc7 above all current background layers and increase the Opacity to 15% to add blue tones to the background.
.jpg)
.jpg)
3. Create a poster with a cat in action
Step 1: Next in your collage poster, let's place our two sharks [ 1 ] [ 2 ].
Let's apply two image adjustments to the shark:
Brightness/Contrast set to Brightness -19 and Contrast 67
Hue/Saturation is set to -20 Saturation
.jpg)
Step 2: Add all of your explosion images behind and below the two shark layers. Just roughly place them together; you can rearrange them later.
Group them into a group called "Fire".
.jpg)
Step 3: Place your cat on top of the two sharks.
.jpg)
Step 4: Use the default round brush to mask out some of the paws so the cat appears above the shark. Most of the paws will be hidden by the water, so there's no need to be precise.
.jpg)
Step 5: Below the shark layers and above the Fire group, create two adjustment layers:
Vibrance is set to -80 Vibrance
Brightness/Contrast set to -22 Brightness
This will darken and desaturate the background, making the main image stand out more later.
.jpg)
4. How to Make Your Movie Poster Waves
Step 1: We'll create a quick front wave by selecting the second wave layer, duplicating it, and then bringing it above the shark layers. Squeeze the layer vertically and place it below the shark's body.
.jpg)
Step 2: Use a black brush to cover up some missing areas. You can also adjust the color using Hue/Saturation and Brightness Contrast.
I placed a Color Lookup adjustment layer set to 3DLUT: 3Strip above the new wave. This is an optional step that will simplify and desaturate the existing color.
.jpg)
Step 3: Now it's time to start designing the waves and water using the 3D water assets. I added two adjustments:
Set Hue/Saturation to Colorize, Hue 209, Saturation 19 and Lightness +20
Brightness/Contrast is set to Brightness +6.
.jpg)
Step 4: You will place the waves both above and below the main shapes. Some will be below the shark layers, while others will be above the cat layer.
Place them in a wave-like shape. You can create depth by making the water streaks closer to the foreground larger.
.jpg)
Step 5: Below your bottom splash layer, create a Solid Color Fill layer set to a dark blue #00274f. Set the Layer Mode to Multiply and Opacity to 50%.
Invert the layer mask using Ctrl+I.
Now use a soft round brush to paint shadows where the water needs to look deeper, darker, or thicker.
If you need to quickly paint a shadow on top of the shark or cat layers, you can use the same color and set the layer on a new layer. I put a shadow behind the water splashing out from between the cat's legs.
.jpg)
5. Create water bubbles for your movie poster
Next we'll add some bubbles to match the ocean movie poster vibe.
Step 1: I used these bubbles to create more movement. So I arranged them larger towards the front and smaller as they got further from the front of the canvas.
.jpg)
Step 2: Group the bubbles and name them Bubble, set the layer mode to Lighten. Turn them black and white using Hue/Saturation. You can keep the rainbow colors if you like.
.jpg)
Step 3: Now we want to make them look like they are reflecting and distorting the background behind them. First, select all the layers below the bubbles, then Ctrl+J to duplicate and merge the duplicated part. So now you will have a flat copy of your background.
Move that copy below the Bubble group.
Now, use the Lasso tool to make a selection for each bubble.
.jpg)
Step 4: Use Filter => Distort => Spherize, set to 100 to distort the background behind the bubbles.
I also added a Layer Mask to the flat background right after that, so if I want to edit the background, I can do so without having to redo the whole process.
.jpg)
6. How to create background lighting
Step 1: First, let's use a mixture of Soft Light and Overlay layers to increase the shadows and highlights in the image. I used the default soft round brush and black and white.
For this collage poster, I focused mainly on the cat's body as well as the surrounding waves.
.jpg)
Step 2: Next, let's add the color levels. These three layers will sit at the top of the canvas so they affect all the layers below, giving everything a cohesive look.
Create a Color Lookup adjustment layer above all current layers, set to 3DLUT 3Strip at 45% Opacity.
.jpg)
Step 3: Create a Selective Color adjustment layer and increase the red, green, and light blue.
.jpg)
Step 4: Finally, create a Color Lookup adjustment layer set to 3DLUT Teal Orange Plus Contrast with 26% Opacity.
Step 5: Now, for the backlight. Duplicate the main subject layer and bring it below the original layer. You don’t need to include any of the clipped layers.
Color the copy with a light orange color #fedb99 using the Color Overlay layer effect.
Next, move the color layer around so that the color peak is behind the object. You can also use Warp Transform to push and pull the layer.
.jpg)
Step 6: Next, quickly paint with the same light orange color and a very small hard round brush on a new layer over the subject to help blend the two layers. I also painted in some mustache.
Step 7: Finish things off with some text about your cat, to make the design more appealing.
(1).jpg)
So you have completed the steps to create your movie poster. The implementation requires a combination of many stages, so the person doing it should be careful. Do it many times and customize the parameters to best suit your photo.


