Best Selling Products
Learn about Curvature Pen Tool in Photoshop CC 2018
Nội dung
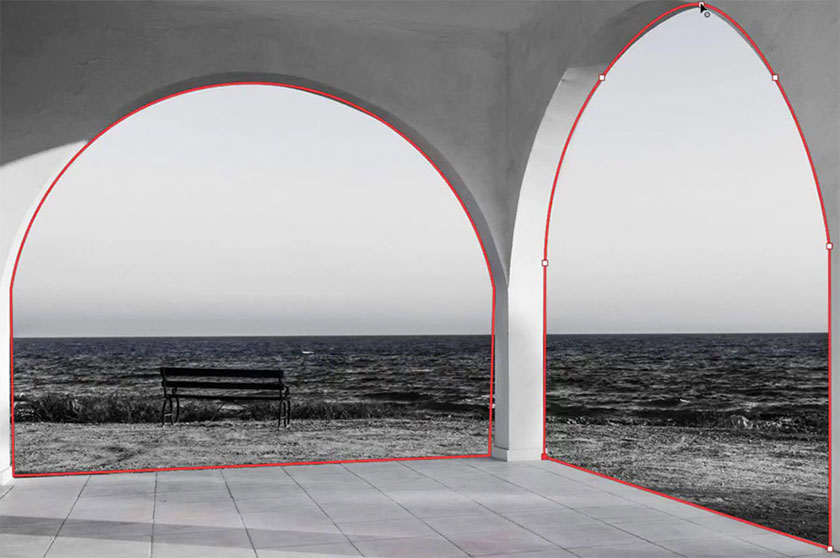
Curvature Pen Tool in Photoshop CC 2018 is one of the coolest new features brought to Photoshop CC 2018. This tool makes selecting and creating masks become easy, incredibly useful in image editing.
 Curvature Pen Tool in Photoshop
This quick video tutorial will help you to use this powerful new tool right away.
[embed]https://youtu.be/iv89xp3MO1I[/embed]Learning about Pen Tool
The Pen tool has been an important element of Photoshop. Previously, SaDesign Retouching has mentioned the usefulness of this tool in creating Paths, Shapes, and Selections. With the advent of the Curvature Pen Tool, creating paths with less geometrical properties is made immensely easier.
In the above video of Photoshop Amateur, the Curvature Pen Tool is used to demonstrate the speed at which arches and headlights are selected within seconds. To find the Curvature Pen tool, you have to click and hold on the Pen Tool itself, to reveal more options.
Once the Curvature Pen Tool is selected, an additional new feature that will be taken advantage of is the Path Options, which allows you to customize the color and thickness of the paths.
Set to Path by default, you'll start by clicking on the area of the image where you want to place your first Anchor Point. You'll then select your second Anchor Point, which will still show your segment as a line, similar to how the Pen Tool normally works.
The third anchor point is when the path will warp and begin to show the magic of the Curvature Pen Tool. Once you have closed and adjusted your Path, you can convert it to Shape, Selection or Mask, moving on to the next step of the workflow in seconds.
With this tool's added precision, you'll be able to make your selections quickly and accurately.
How to use the Pen Tool in Photoshop fluently and effectively
The elements that create the product of the Pen Tool
- Anchor Point: Anchor point in Photoshop will help create curves. When choosing an Anchor point, you need to first select the points at the transition point. The transitional curve point is the point at which the curve turns direction.
- Path: This can be a curve or a straight line to connect the Neo points. The path will be tangent with 2 navigation bars at 2 anchor points.
- Handle: This is the navigation bar. This bar is the path of the path. When dragging the navigation bar, you need to pay attention that the navigation bar is the tangent of the surrounding curve.
When the first navigation bar is the tangent of a curve, the second one is busy holding the Shift key. Next, you adjust for the second navigation bar to be the tangent of the next curve of the envelope.
How to use the Pen Tool in Photoshop to create a simple path
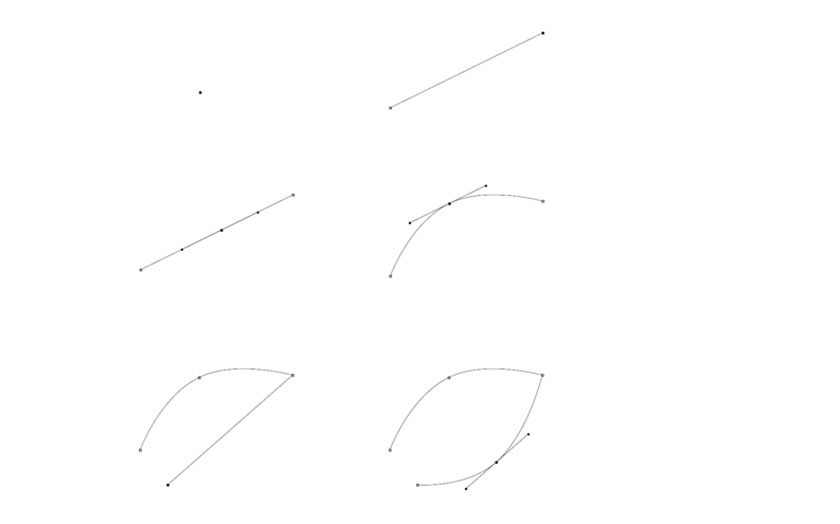 create a simple path
- Step 1: Pick the Pen Tool
- Step 2: You click one point at the start curve
- Step 3: Click the endpoint of the curve
- Step 4: Move your mouse to the middle path and Click 1 point
- Step 5: Appears the crank of the middle
- Step 6 : Hold Ctrl key to move Pen Tool to Direct Selection Tool
- Step 7: Select the middle point, drag up to create a curve
- Step 8: Hold Ctrl and drag the handle of the Anchor point in the middle of the Path to adjust if you want
- Step 9: You perform the same steps above with the beginning and the end of the curve to create a path.
How to use the Pen Tool in Photoshop CS6 to create complex paths
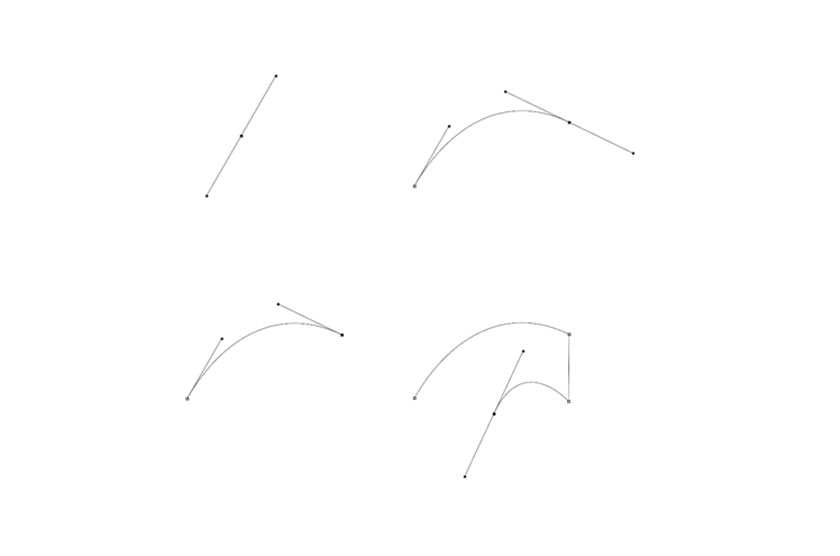 create complex paths
- Step 1: Click 1 anchor point and drag to the direction you want to create a curve
- Step 2: Appear 2 crank ends of this point
- Step 3: Click on the end point of the curve, drag to create a crank for this point
- Step 4: Before releasing the mouse left out you need to adjust the curve to match
- Step 5: To remove the cranks do not use, you hold down the Alt key and click on the end of the curve
- Step 6: Continue to manipulate Steps as above until the path is closed
The above sharing of SaDesign Retouching has helped you better understand Curvature Pen Tool in Photoshop CC 2018. Hope this information is really useful to readers.
See more How to cut the hair in Photoshop fastest


