Best Selling Products

Capcut Pro 1 Year
39 USD

Upgrade genuine Capture One account
120 USD

Upgrade Genuine Office 365
49 USD

Freepik Premium Account
59 USD

Genuine Cheap Canva Pro
39 USD

MidJourney Account
29 USD

Windows 10 & 11 Pro Key
36 USD

Genuine Adobe Illustrator account
99 USD

Plugin Retouch4me
69 USD

Upgrade Duolingo Super
29 USD

Copyright Adobe Lightroom Account
59 USD

Adobe Photoshop Copyright - Full App
120 USD

Autodesk All App Account Copyright
120 USD

Adobe Premiere Pro Account
99 USD

ChatGPT Plus Account (GPT-4)
16 USD
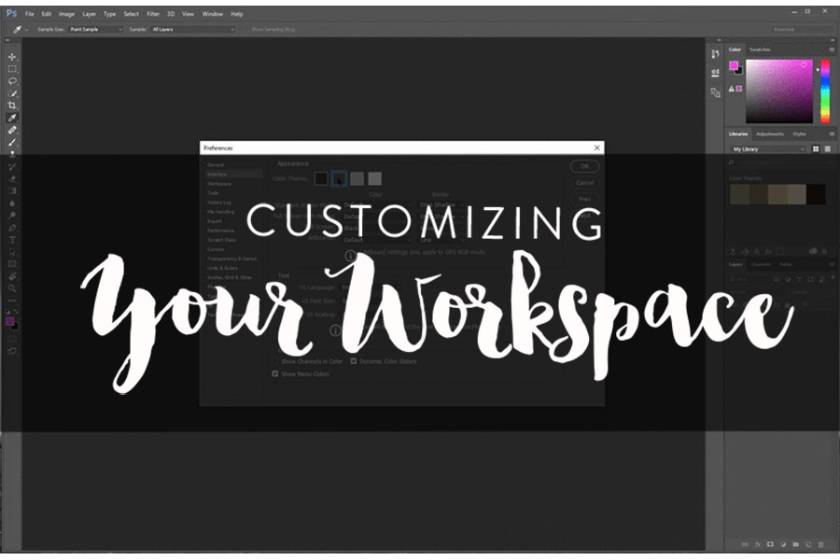
How to customize workspaces in Photoshop
Nội dung
 customize workspaces in Photoshop
Default workspaces
Adobe default has 6 workspaces for you as follows:- Essentials
- 3D
- Graphics and Web
- Motion
- Painting
- Photography
 Default workspaces
Convert Workspaces
You can switch through different workspaces, from the menu drop-down Workspace in Photoshop's upper right corner. You can also create new workspaces, modify or delete existing ones here: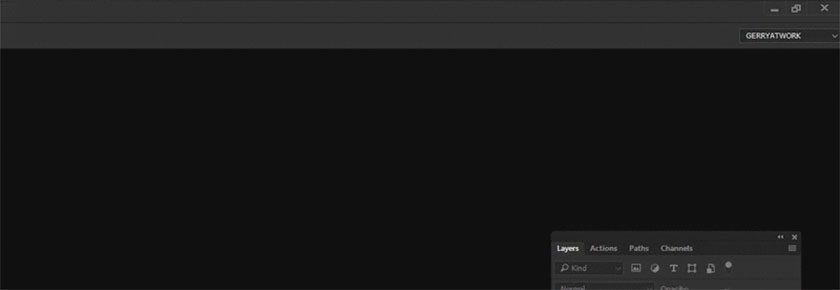 Convert Workspaces
Why is it necessary to make customizations?
No default workspace will include everything we need in our editing process. Therefore, having the ability to customize workspaces allows us to change not only the look, but also create a more efficient, centralized work environment by showing the tables and tools that you need. Everyone will have different working needs, different things and different ways of working, ... that's why workspaces in Photoshop are designed to be customizable. From dashboards, to menus and shortcuts, almost anything can be reconfigured to suit the needs of the user. There's no right or wrong way. How you choose to customize your work space will be based on each person's personal preferences.Customized
We can customize the tools as follows:- Panels
- Interface options:
- + Appear
- + Screen mode
- + Interface text
- Items in the color menu
- Keyboard shortcuts
- General interests
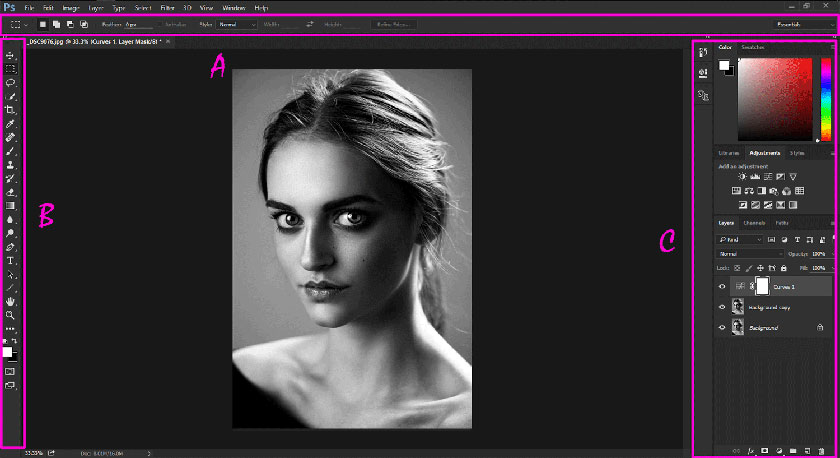
Panels
All tables, as well as toolbars, are clickable objects that move in the interface. Moving the panel is easy, you just have to click on the darker top bar of a certain panel, so that they will be moved from its location. You will notice that we can move the boards to the position by clicking on the top bar, holding down the stylus button while dragging and bringing it to the edge of the window. A blue marked area, called a "drop zone" that will light up, suggests that it can be located here. Dropping the button will "attach" it to the correct position. In addition, you can have any floating tools and dashboards completely free of charge. The panel can also be fully reduced to icons by using the double arrow button, as shown in the image below:Interface options
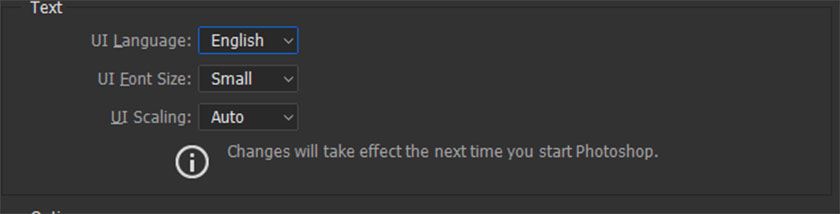
Edit -> Options -> Interface or press Ctrl + K (Windows) or ⌘ + K (Mac) Within these options we can change the look, language, text size and color and border of the screen mode of Photoshops. If you find the interface text too small to read, you can also adjust its size here.- Color theme: There are four grayscale options from dark to light for you to choose. You can also change the default colors of different screen modes and Artboards through the same Preferences settings dialog.
- Text: These options allow to change the interface language, font size and scale.
 change the look, language, text size
Color menu items
The color feature enables the ability to highlight menu items with specific colors. You should color to highlight your most used menu items and group them into color. This makes them easier to locate visually in a long menu list.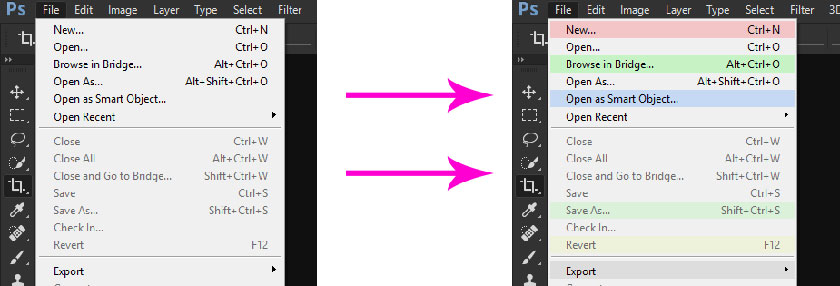 Color menu items
General preference of the workspace
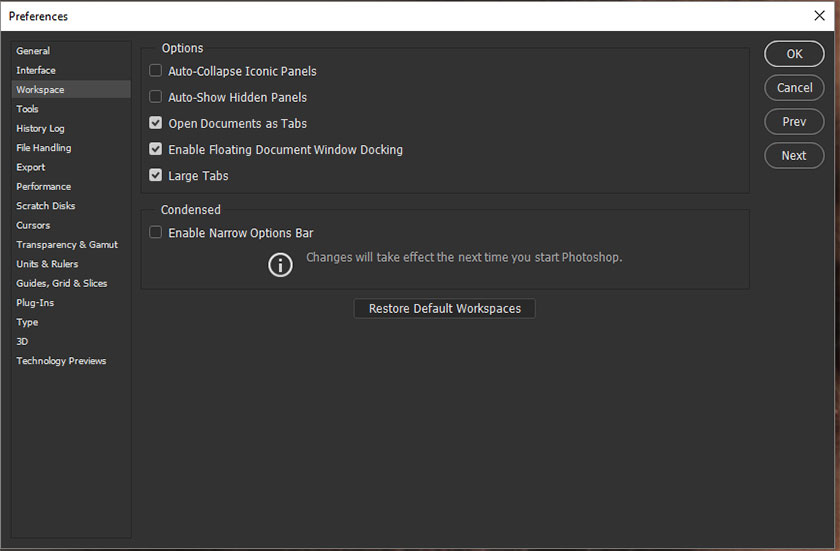 General preference of the workspace
Creating a new custom workspace
Now that we've examined all the ways in which the interface can be customized, you can start to set up the layout, tools, and panels in the way you want. Some of the most common basic elements for re-editing would be Layer / Action / Navigation / Chart / Adjustment Layer / Path / History and Channel. If you're a Beauty Retouch panel user, you're sure to incorporate it, as well as the Pixel Juggler, into your custom workspace. Whether you want your tools and panels to be positioned in the outer edges of the interface or you like them to float freely, you arrange everything as you please. It's important that your workspace is right for you!Save your new workspace
When you're satisfied with your workspace, all you need to do is save it. This can be done through the Workspace drop-down menu in the upper right corner of the screen or through the Window menu. Select “New workspace…” and this will open a new window in which you can give your new workspace a name.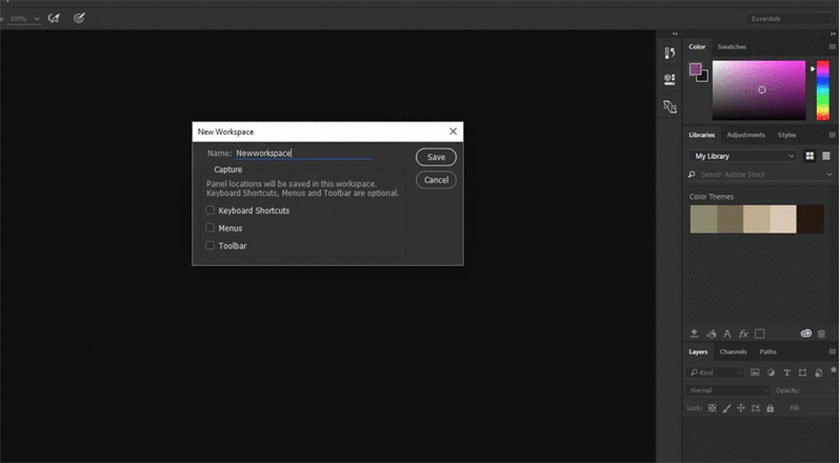 give your new workspace a name
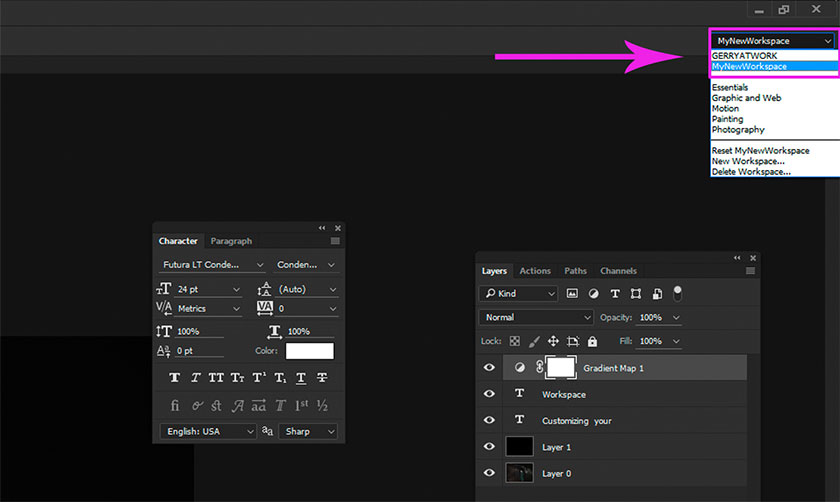 save workspace
Reset your workspace
In case you make a mistake or accidentally close or move the console, you can easily reset your workspace using the reset function. This also works for the default workspace. Just remember that this will only reset it back to the last saved workspace. If you are using a modified unsaved workspace, the edits will no longer be there. So make sure whenever you want to make a permanent modification to your custom workspace, always save and overwrite the existing space.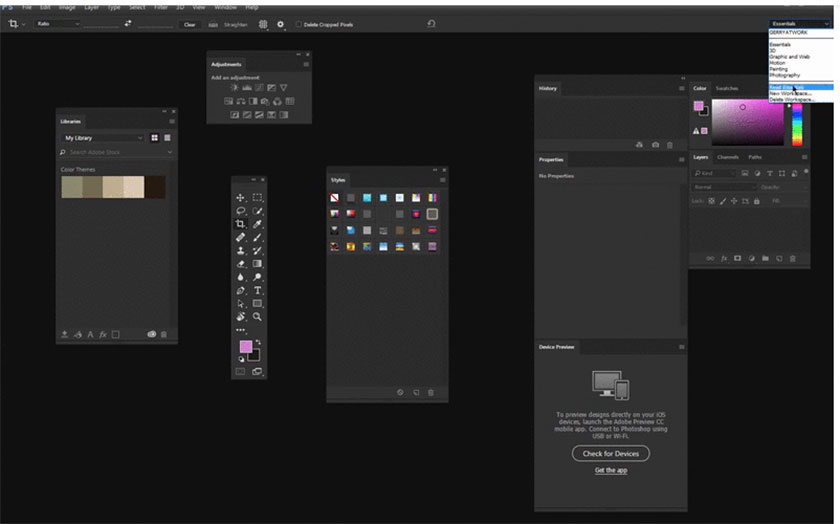 Reset your workspace
Multiple workspaces
There's no limit to the amount of custom workspaces you can have, so workspaces are endless. You can create separate workspaces for different types of projects and convert through them easily thanks to the instructions above on customize workspaces in Photoshop. If there are any problems, leave your comments below this article, the SaDesign Retouching team will help you. See more How to change background color in Photoshop the fastest


VIP Products


Best Selling Products
Capcut Pro 1 Year
39 USD
Upgrade genuine Capture One account
120 USD
Upgrade Genuine Office 365
49 USD
Freepik Premium Account
59 USD
Genuine Cheap Canva Pro
39 USD
MidJourney Account
29 USD
Windows 10 & 11 Pro Key
36 USD
Genuine Adobe Illustrator account
99 USD
Plugin Retouch4me
69 USD
Upgrade Duolingo Super
29 USD
Copyright Adobe Lightroom Account
59 USD
Adobe Photoshop Copyright - Full App
120 USD
Autodesk All App Account Copyright
120 USD
Adobe Premiere Pro Account
99 USD
ChatGPT Plus Account (GPT-4)
16 USD