
Best Selling Products

Genuine Adobe Illustrator account
99 USD

Upgrade Duolingo Super
29 USD

MidJourney Account
29 USD

ChatGPT Plus Account (GPT-4)
16 USD

Windows 10 & 11 Pro Key
36 USD

Genuine Cheap Canva Pro
39 USD
Adobe Photoshop Copyright - Full App
120 USD

Capcut Pro 1 Year
39 USD
Autodesk All App Account Copyright
120 USD
Plugin Retouch4me
69 USD

Freepik Premium Account
59 USD

Copyright Adobe Lightroom Account
59 USD
Upgrade genuine Capture One account
120 USD
Upgrade Genuine Office 365
49 USD

Adobe Premiere Pro Account
99 USD
Detailed Autodesk AutoCAD 3D Map tutorial for beginners.
Nội dung
- 1. What is Autodesk AutoCAD Map 3D?
- 2. Familiarize yourself with the Autodesk AutoCAD Map 3D interface.
- 3. Instructions for creating a new drawing in AutoCAD Map 3D
- 4. How to set up coordinate systems in AutoCAD Map 3D
- 5. Instructions for importing and connecting map data
- 6. How to manage layers and object properties
- 7. Common errors when using AutoCAD Map 3D
- 8. Tips for using Autodesk AutoCAD Map 3D effectively
- 9. Conclusion
Autodesk AutoCAD Map 3D is a useful software in the fields of mapping, urban planning, construction, and geographic data management. This tool combines CAD drawing design capabilities with GIS features, allowing users to create maps, manage spatial information, and process data in a single working environment. For beginners, familiarizing themselves with the interface, setting up coordinate systems, and connecting data can be quite challenging. In this article, let''s explore the basic to practical aspects of using Autodesk AutoCAD Map 3D, helping you grasp important operations and use the software more effectively.
1. What is Autodesk AutoCAD Map 3D?
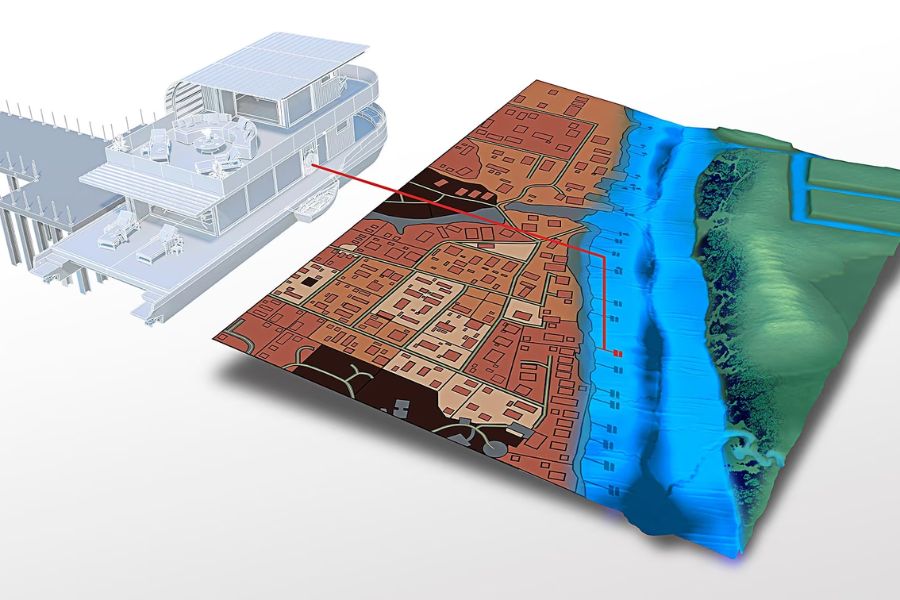
Autodesk AutoCAD Map 3D is mapping and spatial data management software developed on the AutoCAD platform. The software allows the integration of technical drawings with GIS data, enabling users to manage geographic objects and related attribute information. Instead of simply representing objects with lines, users can connect data, query information, and organize maps according to their specific needs. Some common applications of AutoCAD Map 3D include:
-
Cadastral map management: Supports the display of land parcel boundaries and related information.
-
Urban planning: Managing transportation networks, residential areas, and technical infrastructure.
-
Construction management: Monitoring data on pipelines, water supply and drainage systems, and construction projects.
-
GIS data processing: Connecting, querying, and exchanging geographic data between supported sources.
-
Map editing: Modifying objects, classifying information layers, and presenting the map.
2. Familiarize yourself with the Autodesk AutoCAD Map 3D interface.
Before you begin, you should familiarize yourself with the main areas of the interface for easier operation. AutoCAD Map 3D has many components familiar to AutoCAD users, while also adding tools for managing geographic data. Important components to know include:
-
Ribbon: Contains groups of tools for drawing, editing, and managing data.
-
Drawing Area: The area where the drawing and map objects are displayed.
-
Command Line: Allows you to enter commands and monitor notifications during the operation.
-
Display Manager: Helps manage how map layers are displayed.
-
Task Pane: Provides access to tools for connecting to and managing data.
-
Layer Properties: Used to create, categorize, and adjust the properties of CAD layers.
Beginners should start with simple operations such as zooming in and out, moving the drawing, turning layers on and off, and saving files. Once you are familiar with the interface, you can continue to explore more advanced tools.
Upgrade Autodesk AutoCAD Map 3D at a low price.
3. Instructions for creating a new drawing in AutoCAD Map 3D
Setting up the map correctly from the start helps minimize errors in dimensions, positioning, or data integration. Before importing the map, determine the units of measurement, coordinate system, and how to organize the information layers. The basic steps are as follows:
-
Step 1: Create a new drawing: Open Autodesk AutoCAD Map 3D and create a new drawing. You can use the default template or the project's pre-existing template.
-
Step 2: Set the unit of measurement: Enter the command UNITS to check the unit. For many technical drawings and map data in Vietnam, the metric unit is commonly used, but it must comply with the requirements of each project.
-
Step 3: Set up the coordinate system: Access the coordinate system setup tool in Map 3D and select the system that matches the source data.
-
Step 4: Create layers: Divide the objects into groups such as roads, boundaries, buildings, and technical systems. Give them clear names for easy management.
-
Step 5: Save the drawing: Use the SAVEAS command to save the file with an easily recognizable name and appropriate format. After completion, double-check the parameters before importing data. A well-organized drawing will make the subsequent processing steps simpler.
4. How to set up coordinate systems in AutoCAD Map 3D
Coordinate systems help determine the location of objects on a map. If set up incorrectly, the data may be misaligned or not match other information layers. To set up a coordinate system, follow these steps:
-
Step 1: Open the drawing you need to set up and access the coordinate assignment tool.
-
Step 2: Find the coordinate system by name, code, or geographic area.
-
Step 3: Compare the information with the technical documentation of the source data.
-
Step 4: Select a suitable coordinate system and apply it according to the software's instructions.
-
Step 5: Check the object's position after connecting or transferring data.
You need to distinguish between coordinate system assignment and coordinate conversion. Coordinate system assignment helps the software recognize the reference system the data is using, while coordinate conversion recalculates the data's position to a different system. For maps of Vietnam, carefully check the reference system, projection zone, and related parameters according to the project documentation. Do not choose a coordinate system based solely on the location displayed on the screen.
5. Instructions for importing and connecting map data
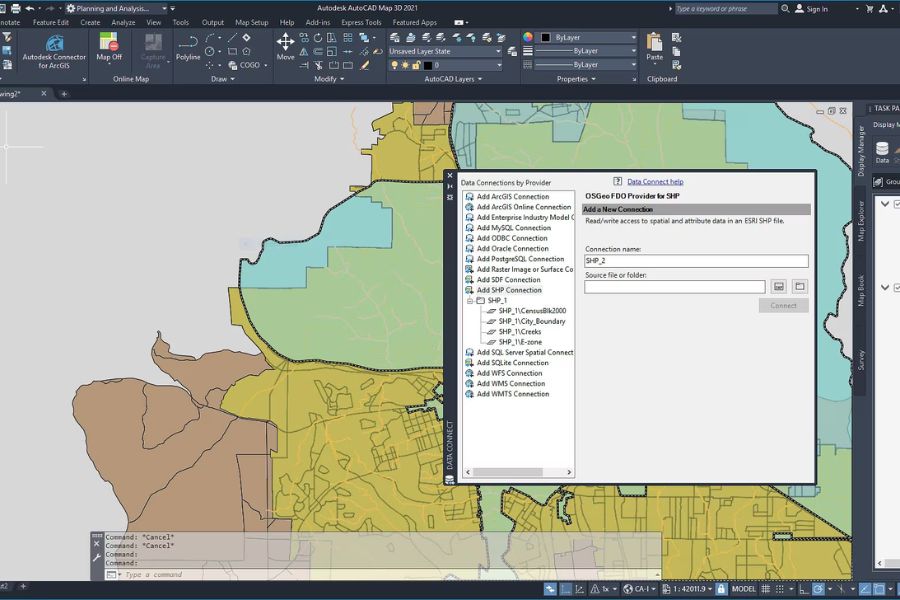
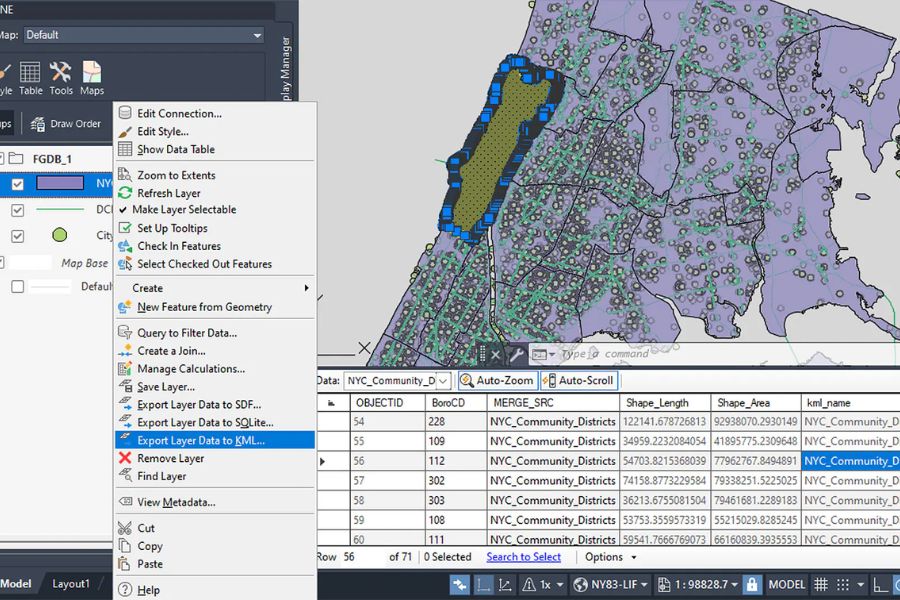
AutoCAD Map 3D supports connecting multiple data sources, allowing users to utilize existing maps instead of having to redraw them from scratch. Depending on the purpose, you can connect data via FDO or import data into the drawing. The process includes:
-
Step 1: Prepare the data: Check the file format, coordinate system, and attribute fields. Common formats may include SHP, SDF, DWG, and data sources supported by the software version.
-
Step 2: Open the connection tool: Find the Data Connect option in the Map 3D interface and select the appropriate data source type.
-
Step 3: Select the data file: Browse to the file's location or enter the connection information as requested.
-
Step 4: Add data layers: Select the layers to display on the map. If the data source has multiple layers, prioritize the information that directly relates to your work.
-
Step 5: Check the results: Observe the position, shape, and attributes of the object. If the data does not appear in the correct position, check the coordinate system, display range, and connection status.
Note that connecting to data and importing data into CAD objects are two different methods. Connecting to FDO typically allows direct work with external data sources, while importing can convert data into objects within the drawing. Choose the method that best suits your editing and management needs.
Upgrade Autodesk AutoCAD Map 3D at a low price.
6. How to manage layers and object properties
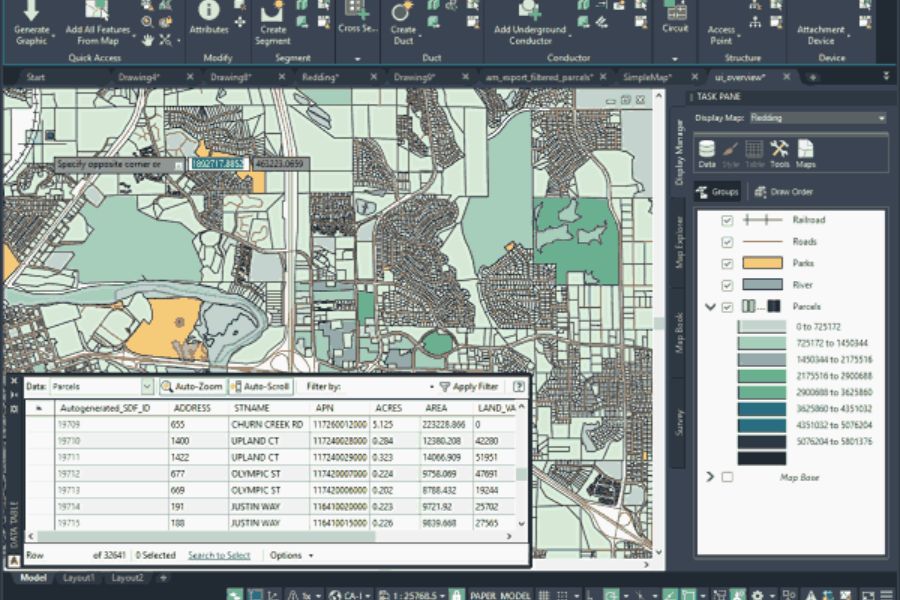
When a map contains multiple groups of information, proper layering will make it easier to edit and control the content. For example, a planning map might include roads, land boundaries, existing structures, and infrastructure systems. Some effective management methods include:
-
Layer classification: Create separate layers for each group of objects.
-
Consistent naming convention: Use short, easy-to-understand names that accurately reflect their function.
-
Configure the display settings: Adjust the color, line style, and on/off status.
-
Check attributes: View the object code, route name, project type, or related information if provided in the data.
-
Maintain a consistent structure: Standardize how data is organized to facilitate teamwork.
It's important to note that CAD layers and GIS data layers are not entirely the same. CAD layers primarily serve to organize and display objects in a drawing, while GIS layers are typically associated with spatial data and attribute tables. Understanding this difference will help you choose the right tool.
7. Common errors when using AutoCAD Map 3D
During the work process, newcomers may encounter connection, display, or data processing errors. Identifying the correct cause will save time and avoid affecting the original drawing. Some common errors and how to fix them include:
-
The map is misaligned: Check the coordinate system of the drawing and the source data.
-
Data connection failed: Check the path, access permissions, and file format.
-
Objects not showing: Check layers, data filters, and display scope.
-
Missing attributes: Review the data structure and selected fields during import or export.
-
Software is running slowly: Turn off unnecessary layers and limit the amount of data displayed at the same time.
-
The output file does not match the original: Check the output format and compatibility of the information fields.
When encountering problems, check each element individually instead of changing many settings at once. Don't forget to save a backup before performing any actions that could affect important data.
8. Tips for using Autodesk AutoCAD Map 3D effectively
To work quickly and minimize errors, you should establish a clear software usage process. There's no need to memorize all the commands at once; focus on the tools that are relevant to your specific tasks. You can apply the following tips:
-
Creating a drawing template: Prepare layers, colors, and commonly used settings.
-
Data normalization: Check coordinate systems, field names, and information before importing.
-
Create backup copies periodically: Make a backup copy before performing bulk conversions or edits.
-
Learning based on needs: Prioritize tools for layer management, data connection, and map publishing.
-
Verify the results: Compare the location and attributes with the original data.
-
Refer to the correct version: Interfaces and features may vary between versions of AutoCAD Map 3D.
Additionally, clearly define the objectives of each task. If you need to edit technical drawings, you can prioritize CAD tools. If you need to manage geographic data, focus on GIS functions and attribute queries. This approach makes learning easier and more practical.
9. Conclusion
Autodesk AutoCAD Map 3D is a useful tool for tasks requiring the integration of CAD drawings with map data and geographic information. Mastering how to create drawings, set up coordinate systems, connect data, manage layers, and export files will provide a foundation for more efficient map projects. For beginners, start with basic operations and use small datasets to familiarize yourself with the process. Pay particular attention to coordinate systems and data quality, as these two factors directly impact map accuracy. Once you become proficient with the necessary tools, you can gradually expand your knowledge and apply AutoCAD Map 3D to construction, planning, and spatial data management.
















VIP Products






Best Selling Products
Genuine Adobe Illustrator account
99 USD
Upgrade Duolingo Super
29 USD
MidJourney Account
29 USD
ChatGPT Plus Account (GPT-4)
16 USD
Windows 10 & 11 Pro Key
36 USD
Genuine Cheap Canva Pro
39 USD
Adobe Photoshop Copyright - Full App
120 USD
Capcut Pro 1 Year
39 USD
Autodesk All App Account Copyright
120 USD
Plugin Retouch4me
69 USD
Freepik Premium Account
59 USD
Copyright Adobe Lightroom Account
59 USD
Upgrade genuine Capture One account
120 USD
Upgrade Genuine Office 365
49 USD
Adobe Premiere Pro Account
99 USD