Best Selling Products

Adobe Photoshop Copyright - Full App
120 USD

Freepik Premium Account
59 USD

Plugin Retouch4me
69 USD

Upgrade genuine Capture One account
120 USD

Upgrade Duolingo Super
29 USD

Upgrade Genuine Office 365
49 USD

Genuine Adobe Illustrator account
99 USD

Genuine Cheap Canva Pro
39 USD

ChatGPT Plus Account (GPT-4)
16 USD

Adobe Premiere Pro Account
99 USD

MidJourney Account
29 USD

Copyright Adobe Lightroom Account
59 USD

Windows 10 & 11 Pro Key
36 USD

Autodesk All App Account Copyright
120 USD

Capcut Pro 1 Year
39 USD
Discover 10 Tips for Creating the Perfect Canva Design
Nội dung
- 1. Create layouts with grids
- 2. Use Frames to crop photos into shapes
- 3. Arrange and group elements
- 4. Lock the position of elements
- 5. Adjust the transparency of elements
- 6. Add link
- 7. Animations, GIFs and Videos
- 8. Choose a trendy style
- 9. Search and filter elements
- 10. Make a copy of your design
- 11. Conclusion
With the development of technology, many online design tools have been born, and Canva is one of the top choices. Founded in 2013, Canva has quickly attracted millions of users thanks to its ease of use, rich template library, and high customizability. With Canva, anyone can create beautiful design products, from social media posts to brochures or presentations. In this article, let's explore with Sadesign 10 useful tips to create perfect Canva designs, helping you convey your message most effectively.
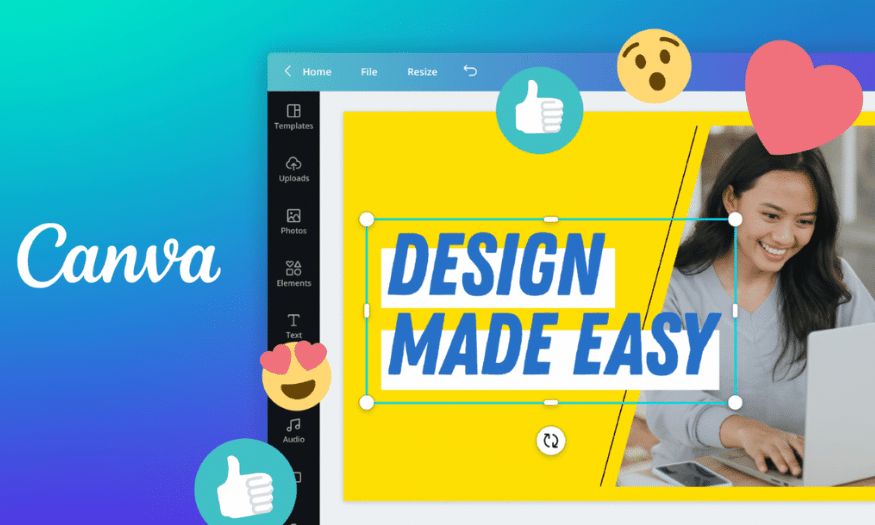
With the development of technology, many online design tools have been born, and Canva is one of the top choices. Founded in 2013, Canva has quickly attracted millions of users thanks to its ease of use, rich template library, and high customizability. With Canva, anyone can create beautiful design products, from social media posts to brochures or presentations. In this article, let's explore with Sadesign 10 useful tips to create perfect Canva designs, helping you convey your message most effectively.
1. Create layouts with grids
When it comes to the world of design, one of the most important factors that determines the success of a product is its layout. Using grids in Canva is not only a convenient method but also an art in creating balance and harmony for design elements. Grids act as a framework to help you shape your space, allowing you to easily arrange images, graphics, and colors in a logical and attractive way.
You can find this feature in the Elements section on the left side of the screen. When you scroll down to Grids, you’ll see a variety of different formats, from simple to complex. If you want to save time, use the search bar to search for “grids.” Using grids makes it easy to create unique layouts without worrying about imbalance. You can even experiment with different grids to see which one best fits your idea.
A great example is using a 2×2 grid for an Instagram post. This is a great way to share multiple images or messages in a small space. You can drop graphics, images, or even text into each grid box and change the colors to your liking. This not only makes your post more dynamic but also effectively draws the viewer’s eye. Once you’ve finished your design, if you no longer need the grid, remember to delete it to make room for other elements. Grids are a powerful tool for creating the perfect design, helping you get started on your creative journey.
2. Use Frames to crop photos into shapes
Frames are one of Canva’s fun and creative features, allowing you to crop images into various shapes. Not only do they enhance the aesthetics, but they also help your designs become more unique and stand out in the eyes of viewers. To get started, simply scroll down to the Frames section or search for “Frames” in Elements, and select a frame that best suits your style.
Once you’ve chosen your frame, you can upload your image to Canva via the Uploads section or choose from the stock photos in the Photos section. While Canva Pro offers more options, the free version is still not lacking in high-quality images. You can easily drag and drop your images into the selected frame, creating unique and visually appealing images. This not only saves you time, but also makes the design process more fun.
Once you have your image in a frame, you can resize or position it as you like. You can zoom in, zoom out, or move the frame to achieve the desired effect. Try combining multiple frames with different shapes to create unexpected designs. Creativity knows no bounds in Canva, and using frames will help you express your personal style clearly. Don’t hesitate to experiment with different shapes to explore your creativity and make your design more impressive than ever.
.png)
3. Arrange and group elements
When designing, it is inevitable that you will have to use different elements. To create a beautiful and professional design, it is important to arrange and group elements. Canva gives you the ability to arrange elements in just a few clicks. You can right-click on an element and select Send Backward or Bring Forward to adjust its position on the design layer. This feature is useful when you want to make sure that the most important elements are always displayed in a prominent position.
Grouping elements is also an effective way to manage your design. After selecting the necessary elements, select Group from the top toolbar or use the keyboard shortcut Ctrl + G (Cmd + G on Mac). Grouping allows you to move, edit, or copy multiple elements at once, saving time and effort. This is especially useful when you are working on large projects that require many different elements.
When you are done with your design, you can also easily ungroup elements if needed. Arranging and grouping elements not only makes your design easier to manage, but also adds a professional look to your final product. Take advantage of these features to give your designs a polished look. In fact, proper organization not only helps you work more efficiently, but also creates beautiful products that attract viewers' attention and convey your message clearly.
4. Lock the position of elements
One of the most useful features of Canva when working with multiple elements is the Lock tool. This feature allows you to keep elements in place in your design, preventing them from accidentally changing or moving during editing. This is especially important when you have perfectly arranged elements and don’t want to ruin the balance of your design.
To lock an element, simply select it and then click the Lock icon in the top right corner of the toolbar. If you want to lock multiple elements at once, hold down the Shift key on your keyboard and click each element you want, then do the same to lock them. This not only makes you more productive, but also ensures that important elements don’t get changed when you make other edits.
If you want to unlock selected elements, simply click the Lock icon again. This makes it easy to manage your design without worrying about accidentally messing up your layout. Using the lock feature allows you to focus on new elements without worrying about editing the finished ones.
.png)
5. Adjust the transparency of elements
Agreat way to enhance the aesthetics of your designs is to adjust the transparency of elements. This technique not only helps you create unique effects, but also allows you to adjust the interaction between elements in your design. To do this, simply select the element you want to adjust, then click the Transparency icon (checkerboard icon) on the toolbar.
Drag the slider to the left to increase the opacity of an element, or to the right to decrease it. This feature can be applied to many different types of elements, including backgrounds, text, images, and videos. Adjusting transparency not only adds depth to your design, but it also helps create interesting visual layers that make your product more appealing.
Experiment with this on different platforms, from creating blurry backgrounds to making text stand out more on images. Transparency can be a powerful tool to effectively convey your emotions and messages. By using this feature, you can bring a fresh look to your design, making it more eye-catching and appealing to your viewers.
6. Add link
When creating a digital design in Canva, adding links can add interactivity and value to your work. By allowing your audience to access a related website or document, you not only provide additional information but also enhance the user experience. This is especially useful for presentations, brochures, or any design that requires interactivity.
To add a link, simply select the element you want to link to—it can be text, an image, or a video. Click the ellipses icon in the toolbar, then select the link icon. Enter your website URL and click Apply to finish. The process is quick and simple, making it easy to connect your design to the outside world.
If you need to remove a link, simply follow the same process and remove the URL. Not only does this make your design look more professional, it also gives viewers a chance to learn more about your brand or product. Remember, every link can open a new door for engagement and connection with your audience, so use this feature wisely.
.png)
7. Animations, GIFs and Videos
Using animations can be a fun way to make your designs come to life and be more engaging. Canva allows you to animate almost any element, including text, graphics, photos, and videos. This not only helps to capture the viewer’s attention, but also creates a more engaging experience for your audience.
When you’re creating a social media post or a promotional video, consider adding animations to your elements. To do this, select the element you want to animate and click Animate on the toolbar. From here, you can choose from a variety of effects, from simple to complex, depending on the style and message you want to convey.
Creativity knows no bounds when working with animations and videos. Experiment with different effects to find what works best for your design. Using animations not only brings your design to life, but can also create a lasting impression on your viewers. Don’t hesitate to explore these features to enhance your designs.
8. Choose a trendy style
In the world of design, choosing the right style can be the key to creating an impressive and engaging product. If you’re feeling lost when it comes to combining colors and fonts, Canva has a great solution for you: pre-made styles. These styles are not only carefully researched but also reflect current design trends, making it easy to create products that stand out and look professional.
To explore these styles, simply go to the Style tab in the left sidebar menu. Here you will find a variety of styles, from bright color palettes to elegant font combinations. Adopting one of these styles will not only save you time, but will also give you more confidence in your color and font choices. Feeling like you are keeping up with design trends will help you enhance the value of your product, making a strong impression on your viewers.
If you want more flexibility, Canva also lets you choose your own color and font elements. Just go to Colors and Fonts to experiment and customize to your liking. Design style is more than just color; it’s how you express your personality and message through every little detail. By adopting trendy styles, you not only upgrade your designs, but also express your own unique taste.
.png)
9. Search and filter elements
When working with Canva, the ability to search and filter elements is one of the most powerful features you can take advantage of. Not only does this save you time, but it also makes it easy to find the right elements for your design. You can search not only for elements, but also for templates, photos, and more with just a few clicks.
To get started, enter a keyword related to the element you want to find in the Elements tab. Then, click the Filter icon to open up the filtering options. Here, you can choose your preferred filter, from color to animation. This is especially useful if you're looking for a specific style or want to coordinate elements according to a certain theme. Once you've adjusted your filters, click Apply filter to see the results.
Efficient searching not only saves you time but also brings creativity to your designs. Imagine you are creating an event poster; finding the right icons, images, and fonts will help you quickly complete your product without wasting time on unnecessary elements. The flexibility of searching and filtering will help you easily create impressive and professional designs.
10. Make a copy of your design
One of the handy features of Canva is the ability to create a copy of your design. This is useful when you want to experiment with new ideas without affecting the original. Creating a copy allows you to keep the original design intact while still having room to be creative or edit it to your personal taste.
To create a copy, simply go to the File menu and select Make a copy. Once done, the copy will open in a new tab, with “Copy of” added to the file name. This not only makes it easier to differentiate between the copy and the original, but also allows you to create multiple versions of the same design. You can name each copy for easy tracking and comparison.
This is useful when you’re experimenting with different styles or layouts. You can easily go back to your original design if you want, or use duplicate versions to test new ideas without worrying about losing what you’ve already done. This allows you to get creative without worrying about making too many changes to a single design.
.png)
11. Conclusion
In short, creating a perfect design on Canva is not only about skill, but also about applying the right tips and tricks. These tips will help you improve your design skills, from choosing colors to using images and fonts. Practice regularly and keep creating, and you will see that design is not just a job but also an art.


VIP Products


Best Selling Products
Adobe Photoshop Copyright - Full App
120 USD
Freepik Premium Account
59 USD
Plugin Retouch4me
69 USD
Upgrade genuine Capture One account
120 USD
Upgrade Duolingo Super
29 USD
Upgrade Genuine Office 365
49 USD
Genuine Adobe Illustrator account
99 USD
Genuine Cheap Canva Pro
39 USD
ChatGPT Plus Account (GPT-4)
16 USD
Adobe Premiere Pro Account
99 USD
MidJourney Account
29 USD
Copyright Adobe Lightroom Account
59 USD
Windows 10 & 11 Pro Key
36 USD
Autodesk All App Account Copyright
120 USD
Capcut Pro 1 Year
39 USD