Best Selling Products

Genuine Cheap Canva Pro
39 USD

MidJourney Account
29 USD

Genuine Adobe Illustrator account
99 USD

Copyright Adobe Lightroom Account
59 USD

Adobe Photoshop Copyright - Full App
120 USD

Upgrade genuine Capture One account
120 USD

Plugin Retouch4me
69 USD

Upgrade Duolingo Super
29 USD

Windows 10 & 11 Pro Key
36 USD

Freepik Premium Account
59 USD

Upgrade Genuine Office 365
49 USD

Capcut Pro 1 Year
39 USD

Adobe Premiere Pro Account
99 USD

ChatGPT Plus Account (GPT-4)
16 USD

Autodesk All App Account Copyright
120 USD
Discover Bracketing Photography and 3 Methods to Enhance Image Quality
Nội dung
- 1. Decoding the concept of bracketing photography and why it makes a difference.
- 1.1. What is bracketing technique in professional photography?
- 1.2. Why is bracketing photography the secret weapon for challenging lighting situations?
- 2. Discover 3 types of bracketing photography to handle any challenging situation.
- 2.1. Use Aerial Exposure Bracketing (AEB) to master light and shadow.
- 2.2. Use focus point bracketing to optimize sharpness across the entire frame.
- 2.3. Use bracketing with white balance to ensure the most accurate colors.
- 3. Practical tips and post-production process for bracketing photography.
- 3.1. Instructions for setting up the camera for accurate bracketing
- 3.2. How to combine Bracketing files in post-production to create masterpieces
- 4. Mistakes that make bracketing counterproductive
Bracketing is a technique used by many professional photographers to capture full detail in scenes with high light contrast.
1. Decoding the concept of bracketing photography and why it makes a difference.
1.1. What is bracketing technique in professional photography?
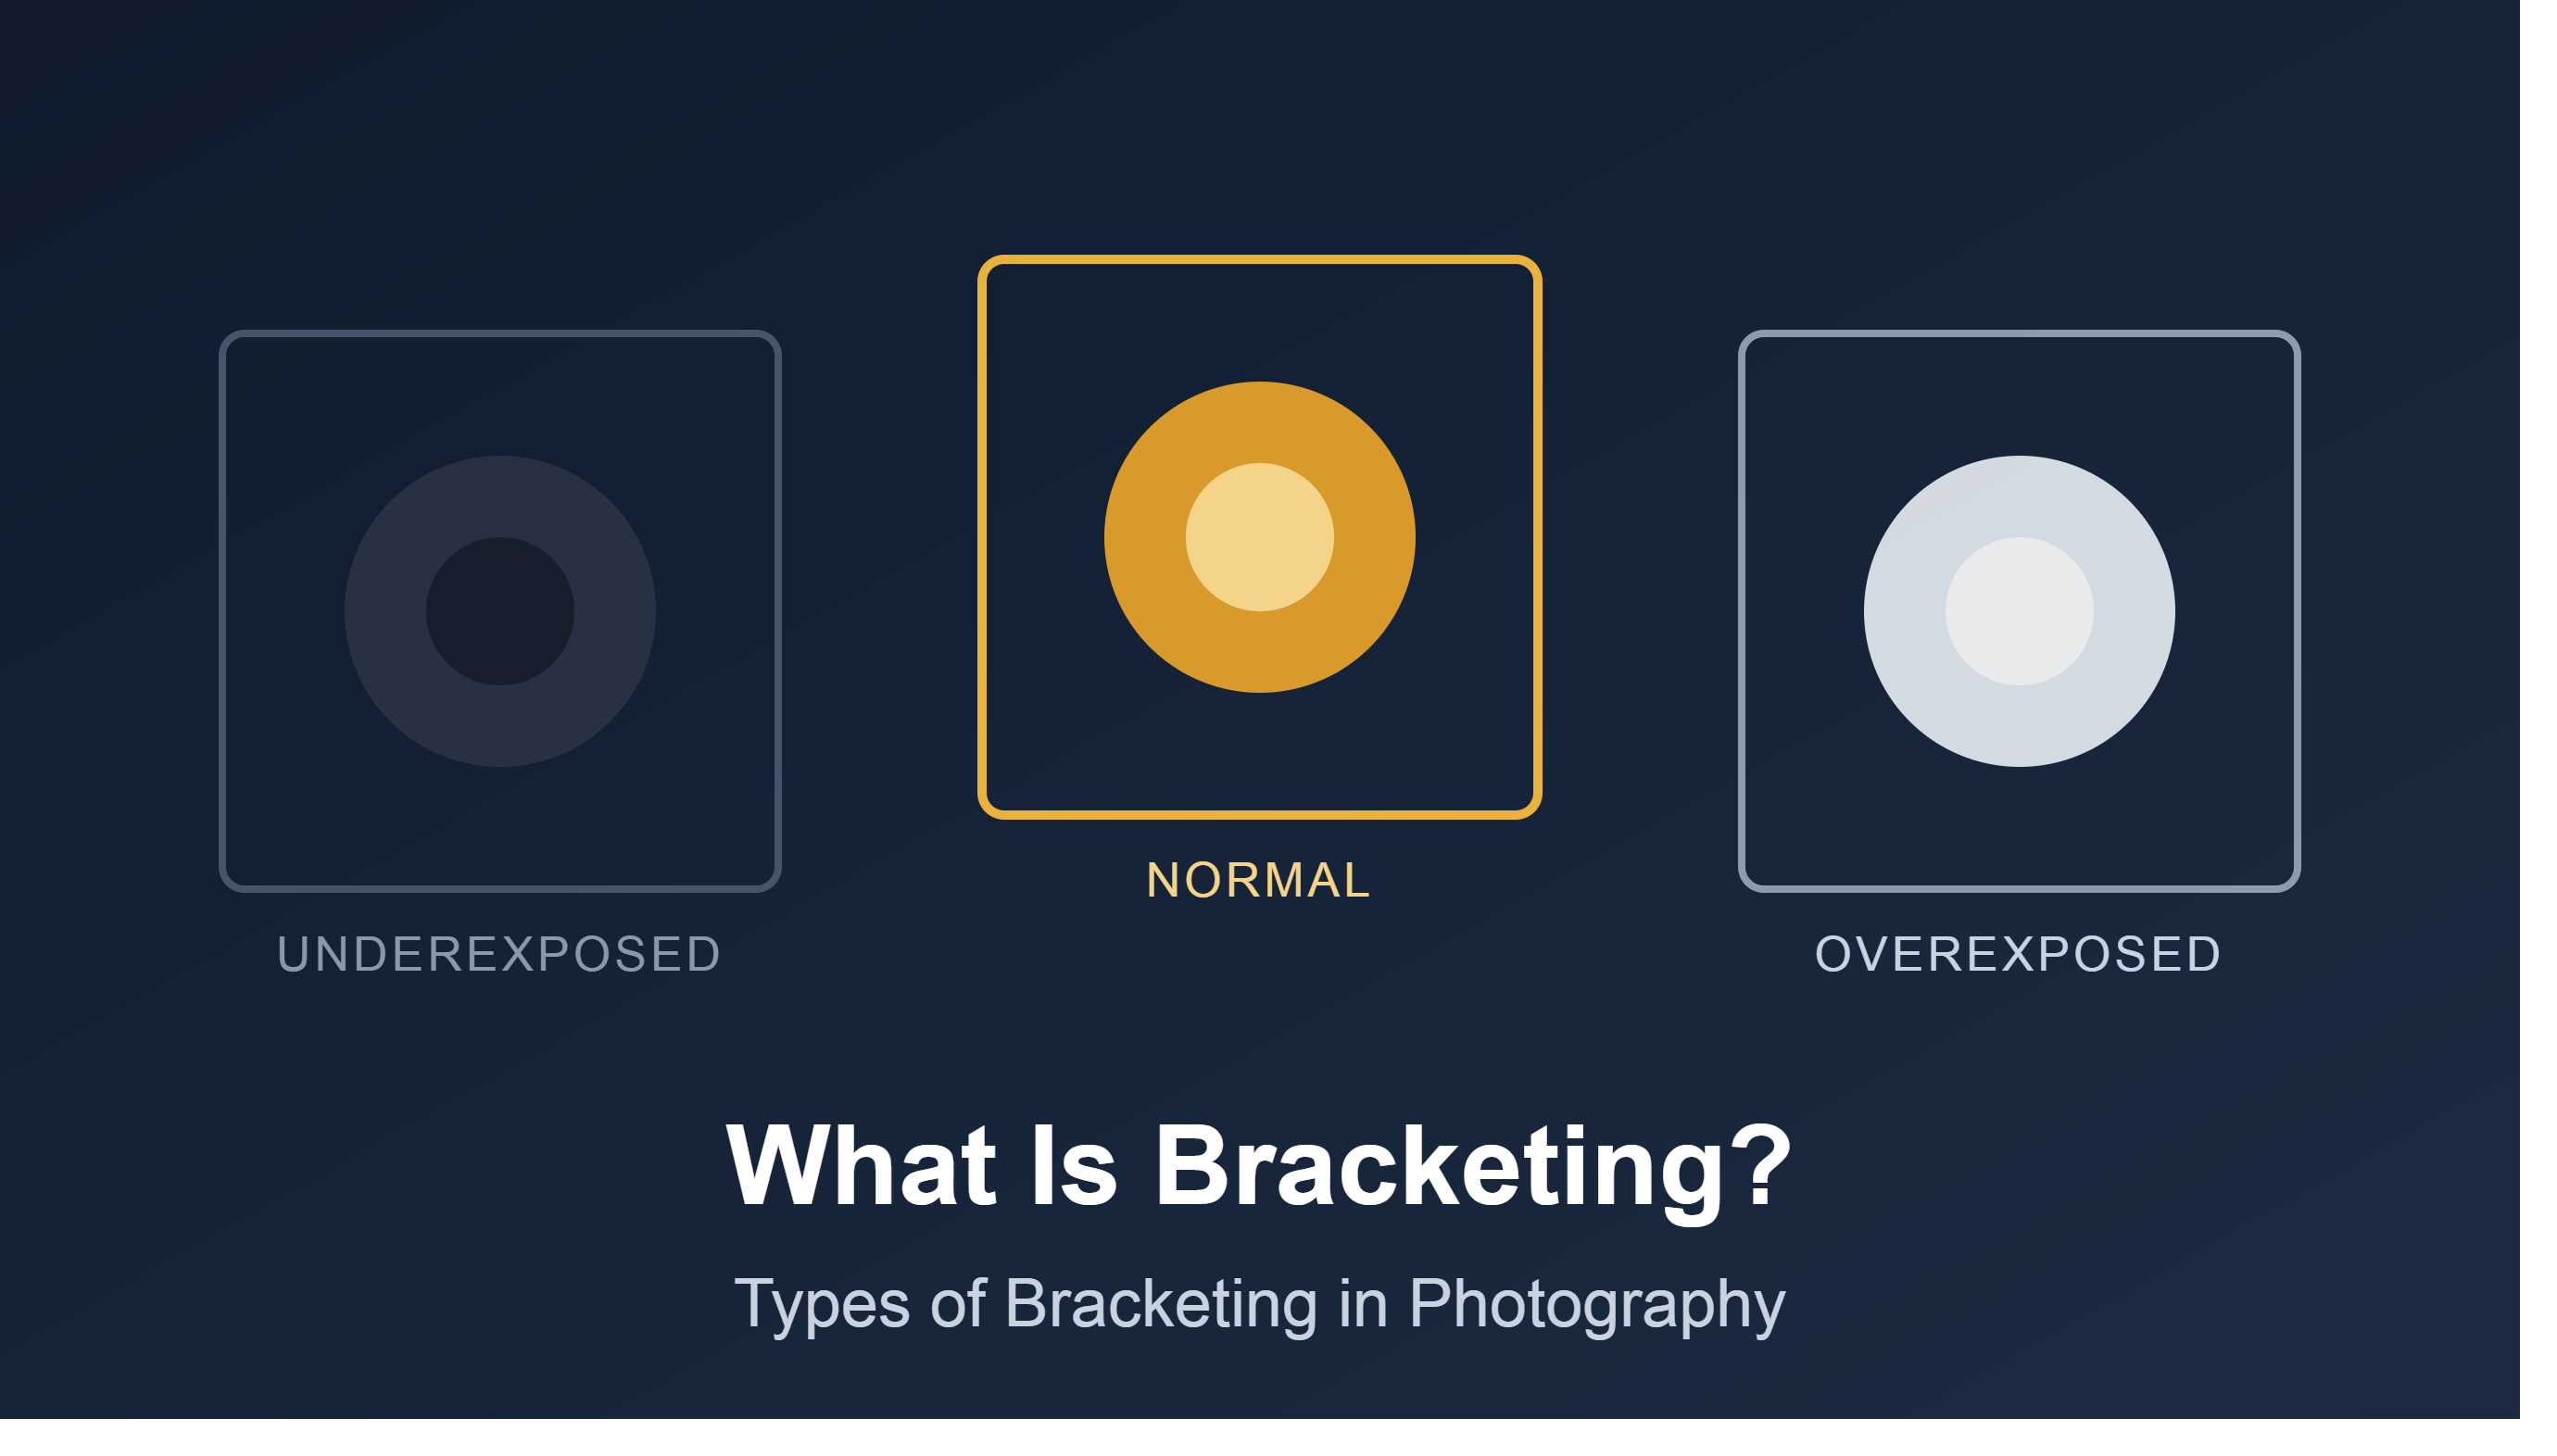
Bracketing is a technique for taking multiple consecutive photos of the same scene with different settings to ensure the maximum amount of information is gathered from the scene.
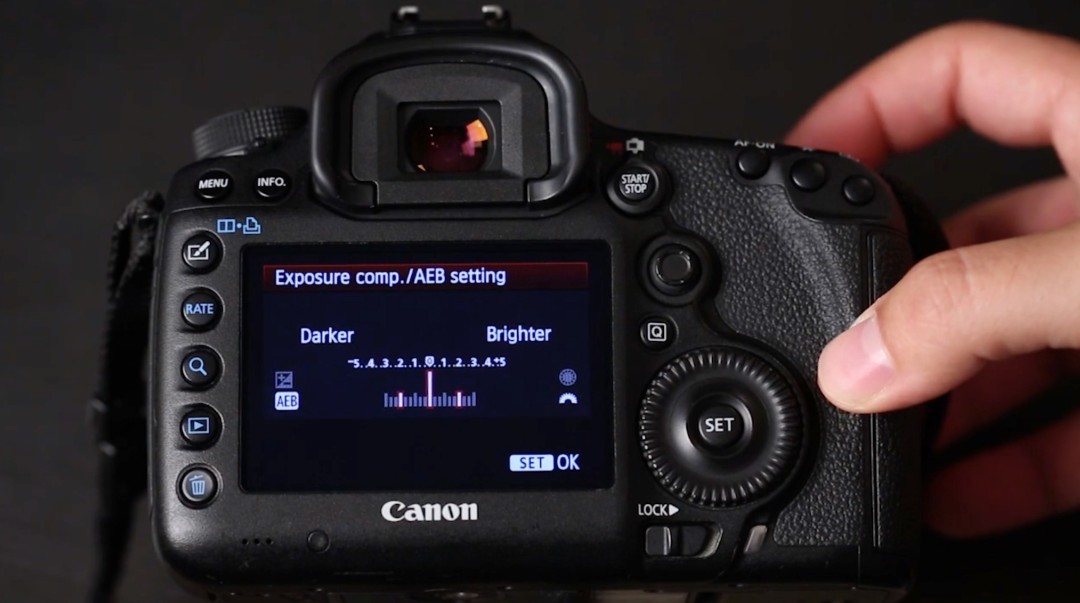
In practice, the most common form is Exposure Bracketing, or exposure compensation. When using this technique, the camera records a series of images with different exposure levels. Typically, one image is taken at standard metering, one or two images are darker, and one or two images are brighter.
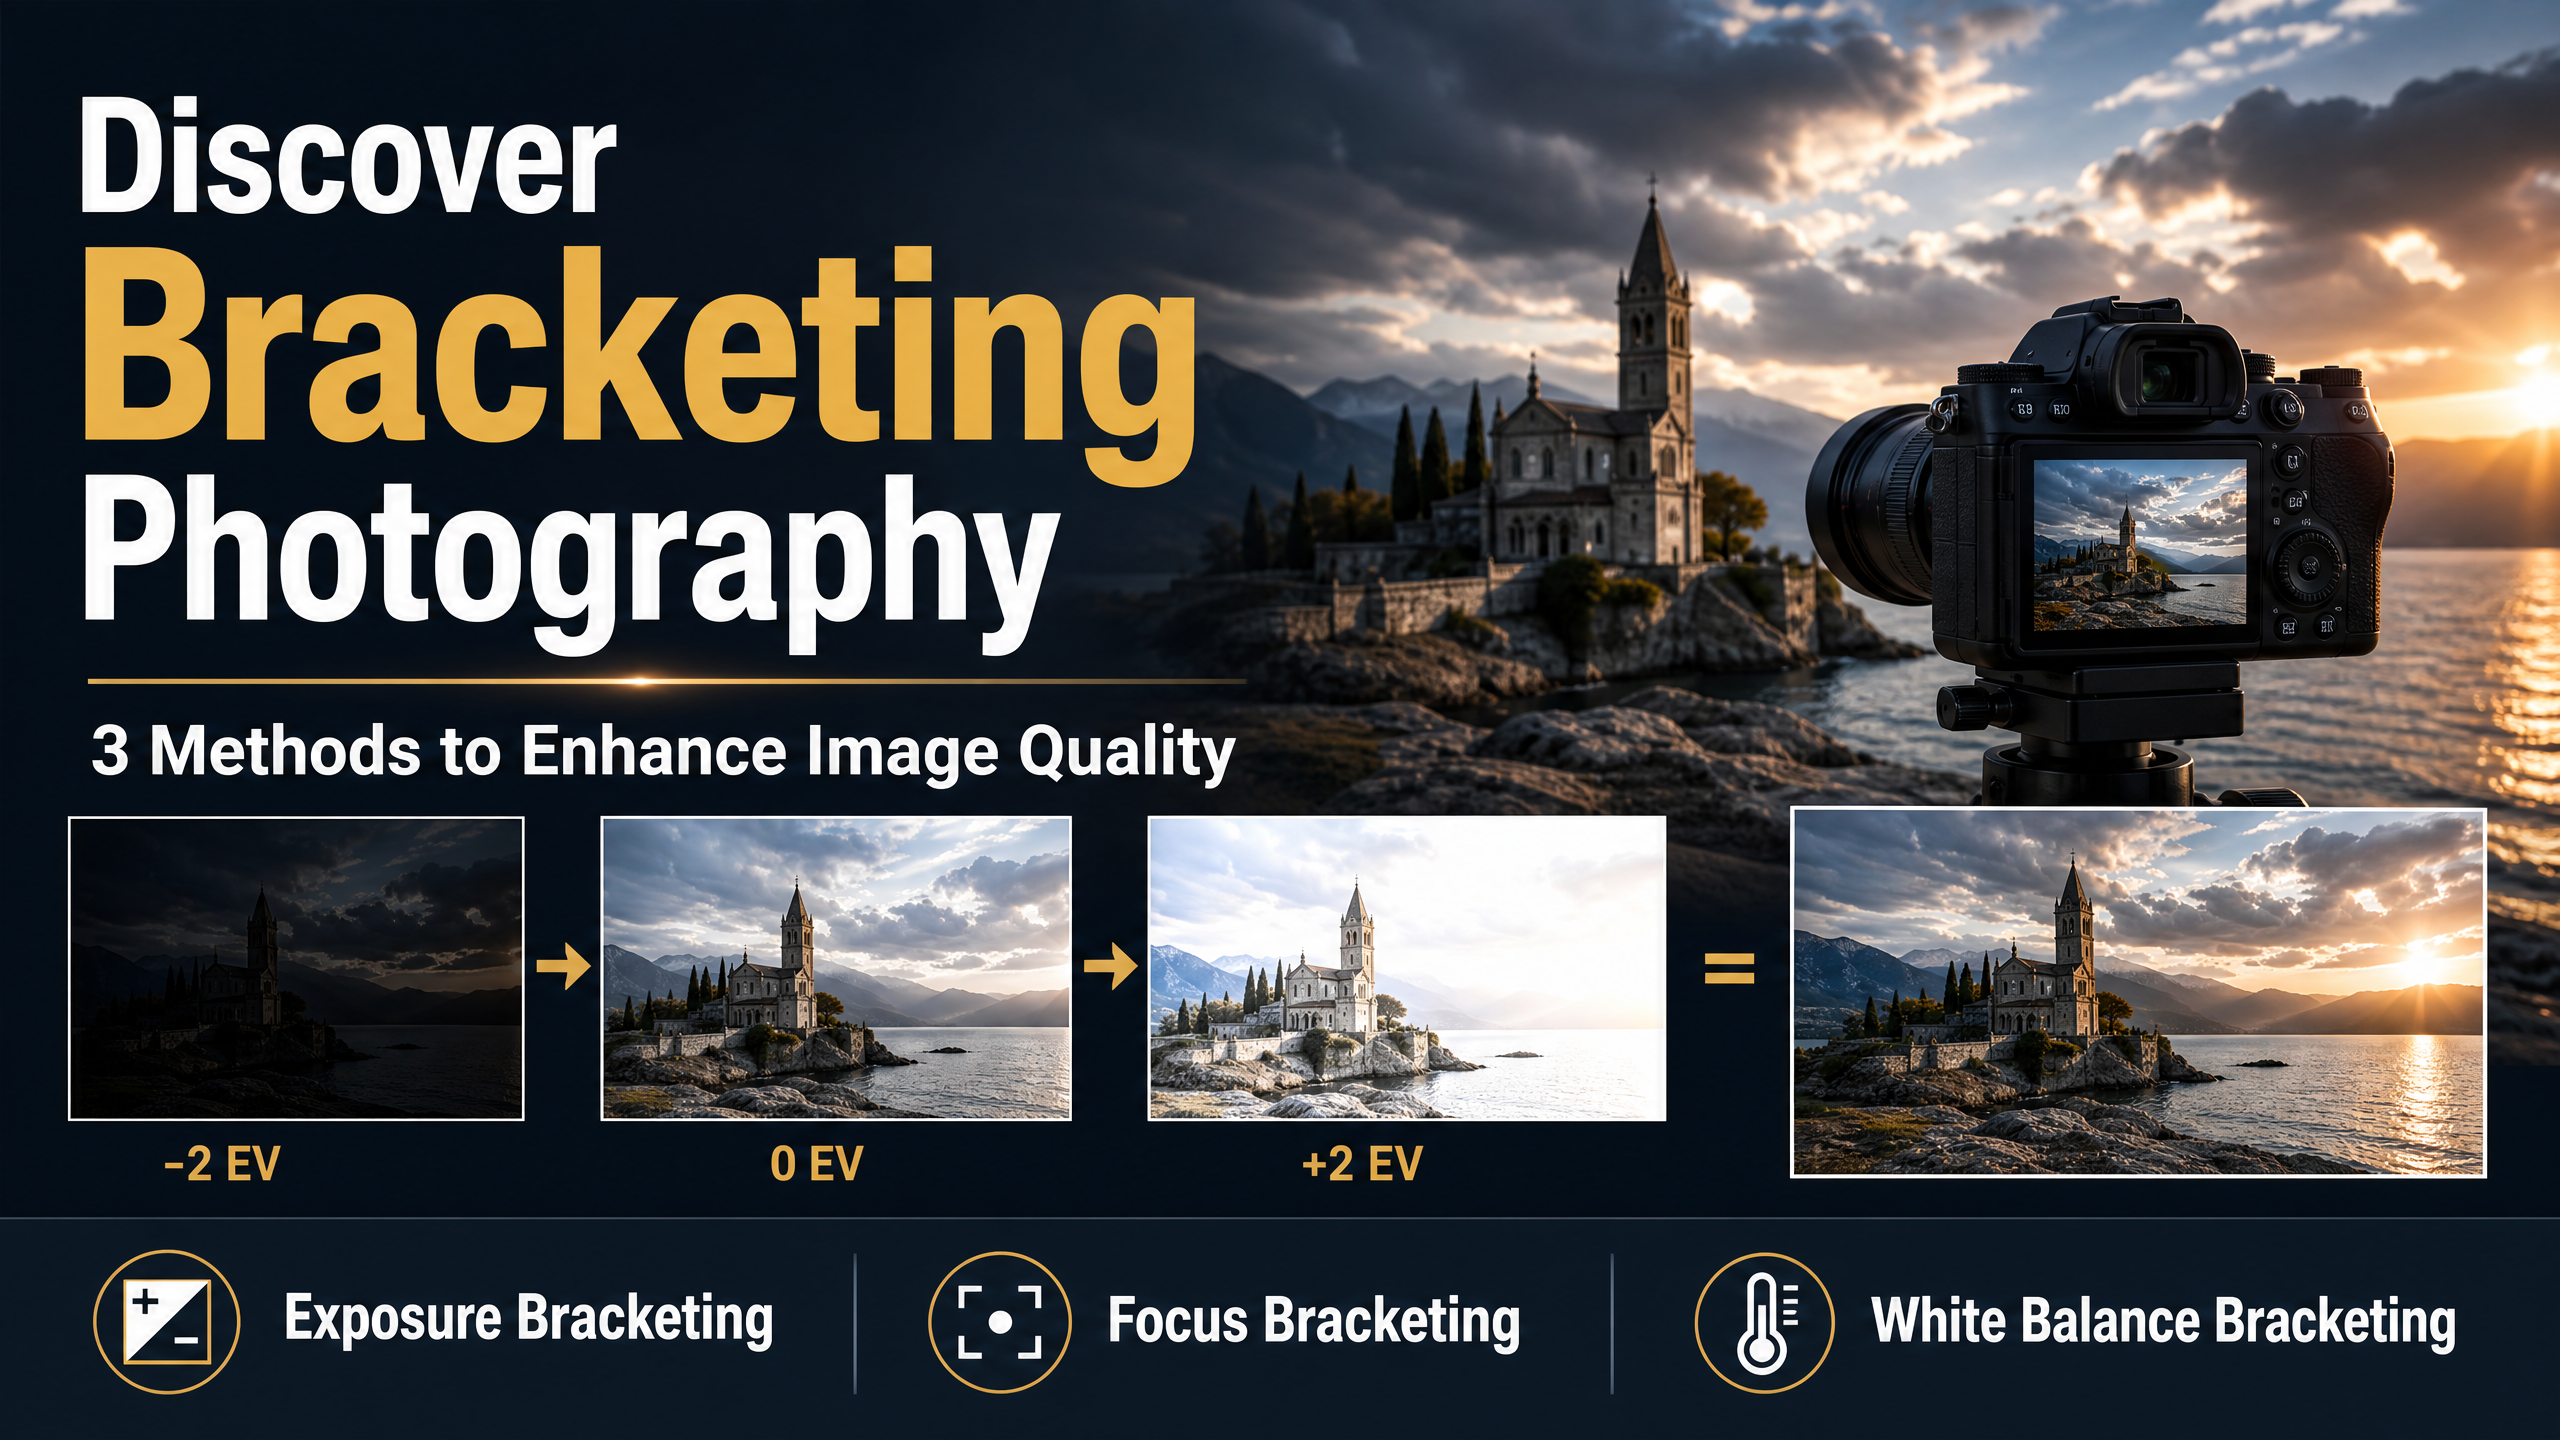
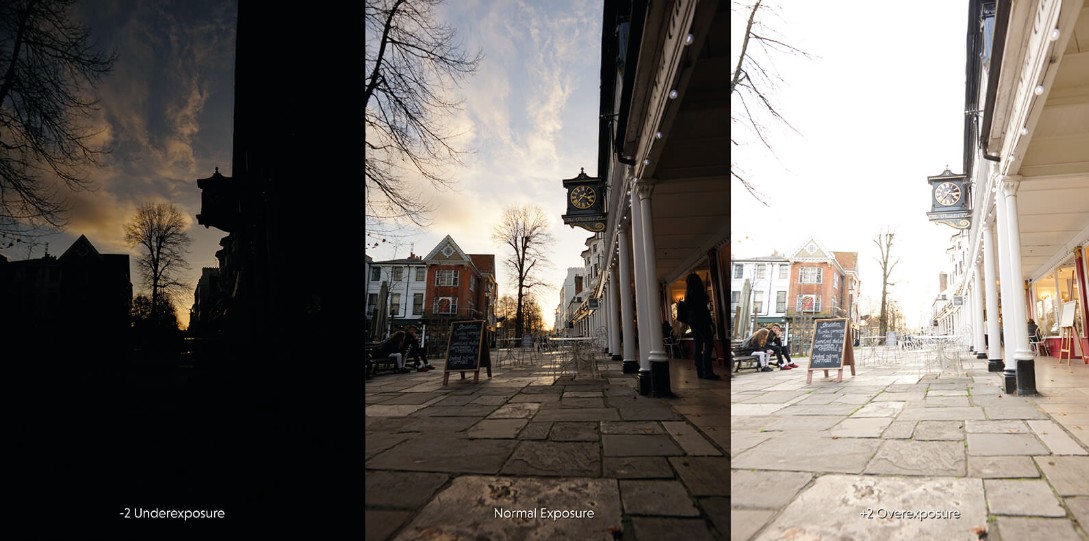
For example, if Bracketing is set to ±2 EV, the camera can produce a series of images including:
The first frame is at -2 EV.
The second frame is at 0 EV.
The third frame is at +2 EV.
As a result, each image will best preserve information in different light areas. Dark images will retain detail in the highlights. Bright images will preserve data in the shadows. Intermediate images maintain overall balance.
These images can then be selected individually or combined in post-processing to create a much more complete image than the individual photos.
What makes bracketing a professional technique isn't the shooting process itself, but its ability to extend the dynamic range of the image. This is what allows photographers to create images with depth and detail far beyond the sensor's limitations.
1.2. Why is bracketing photography the secret weapon for challenging lighting situations?
The human eye has an incredibly good ability to adapt to light. We can simultaneously see a bright sky and details in dark areas.
However, camera sensors cannot do that.
Each sensor has a limited dynamic range. When the difference in light in the scene exceeds this capability, the camera is forced to sacrifice either bright or dark areas.
This is why many landscape photos lose detail in the sky, or interior photos have overexposed windows.
Bracketing solves this problem by dividing the light capture into multiple separate shots.
Dark photos specialize in processing bright areas.
The light is specifically designed to handle dark areas.
Neutral images maintain balance.
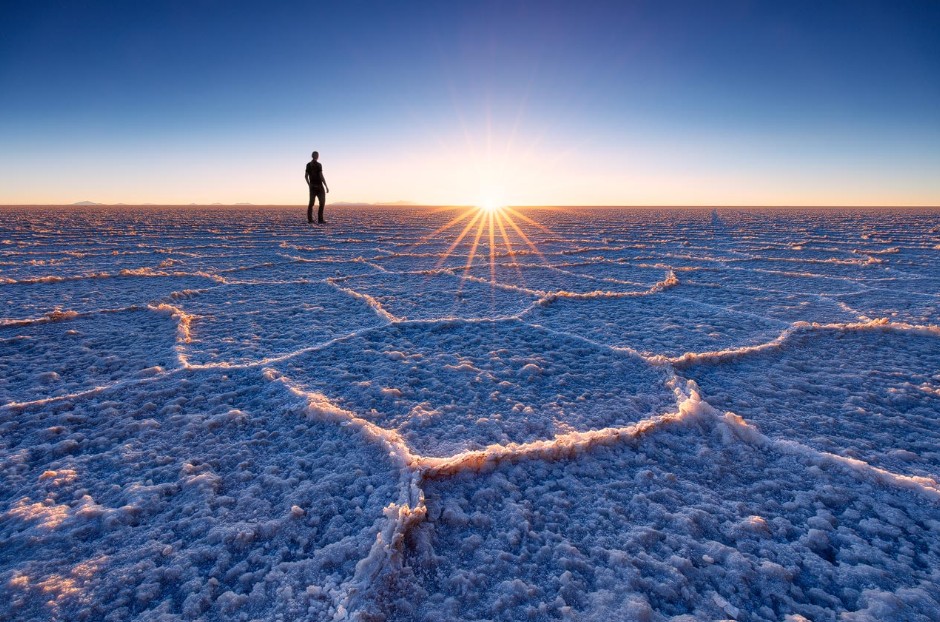
When you combine those frames, you get an image with a significantly wider dynamic range.
This is why this technique is considered the secret behind so many award-winning landscape photographs, high-end real estate photos, and professional architectural photos that appear in international magazines.
2. Discover 3 types of bracketing photography to handle any challenging situation.
When it comes to bracketing, most people only think of changing exposure. However, in reality, this technique has many different variations aimed at solving various problems in modern photography.
2.1. Use Aerial Exposure Bracketing (AEB) to master light and shadow.
AEB stands for Auto Exposure Bracketing.
This is the most common form of bracketing and is found on almost every modern camera.
When AEB is activated, the camera will automatically record multiple frames with different brightness levels with a single press of the shutter button.
The biggest advantage of AEB is its ability to handle scenes with extremely high contrast.
In landscape photography, this technique helps preserve the details of clouds, water, mountains, and the shadows beneath the canopy.
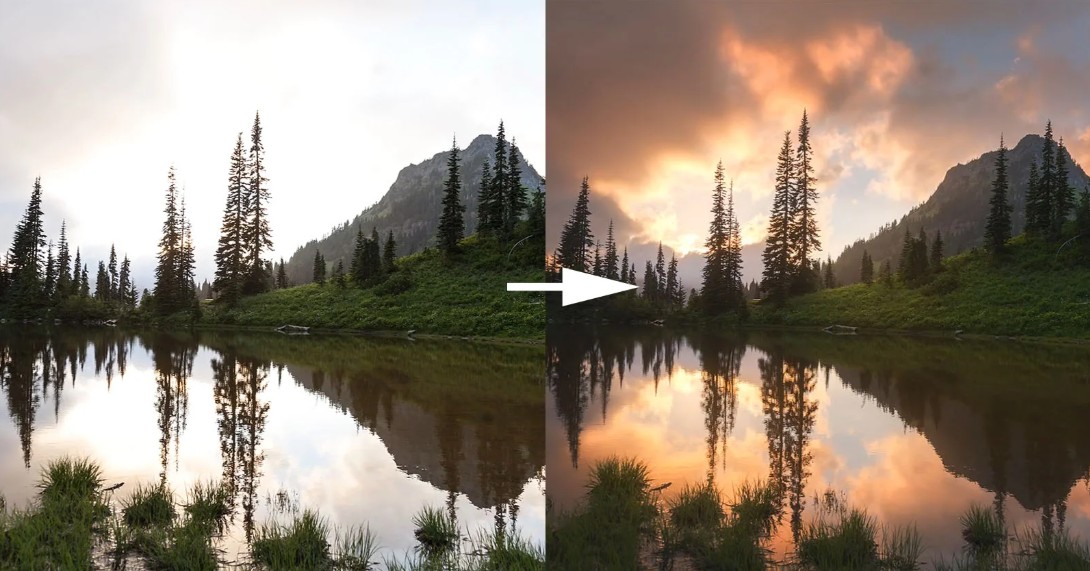
In architectural photography, it helps to simultaneously capture details of the building's facade and the sky behind it.
In interior photography, AEB allows natural light from outside the window to be retained while still ensuring detail within the room is captured.
This is why almost every professional real estate photographer uses bracketing in their daily workflow.
2.2. Use focus point bracketing to optimize sharpness across the entire frame.
Focus bracketing is a technique widely used in macro and landscape photography.
The biggest problem with macro photography is the extremely shallow depth of field. Even when stopping down to f/16 or f/22, it's still very difficult to get the entire subject in sharp focus.
Similarly, in landscape photography, capturing both the flower in the foreground and the mountain range in the background can sometimes be beyond the capabilities of a single focus.
Focus Bracketing solves this by capturing multiple frames with different focus points.
A close-up shot.
A medium focus image.
A telephoto shot.
The images were then stitched together using the Focus Stacking technique.

The end result is an image with sharpness throughout the entire frame.
This technique is widely used in product photography, insect photography, high-end landscape photography, and commercial advertising photography.
2.3. Use bracketing with white balance to ensure the most accurate colors.
White balance bracketing is less common but extremely useful in challenging lighting conditions.
A prime example is a photograph taken in an interior space that blends the warm yellow light of tungsten lamps with the blue natural light from the windows.
In this case, the Auto White Balance system often has difficulty determining the correct color temperature.
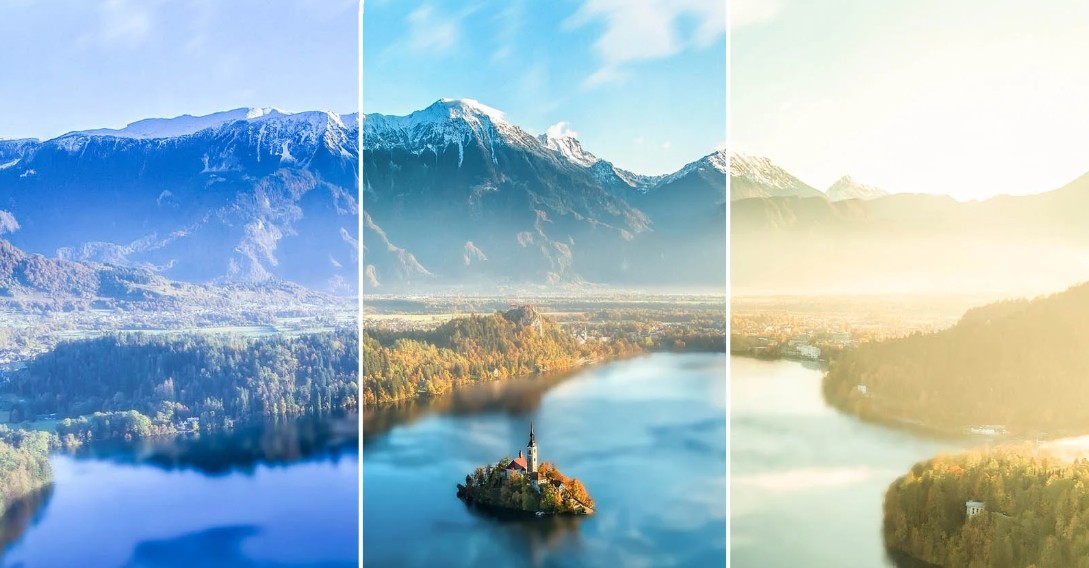
White balance bracketing will create multiple different color variations of the same image.
The photographer can then evaluate the options directly on the screen and choose the most suitable one.
This significantly saves post-production editing time while ensuring more accurate color reproduction.
3. Practical tips and post-production process for bracketing photography.
Understanding the theory is only the first step. What really makes the difference is the ability to apply this technique in real-world shooting conditions.
3.1. Instructions for setting up the camera for accurate bracketing
First, enable Auto Bracketing in the camera menu.
Most cameras today allow you to select from 3 to 9 frames in a bracketing sequence.
For beginners, 3 frames at ±2 EV is usually the most reasonable choice.
Next, switch your camera to Aperture Priority or Manual mode to ensure the aperture remains consistent between shots.
Changing the aperture will alter the depth of field, making image stitching more difficult.
Another important factor is using a tripod.
Although modern software can automatically adjust images, having the frames captured from a fixed position still helps improve the quality of the stitching and minimize errors.
Additionally, using a remote control or timer should be avoided to prevent the machine from vibrating.
When photographing moving subjects such as ocean waves, leaves, or clouds, prioritize high-speed continuous shooting to minimize differences between frames.
3.2. How to combine Bracketing files in post-production to create masterpieces
Once the shooting is complete, the full power of bracketing is truly unleashed during the post-production phase.
Adobe Lightroom is currently the most popular tool for this work.
Users simply select the bracketing images, press HDR Merge, and let the software automatically analyze them.
The Auto Align feature will align the frames.
The Auto Settings feature helps optimize the initial lighting.
The Deghost option helps handle moving objects such as pedestrians, vehicles, or drifting clouds.
After the HDR merging is complete, you will get a DNG file with a superiorly wide dynamic range.
This is where the creative process begins.
Instead of pushing every parameter to its maximum, process the image naturally. The goal of modern HDR is not to create artificial photos with oversaturated colors like the trend was many years ago.
A successful bracketing photograph is one that makes viewers unaware it's composed of multiple separate frames.
4. Mistakes that make bracketing counterproductive
Many beginners often misuse HDR, creating photos with oversaturated colors, unnatural highlights, or unusual contrast.
Another mistake is using bracketing in scenes where it's unnecessary.
If the contrast of the scene is within the sensor's capabilities, bracketing only increases storage space and prolongs processing time.
Additionally, many photographers forget to lock their tripod or shoot too slowly, causing the frames to be out of sync, making it difficult to stitch the images together.
The most important thing is to understand when to use bracketing and when it's not necessary.
Bracketing isn't a flashy technique often mentioned in photography discussions, but it's one of the most powerful tools for creating professional-looking photos.





















VIP Products








Best Selling Products
Genuine Cheap Canva Pro
39 USD
MidJourney Account
29 USD
Genuine Adobe Illustrator account
99 USD
Copyright Adobe Lightroom Account
59 USD
Adobe Photoshop Copyright - Full App
120 USD
Upgrade genuine Capture One account
120 USD
Plugin Retouch4me
69 USD
Upgrade Duolingo Super
29 USD
Windows 10 & 11 Pro Key
36 USD
Freepik Premium Account
59 USD
Upgrade Genuine Office 365
49 USD
Capcut Pro 1 Year
39 USD
Adobe Premiere Pro Account
99 USD
ChatGPT Plus Account (GPT-4)
16 USD
Autodesk All App Account Copyright
120 USD