Best Selling Products

Autodesk All App Account Copyright
120 USD

Freepik Premium Account
59 USD

MidJourney Account
29 USD

Upgrade genuine Capture One account
120 USD

Adobe Premiere Pro Account
99 USD

ChatGPT Plus Account (GPT-4)
16 USD

Windows 10 & 11 Pro Key
36 USD

Genuine Adobe Illustrator account
99 USD

Adobe Photoshop Copyright - Full App
120 USD

Upgrade Genuine Office 365
49 USD

Upgrade Duolingo Super
29 USD

Plugin Retouch4me
69 USD

Capcut Pro 1 Year
39 USD

Genuine Cheap Canva Pro
39 USD

Copyright Adobe Lightroom Account
59 USD
How to fix deep shadows in photoshop
Nội dung
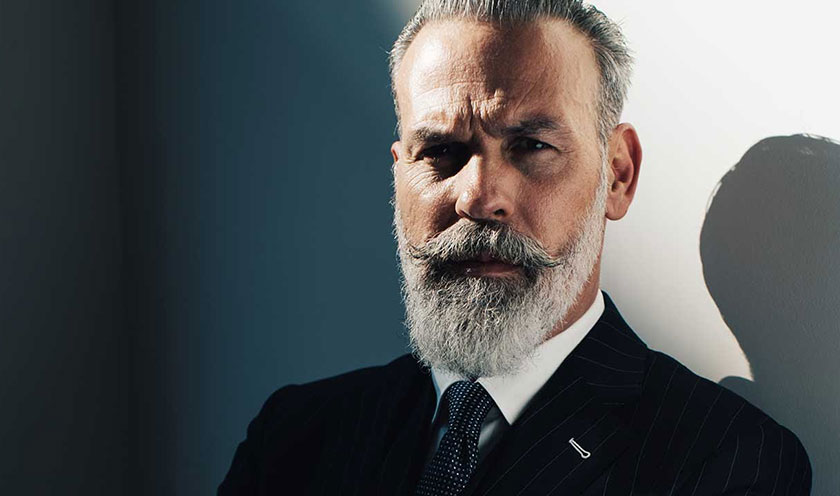 “Levels and Curves” is not necessarily the best tool for adjusting the depth of shadows. Looking at his example in the image below, you'll see how quick adjustments made with these tools can lead to overblown highlights.
 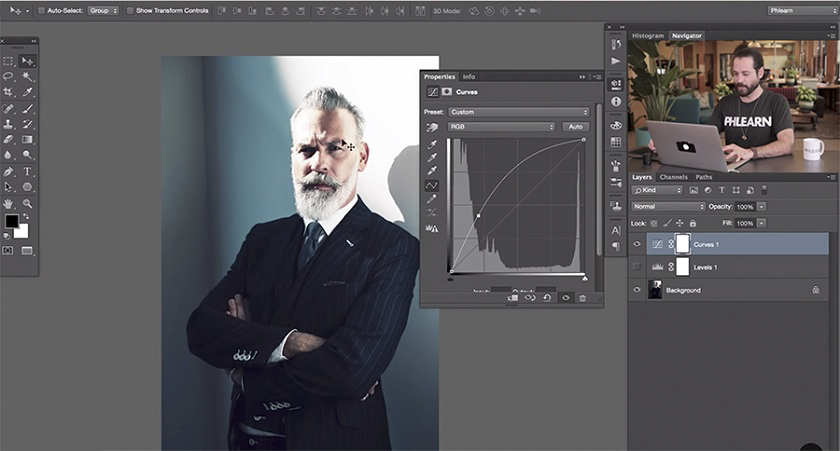 Using Curves: creating a point in the shadow of the line and dragging it up results in unwanted changes to the highlights and midtones.
 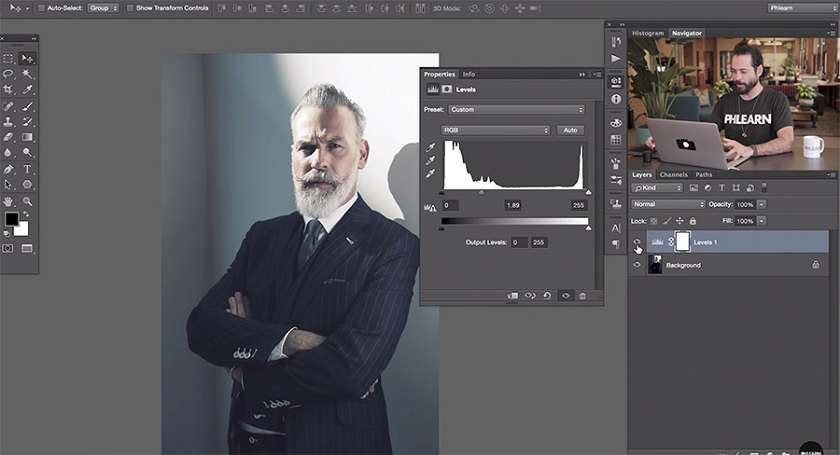 Moving the sliders in the Adjustment Panel will either blur the image or result in blown highlights. So instead of using those tools, you can use the Shadows / Highlights tool
 Shadows / Highlights
The Shadow/Highlight tool is a method for correcting images with shadows caused by strong backlighting or for correcting subjects that are slightly blown because they are too close to the camera flash. Adjustments can also be used to lighten shadow areas in a well-lit image. The Shadow/Highlight tool does more than simply lighten or darken an image; it lights up or darkens based on the surrounding pixels (local neighborhood) in the shadow or highlight. For this reason, there are separate controls for shadows and highlights. Defaults are set to correct images with backlight problems. The Shadow/Highlight tool also has a Midtone Contrast slider, a Black Clip option and a White Clip option to adjust the overall contrast of the image, and a Color Correction slider to adjust saturation. Note: Remember that the Shadow / Highlight command applies adjustments directly to the image and will remove the image information. For non-destructive image editing, you should use adjustment layers or Camera Raw.Adjusting Shadows and Highlights
- Select Menu Bar > Image > Adjustments > Shadows/Highlights: Make sure that the Preview option is selected in the dialog box if you want the image to be updated as you make adjustments.
- Adjust the amount of light correction by moving the Amount slider or entering a value in the Shadows or Highlights percentage box. Larger values provide greater shadow brightness or more highlight darkness. You can adjust both Shadows and Highlights in an image.
- For greater control, check the Show More Options box to make additional adjustments.
Shadow / Highlight tool options
Amount
Controls (separately for highlight and shadow values in the image) the amount of correction to be made. Note: Extreme Amount values can lead to a crossover, where what starts as a highlight becomes darker than what begins as a shade; this can make the adjusted image look 'unnatural'.Tonal Width
Control the tonal range in shadows or modified highlights. Smaller values constrain the adjustments to darker areas to correct for shadows and lighter areas to correct highlights. A larger value increases the tonal range that is tuned deeper into the mids. For example, at 100% of the shadow-tone-width slider that affects the shadows the most, the mids are partially affected, but the brightest highlights are unaffected. Color width varies depending on the image. Values that are too large can create halos around dark or light edges. The default settings try to reduce these components. Halos can also occur when the Amount Shadow or Highlight value is too large. Note: Tonal Width is set to 50% by default. If you find that you're trying to lighten a dark subject but the midtones or lighter areas are changing too much, try reducing the Shadow Tone Width to zero so that only the darkest areas are lightened. However, if you want to lighten the mid tones as well as the shadows, increase the Shadow Tone Width of the Shadows to 100%Radius
Controls the size of the local neighborhood around each pixel. Neighboring pixels are used to determine if a pixel is in a dark or a light area. Moving the slider to the left specifies a smaller area, and moving it to the right specifies a larger area. The optimal local neighborhood size depends on the image. Best to experiment with tuning. If the radius is too large, the adjustment tends to lighten (or darken) the entire image rather than just lightening the subject. It's best to set a radius roughly equal to the size of the objects of interest in the image. Experiment with different Radius settings to get the best balance between your subject's contrast and how bright (or dark) it is from the background.Brightness
Adjust brightness in grayscale image. This adjustment is only available for grayscale images. Moving the Brightness slider to the left will darken the grayscale image, and moving the slider to the right will lighten the grayscale image.Midtone Contrast
Adjust the contrast in the midrange. Move the slider left to decrease contrast and right to increase contrast. You can also enter a value in the Midtone Contrast box. Negative values decrease contrast and positive values increase contrast. Increasing midtone contrast creates more contrast in midtones while tending to darken the dark areas and lighten the highlights.Black Clip and White Clip
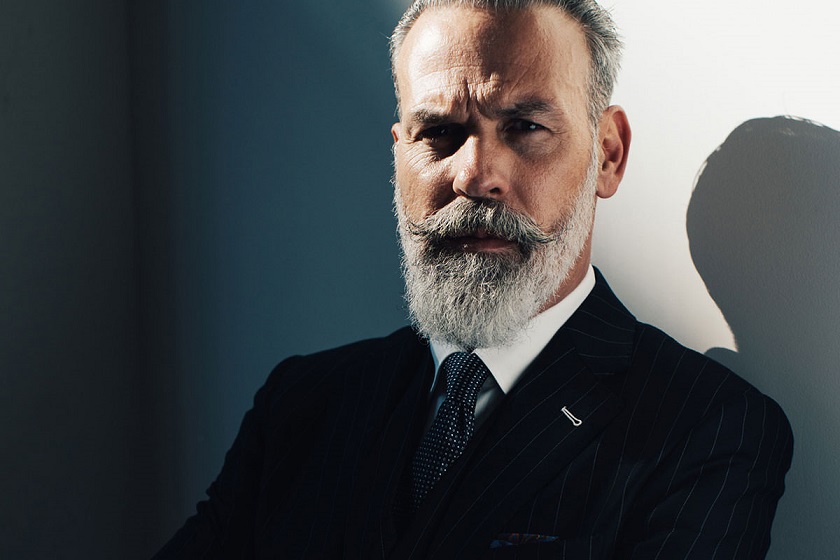
Specify how much shadows and highlights are clipped to the new maximum (level 0) and highlight color (level 255) in the image. A larger value produces an image with greater contrast. Be careful not to make the clipping values too large, as doing so will reduce detail in the shadows or highlights (intensity values are clipped and displayed as jet black or pure white) . Some things to keep in mind when playing with the Shadows / Highlights slider, keep the Radius low and try to find a balance between Amount and Tone by adjusting the sliders to the right slowly. Adjust the slider only as needed. You may not even need to touch the Highlights slider and you certainly don't want to overdo any changes as this will give your image a cartoon-like quality. After watching the video, keep this tool in mind the next time you face deep darkness: [embed]https://www.youtube.com/watch?v=hHpYpT-lZyE[/embed]


VIP Products


Best Selling Products
Autodesk All App Account Copyright
120 USD
Freepik Premium Account
59 USD
MidJourney Account
29 USD
Upgrade genuine Capture One account
120 USD
Adobe Premiere Pro Account
99 USD
ChatGPT Plus Account (GPT-4)
16 USD
Windows 10 & 11 Pro Key
36 USD
Genuine Adobe Illustrator account
99 USD
Adobe Photoshop Copyright - Full App
120 USD
Upgrade Genuine Office 365
49 USD
Upgrade Duolingo Super
29 USD
Plugin Retouch4me
69 USD
Capcut Pro 1 Year
39 USD
Genuine Cheap Canva Pro
39 USD
Copyright Adobe Lightroom Account
59 USD