Best Selling Products

Copyright Adobe Lightroom Account
59 USD

Capcut Pro 1 Year
39 USD

Adobe Photoshop Copyright - Full App
120 USD

Windows 10 & 11 Pro Key
36 USD

Upgrade genuine Capture One account
120 USD

Upgrade Duolingo Super
29 USD

ChatGPT Plus Account (GPT-4)
16 USD

Upgrade Genuine Office 365
49 USD

Adobe Premiere Pro Account
99 USD

Autodesk All App Account Copyright
120 USD

MidJourney Account
29 USD

Genuine Adobe Illustrator account
99 USD

Freepik Premium Account
59 USD

Genuine Cheap Canva Pro
39 USD

Plugin Retouch4me
69 USD
Flare Effect In Photography: Create An Artistic Impression For Your Photos
Nội dung
- 1. What is the Flare Effect in Photography?
- 2. Types of Flare in Photography
- 2.1. Flare Đĩa (Lens Flare Disc)
- 2.2. Streak Flare
- 2.3. Colored Lens Flare
- 2.4. Motion Flare (Bokeh Flare)
- 2.5. Auction Flare
- Characteristic :
- 2.7 Starburst Flare
- 3. Reasons Why Photographers Choose to Use the Flare Effect
- 3.1. Create Naturalness and Emotion
- 3.2. Enhance Depth and Space
- 3.3. Create a Personal Imprint for Your Work
- 4. How to Use Flare Effects in Photography
- 4.1. Shoot at Bright Angle
- 4.2. Using Special Filters (Lens Filter)
- 4.3. Adjust Camera Position and Lighting
- 4.4. Explore Different Prisms and Lenses
- 5. Common Errors When Using Flare and How to Fix Them
- 5.1. Flare is Too Strong
- 5.2. Unwanted Flare
- 6. Conclusion
The flare effect in photography is an interesting technique that helps create artistic highlights, adding depth and emotion to a photo. Let's learn about the flare effect and how to use it in photography to create impressive photos.
In photography, the flare effect (also known as lens flare) is not only a random element but also a technique to create a strong highlight for the photo. Although it can cause loss of detail in the image, when used properly, flare can create beautiful, impressive and emotional photos. This article sadesign will help you understand the flare effect, how it affects the photo, as well as how to take advantage of this technique to enhance your photography work.
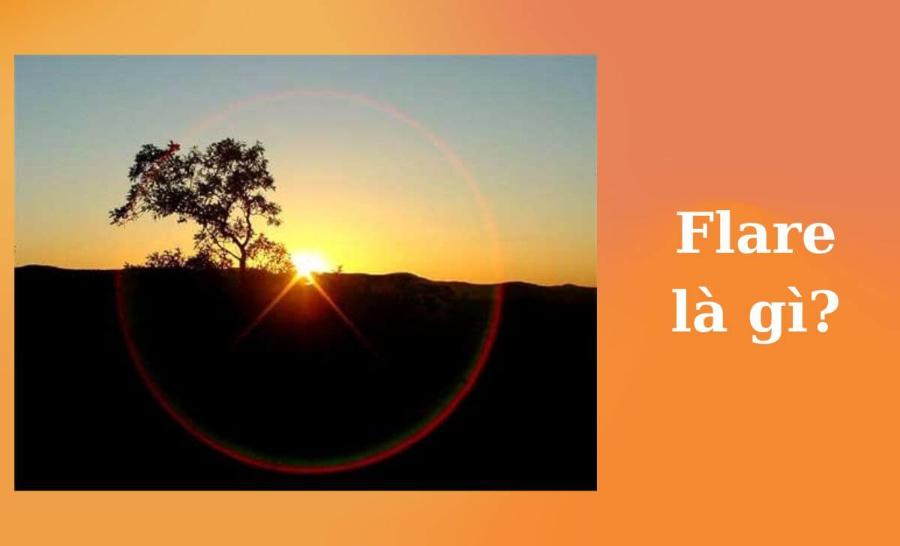
1. What is the Flare Effect in Photography?
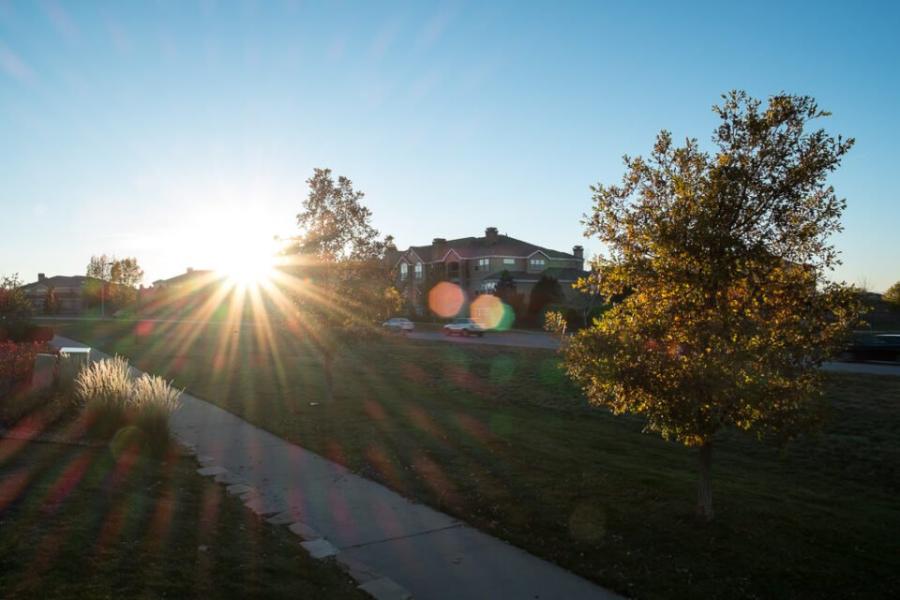
Flare in photography is the phenomenon of light spreading into a camera lens, causing streaks or bright circles around a strong light source. This phenomenon occurs when strong light such as the sun or a lamp shines directly into the lens, causing the light to reflect and scatter in the camera's lenses. As a result, images can appear as streaks or ghosts, sometimes with strange circular images, bright arcs or streaks of light.
Flare can have an unwanted effect on a photo, making it blurry or reducing contrast, but if used intentionally, flare can create impressive photos that are full of the photographer's personal stamp.
2. Types of Flare in Photography
Flares don't always look the same in every photo, and they can vary depending on factors like the angle of light, the type of lens, and the equipment used. Here are the common types of flares in photography:
2.1. Flare Đĩa (Lens Flare Disc)
This is the most basic type of flare, usually appearing as a circle or disk of light. These disks can appear anywhere in the image and often create a sense of space and depth in the image. They can be used to highlight a particular light source or to enhance the artistic qualities of the image.
The main cause is that the light is not controlled or not completely absorbed, leading to the phenomenon of scattering and creating halos or bright spots on the image. In particular, when using a lens with many optical elements or without an effective anti-reflective coating, the possibility of Disc Flare will increase. In addition, the angle and intensity of the light source also play an important role in the formation of this phenomenon. To minimize Disc Flare, users can use accessories such as lens hoods or adjust the shooting angle to avoid direct light shining on the lens.
2.2. Streak Flare
Light trails are a type of flare that creates bright lines extending from the main light source. They typically occur when light enters the camera lens at a narrow angle or when you shoot into a strong light source like the sun. Light trails can create movement or time in a photo, making it dynamic and captivating.
Streak flare is usually caused by the reflection or refraction of light as it passes through the lens surfaces or optical components of a recording device, such as a camera or camcorder. It occurs when bright light, often from a direct light source such as the sun, headlights, or spotlights, hits the lens at an angle, creating streaks or unwanted lighting effects in the frame. Factors such as lens quality, anti-reflective coating, and the angle of the light source all play a role in the formation and visibility of streak flare. This phenomenon can be controlled or minimized through the use of a lens hood, adjusting the shooting angle, or using high-quality optical equipment with effective anti-reflective coatings.
2.3. Colored Lens Flare
Sometimes, when strong light hits the lens, the flare effect can produce different colors, such as red, yellow or blue. These colors can create photos with depth and sharp lighting effects, creating a mysterious or dramatic feeling for the photo.

The cause of the Colored Lens Flare phenomenon mainly comes from the dispersion of light when passing through the lens surfaces in the optical system of a camera or recording device. When strong light, such as sunlight or a high-intensity artificial light source, shines directly on the lens, it is reflected and refracted through multiple layers of the lens. During this process, different wavelengths of light are separated, creating an optical effect with various colored light streaks. In addition, this phenomenon can be enhanced by lens quality, insufficient anti-reflective coating, or non-ideal lighting angle. Although generally considered an undesirable phenomenon in professional photography, Colored Lens Flare is sometimes used intentionally to create unique artistic effects in photos or videos.
2.4. Motion Flare (Bokeh Flare)
Bokeh flare occurs when a bright light source enters the lens at a particular angle, creating small circles or blurred images around the main subject. This type of flare is often used by photographers to create beautiful, highly artistic effects.
The cause of the Bokeh Flare phenomenon often comes from the way light interacts with the camera lens when shooting in bright light conditions or direct light sources. This phenomenon occurs when light passes through the optical components in the lens, is reflected or scattered, resulting in the creation of light streaks or characteristic blur effects. In addition, the quality of the lens, anti-reflective coating (coating) and the way the aperture is adjusted also play an important role in forming and controlling this phenomenon. In particular, Bokeh Flare is often used in artistic photography to create unique visual effects, enhancing the aesthetics of the photo.
2.5. Auction Flare
Veiling Flare is a common optical phenomenon in photography, especially when using low quality lenses or in strong lighting conditions.
Characteristic :
Appears as a thin layer of fog or film covering the entire frame.
Reduces image contrast and sharpness.
Usually has no specific shape, but blurs the entire image.
Reason :
High intensity light enters the lens from outside the viewing angle.
Often occurs when taking photos against the light or in strong lighting conditions.
To limit this phenomenon, users can use a lens hood, adjust the shooting angle or choose high-quality lenses with good anti-reflective coating.
2.6 Ghosting Flare
Characteristic :
Creates "ghost" or shadow images of light sources.
Usually shaped like the lens aperture (e.g. circular, polygonal).
Can appear in many different locations in the image.
Reason :
Light is reflected many times between the lenses in the lens.
Lens quality and anti-reflective coating affect the degree of ghosting.
Factors such as the quality of the anti-reflective coating on the lens, the number of elements in the lens, as well as the angle of light and the arrangement of the light source can all affect the amount of Ghosting Flare.
To minimize this phenomenon, users can use high-quality lenses with good anti-reflective coating, adjust the shooting angle or use a sun hood to control unwanted light.
2.7 Starburst Flare
Characteristic :
Creates a "ray" or "star" effect around the light source.
Often appears when shooting with small apertures (eg f/8, f/11).
The number of light rays depends on the number of aperture blades of the lens.
Reason :
Strong light enters the lens when shooting with a small aperture.
The phenomenon of diffraction of light through the aperture blades.
Additionally, this phenomenon can also become more apparent in bright light conditions or when using a small aperture, which increases the sharpness of the light rays. Understanding the characteristics and causes of Starburst Flare helps photographers better control this effect in the image creation process.
Other rare types of Flare
Red Dot/Sensor Flare : Appears as red dots or streaks on the screen, caused by light reflecting between the sensor and the lens. Commonly found in mirrorless cameras.
Anamorphic Lens Flare : Creates long light streaks, commonly seen in movies using anamorphic lenses.
Note
Each type of flare has different characteristics and causes.
Understanding the different types of flares helps you control and use them effectively.
Flare can be an unwanted bug, but can also be used as an artistic effect.
3. Reasons Why Photographers Choose to Use the Flare Effect
Flares don’t always have a negative impact on a photo. On the contrary, they can create unique and creative photos that feel natural and artistic. Here are some reasons why photographers choose to use flares in their work:
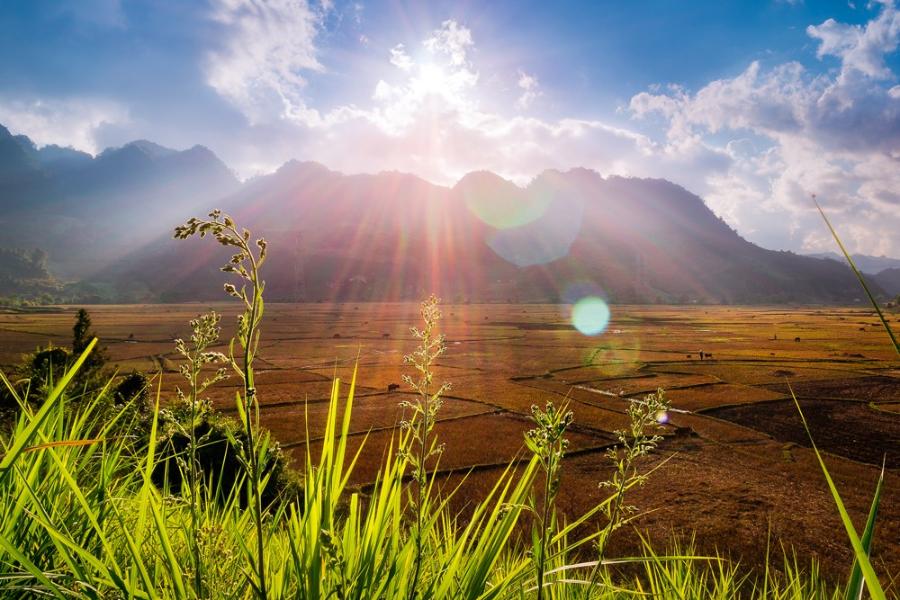
3.1. Create Naturalness and Emotion
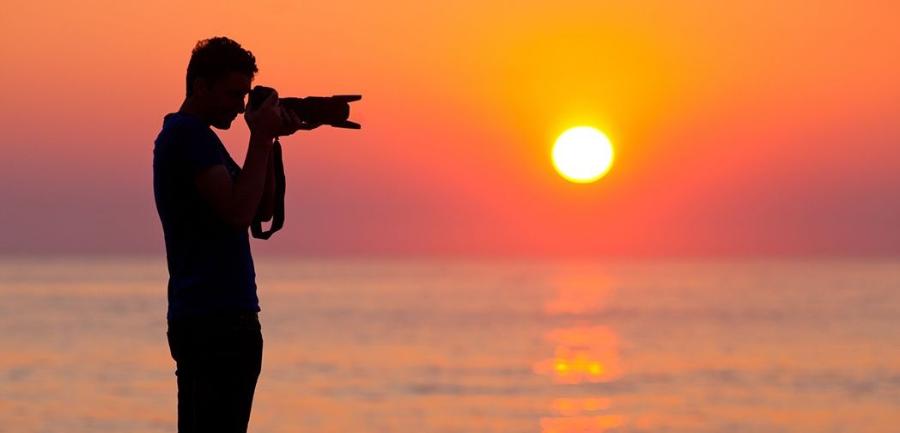
One of the main reasons why flare is such a useful tool in photography is its ability to create a natural, warm feel. Flare can create a soft, fuzzy effect that makes a photo feel dynamic and full of emotion. This is especially useful when shooting nature scenes, sunrises or sunsets.
Lens flare, when used correctly, can be soft and realistic, helping to recreate the natural atmosphere of a scene. At the same time, this effect can create a visual highlight that evokes a sense of warmth, romance or nostalgia, depending on how the photographer handles it. It is this combination of technique and emotion that makes the flare effect such a creative option in modern photography.
3.2. Enhance Depth and Space
Flares can add depth to a photo, creating a three-dimensional feel and enriching the space in a photo. Combining flares with elements like natural light or backlighting can highlight the subject and help them blend into the surrounding scene.
By taking advantage of light reflecting through the lens, this effect creates a soft, natural and emotional feel, while highlighting the contrast between light and shadow. When used correctly, flare can bring a romantic or nostalgic atmosphere to a work, drawing the eye and evoking an emotional connection from the viewer. However, to achieve the best effect, the photographer needs to understand how to control the angle of light, the right lens and the overall setting to avoid losing important details in the frame.
3.3. Create a Personal Imprint for Your Work
Flare effects can help photographers create a unique personal style. By controlling and being creative in their use of flare, photographers can add a new element to their photos, highlighting the design style and emotional expression in each photo.
When light hits the lens directly, flare creates a soft, warm, or even dreamy feel, adding emotional depth to the image. Using this effect requires finesse and experience, because if not well controlled, flare can lose important details or make the image look cluttered. However, when applied correctly, the flare effect not only highlights the photographer's own style but also contributes to conveying a unique story and message, making a difference in the competitive world of photography.
4. How to Use Flare Effects in Photography
While flares can occur naturally, to get the most out of them, photographers need to understand how to use them intentionally. Here are some tips to help you create flares creatively and effectively:
4.1. Shoot at Bright Angle
To create a flare, you need a strong light source, such as the sun or a flashlight, shining into the camera from an angle. Try shooting with the light shining directly into the lens from a low or tilted angle to create the streaks or discs of light characteristic of a flare.
4.2. Using Special Filters (Lens Filter)
Some photographers use special filters to adjust and control flare in their photos. Polarizers or polarizing filters can help reduce unwanted flare and create more pleasing lighting effects.
4.3. Adjust Camera Position and Lighting
If you want to have a lot of control over the flare effect in your photos, adjusting your camera position and lighting is important. Changing the camera angle, distance from the light source, or even adjusting the aperture of your camera can help you create the flare you want.
4.4. Explore Different Prisms and Lenses
Using different types of lenses can also affect how flare appears in a photo. Wide-angle lenses tend to produce stronger flare, while telephoto lenses can create softer, more blurred effects. Experiment with different lenses to create unique photos.
5. Common Errors When Using Flare and How to Fix Them
While flare can be a powerful tool in photography, if not used carefully it can degrade the quality of your photos. Here are some common flare mistakes and how to fix them:
5.1. Flare is Too Strong
Too much flare can cause loss of detail in the photo and loss of contrast. To fix this, you can adjust the camera aperture or use filters to reduce the impact of the flare.
5.2. Unwanted Flare
Sometimes flare can be unwanted and cause unsightly light trails. To avoid this, make sure you have good control over the position of your light and camera.
6. Conclusion
The flare effect in photography is not only a technical phenomenon but also a powerful tool for creating artistic images. When used correctly, flare can bring mystery, warmth and depth to a photo, while expressing the photographer's personal style. Experiment with this effect in your projects to create impressive and unique works.


VIP Products


Best Selling Products
Copyright Adobe Lightroom Account
59 USD
Capcut Pro 1 Year
39 USD
Adobe Photoshop Copyright - Full App
120 USD
Windows 10 & 11 Pro Key
36 USD
Upgrade genuine Capture One account
120 USD
Upgrade Duolingo Super
29 USD
ChatGPT Plus Account (GPT-4)
16 USD
Upgrade Genuine Office 365
49 USD
Adobe Premiere Pro Account
99 USD
Autodesk All App Account Copyright
120 USD
MidJourney Account
29 USD
Genuine Adobe Illustrator account
99 USD
Freepik Premium Account
59 USD
Genuine Cheap Canva Pro
39 USD
Plugin Retouch4me
69 USD