Best Selling Products

ChatGPT Plus Account (GPT-4)
16 USD

Genuine Adobe Illustrator account
99 USD

Autodesk All App Account Copyright
120 USD

Adobe Premiere Pro Account
99 USD

Capcut Pro 1 Year
39 USD

Windows 10 & 11 Pro Key
36 USD

Upgrade Duolingo Super
29 USD

Plugin Retouch4me
69 USD

Copyright Adobe Lightroom Account
59 USD

Adobe Photoshop Copyright - Full App
120 USD

MidJourney Account
29 USD

Upgrade Genuine Office 365
49 USD

Upgrade genuine Capture One account
120 USD

Genuine Cheap Canva Pro
39 USD

Freepik Premium Account
59 USD
Create a simple fur text effects in Photoshop with SaDesign
Nội dung
- 1. Instructions for setting the background for the fur effect
- 2. How to create text
- 3. Instructions for installing Photoshop Fur Brush and Pattern
- 4. How to create actions
- 5. Awesome fur fonts and text effects
- 5.1. Text with a furry effect
- 5.2. Black Text Effect
- 5.3. Liquid Text Effect
- 5.4. Professional 3D Text
- 5.5. Super Cute Fluffy Font
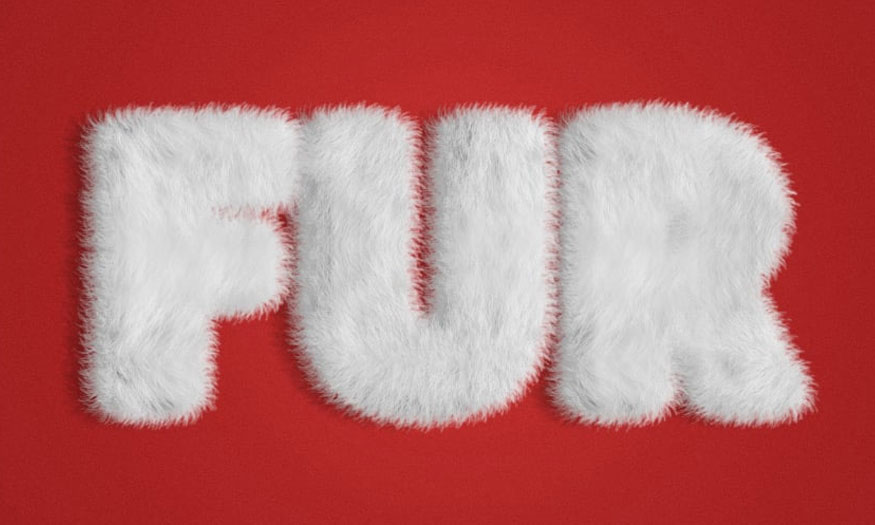
If you are interested in how to create fur text effects in Photoshop, the information shared in the article below will be very useful. SaDesign will provide detailed information about the detailed steps below!

If you are interested in how to create fur text effects in Photoshop, the information shared in the article below will be very useful. SaDesign will provide detailed information about the detailed steps below!
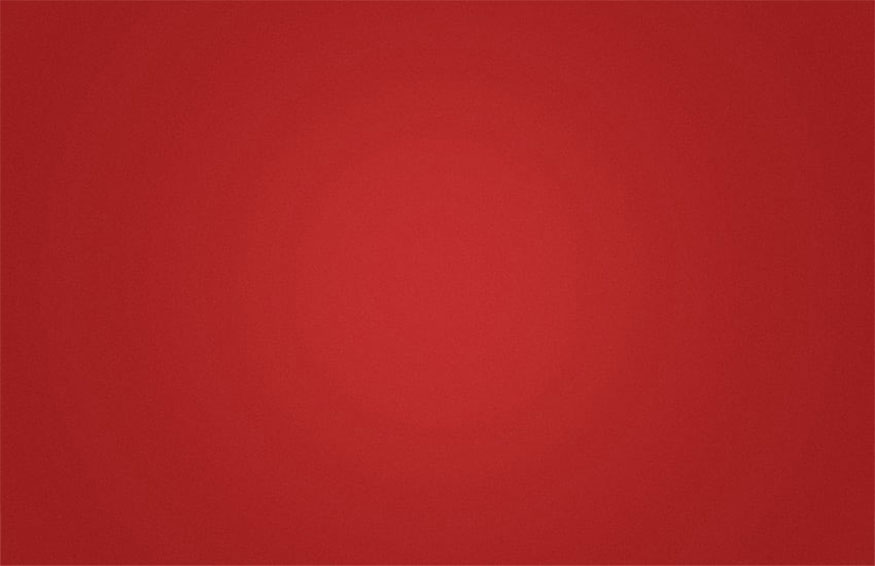
1. Instructions for setting the background for the fur effect
First, you need to open Photoshop => File => Open and select FurAction-BG.jpg.
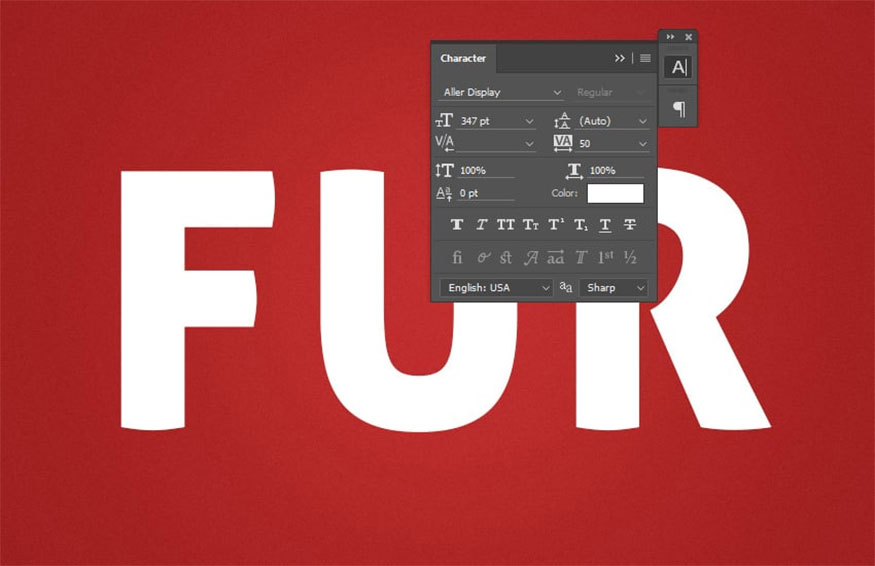
2. How to create text
Select Type Tool (T) then write "FUR" => select font Aller Display => Window => Character => set Size to 347 pt and Tracking to 50.
3. Instructions for installing Photoshop Fur Brush and Pattern
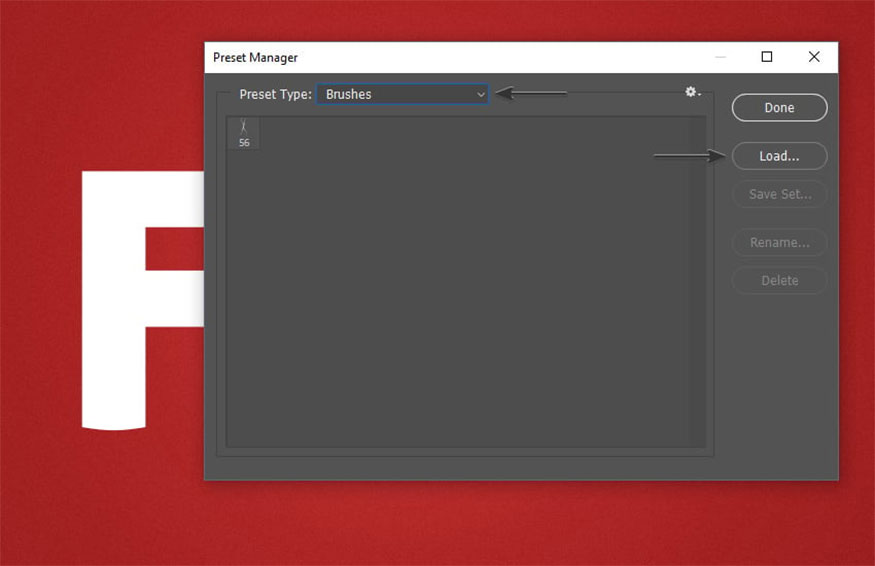
- Step 1: Go to Edit => Presets => Preset Manager...
In Preset Type, click Brushes, click load... and select Brush (Fur Tutorial).abr.
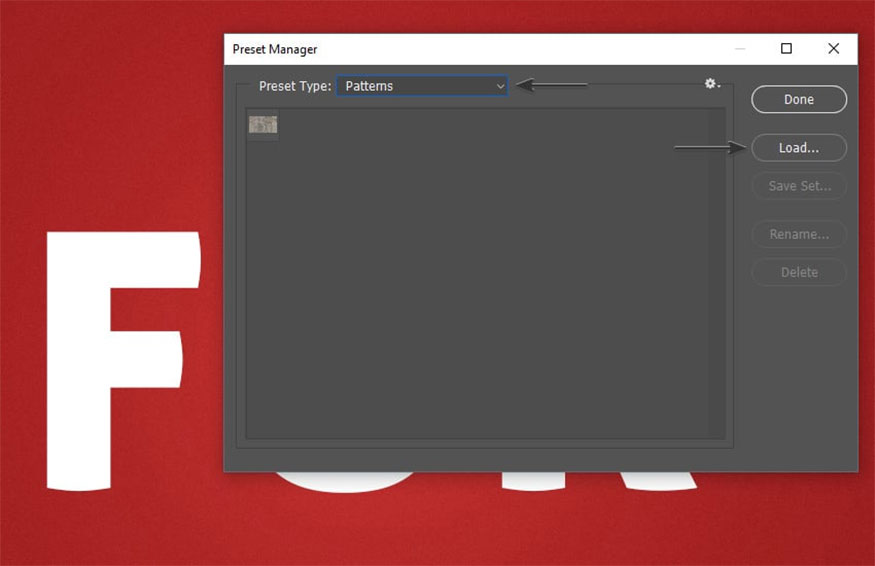
- Step 2: Go to Edit => Presets => Preset Manager...
In the Preset Type section, click Patterns => click load... and select Pattern (Fur Tutorial).pat.
4. How to create actions
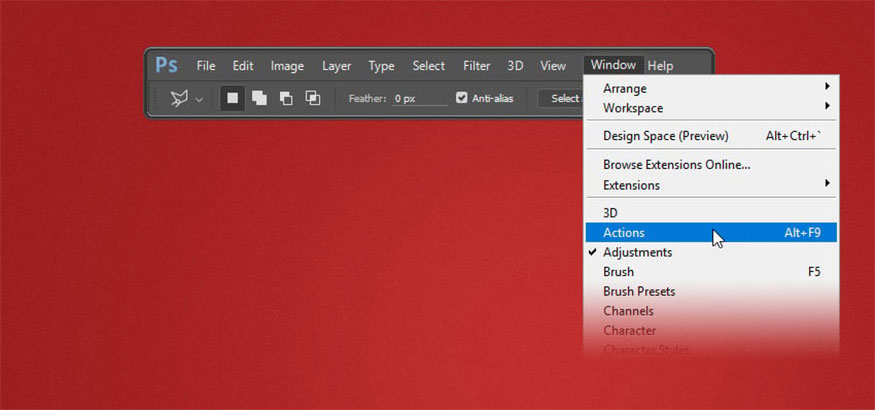
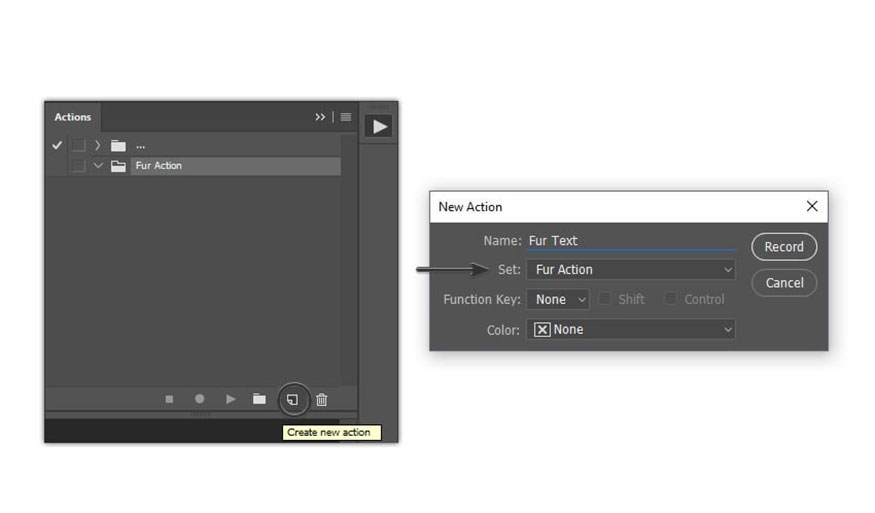
- Step 1: Open the Actions panel => Window => Actions.
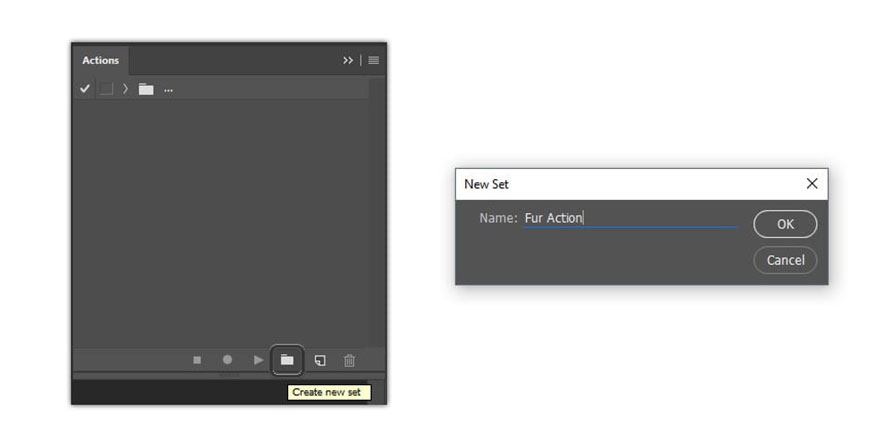
- Step 2: Create a new action set. To do this, click the Create New Set icon => name them “Fur Action” => select OK.
- Step 3: Click the Create New Action icon and name it “Fur Text” => click Record.
From now on, everything you do will be recorded, so pay attention to the Actions panel. If you make a mistake, click the Stop Playing/Recording icon to stop playing/recording and remove unnecessary steps from the Fur Text task.
Next, click on the Begin Recording icon to continue.
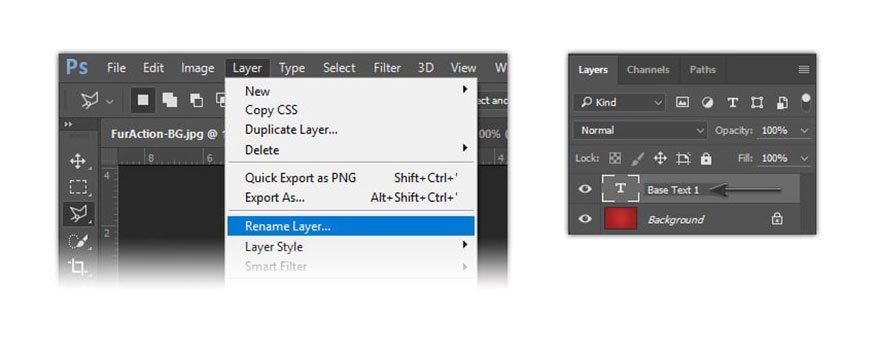
- Step 4: With the text layer selected, go to Layer => Rename Layer... then rename it to “Base Text 1”.
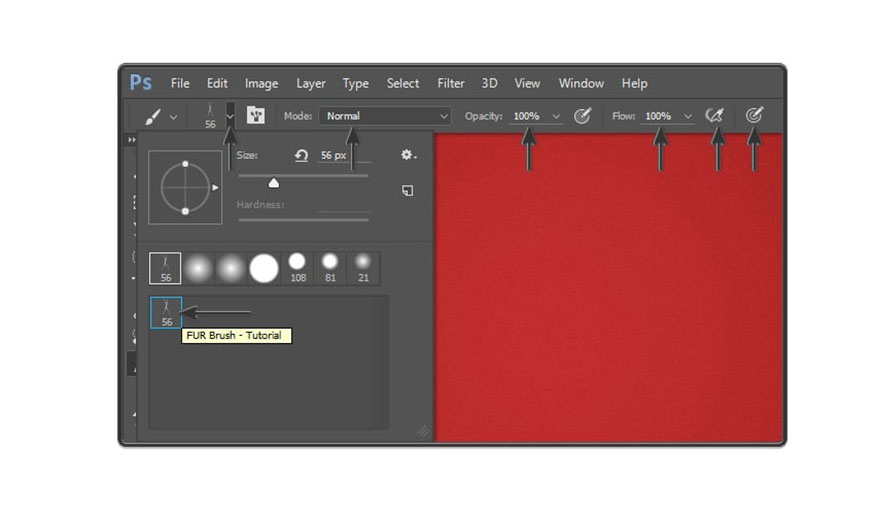
- Step 5: Select Brush Tool (B) => select FUR Brush - Tutorial Brush, then set Mode to Normal, and Opacity and Flow to 100%.
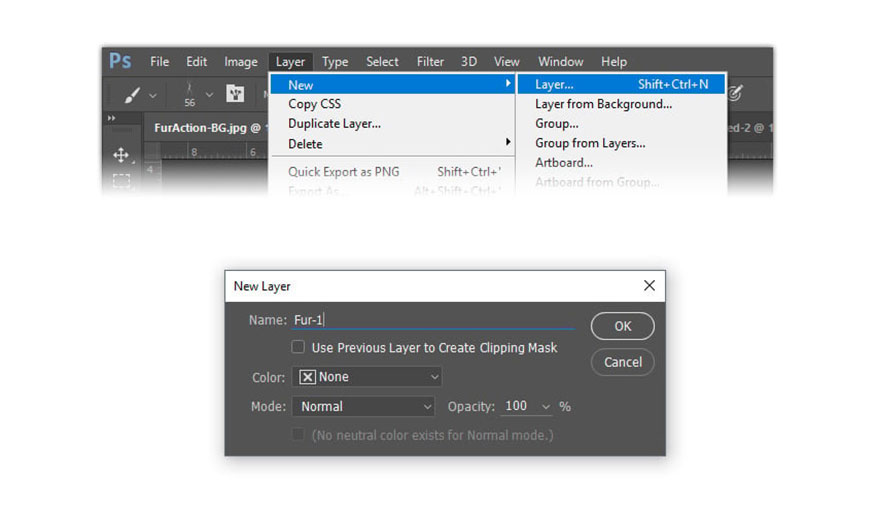
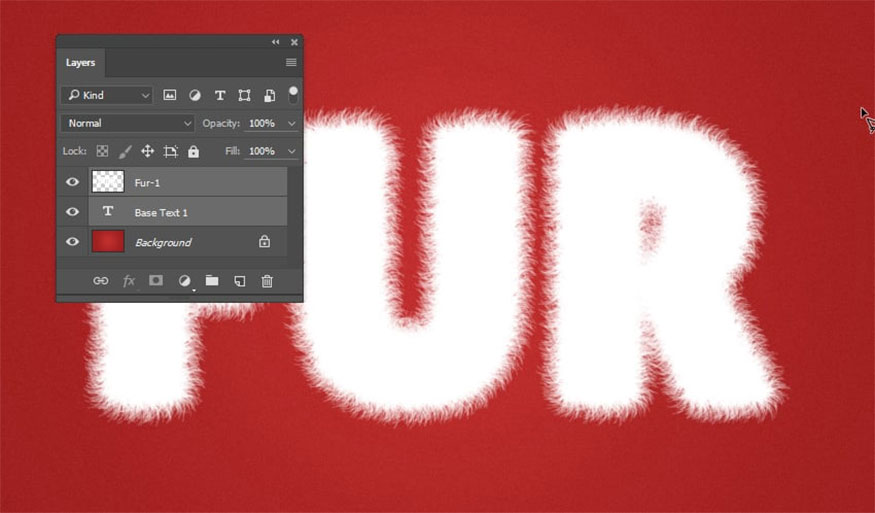
- Step 6: Next, create a new layer by going to Layer => New => Layer..., name it “Fur-1” then click OK.
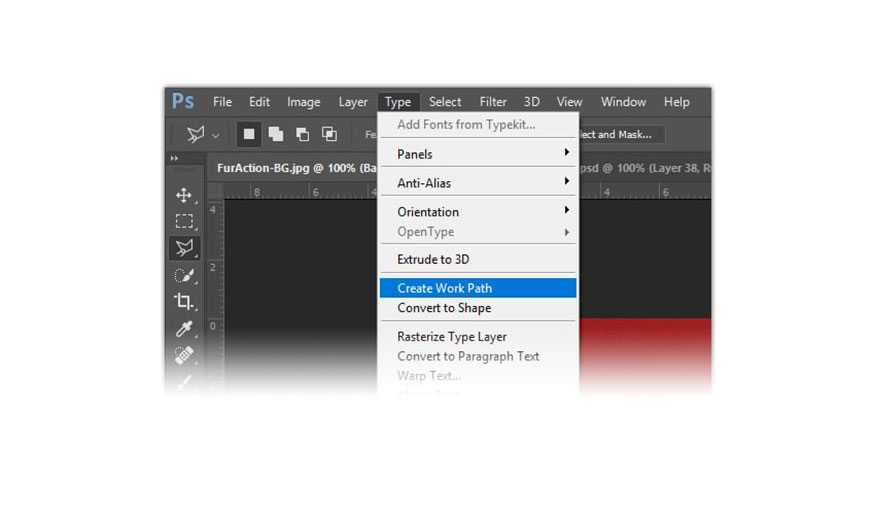
- Step 7: Select Base Text 1 layer, then go to Type => Create Work Path.
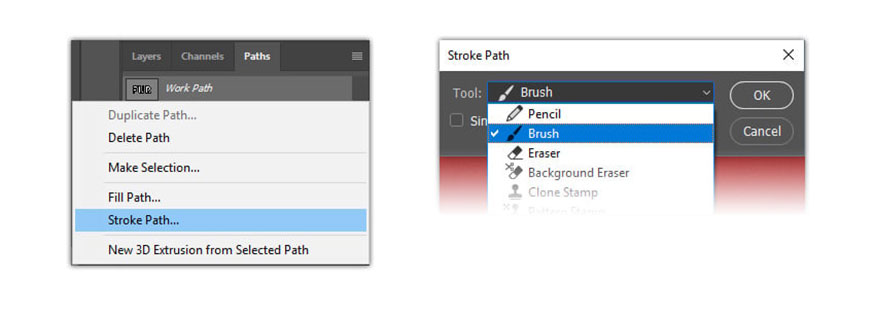
- Step 8: Click to select the Fur-1 layer by opening the Paths panel then click on Window => Paths, right click on Work Path and select Stroke Path...
Click on Brush in the drop-down menu and uncheck the Simulate Pressure => OK.
Next, delete the Work Path from the Paths panel.
- Step 9: Return to the Layers panel to merge the text with the fur. To do this, click Fur-1 in the Layers panel, then press and hold the Shift key and select Base Text 1.
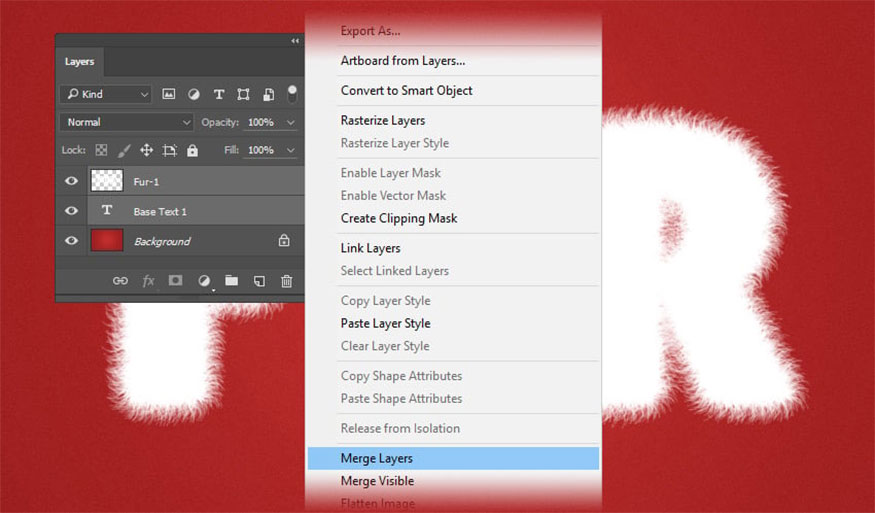
Release the Shift key, then right-click Fur-1 to select Merge Layers to merge the layers together.
- Step 10: Next step, add Layer Style, double click on layer Fur-1 to apply the following style:
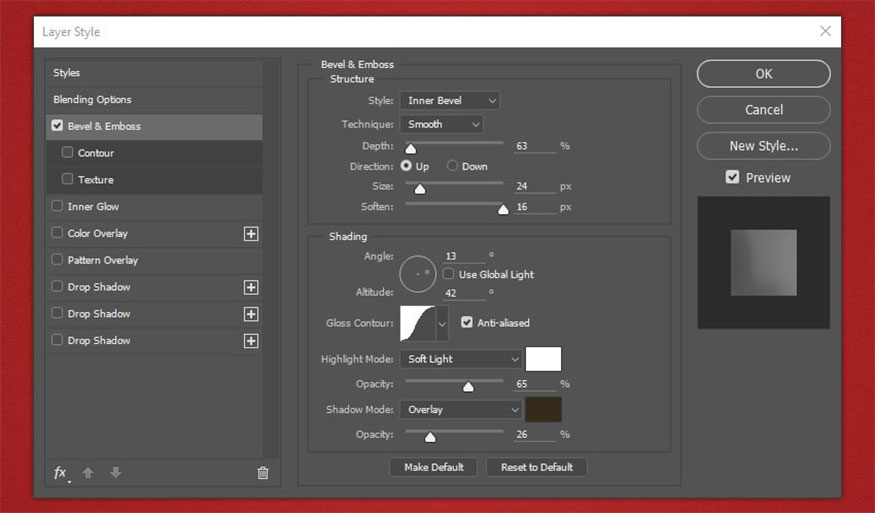
Add Bevel & Emboss and install as follows:
-
Style: Inner Bevel
-
Technique: Smooth
-
Depth: 63 %
-
Direction: Up
-
Size: 24 px
-
Soften: 16 px
-
Use Global Light: Unchecked
-
Angle: 13º
-
Altitude: 42º
-
Gloss Contour: Gaussian
-
Anti-aliased: True
-
Highlight Mode: Soft
-
Color of the Highlight mode: #ffffff
-
Opacity of the Highlight: 65%
-
Shadow Mode: Overlay
-
Color of the Shadow Mode: #362a1a
-
Opacity of the Shadow Mode: 26%.
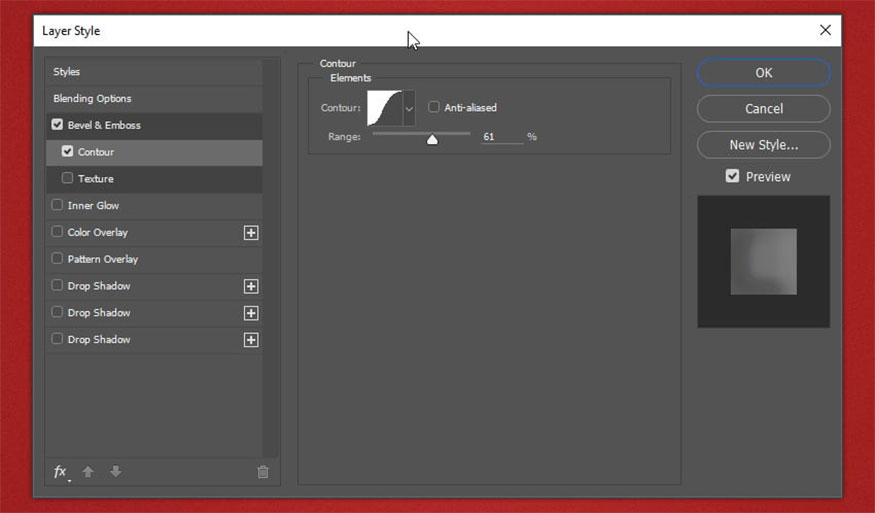
- Step 11: Add border in Bevel & Emboss with the following settings:
-
Contour: Gaussian
-
Anti-aliased: Unchecked
-
Range: 61%
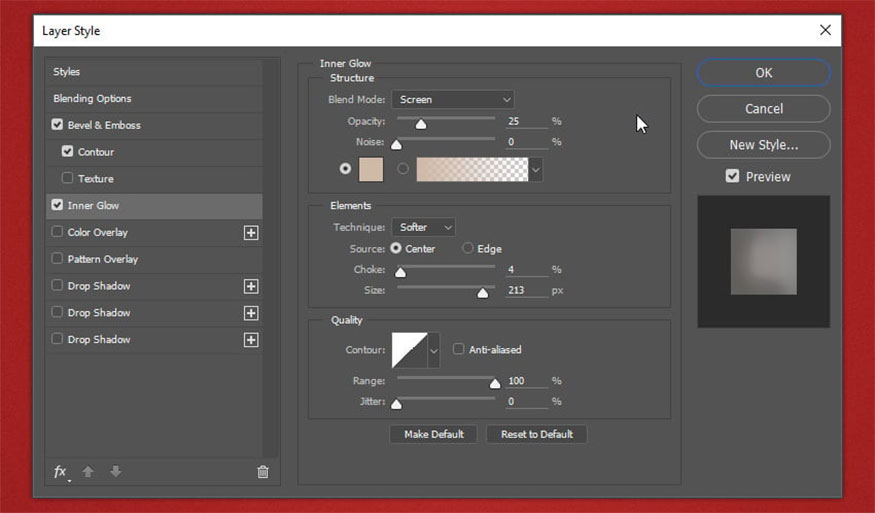
- Step 12: Add Inner Glow with the following settings:
-
Blend Mode: Screen
-
Opacity: 25%
-
Noise: 0%
-
Color: #cfb9a6
-
Technique: Softer
-
Source: Center
-
Choke: 4%
-
Size: 213 px
-
Contour: Linear
-
Anti-aliased: Unchecked
-
Range: 100%
-
Jitter: 0%
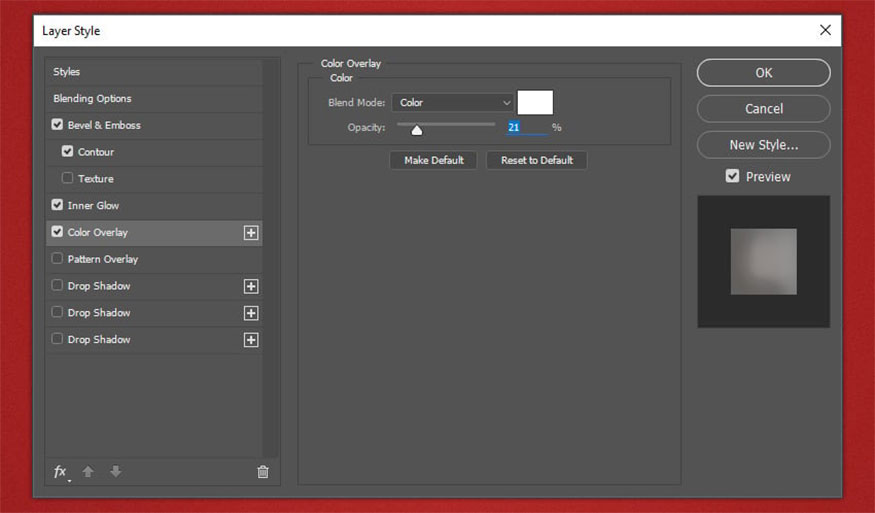
- Step 13: Add Color Overlay with the following settings:
-
Blend Mode: Color
-
Color: #ffffff
-
Opacity: 21%
- Step 14: Add Pattern Overlay with the following settings:
-
Blend Mode: Normal
-
Opacity: 100%
-
Pattern: Select your downloaded model, model (Fur Tutorial).pat.
-
Scale: 25%
-
Link with Layer: Checked

- Step 15: Add Drop Shadow with the following settings:
-
Blend Mode: Normal
-
Color: #6d655d
-
Opacity: 100%
-
Use Global Light: Unchecked
-
Angle: 0 º
-
Distance: 18 px
-
Spread: 100%
-
Size: 0 px
-
Contour: Linear
-
Anti-aliased: Unchecked
-
Noise: 0%
-
Layer Knocks Out Drop Shadow: checked

- Step 16: If you do not use Adobe Photoshop CC, click OK and go to step 18.
In case you do, continue as follows:
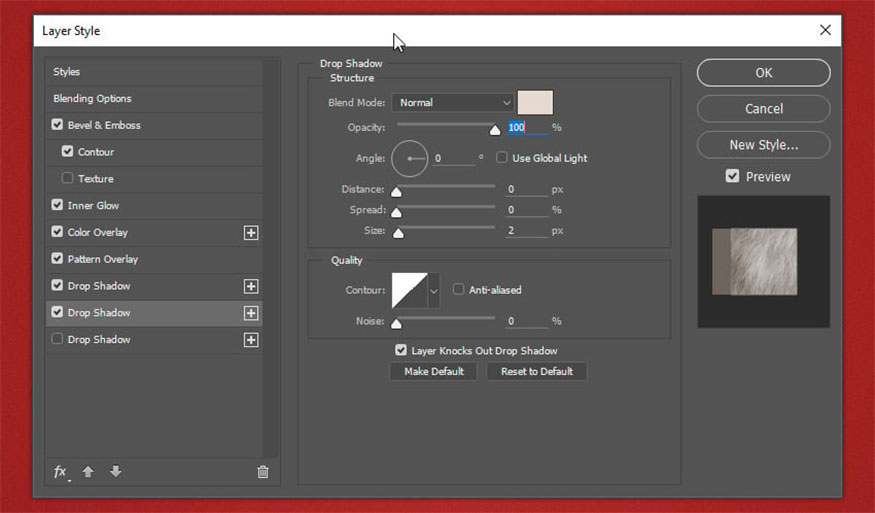
Add the second Drop Shadow right below with the following settings:
-
Blend Mode: Normal
-
Color: #e5dacf
-
Opacity: 100%
-
Use Global Light: Unchecked
-
Angle: 0º
-
Distance: 0 px
-
Spread: 0%
-
Size: 2 px
-
Contour: Linear
-
Anti-aliased: Unchecked
-
Noise: 0%
-
Layer Knocks Out Drop Shadow: Check
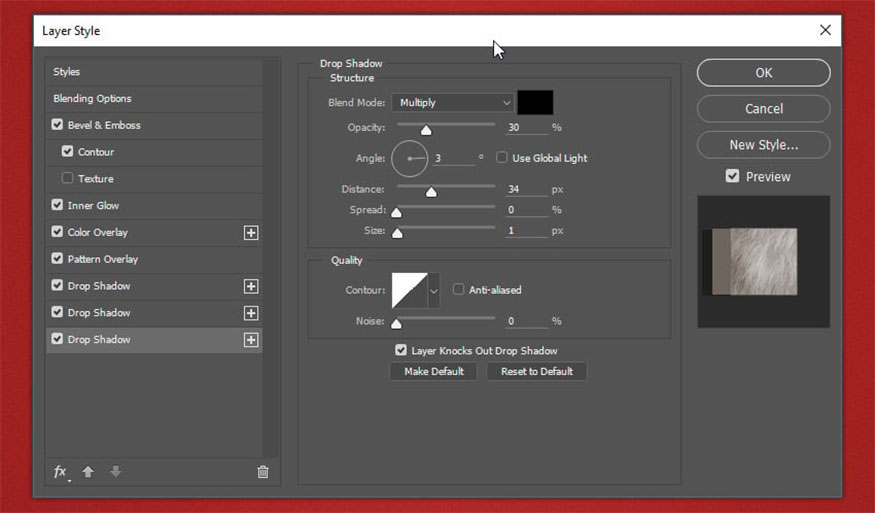
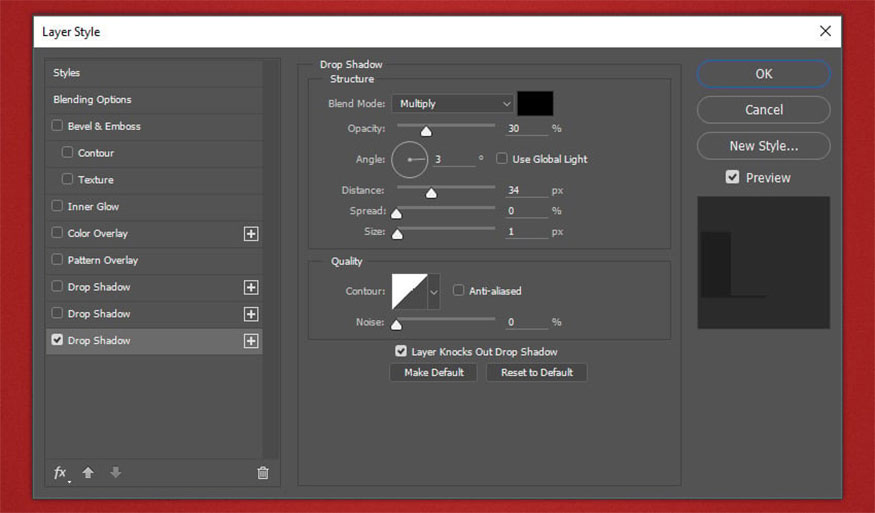
- Step 17: Add the 3rd Drop Shadow right below Drop Shadow 2 with the following settings:
-
Blend Mode: Multiply
-
Color: #000000
-
Opacity: 30%
-
Use Global Light: Unchecked
-
Angle: 3º
-
Distance: 34 px
-
Spread: 0%
-
Size: 1 px
-
Contour: Linear
-
Anti-aliased: Unchecked
-
Noise: 0%
-
Layer Knocks Out Drop Shadow: Check
Click OK.
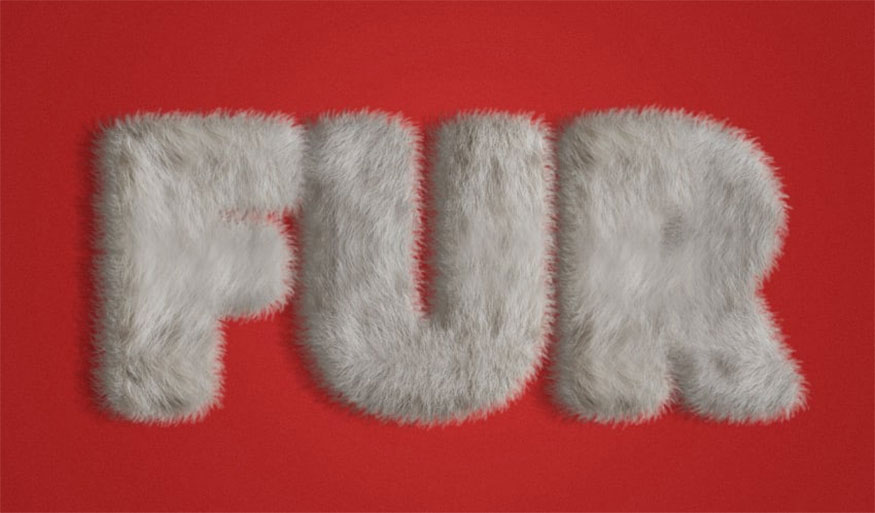
The result:
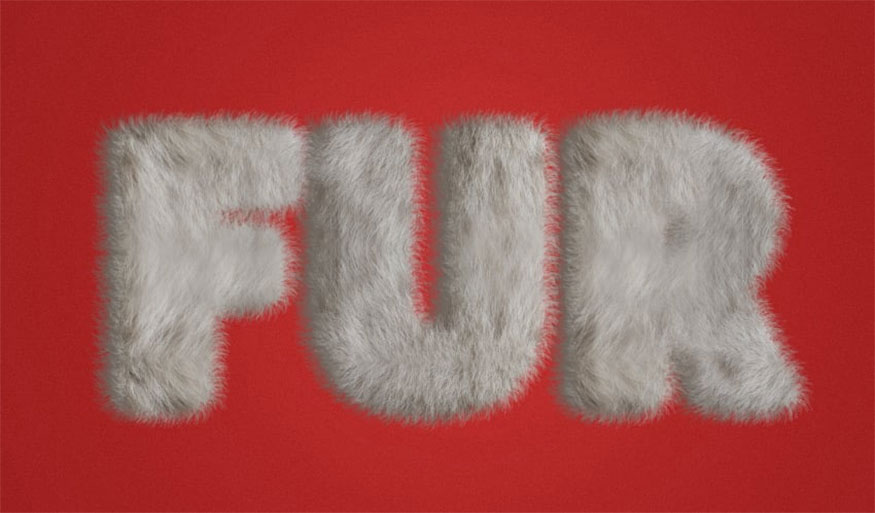
Or like this if you're using the older version of Adobe Photoshop:
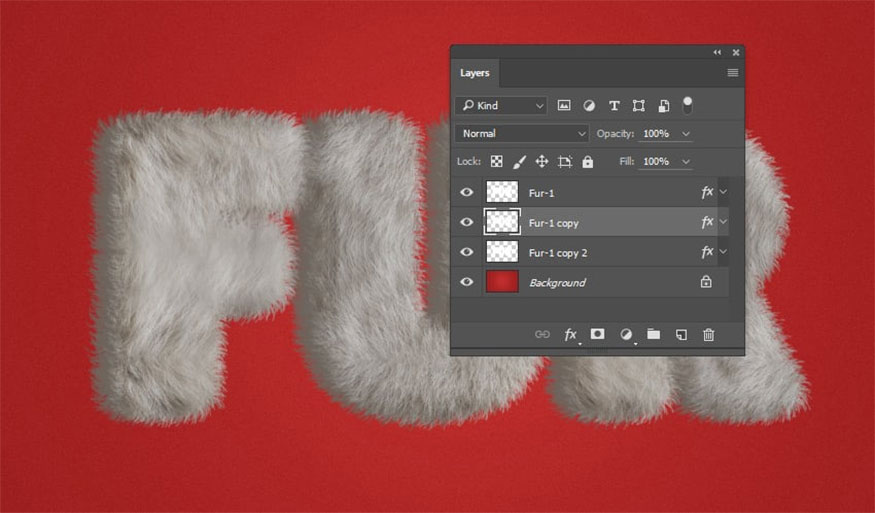
- Step 18: Go to step 23 if you are using Adobe Photoshop CC. Make two copies of the Fur-1 layer and place them below the original:
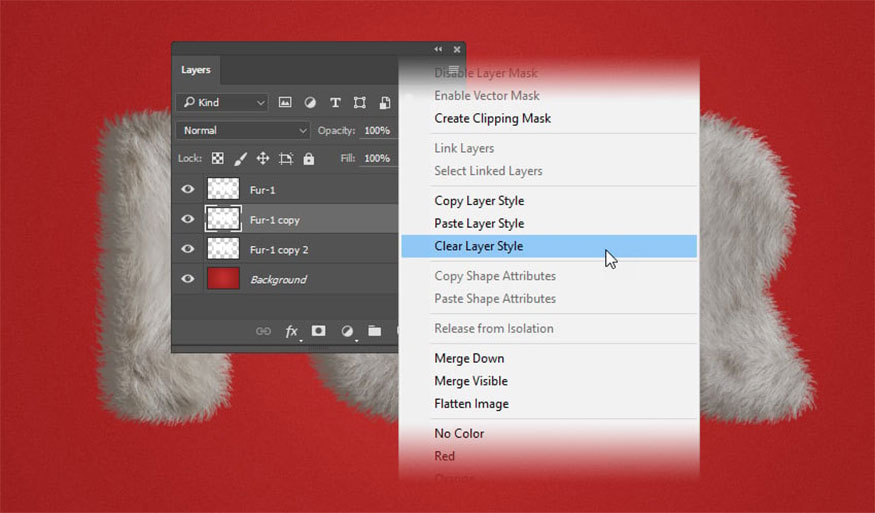
- Step 19: Right click on the first copy, then click Clear Layer Style. Do the same for the second copy.
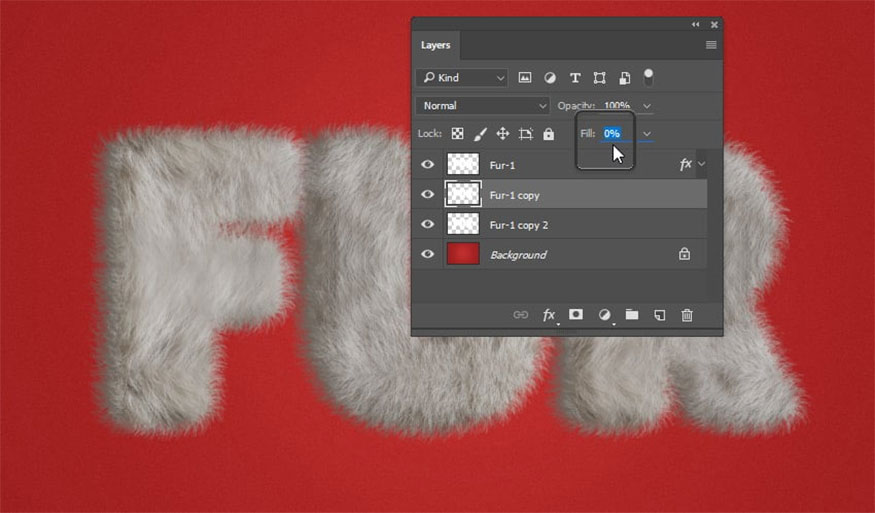
- Step 20: Change the Fill of both copies to 0%.
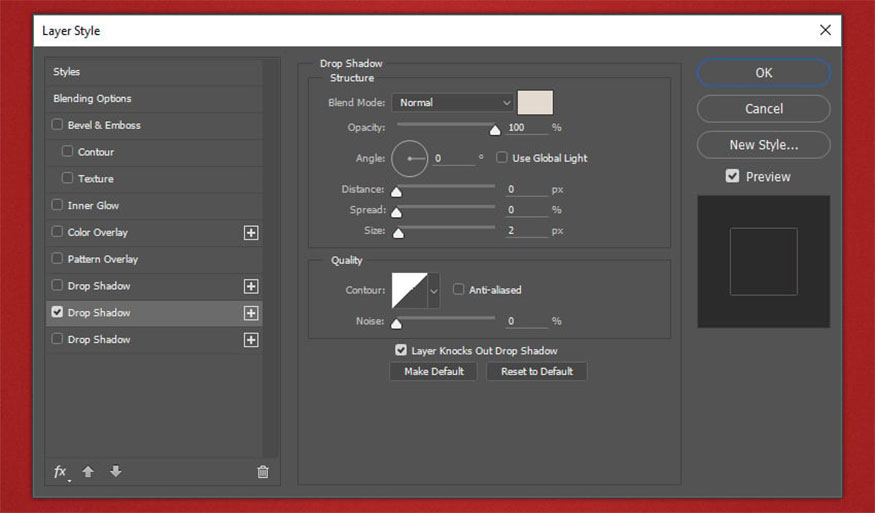
- Step 21: Double click on the first copy to add a new Layer Style. Add Drop Shadow with the following settings:
-
Blend Mode: Normal
-
Color: #e5dacf
-
Opacity: 100%
-
Use Global Light: Unchecked
-
Angle: 0 º
-
Distance: 0 px
-
Spread: 0%
-
Size: 2 px
-
Contour: Linear
-
Anti-aliased: Unchecked
-
Noise: 0%
-
Layer Knocks Out Drop Shadow: Checked
Click OK.
- Step 22: Double-click the second copy to add a Layer Style. Add Drop Shadow with the following settings:
-
Blend Mode: Multiply
-
Color: #000000
-
Opacity: 30%
-
Use Global Light: Unchecked
-
Angle: 3º
-
Distance: 34 px
-
Spread: 0%
-
Size: 1 px
-
Contour: Linear
-
Anti-aliased: Unchecked
-
Noise: 0%
-
Layer Knocks Out Drop Shadow: Checked
Click OK.
- Step 23: You need to convert the Fur-1 layer to Smart Object.
For Adobe Photoshop CC: Right-click on the Fur -1 layer and select Convert to Smart Object.
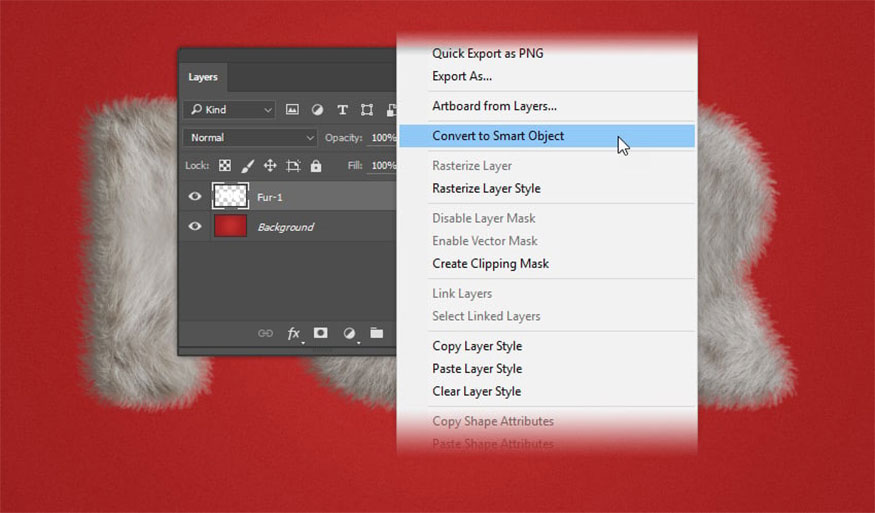
For older versions of Adobe Photoshop: Select Fur-1, hold down the Shift key and click Fur-1 copy 2. Release the Shift key then right-click on the Fur-1 layer and select Convert to Smart Object.
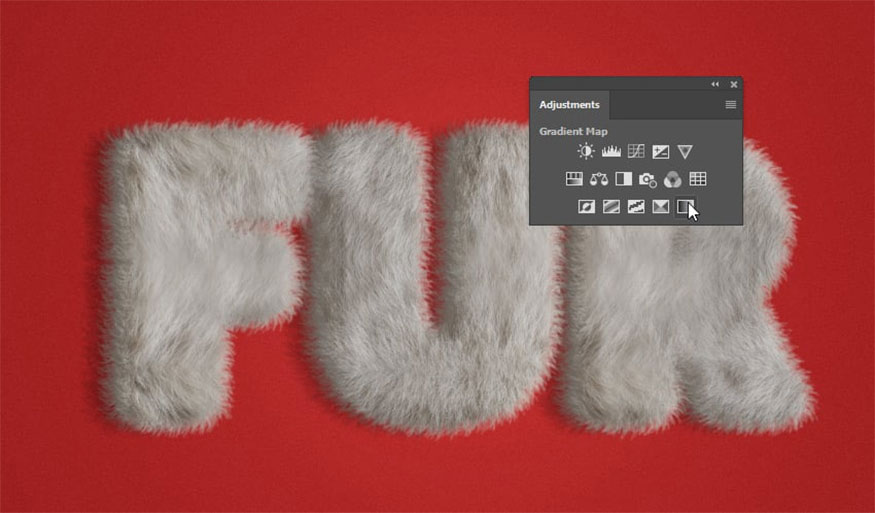
- Step 24: Change the color of the fur to make it whiter by going to the Adjustments panel or clicking Window => Adjustments, then click Gradient Map.
- Step 25: Rename the Gradient map 1 layer to Gradient Color.
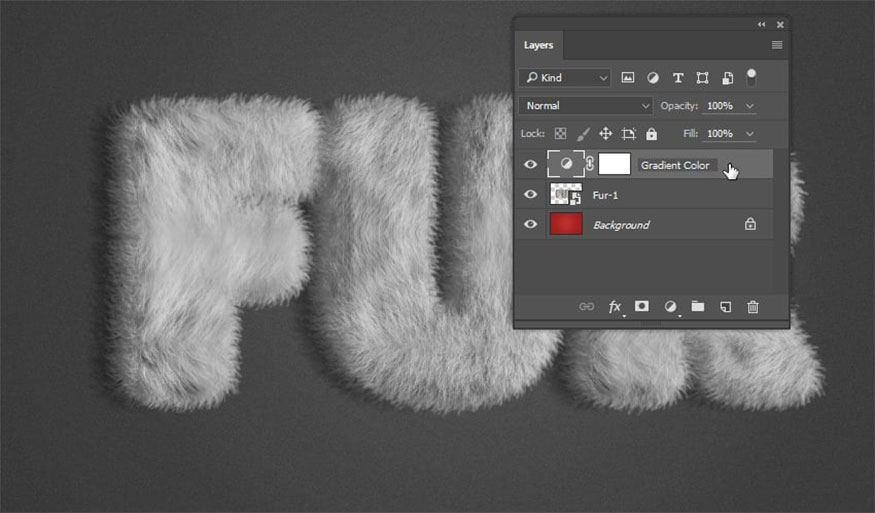
- Step 26: Right click on Gradient Color and select Create Clipping Mask.
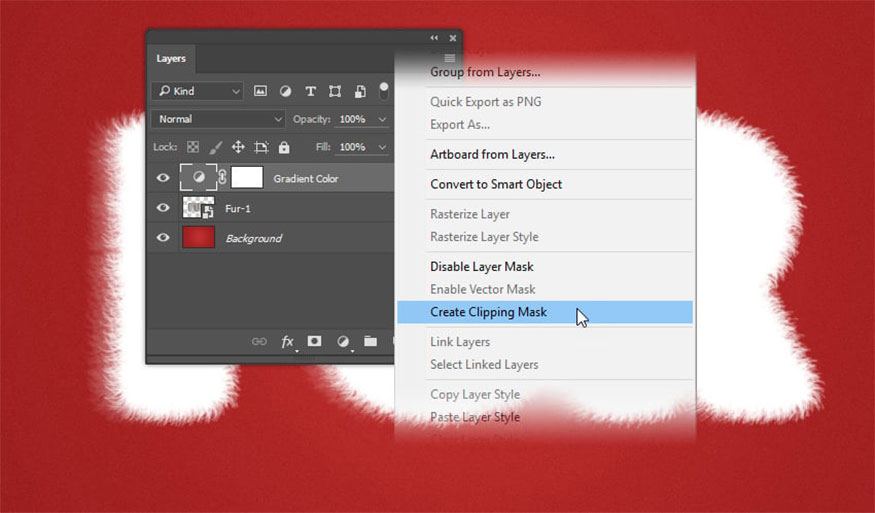
- Step 27: Double click on the gradient icon in the Gradient color layer. The Properties panel will pop up.
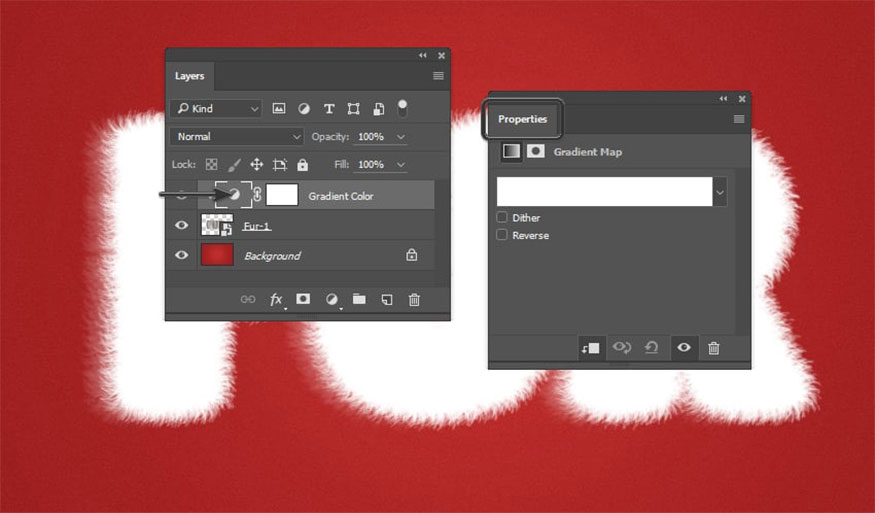
- Step 28: Click on the Gradient bar in the Properties panel to open the Gradient Editor. Set the gradient with the following settings:
-
First stop Color: #000000, Location 0%
-
Second stop Color: #848484, Location 30%
-
Third stop Color: #c0c0c0, Location 48%
-
Fourth stop Color: #ffffff, Location 100%
Click OK.

- Step 29: Rename the layer Fur-1 to Fur and then stop recording the action.
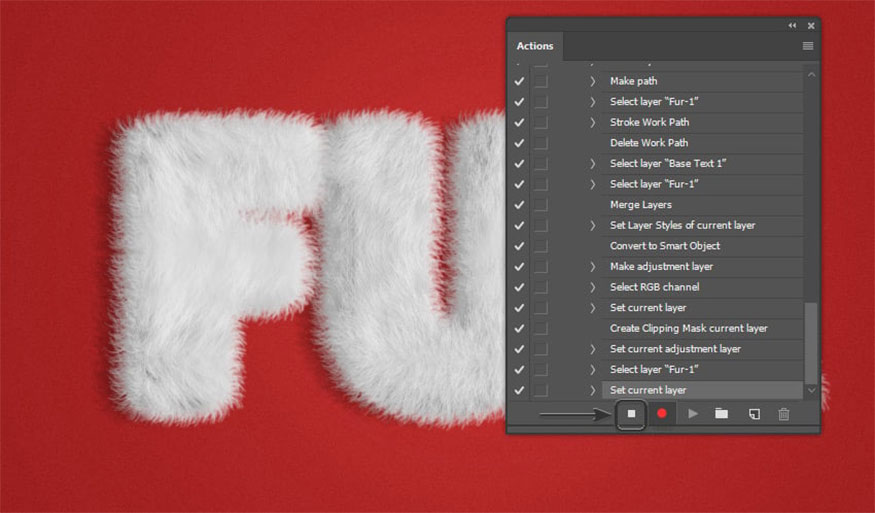
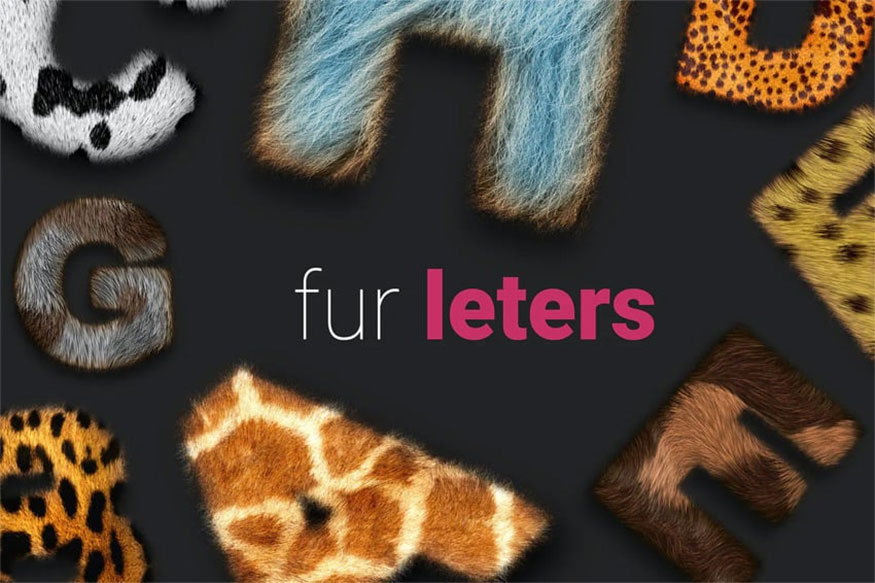
5. Awesome fur fonts and text effects
If you don't have much time to create furry text, you can check out some great fur fonts and other interesting text effects below:
5.1. Text with a furry effect
This effect is remarkably similar to the furry text effect done in the furry fonts tutorial. You can use existing letters or apply styles to your own text to get interesting feathered text effects.
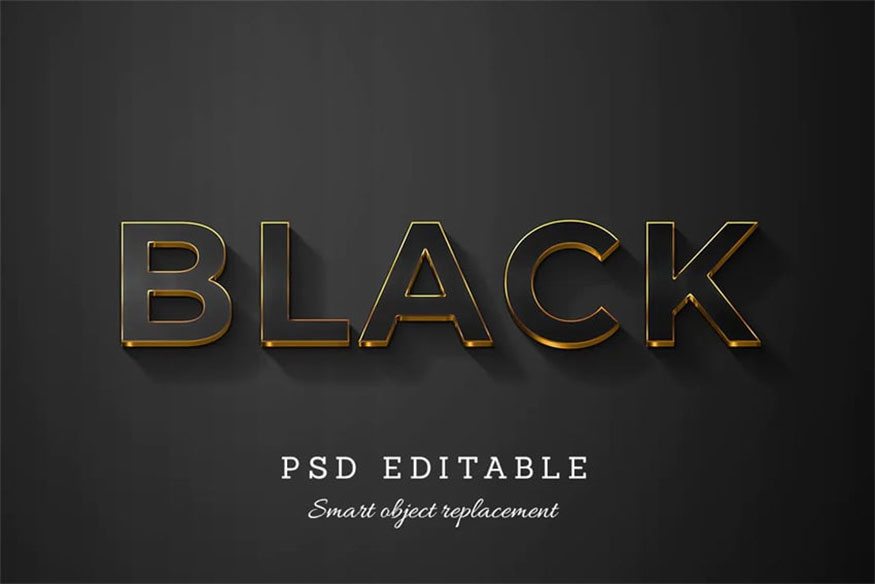
5.2. Black Text Effect
This dramatic effect works well with any text, so you can use it to create logos or titles to make your designs more professional.
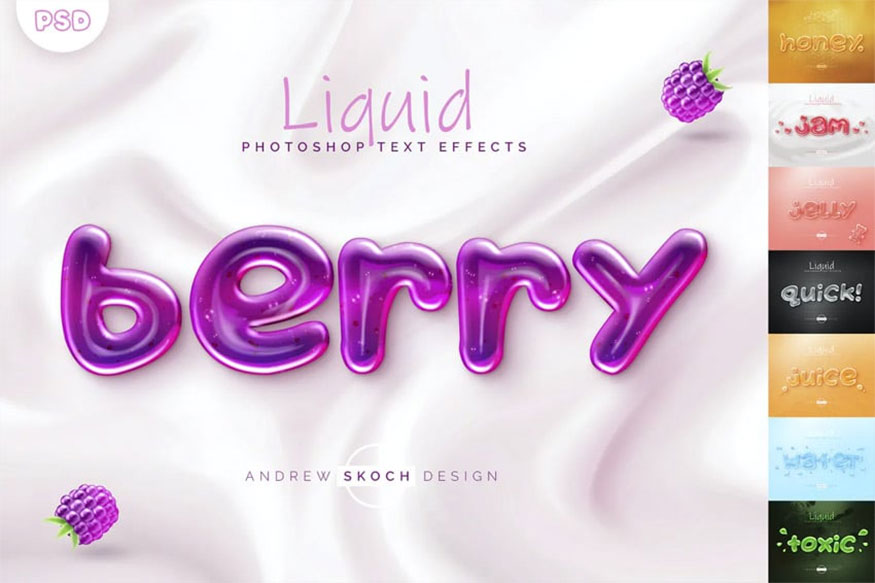
5.3. Liquid Text Effect
This effect has many different letter styles and colors for you to choose from and make your text more attractive.
5.4. Professional 3D Text
This professional 3D text effect will help you get more impressive designs in just a few seconds. Your job is to just enter the text you want to apply.

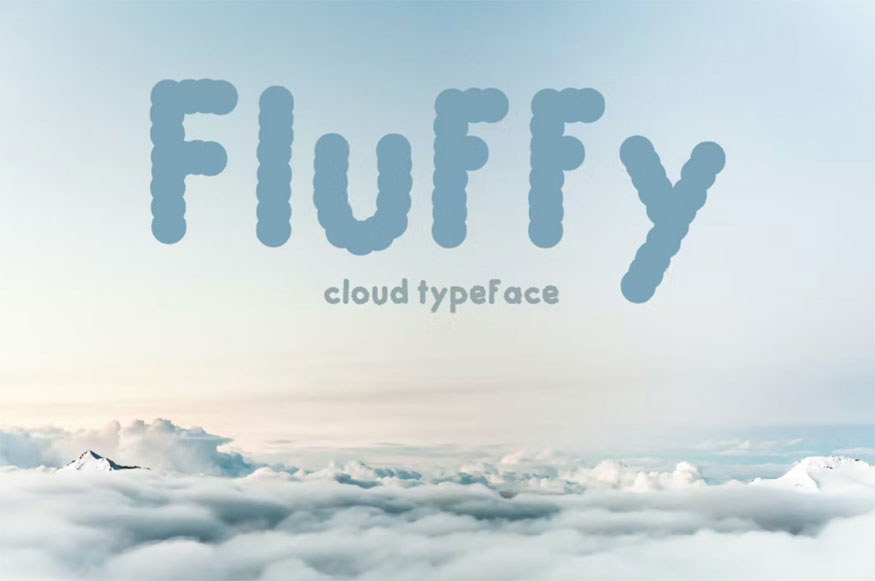
5.5. Super Cute Fluffy Font
If you want to get the same effect as the fluffy font, this is one of the great filters. The font is soft and flexible, allow you to evoke diverse images of animals, clouds, etc.
Above, Sadesign has shown you how to create fur text effects in Photoshop in the most detailed and complete way so you can apply it. Wish you success with the instructions we provide above!


VIP Products


Best Selling Products
ChatGPT Plus Account (GPT-4)
16 USD
Genuine Adobe Illustrator account
99 USD
Autodesk All App Account Copyright
120 USD
Adobe Premiere Pro Account
99 USD
Capcut Pro 1 Year
39 USD
Windows 10 & 11 Pro Key
36 USD
Upgrade Duolingo Super
29 USD
Plugin Retouch4me
69 USD
Copyright Adobe Lightroom Account
59 USD
Adobe Photoshop Copyright - Full App
120 USD
MidJourney Account
29 USD
Upgrade Genuine Office 365
49 USD
Upgrade genuine Capture One account
120 USD
Genuine Cheap Canva Pro
39 USD
Freepik Premium Account
59 USD