Best Selling Products

Genuine Adobe Illustrator account
99 USD

Upgrade Duolingo Super
29 USD

Upgrade Genuine Office 365
49 USD

Freepik Premium Account
59 USD

Copyright Adobe Lightroom Account
59 USD

MidJourney Account
29 USD

Upgrade genuine Capture One account
120 USD

Autodesk All App Account Copyright
120 USD

Genuine Cheap Canva Pro
39 USD

Windows 10 & 11 Pro Key
36 USD

Plugin Retouch4me
69 USD

ChatGPT Plus Account (GPT-4)
16 USD

Adobe Premiere Pro Account
99 USD

Capcut Pro 1 Year
39 USD

Adobe Photoshop Copyright - Full App
120 USD
How to create Glitch text effects in Photoshop
Nội dung
Photoshop is a very popular image editing tool of the Adobe brand. In addition to basic color adjustments, you can completely combine Photoshop tools to create extremely magical and strange designs. In today's article, Sadesign will show you how to create Glitch text effects in Photoshop, let's find out below!

Photoshop is a very popular image editing tool of the Adobe brand. In addition to basic color adjustments, you can completely combine Photoshop tools to create extremely magical and strange designs. In today's article, Sadesign will show you how to create Glitch text effects in Photoshop, let's find out below!
1. What is the Glitch text effect in Photoshop?
Glitch is a digital noise effect. When using this effect, your text will appear with horizontal or vertical lines.
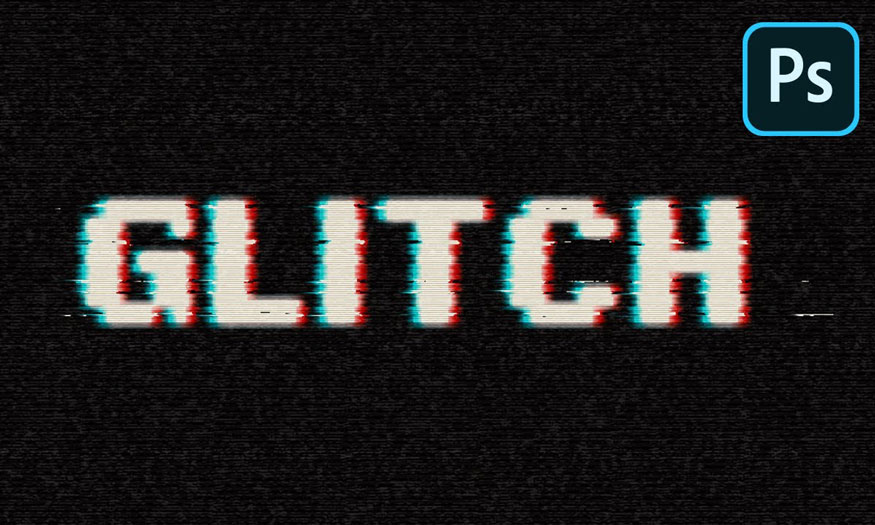
This interference is inspired by noisy TV screens and flickering audio. Glitch effect will make your design magical, attractive, and mysterious.
2. Steps to create a Glitch text effect in Photoshop
To be able to create a Glitch text effect in Photoshop, we need to combine many tools together. You can follow these basic steps:
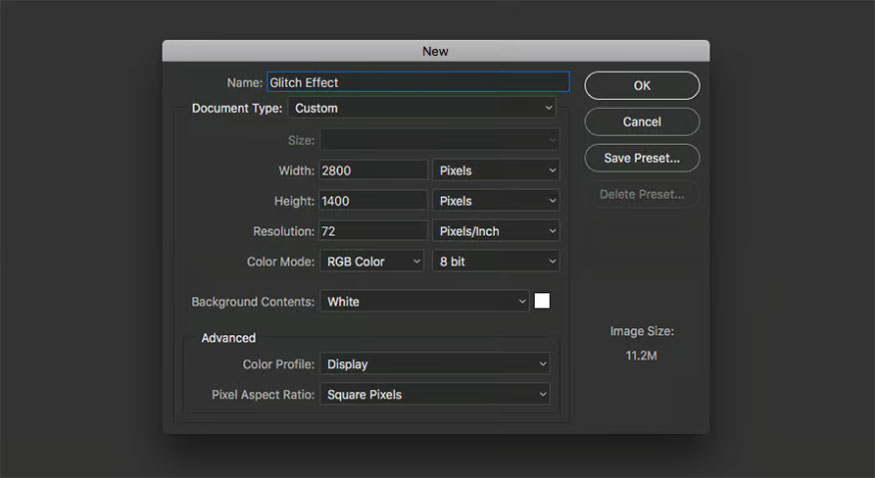
Step 1: Start by launching Photoshop software and creating a new document. This effect needs to be quite large to get all the details, so make the document large. Here I create a new document with dimensions of 2800 x 1400 px.
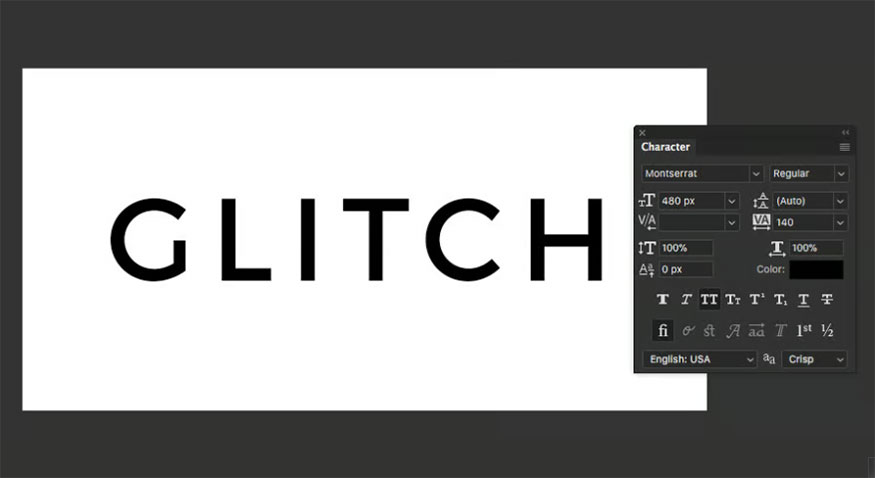
Step 2: Use the Horizontal Type Tools to enter the word Glitch. A simple sans-serif typeface works well for this effect. Here I am using the Montserrat font with a font size of 480px and a spacing between letters of 140.
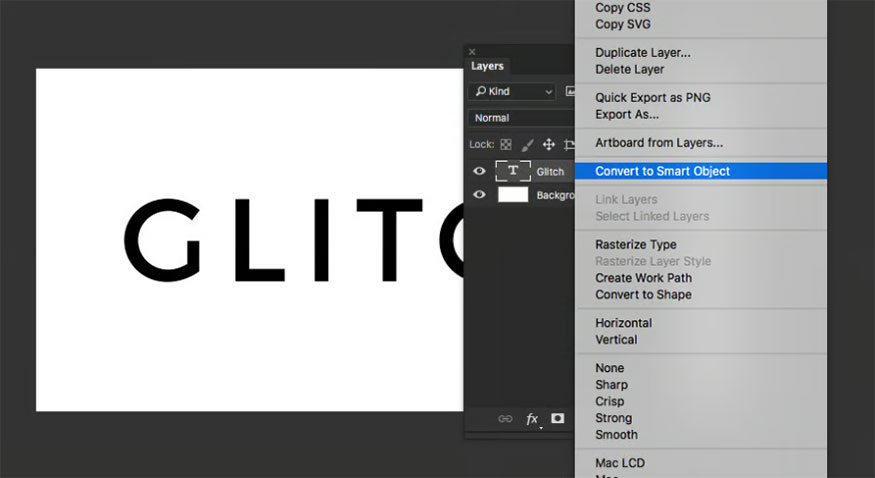
Step 3: Right click on the text layer and select Convert to Smart Object.
Step 4: On the menu bar, select Filter => Distort => Wave then set the following parameters:
-
Type: Square
-
Number of Generators: 2
-
Wavelength Min: 178 Max: 756
-
Amplitude Min: 1 Max: 52
-
Scale Horiz: 20% Vert: 1%
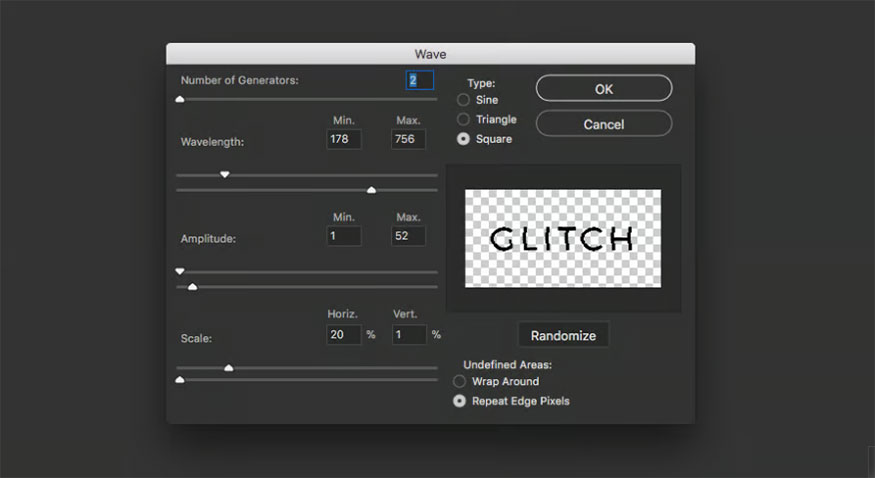
This is the first stage of the Glitch text effect in Photoshop. Feel free to tweak the effect a bit, but don't make any drastic changes.

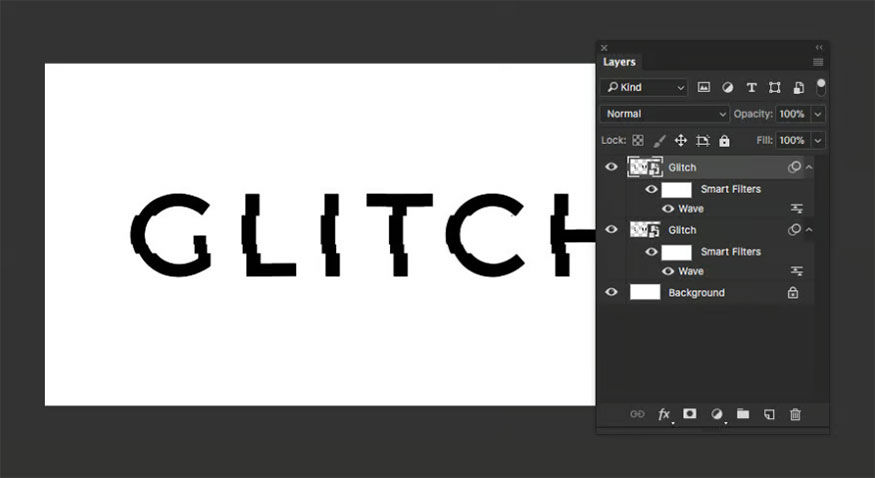
Step 5: Press Ctrl+J to duplicate the Smart Object layer, then expand the menu drop down fx.
Step 6: On the toolbar, select Filter => Distort => Wave... then set the following parameters:
-
Type: Square
-
Number of Generators: 2
-
Wavelength Min: 97 Max: 372
-
Amplitude Min: 1 Max: 283
-
Scale Horiz: 10% Vert: 1%
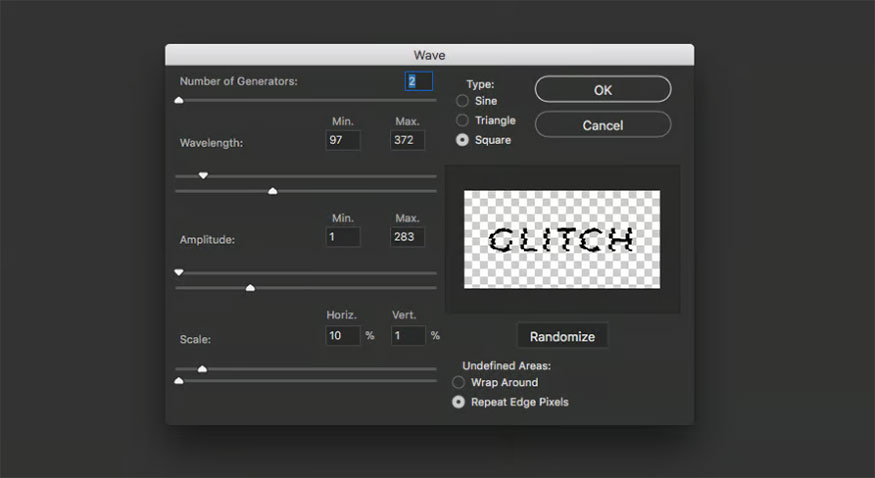
When combined with the basic effect, the text will start to look very random and messy.

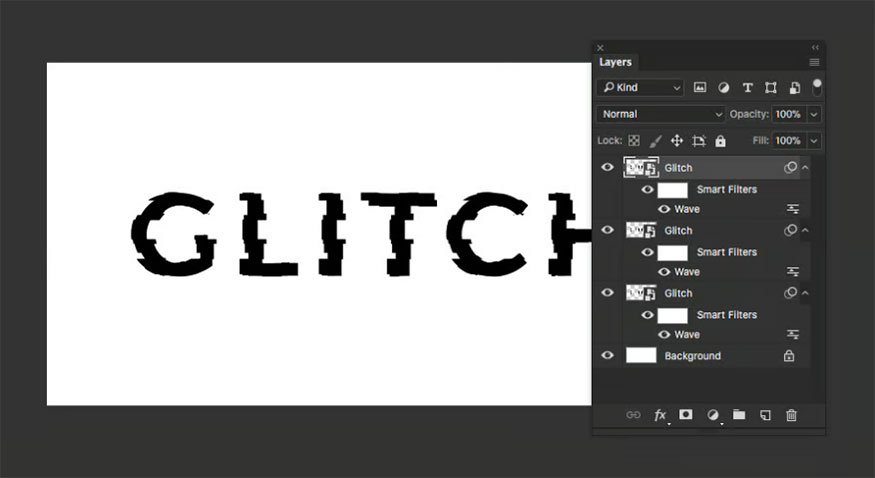
Step 7: Press Ctrl+J to duplicate the Smart Object layer
Step 8: On the toolbar, select Filter => Distort => Wave... then set the following parameters:
-
Type: Square
-
Number of Generators: 3
-
Wavelength Min: 1 Max: 33
-
Amplitude Min: 4 Max: 33
-
Scale Horiz: 60% Vert: 1%
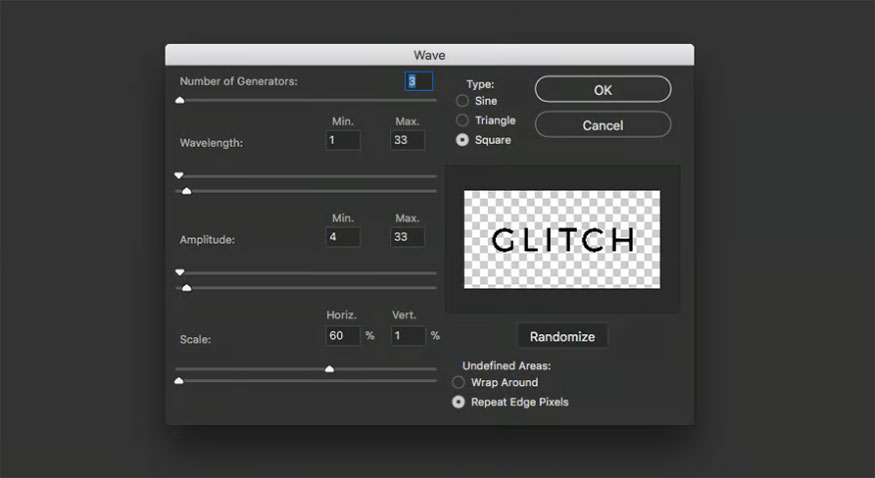
These are the blurred distortion lines that help perfect the Glitch text effect in Photoshop. Experiment with the Horizontal Scale setting to get the right amount of blur.

Step 9: When you are satisfied with the effect, select all 3 Smart Object layers and group them. Name the group “Glitch”. Fill the background with color #242424.
Step 10: Double click on the group (or Smart Object) to add a Layer Style to this layer. Select Color Overlay and set it to white.
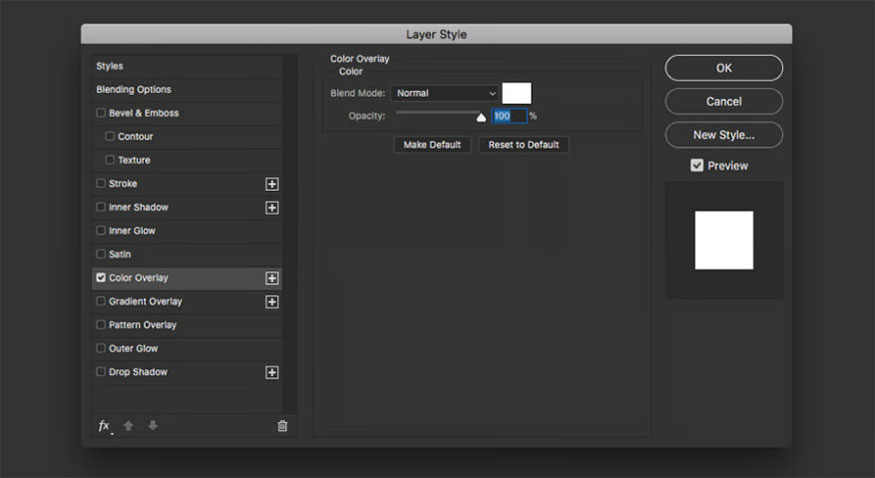
At this point we will get the result as shown in the image below.

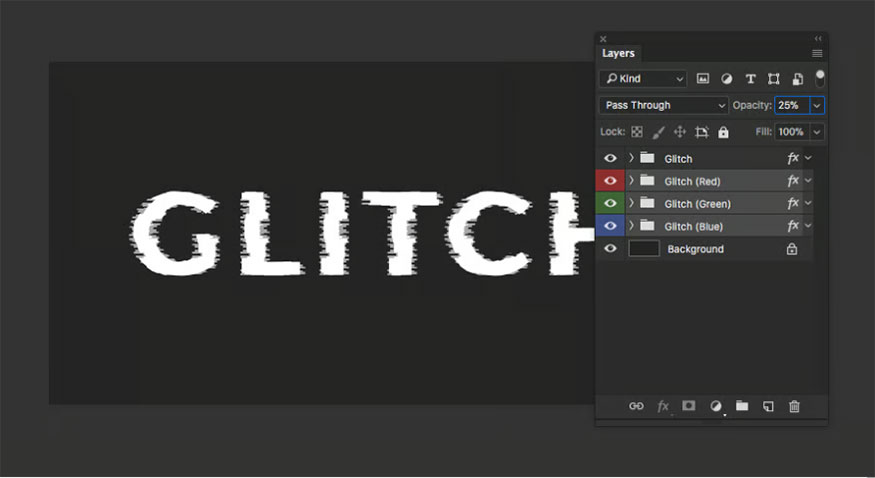
Step 11: Press Ctrl+J 3 times to duplicate the Glitch group (or Smart Object) so you have a total of 4 groups. In the bottom 3 groups, label Red, Green and Blue then set the Opacity of all 3 labeled groups to 25%.
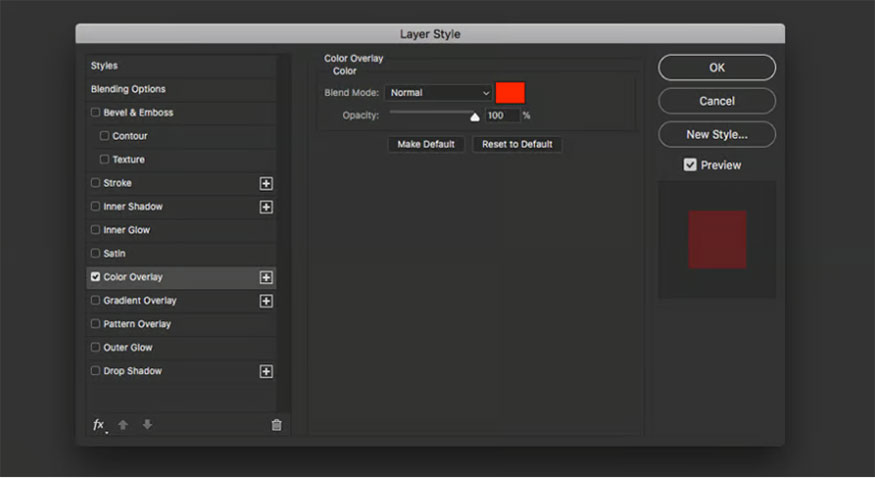
Step 12: Double click on the Red group and change the Color Overlay to #ff2700.
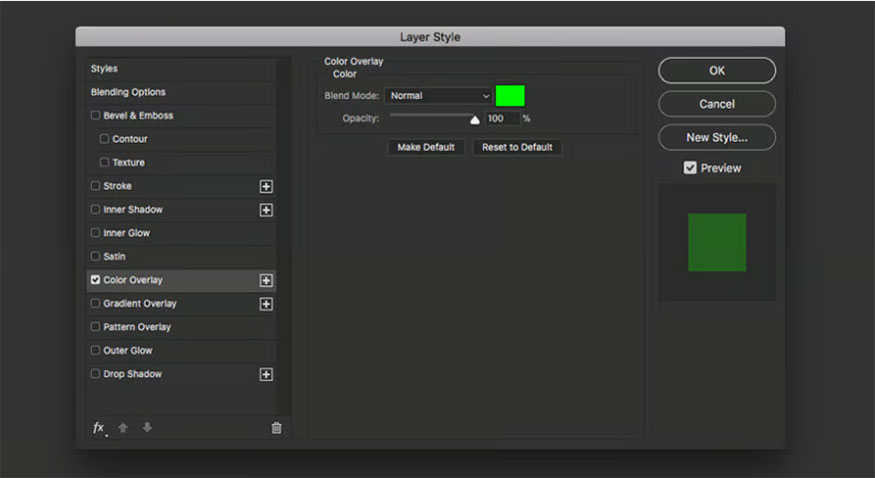
Step 13: Double click on the Green group and change the Color Overlay to #00fa00.
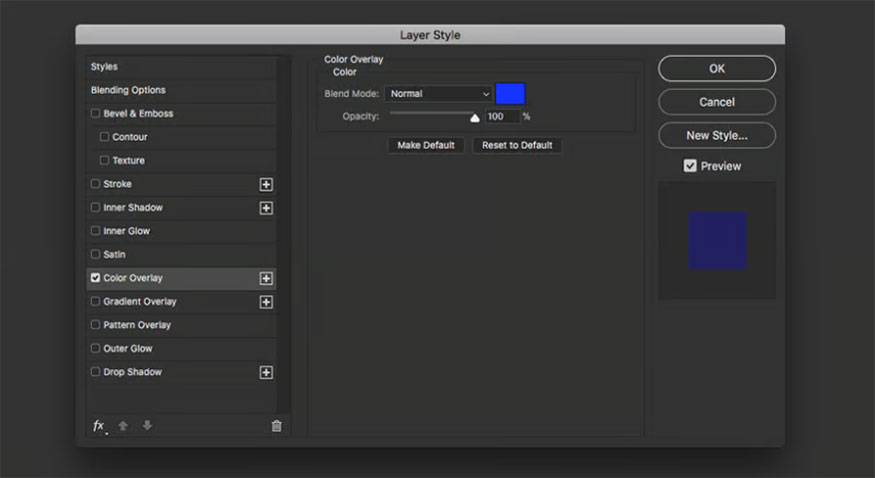
Step 14: Double click on the Blue group and change the Color Overlay to #1833ff.
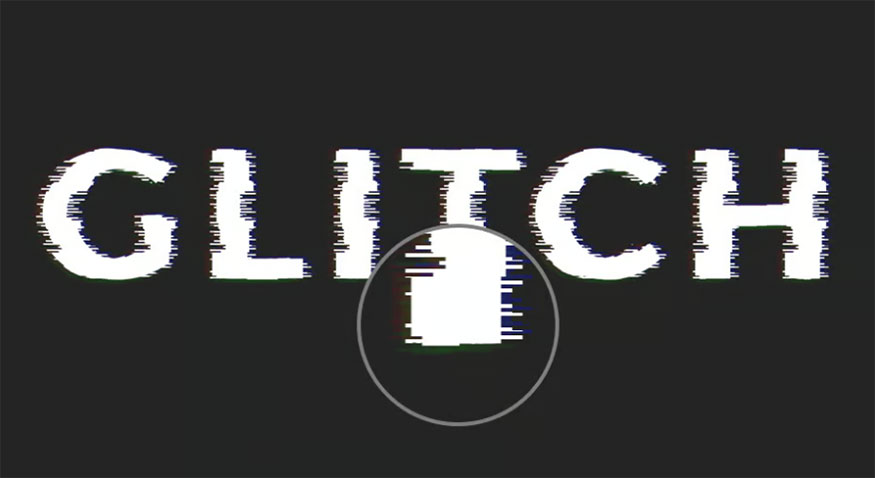
Step 15: Use the arrow keys to randomly move the Red, Green and Blue groups (move them about 10-20 pixels in each group) to get red and blue hues in the text borders.
Step 16: (Optional) To complete the Glitch text effect in Photoshop, I will now add a cool Glitch effect background. Here I used an astronaut background image.
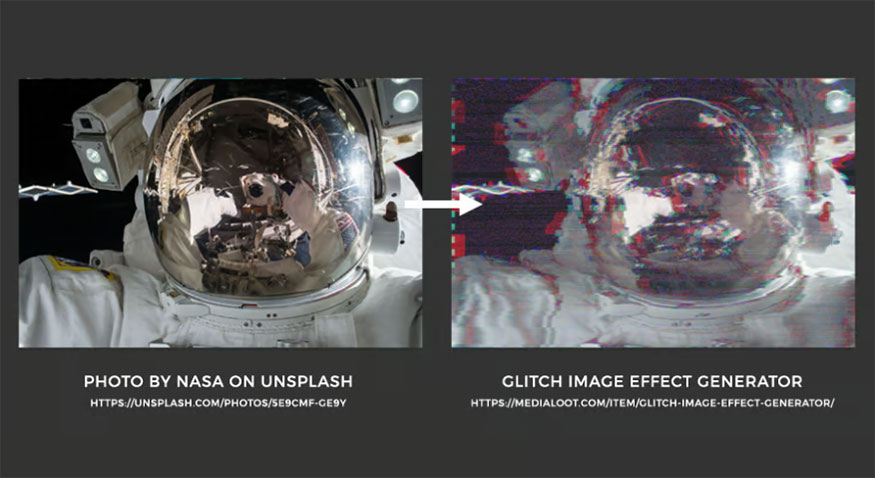
Step 17: Finally, copy and paste your glitch background image behind the Glitch text effect in Photoshop. Now we will have the following result:
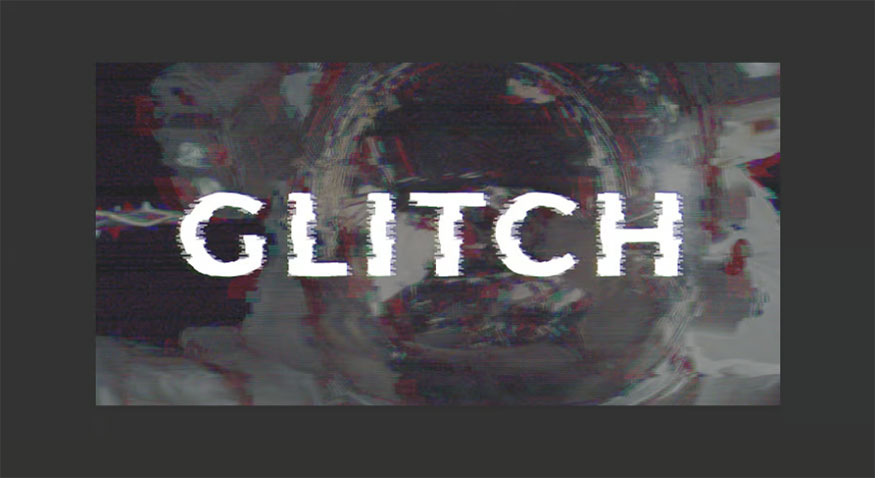
Above is a summary of how to perform the Glitch text effect in Photoshop. You can customize parameters to get unique effects. Try this effect to make your design more unique.


VIP Products


Best Selling Products
Genuine Adobe Illustrator account
99 USD
Upgrade Duolingo Super
29 USD
Upgrade Genuine Office 365
49 USD
Freepik Premium Account
59 USD
Copyright Adobe Lightroom Account
59 USD
MidJourney Account
29 USD
Upgrade genuine Capture One account
120 USD
Autodesk All App Account Copyright
120 USD
Genuine Cheap Canva Pro
39 USD
Windows 10 & 11 Pro Key
36 USD
Plugin Retouch4me
69 USD
ChatGPT Plus Account (GPT-4)
16 USD
Adobe Premiere Pro Account
99 USD
Capcut Pro 1 Year
39 USD
Adobe Photoshop Copyright - Full App
120 USD