Best Selling Products

Autodesk All App Account Copyright
120 USD

Adobe Premiere Pro Account
99 USD

Genuine Adobe Illustrator account
99 USD

Copyright Adobe Lightroom Account
59 USD

Windows 10 & 11 Pro Key
36 USD

Upgrade genuine Capture One account
120 USD

ChatGPT Plus Account (GPT-4)
16 USD

Plugin Retouch4me
69 USD

Freepik Premium Account
59 USD

Upgrade Genuine Office 365
49 USD

MidJourney Account
29 USD

Genuine Cheap Canva Pro
39 USD

Upgrade Duolingo Super
29 USD

Capcut Pro 1 Year
39 USD

Adobe Photoshop Copyright - Full App
120 USD
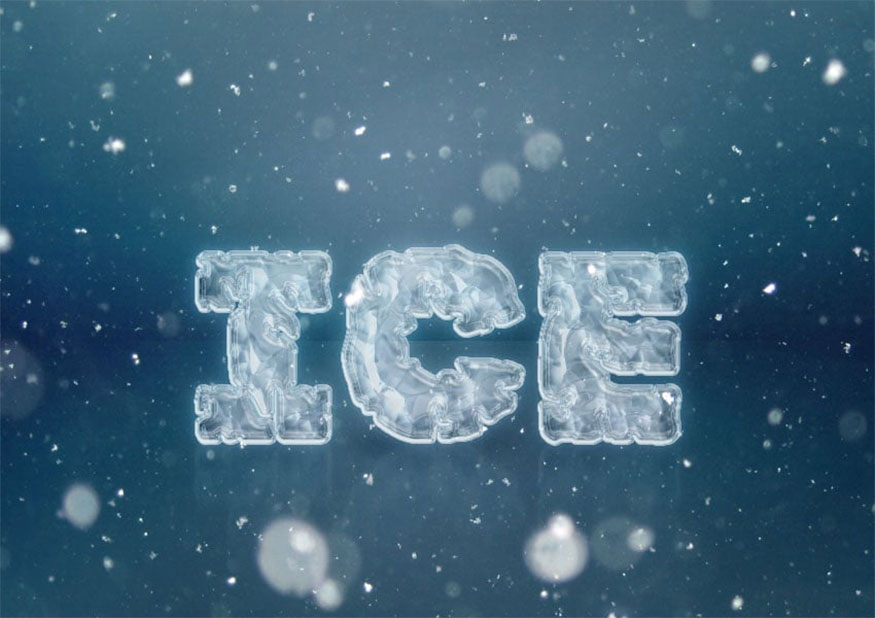
Create an ice text effect in Adobe Photoshop with SaDesign
Nội dung
- 1. Create wallpaper
- 2. How to style the ground shape
- 3. How to copy and paste layer styles
- 4. Instructions on how to adjust the background
- 5. Instructions on how to create a text layer
- 6. Instructions for styling the original text layer
- 7. How to style the first copied text layer
- 8. Styling instructions for the second copied text layer
- 9. Instructions for creating a reflection image
- 10. Instructions for creating simple shadows
- 11. How to add snow texture overlay
- 12. Five impressive ice effects in Photoshop
- 12.1. Snow text effect
- 12.2. Ice Age frozen text effect
- 12.3. Frozen ice texture effect
- 12.4. Digital Snow Brush
- 12.5. Blizzard effect
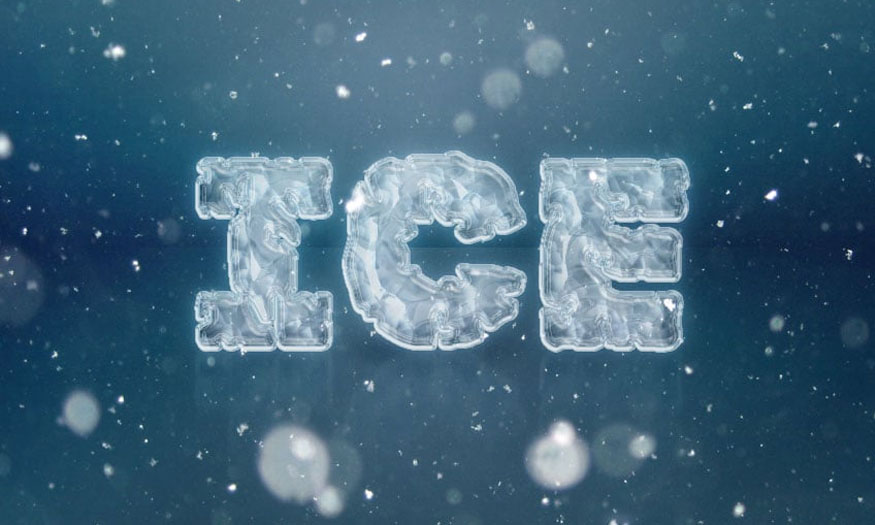
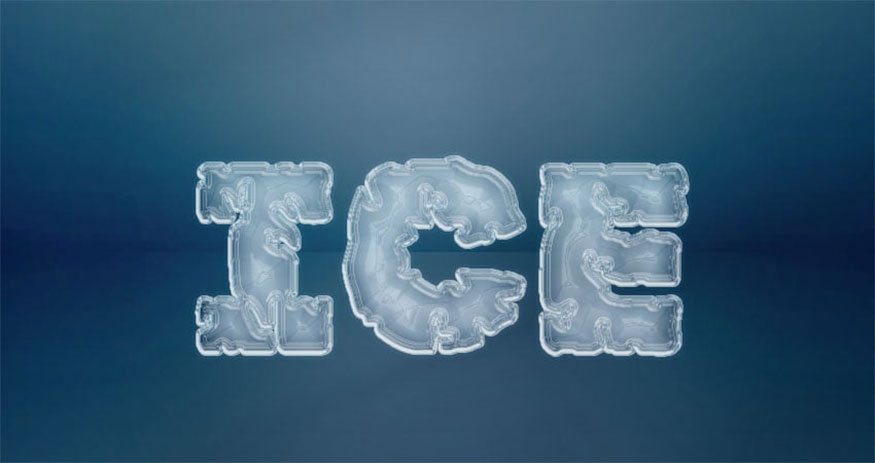
If you are interested in how to create ice text effects in Adobe Photoshop, you absolutely should not miss the following article that Sadesign brings. These instructions will help you easily apply layer styles with simple shapes and textures to create beautiful ice text effects!
If you are interested in how to create ice text effects in Adobe Photoshop, you absolutely should not miss the following article that Sadesign brings. These instructions will help you easily apply layer styles with simple shapes and textures to create beautiful ice text effects!

1. Create wallpaper
The steps to create a wallpaper in Photoshop are very simple, as shown below:
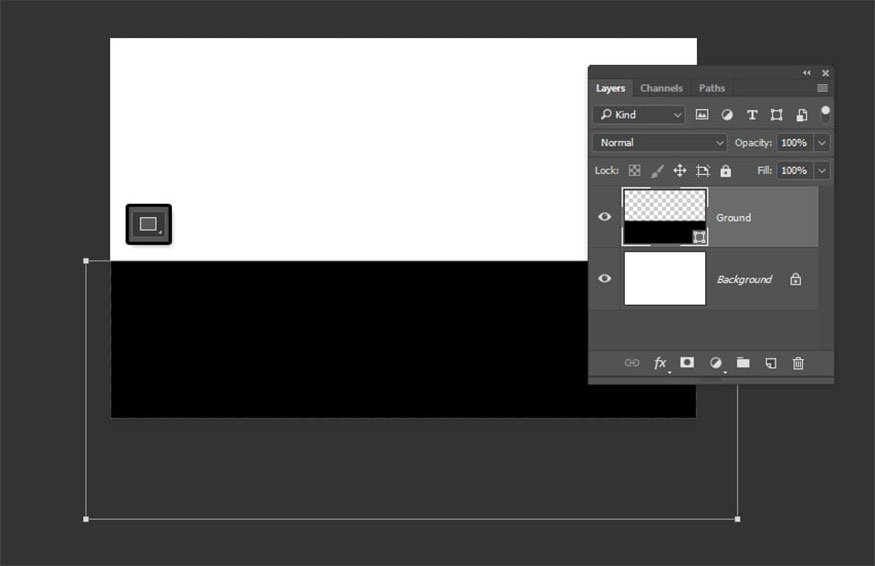
- Step 1: Create a new document with a size of 1000 x 650 px.
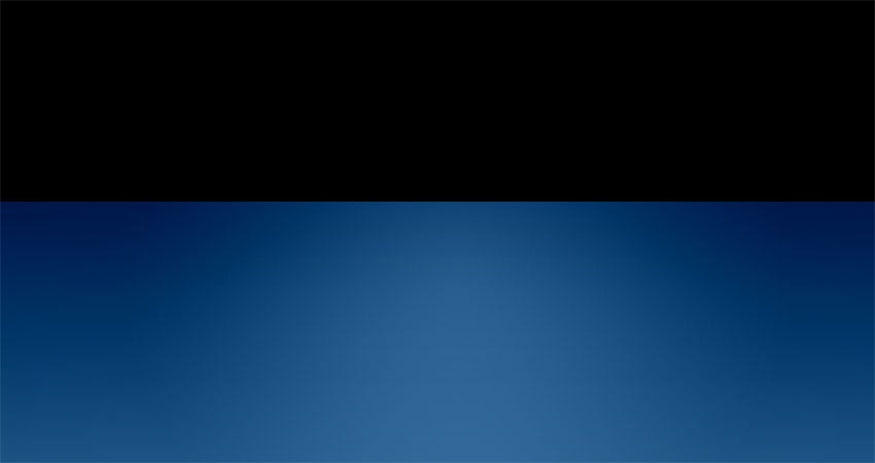
- Step 2: Select the rectangle tool and create a rectangle to cover the bottom of the document. Renaming the rectangular layer to “Ground”.
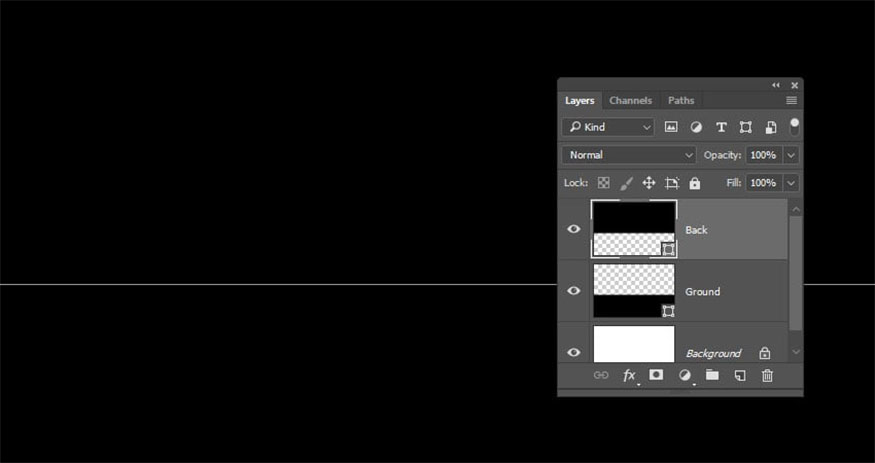
- Step 3: Create another rectangle to cover the top and rename this layer to “Back”.
2. How to style the ground shape
First, you need to double click on the Ground layer to apply the following layer style:
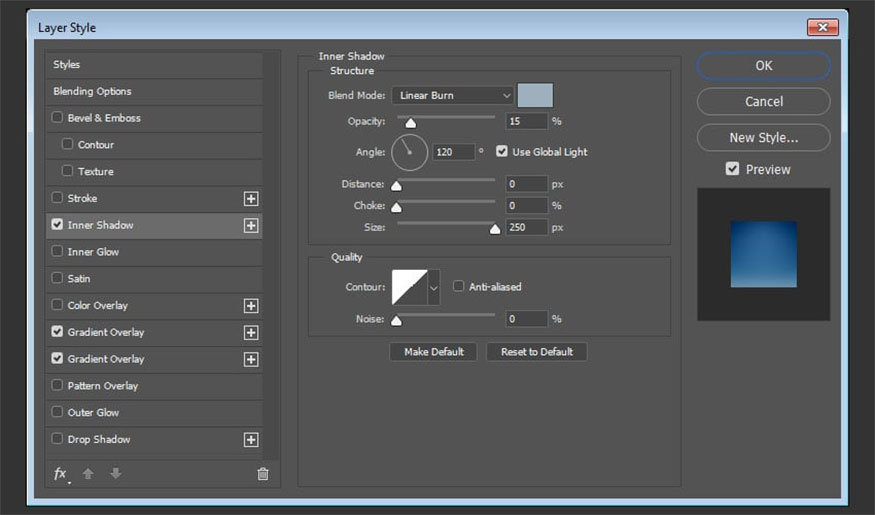
- Step 1: Add Inner Shadow and make the following settings:
-
Blend Mode: Linear Burn
-
Color: #9cb0be
-
Opacity: 15%
-
Distance: 0
-
Size: 250
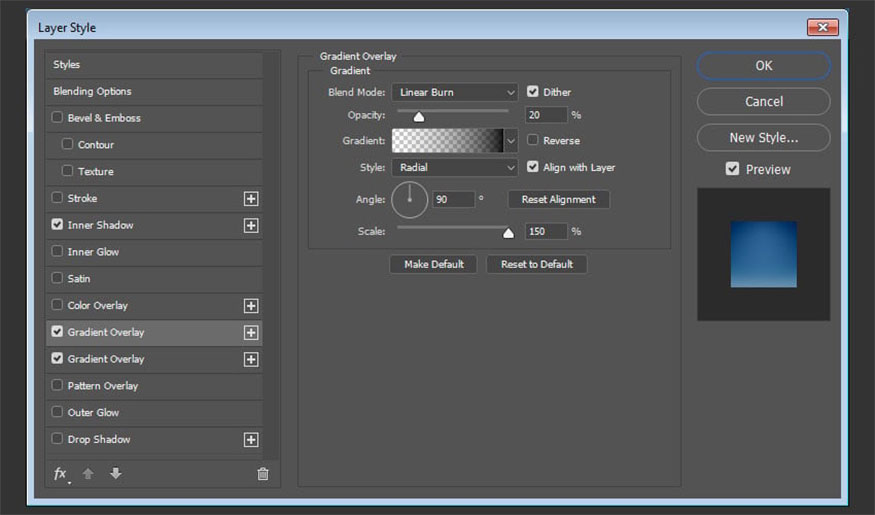
- Step 2: Add Gradient Overlay and make the following settings:
- Check the Dither box
- Blend Mode: Linear Burn
- Opacity: 20%
- Style: Radial
- Scale: 150%
- Create Transparent to Fill Color to fill in color using Black on both sides.
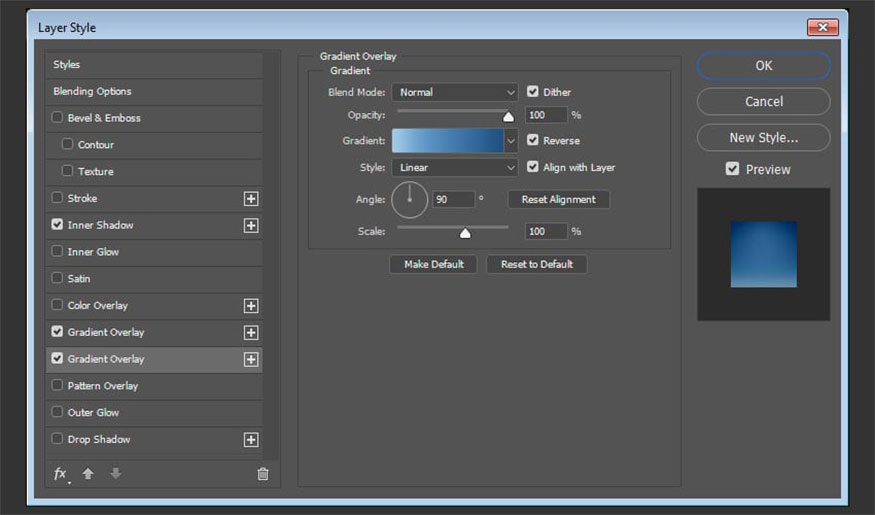
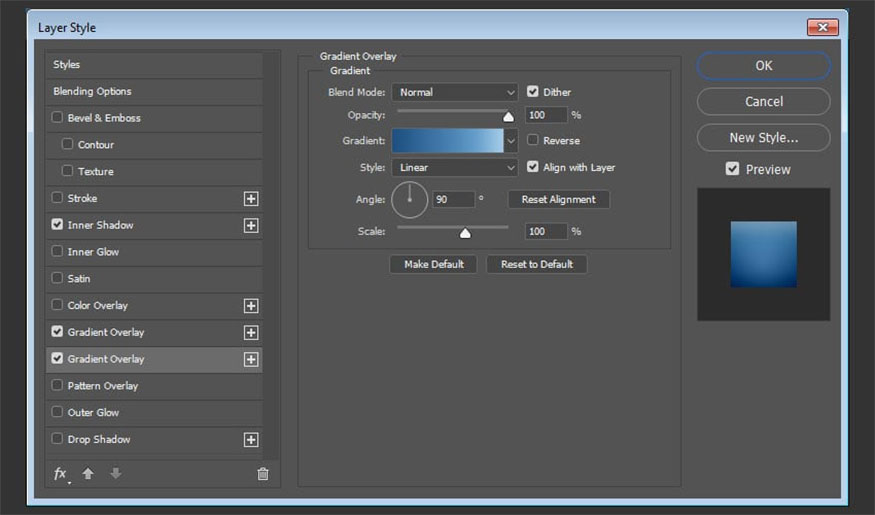
Step 3: Click the + icon right next to the Gradient Overlay Layer tab to add another Gradient Overlay effect and make the following settings:
- Check Dither box.
- Check Reverse box.
- Use Gradient color for rendering from CSP True Sky Gradients file.
- Step 4: Click the first Gradient Overlay tab, then click and drag inside the document to move the gradient so that the light is close to the top of the rectangle.
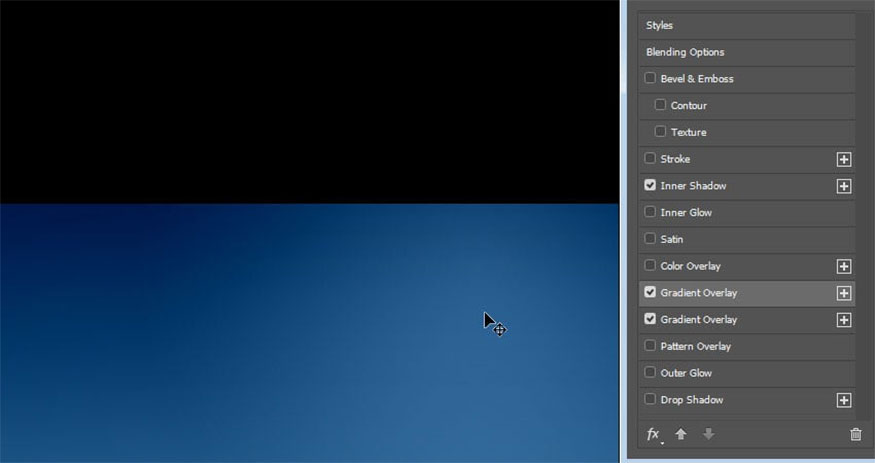
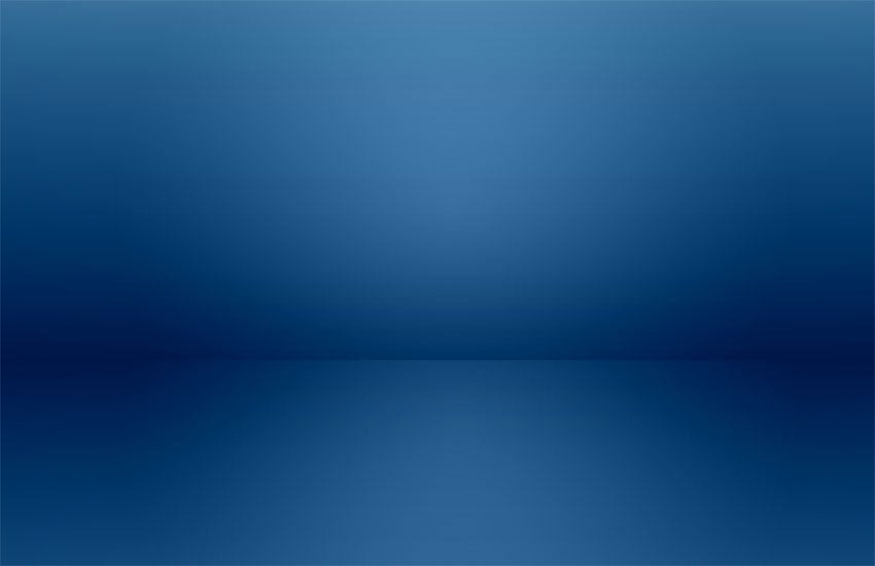
And here is the result with the first rectangle we got:
3. How to copy and paste layer styles
- Step 1: Right click on the Ground layer => select Copy Layer Style => right click on the Back layer => Paste Layer Style.
Double-click the Back layer to uncheck the Reverse box in the second Gradient Overlay effect.
- Step 2: This is to style the rectangle in the back. If necessary you can move any of the gradient fills.
4. Instructions on how to adjust the background
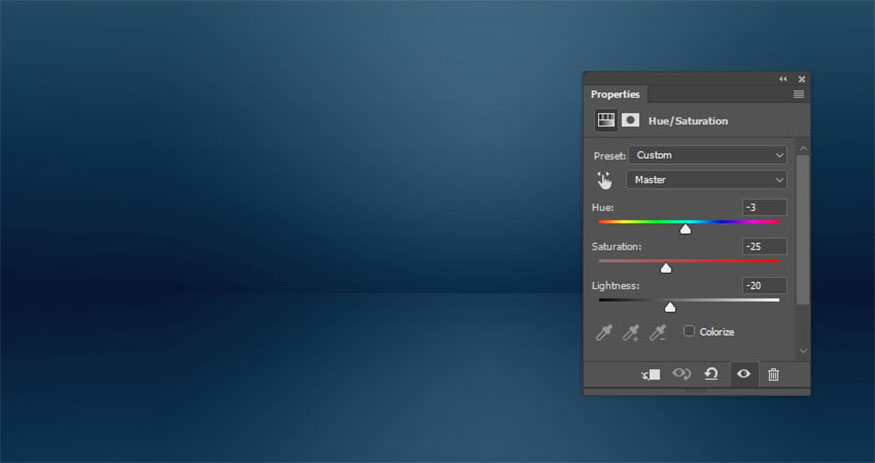
- Step 1: Click the Create new fill or adjustment layer icon at the bottom of the Layers panel, then select Hue/Saturation.

- Step 2: Change the following settings:
- Hue: -3
- Saturation: -25
- Lightness: -20.
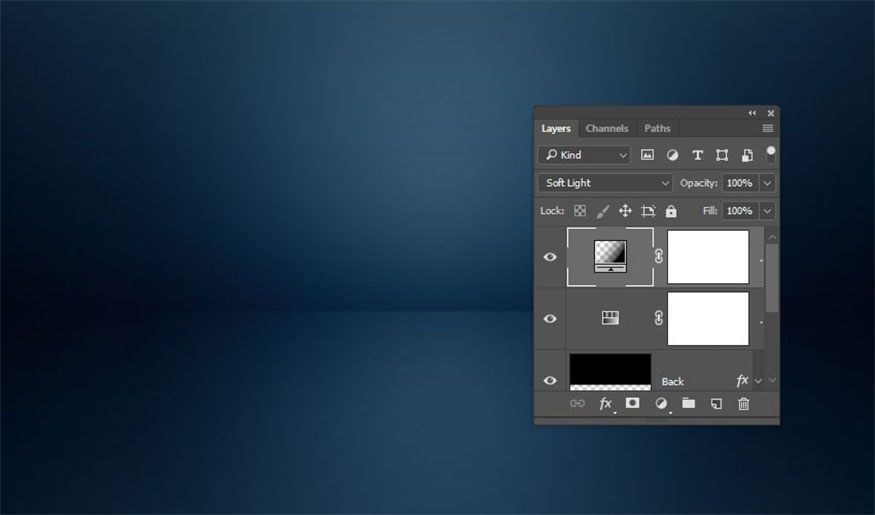
- Step 3: Add a gradient fill layer, create Transparent to Fill Color by using Black color on both sides.
Change the Style to Radial and Scale to 200, then check the Dither box.

- Step 4: Change Blend Mode of gradient layer to Soft Light.
- Step 5: Place the Textures - Golds, Whites, And Grays image on top of all layers, then rename the layer to “BG Texture” and resize if necessary.
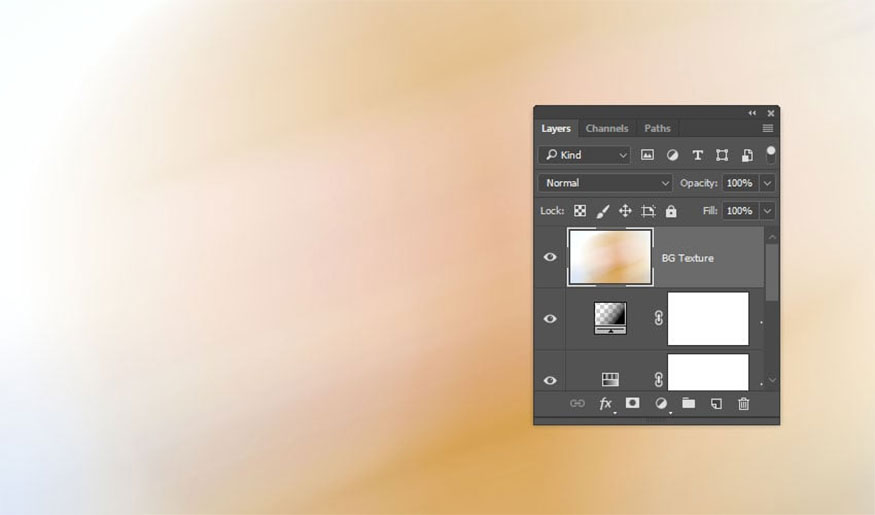
- Step 6: Go to Image => Adjustments => Desaturate, change Blend Mode of BG Texture layer to Soft Light.

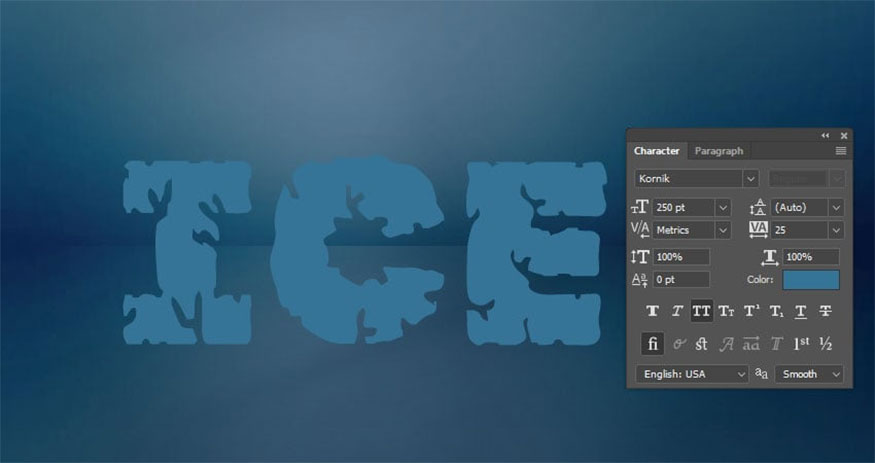
5. Instructions on how to create a text layer
- Step 1: Create a text layer in All Caps format with Kornik font. Next, set the Color to #367497, Size to 250 pt and Tracking value to 25.
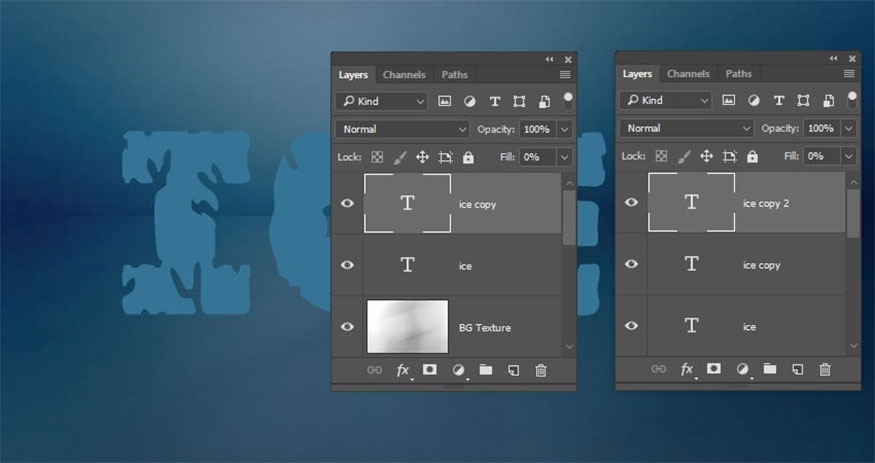
- Step 2: Duplicate the text layer, and change Fill value of the copy to 0, then duplicate the copy layer.
6. Instructions for styling the original text layer
Double-click the original text layer and apply the following layer styles:
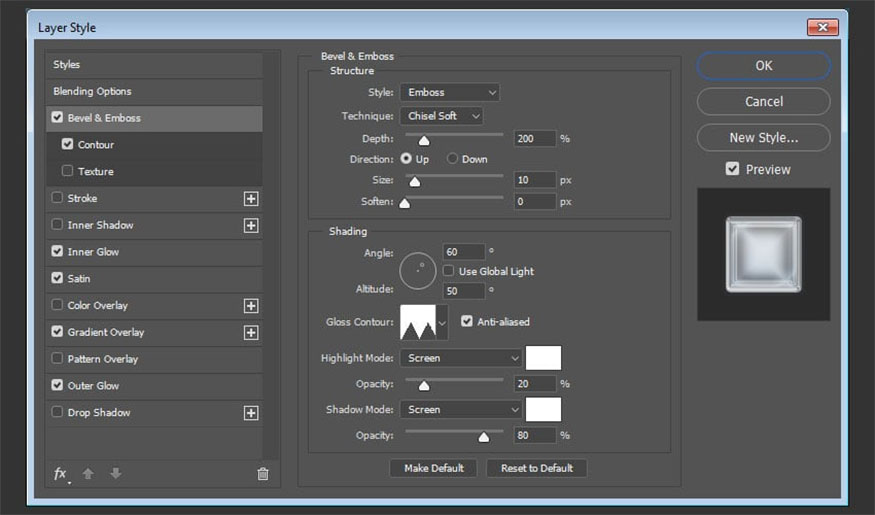
- Step 1: Add Bevel and Emboss and make the following settings:
-
Style: Emboss
-
Technique: Chisel Soft
-
Depth: 200
-
Size: 10
-
Uncheck Use Global Light box
-
Angle: 60
-
Altitude: 50
-
Gloss Contour: Sawtooth 1
-
Check Anti-aliased box
-
Highlight Mode:
-
Opacity: 20%
-
Shadow Mode: Screen
-
Color: #ffffff
-
Opacity: 80%
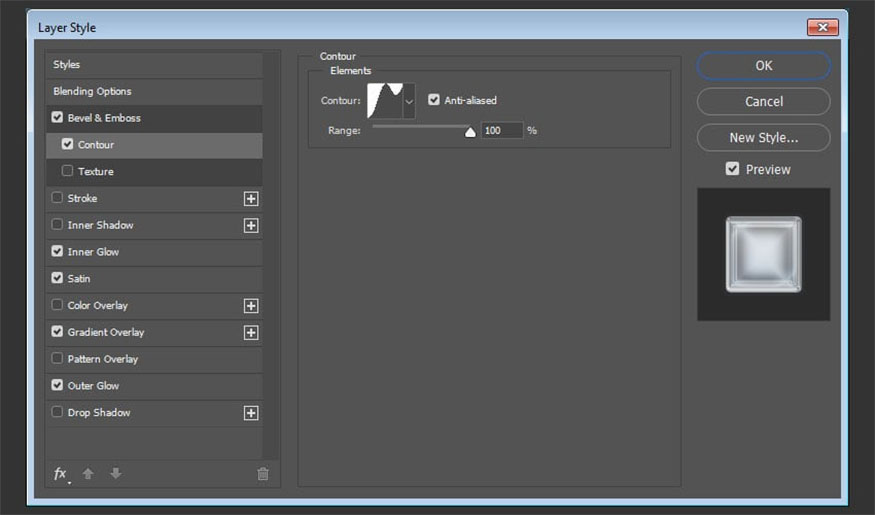
- Step 2: Add Contour and make the following settings:
-
Contour: Rolling Slope - Ascending
-
Check the Anti-aliased box.
-
Range: 100%
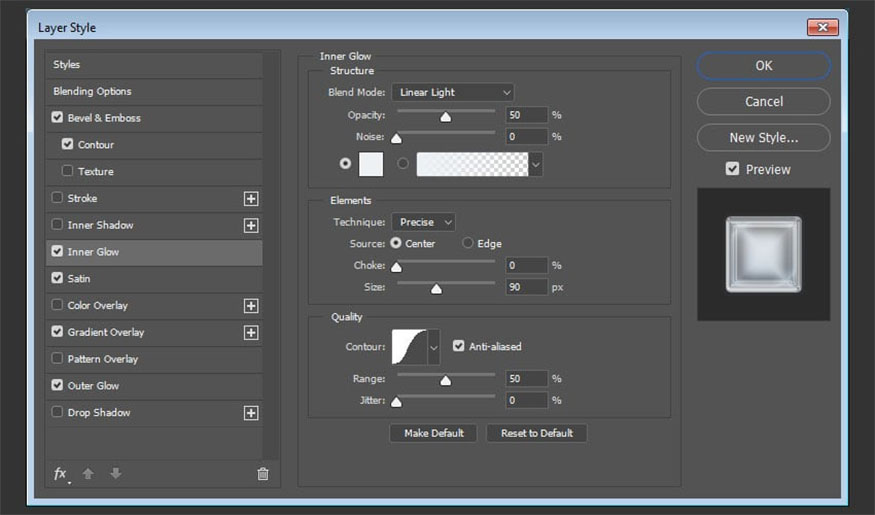
- Step 3: Add Inner Glow and make the following settings:
-
Blend Mode: Linear Light
-
Opacity: 50%
-
Color: #edf1f4
-
Technique: Precise
-
Source: Center
-
Size: 90
-
Contour: Gaussian
-
Check Anti-aliased box.
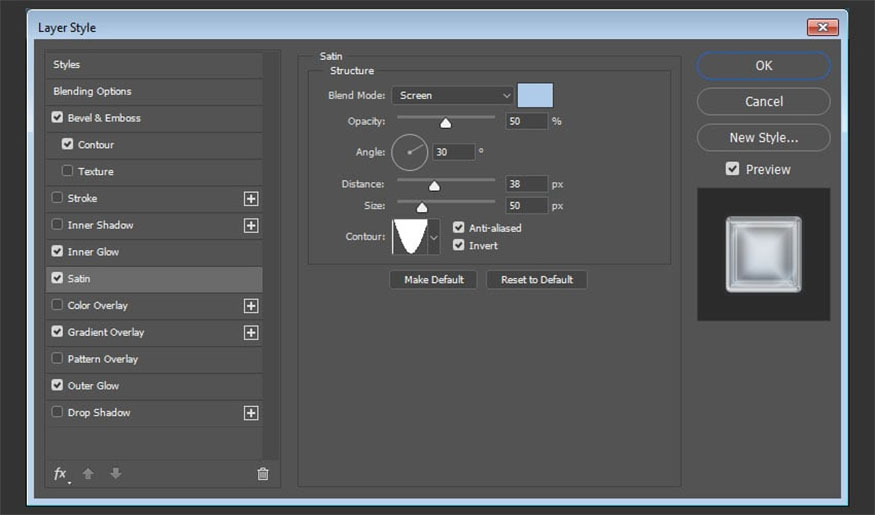
- Step 4: Add Satin and make the following settings:
-
Blend Mode: Screen
-
Color: #afcbea
-
Opacity: 50%
-
Angle: 30
-
Distance: 38
-
Size: 50
-
Contour: Cone - Inverted
-
Check Anti-aliased box
-
Check Invert box.
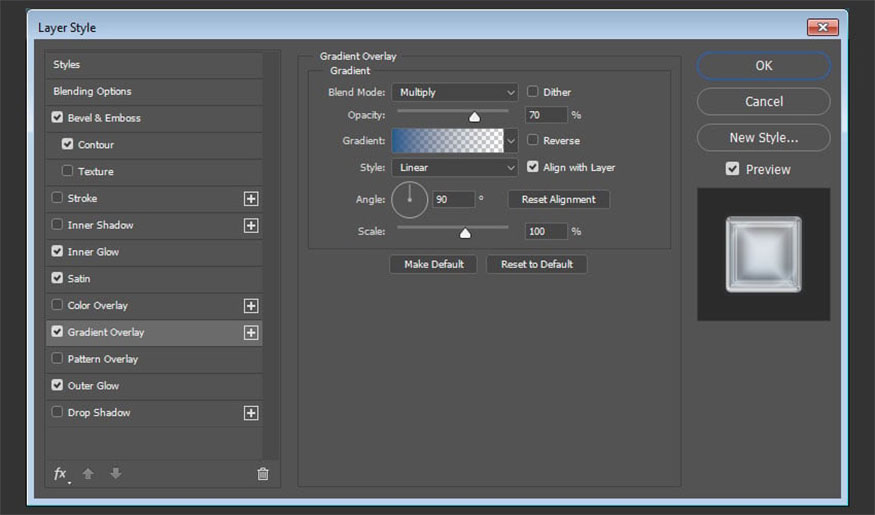
- Step 5: Add Gradient Overlay and make the following settings:
- Blend Mode: Multiply
- Opacity: 70%
- Change Fill Color to Transparent by using color #275c8d on the left and color #274a71 on the right.
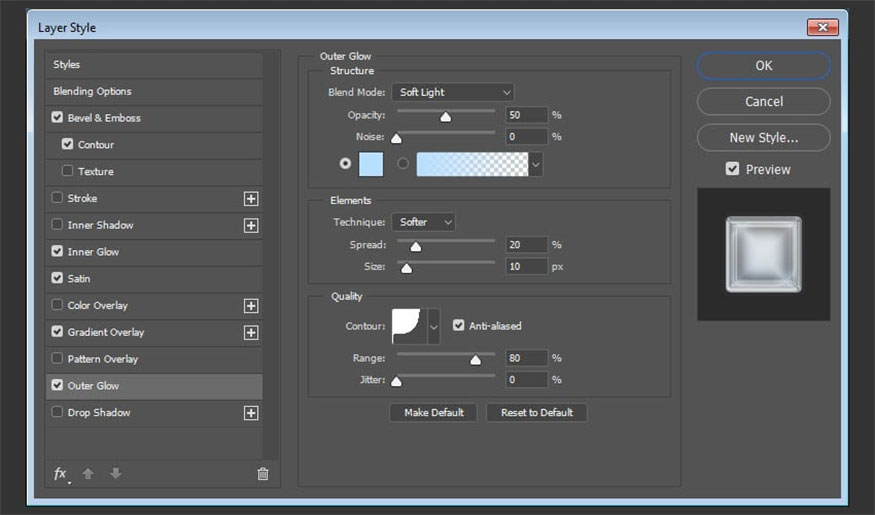
- Step 6: Add Outer Glow and make the following settings:
-
Blend Mode: Soft Light
-
Opacity: 50%
-
Color: #b9dfff
-
Spread: 20
-
Size: 10
-
Contour: Cove - Deep
-
Check Anti-aliased
-
Range: 80%
- Step 7: Change Fill value of text layer to 20%.
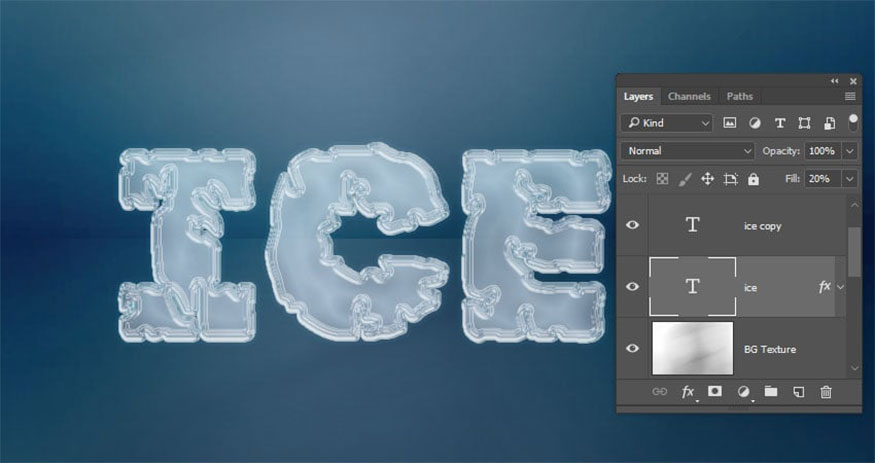
7. How to style the first copied text layer
Double-click the first copied text layer to apply the following layer style:
- Step 1: Add Bevel and Emboss and make the following settings:
-
Technique: Chisel Hard
-
Size: 50
-
Gloss Contour: Ring
-
Check the Anti-aliased box
-
Highlight Mode: Soft Light
-
Opacity: 50%
-
Shadow Mode: Soft Light
-
Color: #f4ffff
-
Opacity: 70%

- Step 2: Add Contour and make the following settings:
-
Contour: Cove - Deep
-
Check Anti-aliased box.

- Step 3: Add Inner Shadow and make the following settings:
-
Blend Mode: Linear Burn
-
Color: #8699a6
-
Opacity: 100%
-
Distance: 0
-
Size: 35
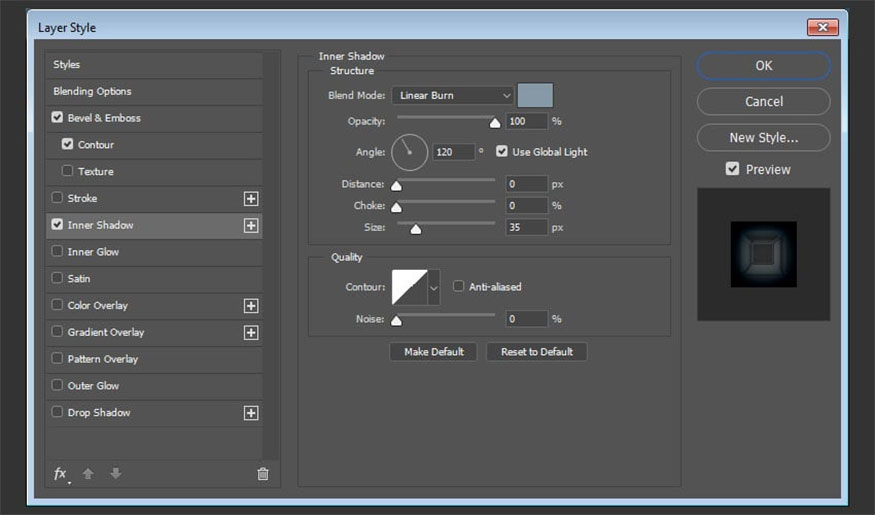
These steps will help style the 2nd text layer as follows:
8. Styling instructions for the second copied text layer
Double -click the second copied text layer then apply the following layer styles:
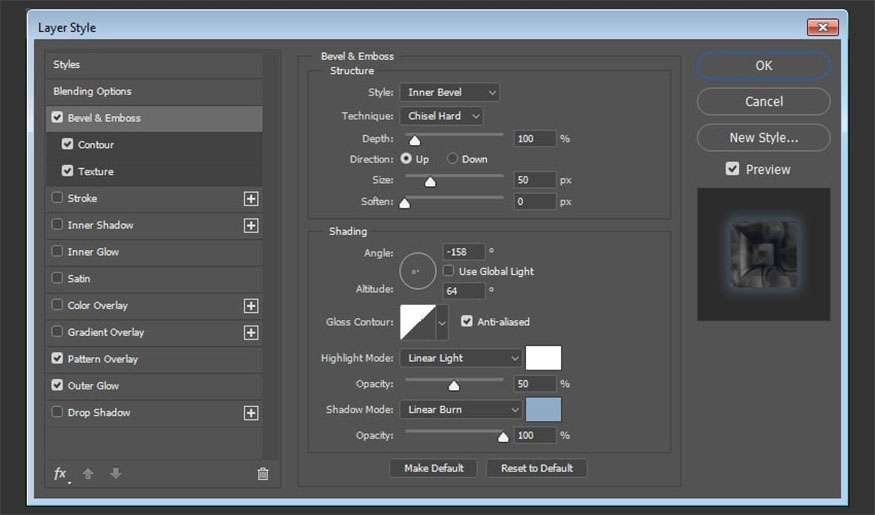
- Step 1: Add Bevel and Emboss and make the following settings:
-
Technique: Chisel Hard
-
Size: 50
-
Check Use Global Light box
-
Angle: -158
-
Altitude: 64
-
Check Anti-aliased box
-
Highlight Mode: Linear Light
-
Opacity: 50%
-
Shadow Mode: Linear Burn
-
Color: #90abc8
-
Opacity: 100%
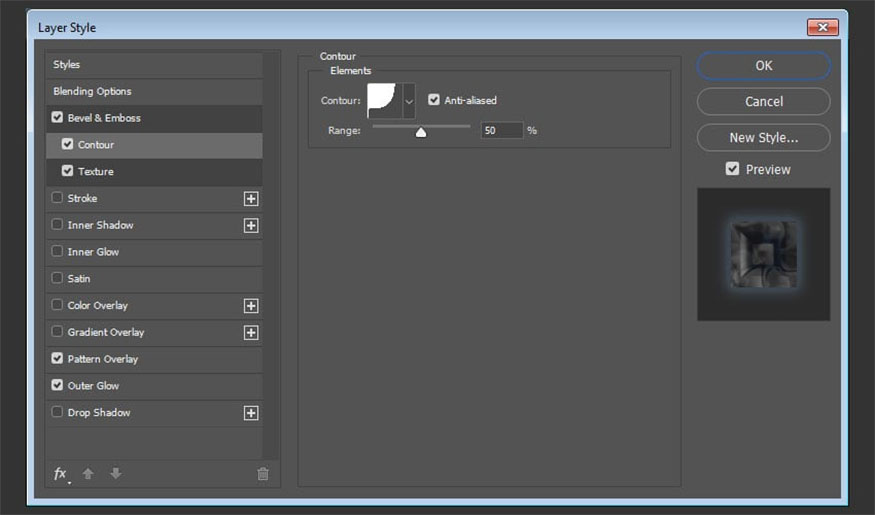
- Step 2: Add Contour and make the following settings:
-
Contour: Cove - Deep
-
Check Anti-aliased box.
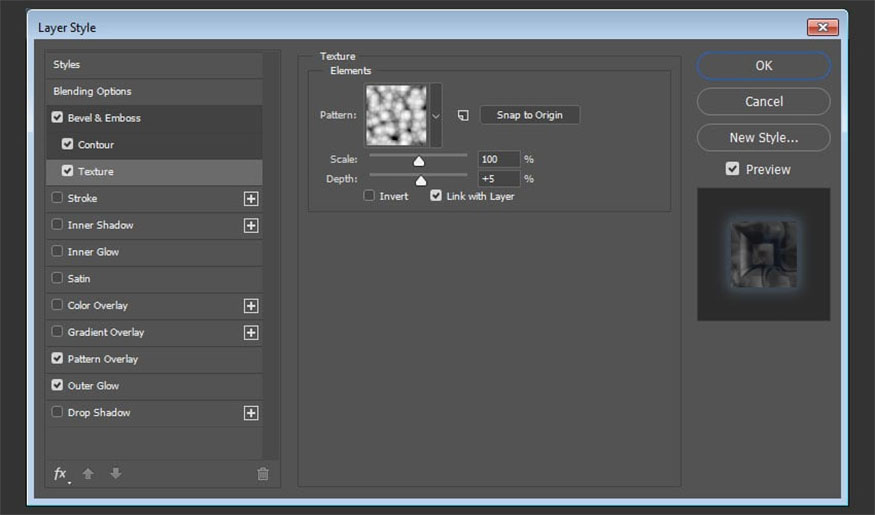
- Step 3: Add Texture and make the following settings:
-
Pattern: Molecular
-
Depth: 5%
- Step 4: Add Pattern Overlay and make the following settings:
-
Blend Mode: Soft Light
-
Pattern: Satin

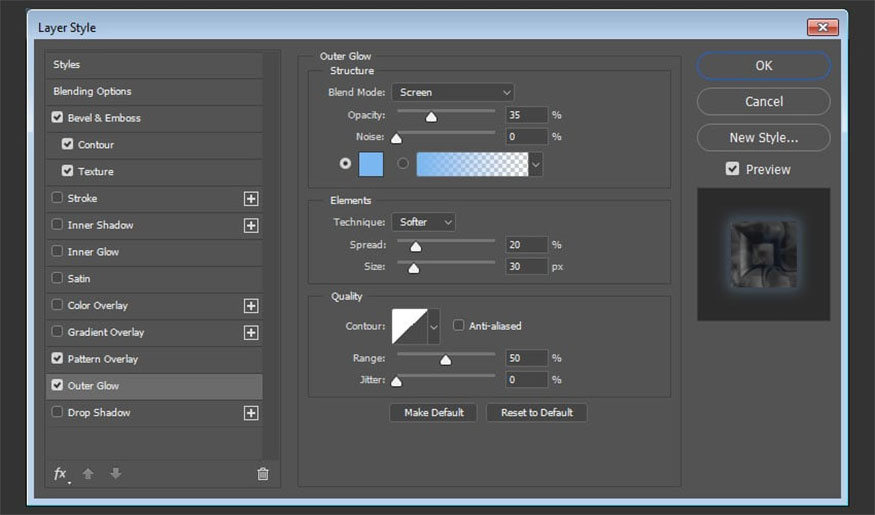
- Step 5: Add Outer Glow and make the following settings:
-
Opacity: 35%
-
Color: #7ab6ef
-
Spread: 20
-
Size: 30
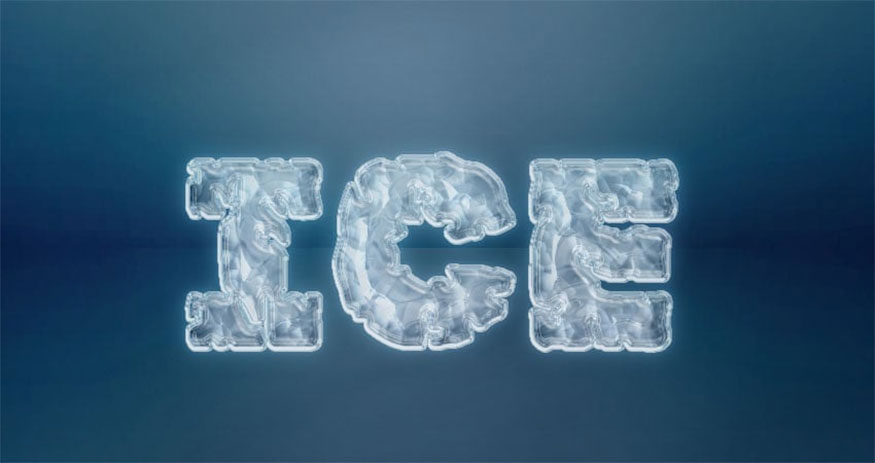
We can see that the font already closely resembles an ice cube.
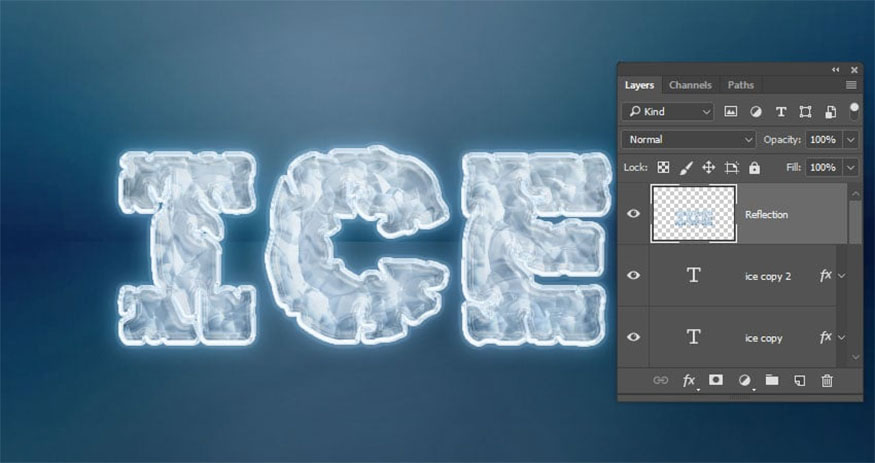
9. Instructions for creating a reflection image
- Step 1: Duplicate the three text layers you have, then go to Layer => Merge Layers => rename the merged layer to “Reflection”.
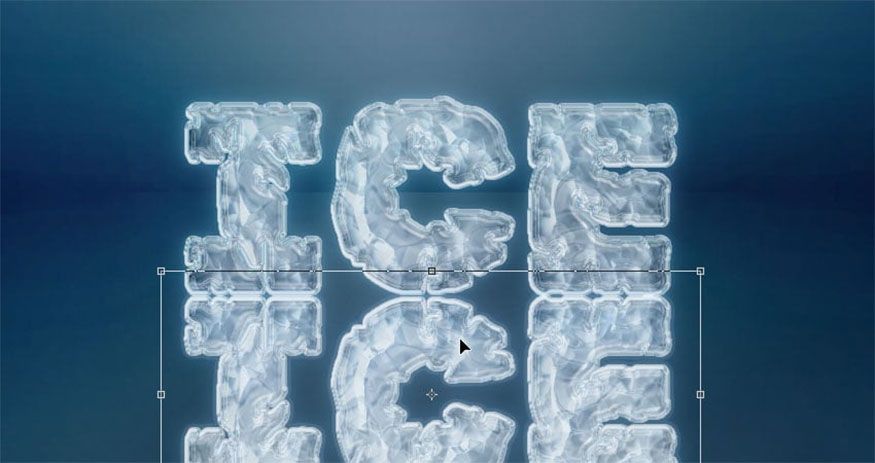
- Step 2: Press Command-T to enter Free Transform Mode => right click on the bounding box => select Flip Vertical.
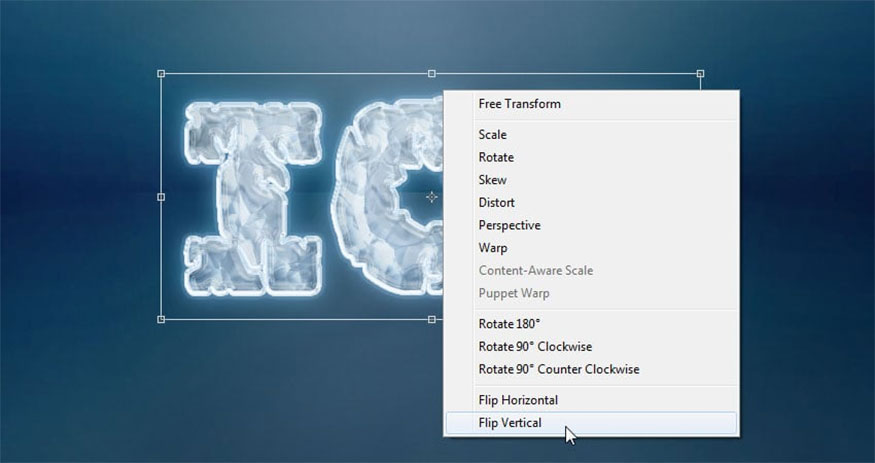
- Step 3: Move the reflected text to the original text, then click Return to accept the changes.
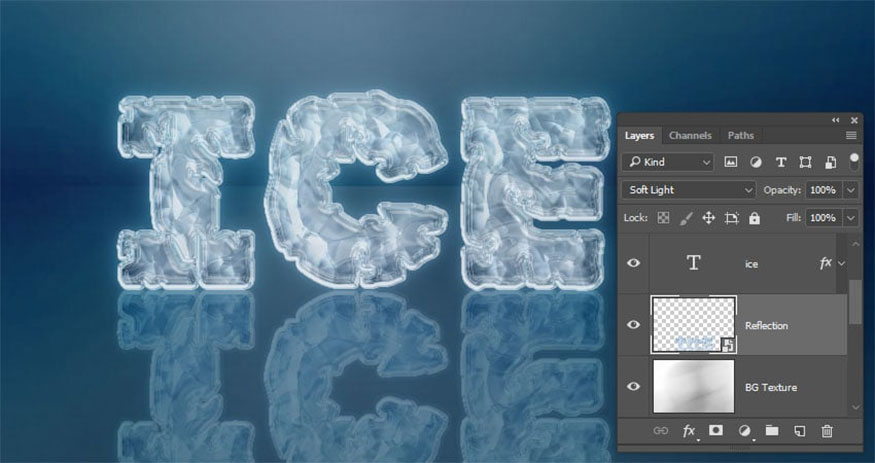
- Step 4: Right click on the Reflection layer => select Convert to Smart Object => change the Blend Mode to Soft Light, name it below the original text layer.
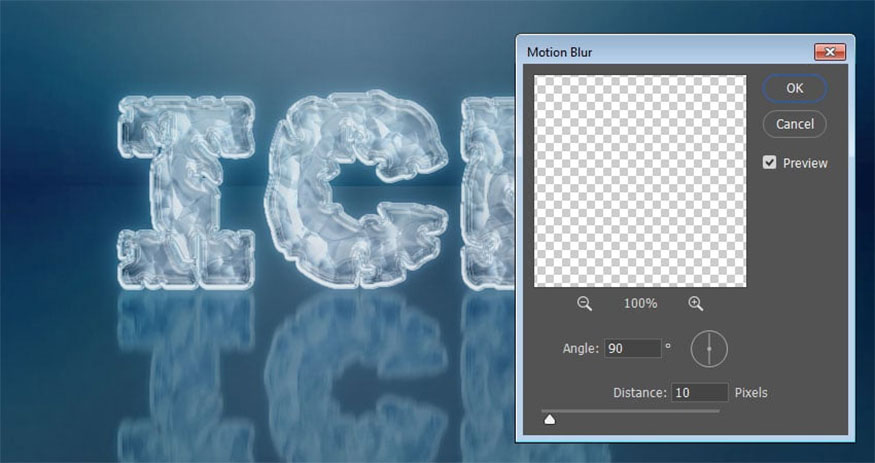
- Step 5: Filter => Blur => Motion Blur => change Angle to 90 and Distance to 10.
- Step 6: Click the Add layer mask icon right at the bottom of the Layers panel to add a mask.
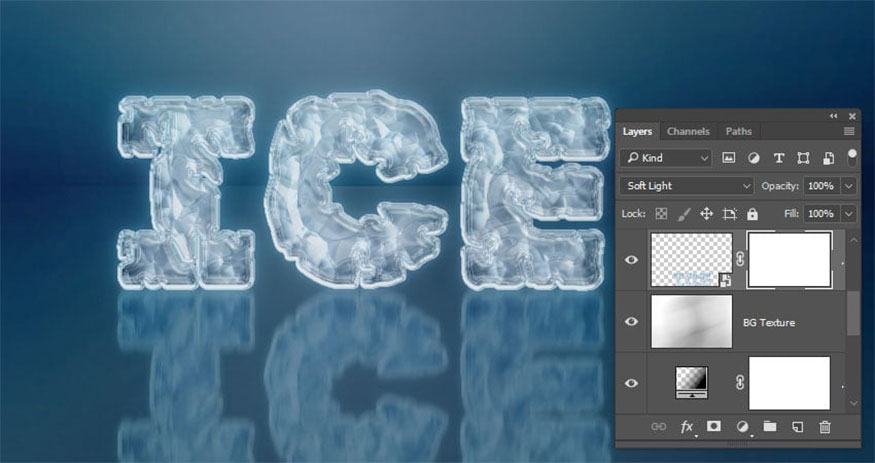
- Step 7: Select Gradient Tool => set Foreground and Background Colors to Black and White, and select the Reflection layer mask thumbnail.
Select Foreground to Transparent and fill in the Options bar to ensure the Linear gradient icon is still active.
Press and hold the Shift key and drag from the top of the original text to the outside of the bottom of the document to fill the mask, hiding the bottom of the reflection.
You can repeat many times to achieve the desired results.
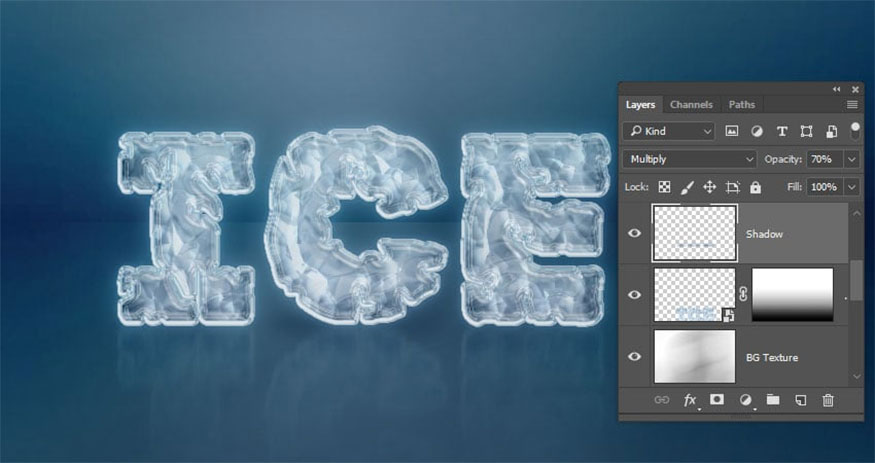
10. Instructions for creating simple shadows
- Step 1: Duplicate the original text layer, drag the copy below it then rename it “Shadow”.
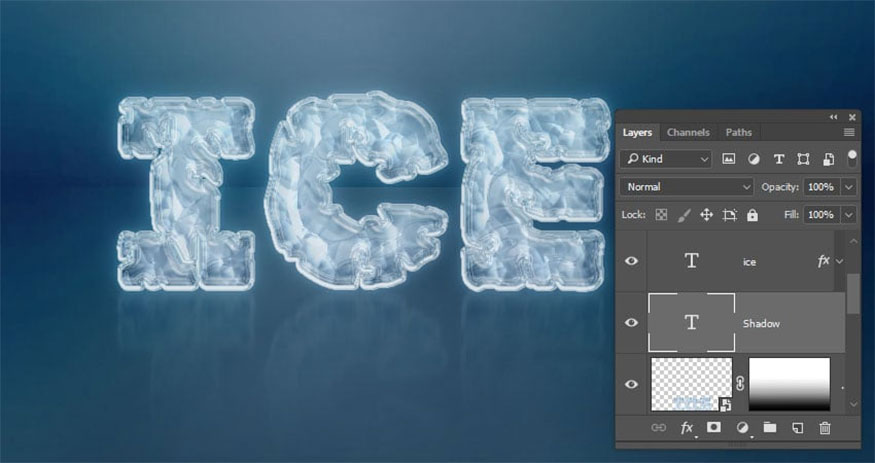
- Step 2: Right click on the Shadow layer => select Rasterize Type => Press Command-T and shrink the text vertically to achieve the basic shadow shape.
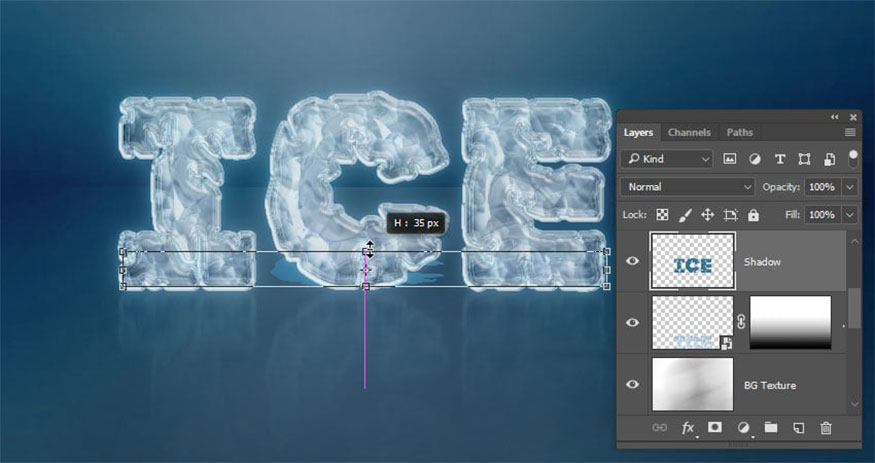
- Step 3: Use the Move Tool to reposition the Shadow right below the text.
- Step 4: Filter => Blur => Gaussian Blur and set Radius to 10.
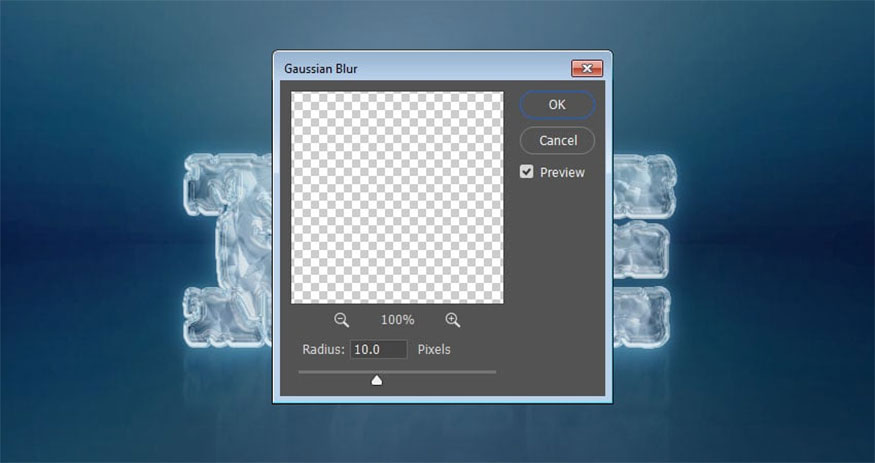
- Step 5: Change Blend Mode of the Shadow layer to Multiply and Opacity to 70%.
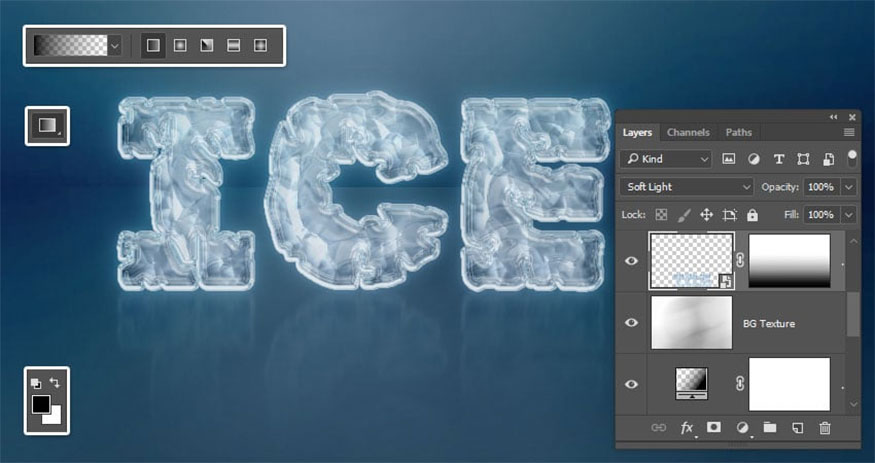
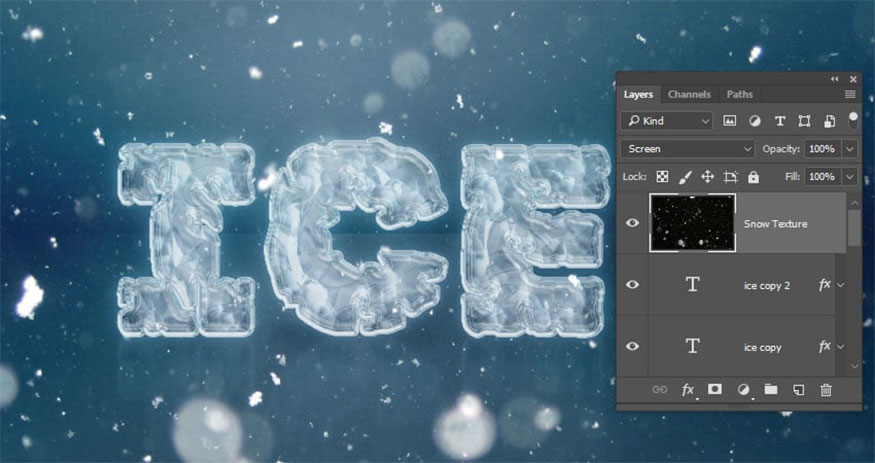
11. How to add snow texture overlay
- Step 1: Place Heavy Snow Texture image on top of all layers and rename this layer to “Snow Texture” => change Blend Mode to Screen => change texture size if needed.
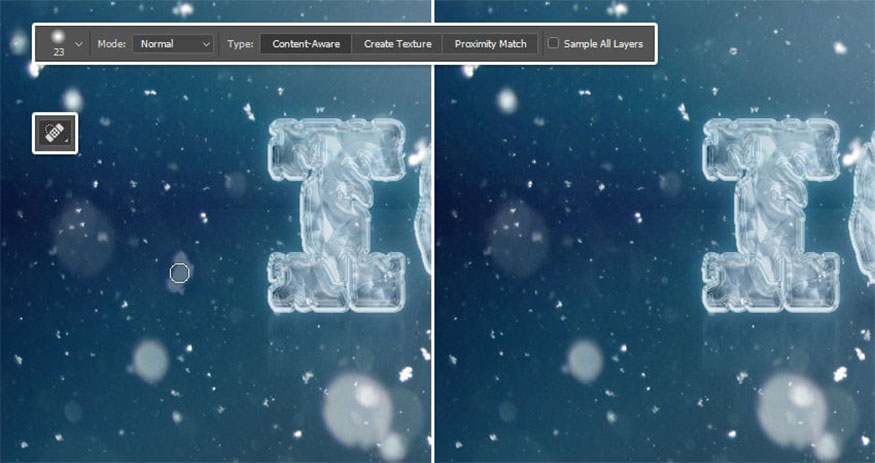
- Step 2: Select Spot Healing Brush Tool, make sure the Sample All Layers box in the Options bar is not selected.
Use the soft round tip to fill in unwanted areas, then to remove them.
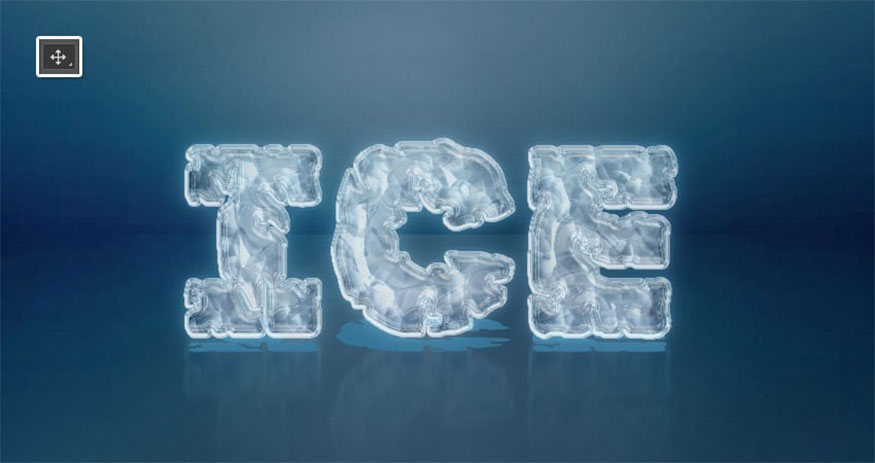
Now we have an extremely beautiful and impressive ice effect in Photoshop.
12. Five impressive ice effects in Photoshop
The following available ice text effects will help you save maximum time while still ensuring you create beautiful and impressive ice letters:
12.1. Snow text effect
You can write text or logo on the snow, within just a few seconds of downloading you will have a realistic writing effect on the snow. This is truly one of the most impressive effects.

12.2. Ice Age frozen text effect
This effect is perfect with all fonts and shapes. You can absolutely apply them to create the feeling of a frozen and icy environment.
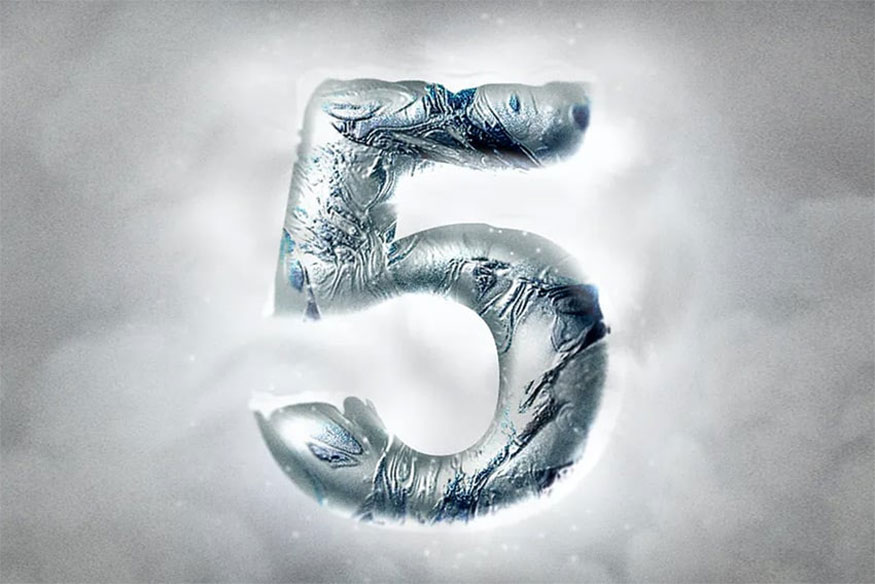
This is a great effect that you can use during Christmas and winter to create a truly beautiful and impressive picture for yourself.
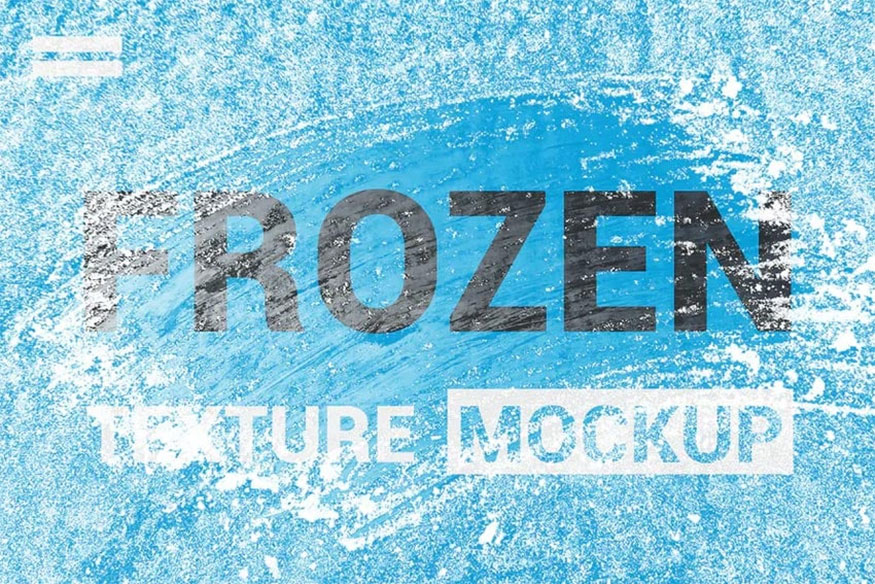
12.3. Frozen ice texture effect
This effect includes a high resolution PSD (size 4500x3000 pixels, 300dpi) and three different styles. With this effect you can edit your ice text with smart objects, layers, folders, and background colors that can be easily changed.
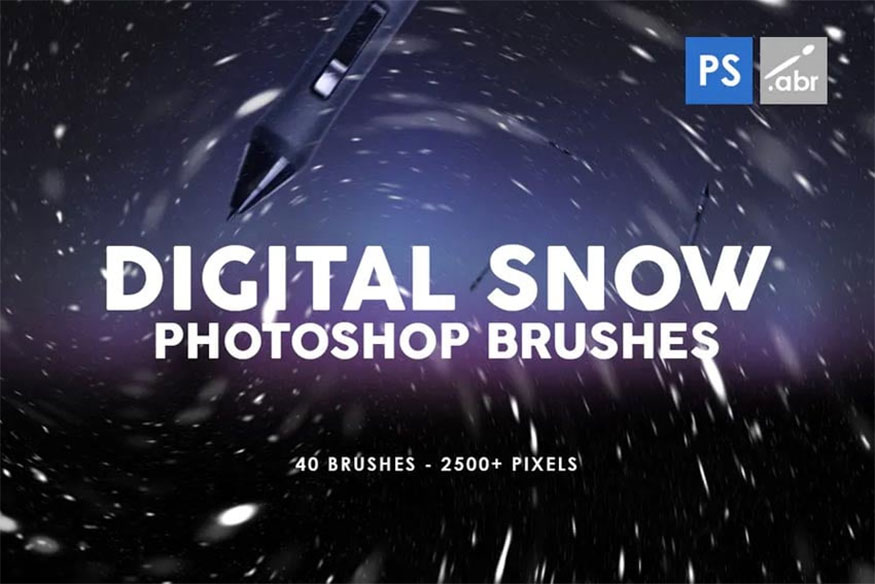
12.4. Digital Snow Brush
Try this digital snow brush effect on your designs. With this effect you will get 2 ABR files, one for Photoshop CS2–CS5 and the other for CS6/CC. You can choose from 40 different snow designs.
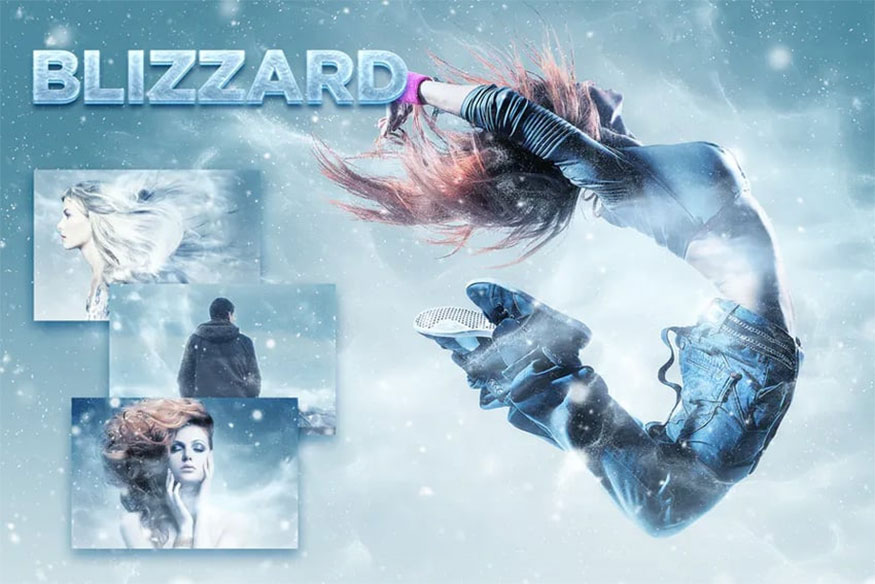
12.5. Blizzard effect
With this effect you just need to swipe the area on the object and perform the action. You will immediately receive the effect of a strong snowstorm. If you want to create ice fonts, this is one filter worth considering.
Hopefully, the complete detailed instructions on how to create ice text effects in Adobe Photoshop that we provide above will help you successfully achieve this effect.


VIP Products


Best Selling Products
Autodesk All App Account Copyright
120 USD
Adobe Premiere Pro Account
99 USD
Genuine Adobe Illustrator account
99 USD
Copyright Adobe Lightroom Account
59 USD
Windows 10 & 11 Pro Key
36 USD
Upgrade genuine Capture One account
120 USD
ChatGPT Plus Account (GPT-4)
16 USD
Plugin Retouch4me
69 USD
Freepik Premium Account
59 USD
Upgrade Genuine Office 365
49 USD
MidJourney Account
29 USD
Genuine Cheap Canva Pro
39 USD
Upgrade Duolingo Super
29 USD
Capcut Pro 1 Year
39 USD
Adobe Photoshop Copyright - Full App
120 USD