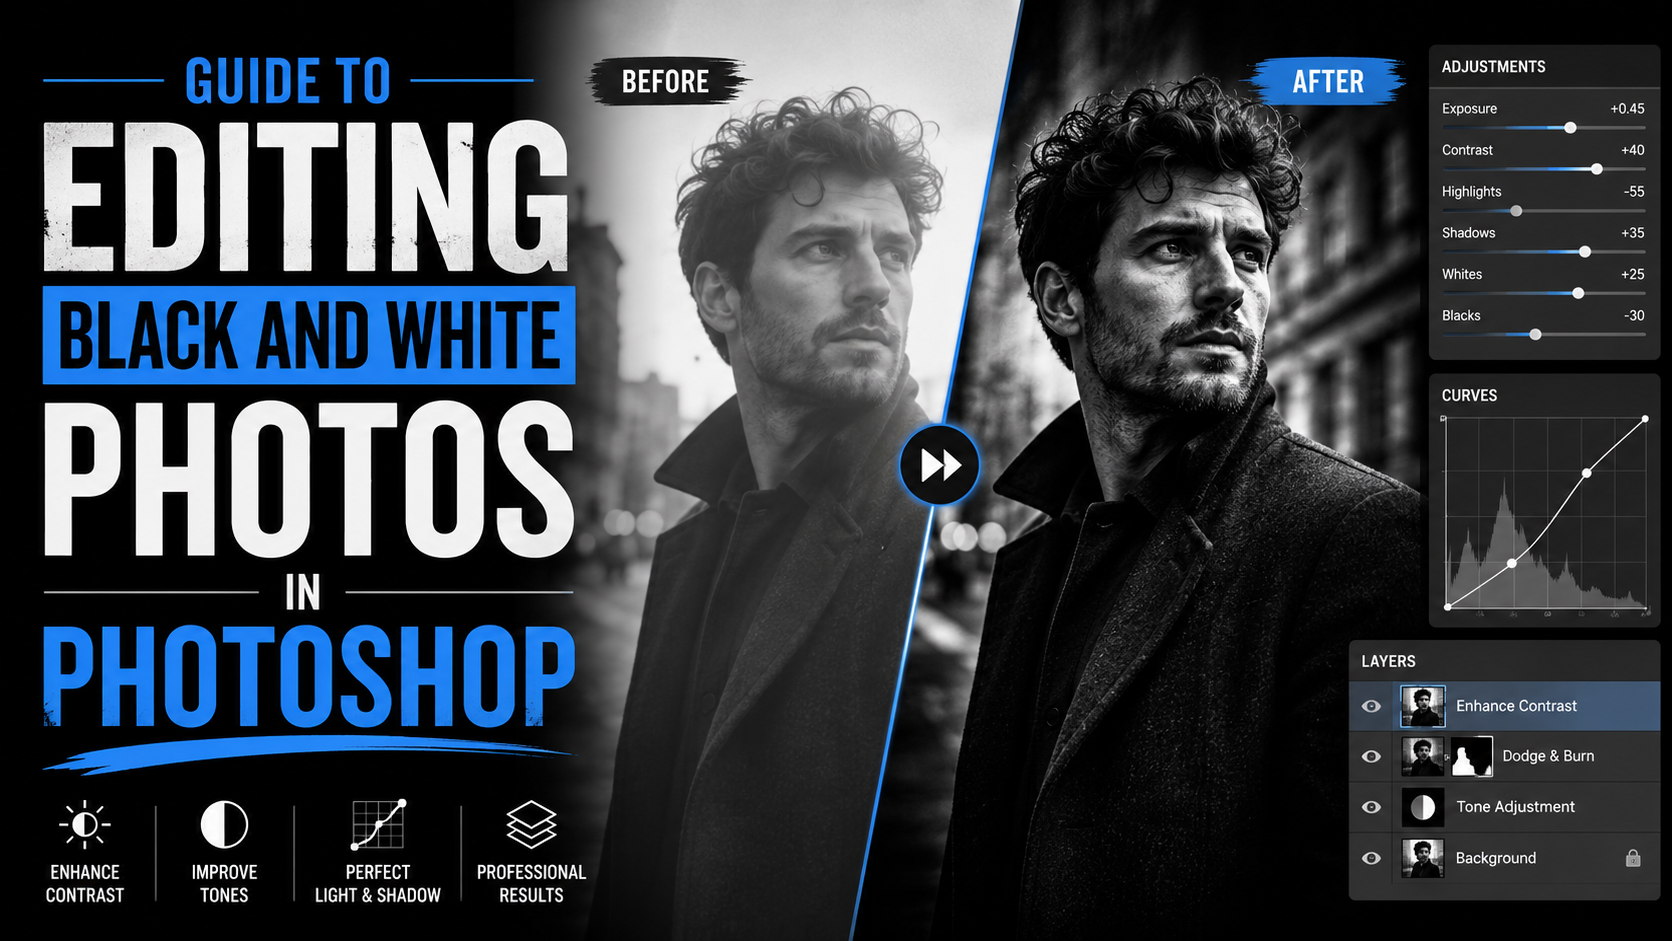
1. Ways to Adjust Black and White Images in Photoshop
In Photoshop, there are two main methods commonly used by photographers and designers to professionally convert color images to black and white. The first method uses the Camera Raw filter, which allows you to access numerous color sliders and other advanced editing tools all within a single workspace. The second method uses the Black and White Adjustment Layer, a tool that has been around since Photoshop CS3 and remains popular due to its simplicity and intuitiveness.
Both methods share the commonality of being non-destructive, meaning you can revert to editing or removing effects at any time without affecting the original image data. This is especially important when you need to experiment with different styles before choosing the best result. Both tools allow you to control the brightness and darkness of individual color ranges such as red, yellow, green, blue, and many others, instead of applying a single conversion formula to the entire image. This allows you to create the desired contrast between areas in the image, such as darkening the sky for added drama, or brightening skin tones to maintain a natural softness in portraits.
2. Convert Color Photos to Black and White Using Camera Raw Filters
The Camera Raw filter is one of the most powerful tools in Photoshop when it comes to converting images to black and white. Not only does it allow conversion with just one click, but it also offers far more detail control than traditional methods. You can apply Camera Raw to any pixel layer; however, to ensure a non-destructive workflow, it's best to convert the image layer to a smart object before you begin editing.
2.1 Step 1: Convert Images into Smart Objects
First, right-click on the image layer in the Layers panel, then select the Convert To Smart Object option. Smart objects act as containers that enclose one or more image layers, allowing you to apply distortion effects, filters, and adjustments without permanently altering the original pixel data. In other words, whenever you want to fine-tune previous settings, or even completely remove an applied effect, you can easily do so without starting over. This is a crucial foundational step that makes the entire subsequent editing process much more flexible and secure.
2.2 Step 2: Apply Raw Camera Filters
After converting the image layer into a smart object, select that layer in the Layers panel, then go to the Filter menu and choose Camera Raw Filter.
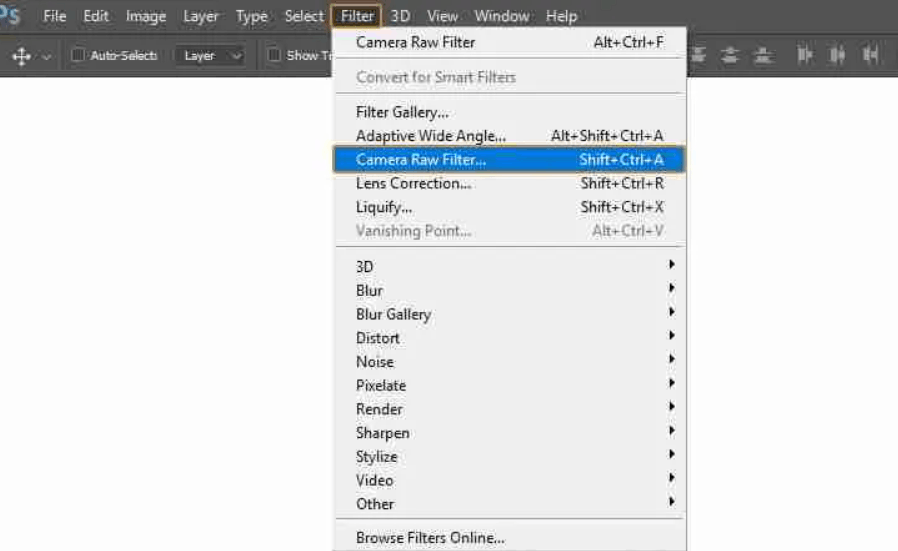
The Camera Raw window opens with a wealth of useful editing tools, not limited to black and white conversion, but also including the ability to enhance saturation, sharpness, contrast, and many other image attributes. Specifically for black and white conversion, Camera Raw offers extremely detailed control over how each color is displayed as different shades of gray, giving you complete control over shaping the style of the final image.
2.3 Step 3: Convert Color Image to Black and White
In Photoshop CC versions, to convert an image to black and white in Camera Raw, you simply click the Black & White button located in the Treatment section. After doing this, a new tab called Black & White Mix will appear, providing you with eight color sliders similar to what you would see in the Black & White Adjustment Layer.
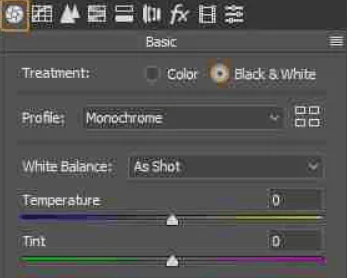
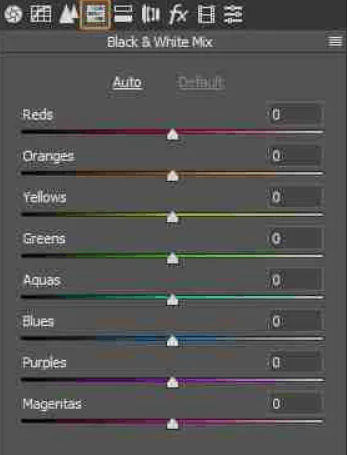
For Photoshop CS6 users, the process is slightly different. You need to switch to the HSL or Grayscale tab, then check the "Convert to Grayscale" box to activate the conversion mode. Although the steps may differ slightly between versions, the ultimate goal remains the same: to prepare your image for the next step of fine-tuning the grayscale levels.
2.4 Step 4: Use the HSL slider to adjust the grayscale of the image.
After desaturatedizing the entire image, you will see eight sliders corresponding to different color ranges. These sliders control the brightness of the grayscale version corresponding to each original color in the image. For example, if you want the sky in the image to be darker and more dramatic, simply drag the Blues slider to the left.
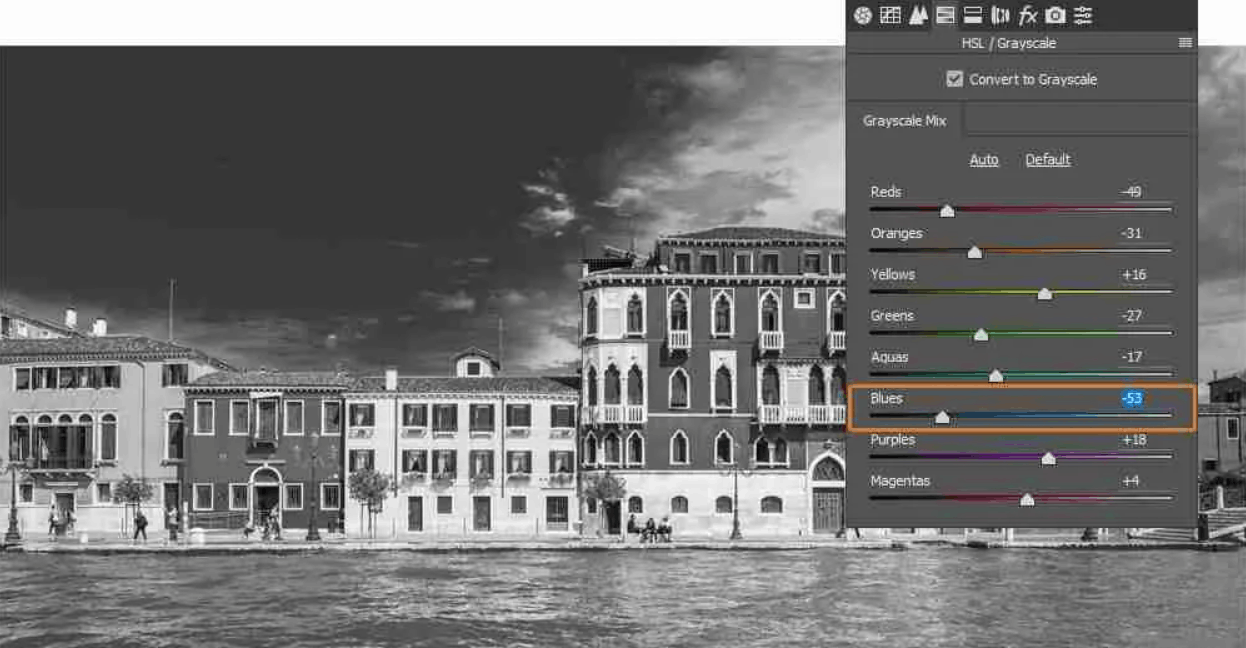
One notable difference between Camera Raw and the Black and White Adjustment Layer lies in the number and types of color sliders. Camera Raw offers three additional sliders: Oranges, Purples, and Aquas, but lacks the Cyans slider found in the Black and White Adjustment Layer. These additional sliders give you more options to fine-tune the final look of a black and white photograph, especially useful when the original image has complex or blended tones.
2.5 Step 5: Adjust the Crop Area in Your Image
Another notable feature of Camera Raw is its ability to display overexposure warnings, indicating areas that have completely lost detail due to being too bright or too dark. When you drag a color slider too far in one direction, you'll see blue or red areas appear in the image. This is Photoshop's way of warning that pixels in that area have become completely black or completely white, no longer retaining any detail.
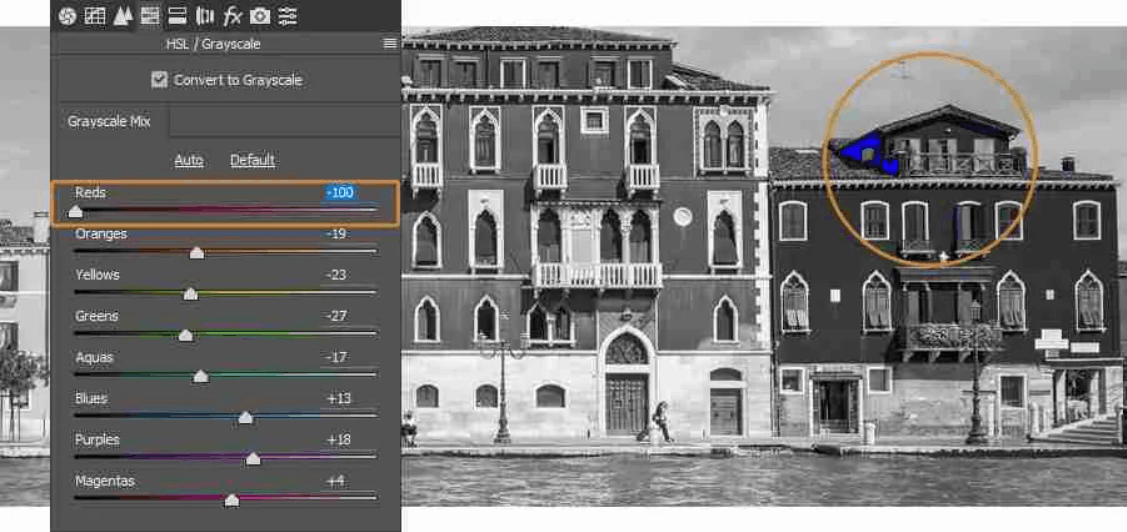
Specifically, the red area indicates that the corresponding region has completely turned white and lost all detail, while the blue area indicates that the pixels below have completely turned black. When you detect these warnings, you can use the color sliders or tone sliders to fine-tune the image, aiming to restore some detail in the affected areas.
In some cases, you might want to keep the highlighted or darkened areas as they are for artistic purposes. If so, you can turn off the warning by clicking the corresponding triangle icon on the histogram. The triangle on the left corresponds to the dark areas, and the triangle on the right corresponds to the bright areas.
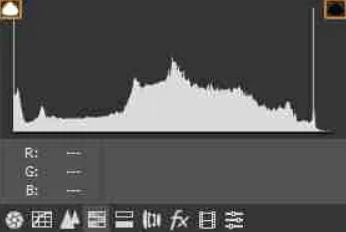
Additionally, you can use the U key to turn off the dark area clipping alert and the O key to turn off the bright area clipping alert, making the operation quicker and more convenient.
2.6 Step 6: Using Other Tools in Camera Raw
Besides its black and white conversion capabilities, Camera Raw integrates many other useful tools to help you perfect your photos. You can adjust exposure to balance the overall light, sharpen details to increase clarity, reduce noise if the original photo was taken in low light conditions, or add darkening effects to create visual emphasis and draw attention to the center of the image. The flexible combination of these tools with the black and white conversion process will help you create a more complete, professional, and emotionally rich product.
3. Creating Black and White Images Using the Black and White Adjustment Layer
Besides the Camera Raw filter, Photoshop also offers another very popular method: using the Black and White Adjustment Layer. This tool first appeared in Photoshop CS3 and is still considered one of the most effective ways to convert color images to black and white, thanks to its ability to precisely control how each color is represented as a shade of gray. Compared to simple desaturation, the Black and White Adjustment Layer provides results with much better depth and contrast.
3.1 Step 1: Create a Black and White Adjustment Layer
To begin, open the Layers panel, click the New Adjustment Layer icon, and then select Black and White from the list of options that appears. Immediately, Photoshop will create a new adjustment layer on top of your original image layer, and automatically desaturated the entire image.
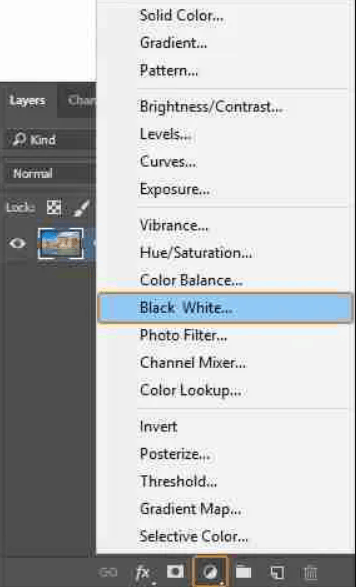
Because this is a separate adjustment layer, you can completely hide, show, delete, or re-edit it at any time without affecting the original image layer underneath, keeping the entire workflow flexible and secure.
3.2 Step 2: Adjust the Color Slider in the Properties Panel
After the adjustment layer is created, the Properties panel will display six sliders corresponding to the colors Reds, Yellows, Greens, Cyans, Blues, and Magentas. Each slider controls the brightness of the grayscale version corresponding to the original color in your image. For example, dragging the Reds slider to the left will darken areas that were originally red in the black and white version. Conversely, dragging it to the right will brighten those areas.
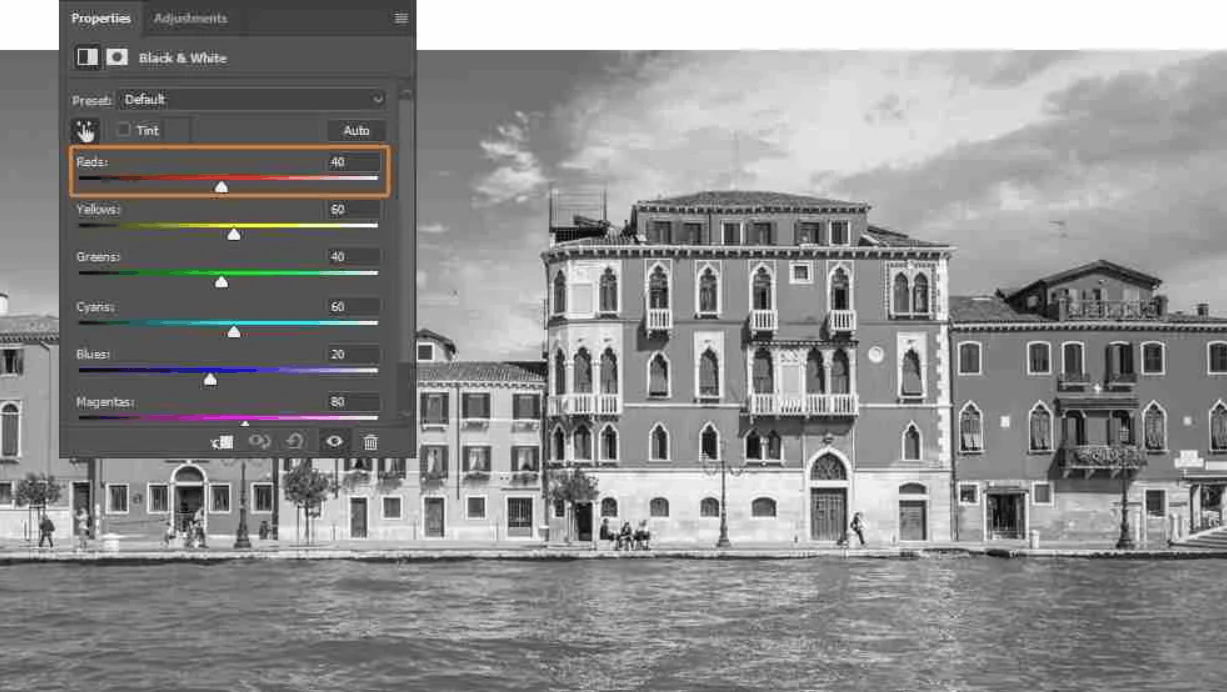
You can fully utilize these sliders to create the desired contrast and tone for your photos. For example, if you want the sky in your photo to be darker to add drama and depth, simply drag the Blues slider to the right. Experimenting and flexibly combining different sliders will help you find the black and white style that best suits each specific photo, depending on the subject and emotion you want to convey.
3.3 Step 3: Using Image Adjustment Tools
In addition to directly manipulating sliders, Photoshop also offers a more intuitive approach through the On-Image Adjustment tool. You can find this tool in the upper left corner of the Properties panel. Once activated, simply click and drag directly over the area of the image you want to adjust.
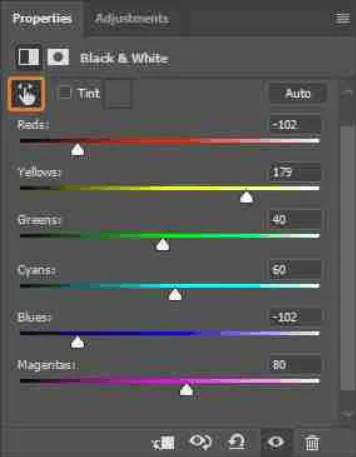
When you perform this operation, Photoshop will automatically identify the dominant color at the location you are manipulating and adjust the color slider accordingly. If you drag the mouse to the left, that area will become darker, and if you drag it to the right, that area will become brighter. This method is particularly useful when you want to quickly edit without having to pinpoint the exact color, as everything is done directly on the image, making the editing process much more intuitive and flexible than manipulating individual sliders.
4. Conclusion
Both methods yield high-quality black and white conversions and maintain non-destructive editing throughout the process. If you need a quick workflow, direct access to the adjustment layer, and easy management within the Layers panel, the Black and White Adjustment Layer is the right choice. Conversely, if you want more color sliders, exposure warnings, and other supporting tools in a single workspace, the Camera Raw filter is a more worthwhile option. Regardless of the method, the most important thing is to take the time to experiment with each color slider to find the black and white style that best suits your personality and the story your photo wants to tell.