Best Selling Products

Freepik Premium Account
59 USD

Genuine Adobe Illustrator account
99 USD

Adobe Photoshop Copyright - Full App
120 USD

Genuine Cheap Canva Pro
39 USD

Upgrade Genuine Office 365
49 USD

Plugin Retouch4me
69 USD

Windows 10 & 11 Pro Key
36 USD

Copyright Adobe Lightroom Account
59 USD

Upgrade Duolingo Super
29 USD

Adobe Premiere Pro Account
99 USD

ChatGPT Plus Account (GPT-4)
16 USD

Upgrade genuine Capture One account
120 USD

Autodesk All App Account Copyright
120 USD

MidJourney Account
29 USD

Capcut Pro 1 Year
39 USD
Guide to Using Canva Image Upscale to Sharpen Images
Nội dung
- 1. What is Image Upscaler in Canva?
- 2. Why should you use Image Upscaler in Canva?
- 3. Advantages and limitations of the Canva image upscaler tool
- 4. How to use Image Upscaler to sharpen images in Canva
- 4.1 Step 1: Log in to Canva
- 4.2 Step 2: Search for and upload images
- 4.3 Step 3: Select the level of clarity and download the image.
- 5. How to sharpen images in Canva besides Image Upscaler
- 5.1 Method 1: Using image filters
- 5.2 Method 2: Using image editing tools
- 5.3 Method 3: Using the background removal and blurring feature
- 6. Should I upgrade to Canva Pro to improve image quality?
- 7. Reputable Canva Pro upgrade service providers
- 8. Conclusion
In today''s digital age, images play a crucial role in conveying messages and making an impression on viewers. With Canva''s AI Upscale Image feature, you can easily enhance image sharpness and quality in just a few simple steps. No advanced design skills are required; anyone can use this tool to transform dull photos into sharp, vibrant works of art. In this article, let''s explore how to use this feature to optimize your images, helping you create more professional and impressive products.
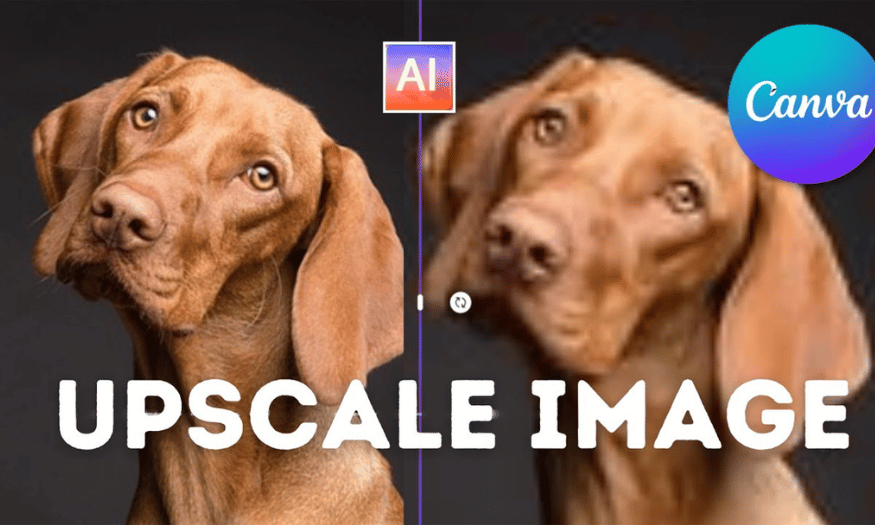
1. What is Image Upscaler in Canva?
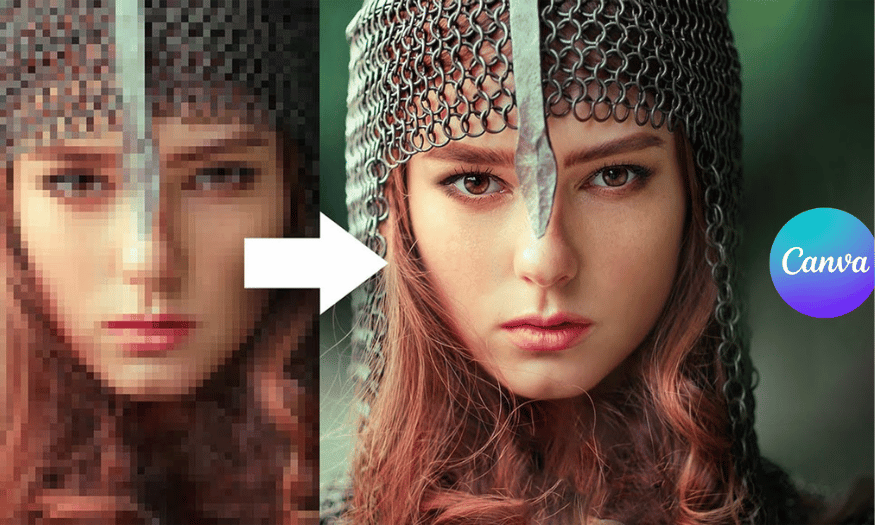
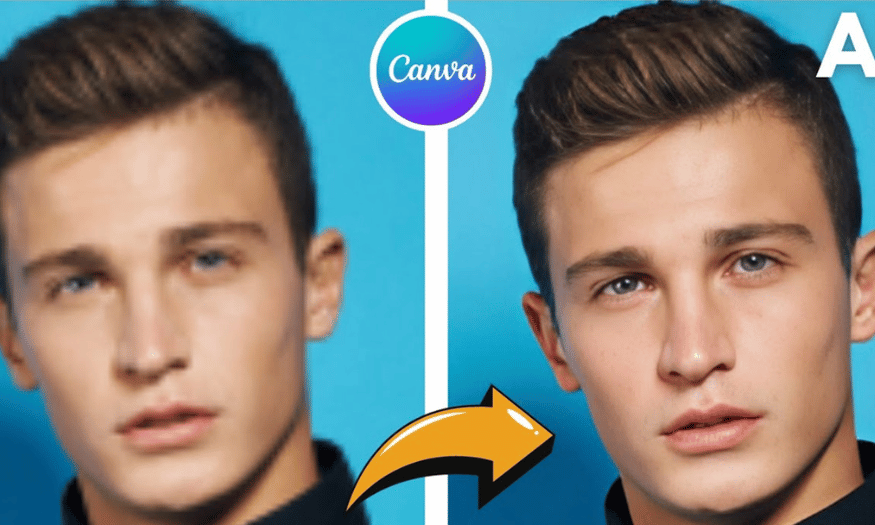
Canva's Image Upscaler is a tool that uses artificial intelligence (AI) to enhance the resolution and sharpness of images. When you upload low-quality photos, this tool automatically analyzes and adds missing details, making the image clearer and sharper without compromising quality. With this feature, you can easily transform dull photos into impressive works of art in just a few clicks.
What makes Image Upscaler special is its fast and efficient operation. Users don't need in-depth knowledge of design or photo editing. All you need to do is upload your image, and the AI will do the rest. Thanks to advanced technology, the upgraded images will retain their natural colors and details, bringing vibrancy to your photos.
This is an ideal solution for those who need to process old photos, small images downloaded from the internet, or prepare high-resolution images for printing. With Image Upscaler, you can be more confident using images in your products, from presentations to advertising materials.
2. Why should you use Image Upscaler in Canva?
There are many reasons why you should use Image Upscaler in Canva. First, it saves time. Instead of using multiple complex editing software programs, you only need a single platform to upscale images. Canva has integrated this feature, making it easy to manage and edit everything in one workspace.
Secondly, the image quality after upscaling is very impressive. With advanced AI technology, Image Upscaler not only sharpens images but also preserves natural colors and details. This means you can rest assured that your images will not be distorted or lose their original beauty after processing.
Finally, this feature is now available to Canva Pro users, making it convenient for those who want to enhance image quality without investing in complex photo editing software. This is a major advantage for designers and marketers, helping them create higher-quality products more quickly.
3. Advantages and limitations of the Canva image upscaler tool
Canva's image upscaler boasts several outstanding advantages. First, the tool's interface is very user-friendly and easy to use, suitable even for beginners. Users only need to perform a few simple steps to upgrade images without having to spend a lot of time learning.
Secondly, this feature is integrated directly into Canva, saving time during the design process. You don't need to switch between different applications, which optimizes your workflow and increases the efficiency of your design projects.
However, the tool also has some limitations. One of the biggest is that this feature is only fully supported on Canva Pro accounts. This can be a drawback for free users who want to enjoy the benefits that Image Upscaler offers. Additionally, the tool doesn't offer many in-depth customizations, and its effectiveness depends heavily on the quality of the original image. If the image is too low-resolution or heavily blurry, the final result may not meet expectations.
4. How to use Image Upscaler to sharpen images in Canva
When editing images in design, enhancing sharpness and image quality is an indispensable factor. Especially in today's digital landscape, a sharp image can make a huge difference in attracting viewers' attention. Among the various tools available, Image Upscaler is a convenient choice thanks to its modern technology. Below, we will explore how to use AI Image Upscaler in Canva simply and effectively.
Using Image Upscaler not only helps you improve your images but also saves you time. You won't need to waste time searching for complex software to enhance your photos. Follow these steps to transform dull photos into impressive works of art.
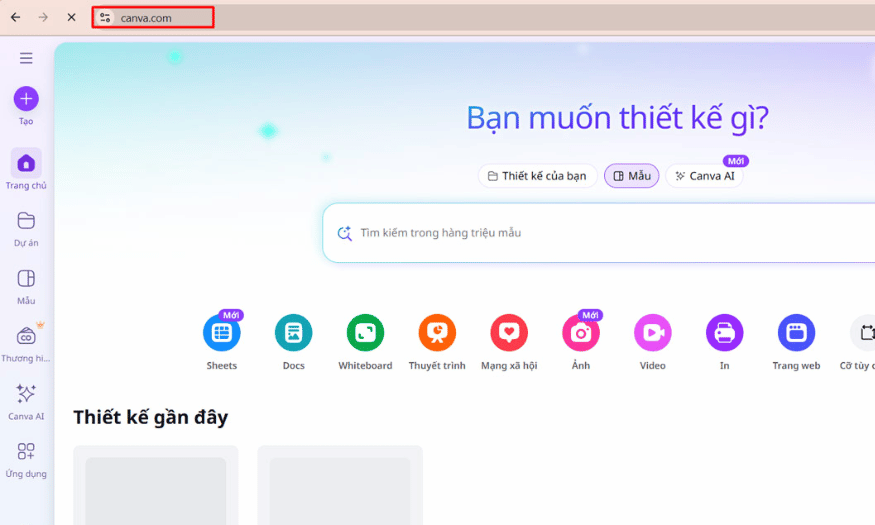
4.1 Step 1: Log in to Canva
First, you need to access the Canva website and fill in your name and other necessary information to log in. Please note that the Image Upscaler feature is only available to Canva Pro users. However, if you are a new account, you can still use it for free for one month. This gives you the opportunity to experience and explore the amazing features that Canva offers.
Once you've successfully logged in, you'll be taken to Canva's main interface. Here, you can not only design but also easily find tools to enhance your image quality. Get ready for the next steps in your image enhancement journey.
4.2 Step 2: Search for and upload images
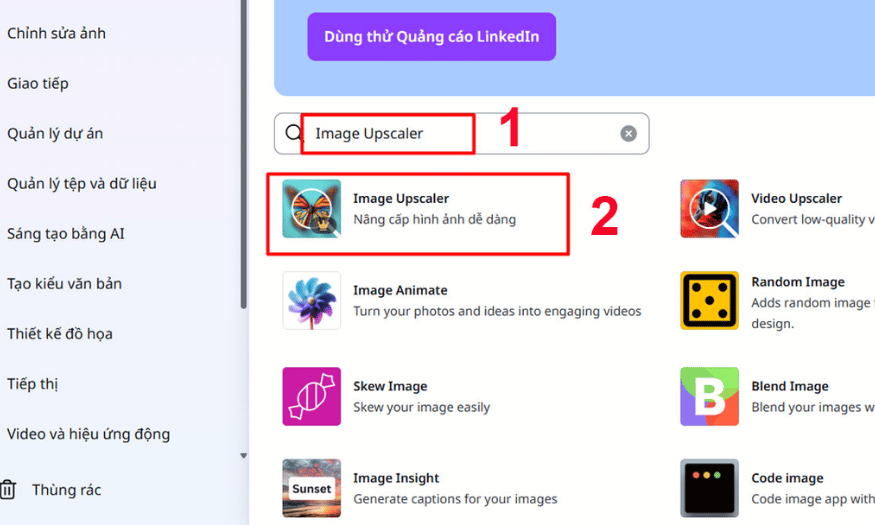
After logging in, the next step is to enter the keyword "upscale image" into the search bar on the main interface. A list of tools and features will appear, and you simply click on the one corresponding to Image Upscaler. This is where the magic happens!
Immediately after accessing this feature, you will see an option to upload the image you want to enhance. Select the image you want to improve from your device and prepare for the impressive improvements this tool provides. The process is quick and simple, making it easy to get started without any difficulty.
4.3 Step 3: Select the level of clarity and download the image.
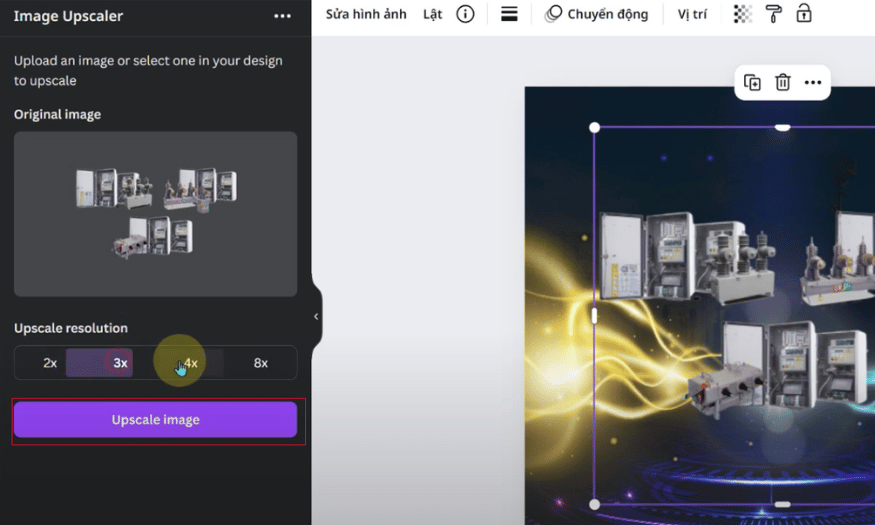
Once the image has been successfully uploaded, you will have the option to choose your desired level of clarity. Canva offers several different levels, making it easy to adjust to your needs. After selecting the appropriate level, click the “Upscale Image” button to allow the system to automatically process the image.
After the upgrade process is complete, you'll see a "Replace" option to replace the original image with the upgraded one. This helps you maintain consistency and sharpness in your design. Finally, don't forget to download the image to your device for use in your projects. With a few simple steps, you can transform blurry photos into high-quality works of art!
5. How to sharpen images in Canva besides Image Upscaler
In addition to the Image Upscaler feature, Canva offers several other methods to improve image sharpness. Below are three detailed ways you can apply to sharpen your photos in Canva.
5.1 Method 1: Using image filters
Step 1: Upload the image
Access Canva and log in to your account. Create a new design or open an existing design you want to edit. Upload the image you want to sharpen by clicking the "Upload" button and selecting the image from your device.
Step 2: Select the image and apply the filter.
Once the image has been uploaded, drag and drop it into your design. Click on the image to select it, then choose the "Edit Image" tab on the toolbar at the top. Here, you will see the "Filters" section. Click on "Filters" to open the list of options.
Step 3: Adjust brightness and contrast
In the filter section, you can adjust the brightness, contrast, and sharpness of the image. Increase the contrast and sharpness to enhance the details in the photo. Once you're finished, press "Apply" to save the changes.
5.2 Method 2: Using image editing tools
Step 1: Upload the image
Start by logging into Canva and creating a new design. Upload the image you want to edit by clicking the "Upload" button and selecting an image from your device.
Step 2: Select the image and go to the editing section.
Drag the image into your design and click on it to select it. On the toolbar, select the "Edit image" tab. You will see several editing options.
Step 3: Fine-tune sharpness and other parameters.
Here, you can adjust parameters such as brightness, contrast, and especially sharpness. Increase sharpness to highlight details in the photo. Experiment with the parameters until you achieve the desired result, then press "Apply".
5.3 Method 3: Using the background removal and blurring feature
Step 1: Upload the image
Log in to Canva and create a new design. Upload the image you want to sharpen as described in the previous steps.
Step 2: Select the image and remove the background.
Drag the image into the design and select it. On the toolbar, click "Remove background". Canva will automatically detect the background and remove it, allowing you to focus on the main subject in the photo.
Step 3: Blur the background and increase sharpness.
After removing the background, you can add a new background or blur the current background to highlight the main subject. Use the "Image Editing" tool to increase the sharpness of the subject. Press "Apply" when you are satisfied with the result.
6. Should I upgrade to Canva Pro to improve image quality?
In the modern world of graphic design, having powerful tools is essential for creating high-quality products. Canva Pro, with its many superior features, is becoming the top choice for those passionate about design. One frequently asked question is: "Should I upgrade Canva Pro to improve image quality?" Let's explore the benefits Canva Pro offers and why you should consider upgrading.
Upgrading to Canva Pro gives you access to a vast library of images, videos, and graphics resources, with over 75 million premium resources. This not only saves you time searching for the right images but also ensures that the images you use are of the highest quality. These images are designed by experts, helping you create truly impressive products.
Furthermore, Canva Pro offers powerful photo editing tools, allowing you to easily resize, remove backgrounds, or add effects with just one click. These features are very useful when you need to sharpen images, helping you create professional-looking photos without having to use other complex software. In particular, the ability to create and save unlimited designs makes it easy to manage and reuse design templates in the future.
7. Reputable Canva Pro upgrade service providers
If you decide to upgrade to Canva Pro, SaDesign is one of the most reliable options. SADESIGN Software Co., Ltd. not only provides high-quality licensed software products but also commits to dedicated customer support. SaDesign offers a Canva Pro package for only 399,000 VND per year, five times cheaper than the price on Canva's official website.
When you purchase products from SaDesign, you will receive dedicated installation support and guidance. Our professional staff are always ready to assist you with product upgrades and usage. Furthermore, SaDesign offers a lifetime warranty, ensuring you will always receive support when needed.
Below is the price list for Canva Pro upgrades at SaDesign for 2025:
As you can see, the price is very reasonable considering what Canva Pro offers. If you're looking for a reputable place to upgrade, SaDesign is the perfect choice. Start today to discover the exciting features Canva Pro has to offer!
8. Conclusion
Canva's AI Upscale Image feature not only easily improves image quality but also gives users flexibility and creativity in design. By using this tool, you can save time and effort while enhancing the aesthetic value of your products. Try applying the instructions above and experience the difference sharper images make to your projects.





















VIP Products








Best Selling Products
Freepik Premium Account
59 USD
Genuine Adobe Illustrator account
99 USD
Adobe Photoshop Copyright - Full App
120 USD
Genuine Cheap Canva Pro
39 USD
Upgrade Genuine Office 365
49 USD
Plugin Retouch4me
69 USD
Windows 10 & 11 Pro Key
36 USD
Copyright Adobe Lightroom Account
59 USD
Upgrade Duolingo Super
29 USD
Adobe Premiere Pro Account
99 USD
ChatGPT Plus Account (GPT-4)
16 USD
Upgrade genuine Capture One account
120 USD
Autodesk All App Account Copyright
120 USD
MidJourney Account
29 USD
Capcut Pro 1 Year
39 USD