Best Selling Products

Upgrade Genuine Office 365
49 USD

Capcut Pro 1 Year
39 USD

Genuine Adobe Illustrator account
99 USD

MidJourney Account
29 USD

Genuine Cheap Canva Pro
39 USD

Windows 10 & 11 Pro Key
36 USD

Upgrade Duolingo Super
29 USD

Autodesk All App Account Copyright
120 USD

Plugin Retouch4me
69 USD

Upgrade genuine Capture One account
120 USD

Adobe Photoshop Copyright - Full App
120 USD

Freepik Premium Account
59 USD

Adobe Premiere Pro Account
99 USD

ChatGPT Plus Account (GPT-4)
16 USD

Copyright Adobe Lightroom Account
59 USD
How To Create A Bend Photo Effect in Photoshop
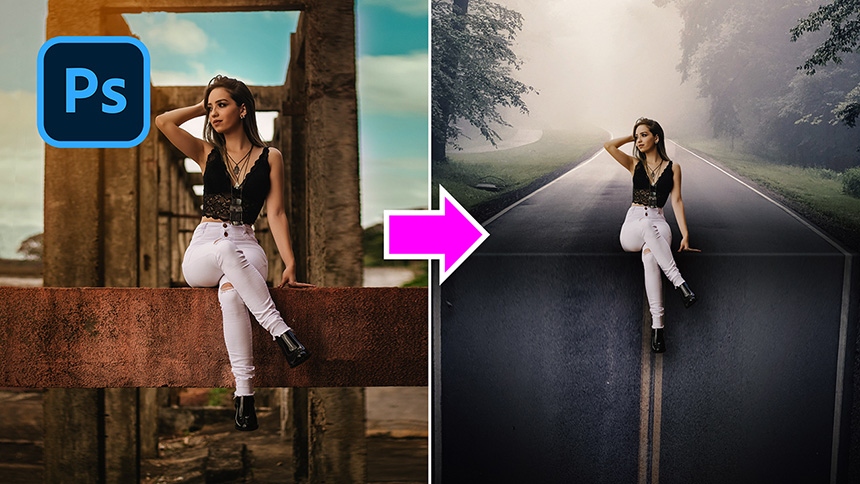
Hi everyone, welcome to SaDesign channel, in this tutorial, I’m going to show you how to create a perspective bending effect in Photoshop. At first, use Rectangular Marquee tool to take the area that you want to bend.
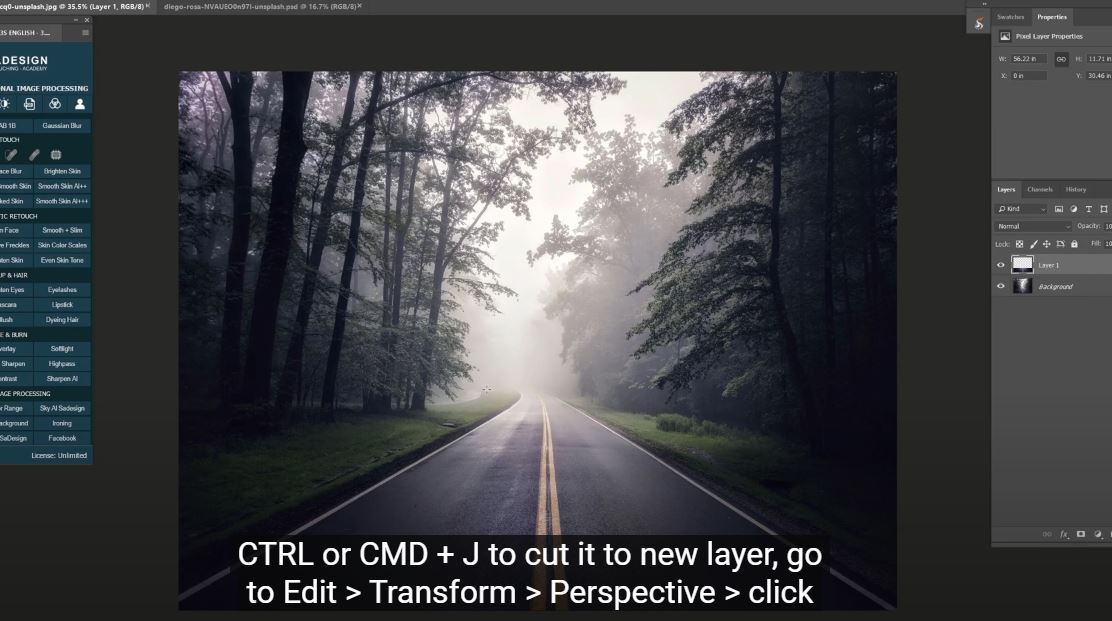
CTRL or CMD + J to cut it to new layer, go to Edit > Transform > Perspective > click to the corner and drag in until you can see the road falling down 90 degrees. Then hit Enter to complete.
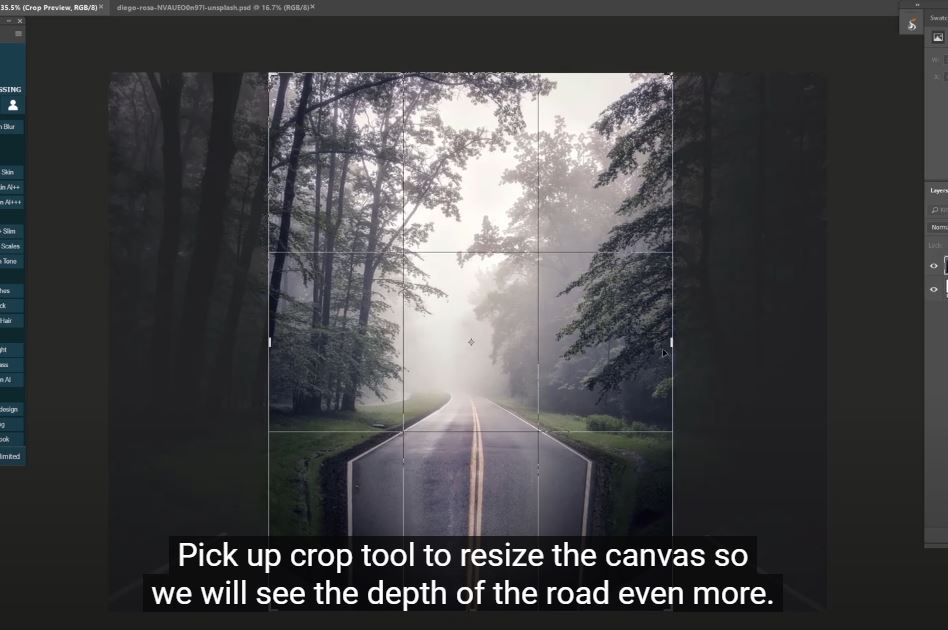
Pick up crop tool to resize the canvas so we will see the depth of the road even more.
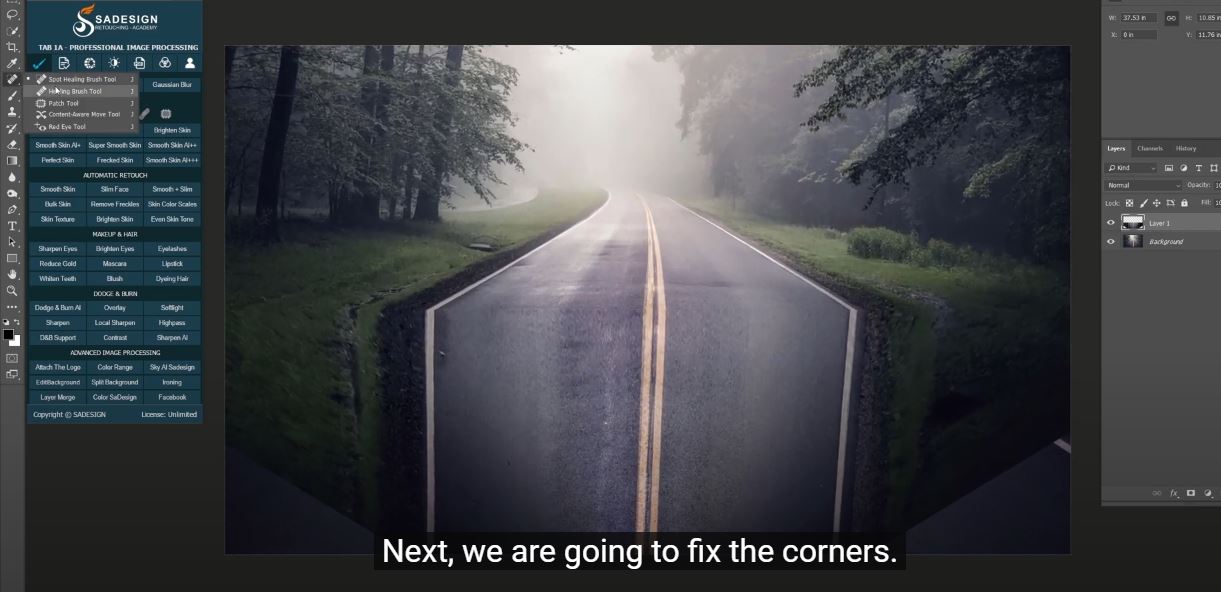
Next, we are going to fix the corners. Zoom closure, simply use “Spot healing brush tool” in this case to brush on the corner and let Photoshop fix it.
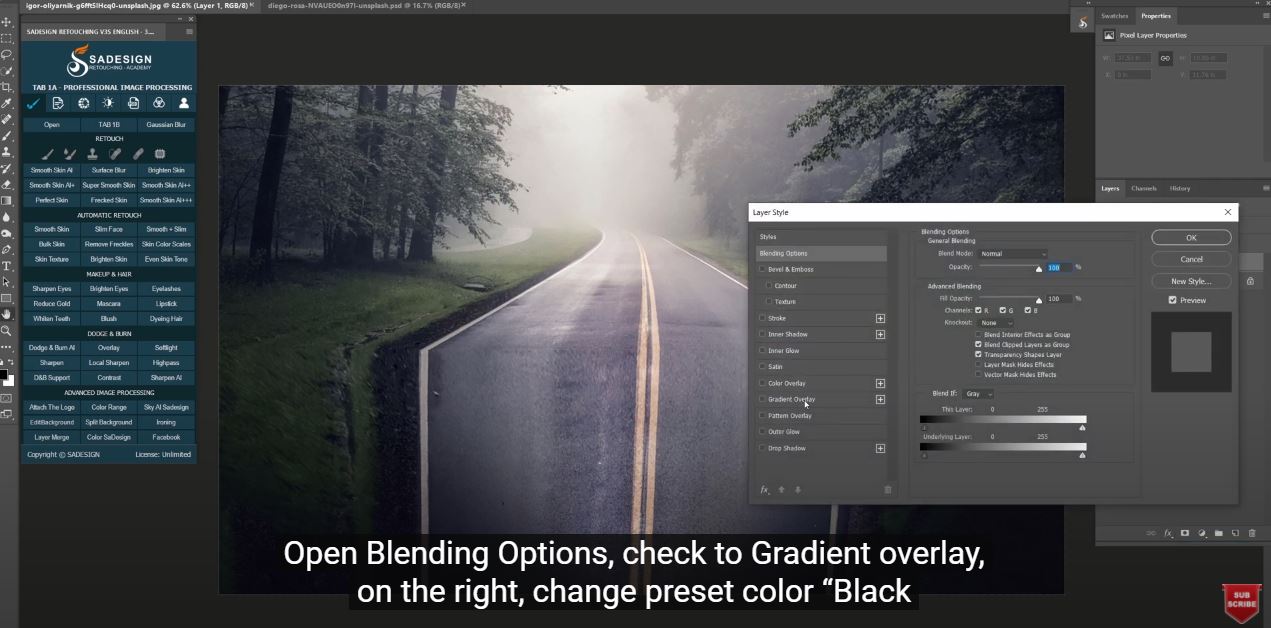
Let’s add gradient to make it just like an abyss. Open Blending Options, check to Gradient overlay, on the right, change preset color “Black to transparent”. The opacity is 80%.
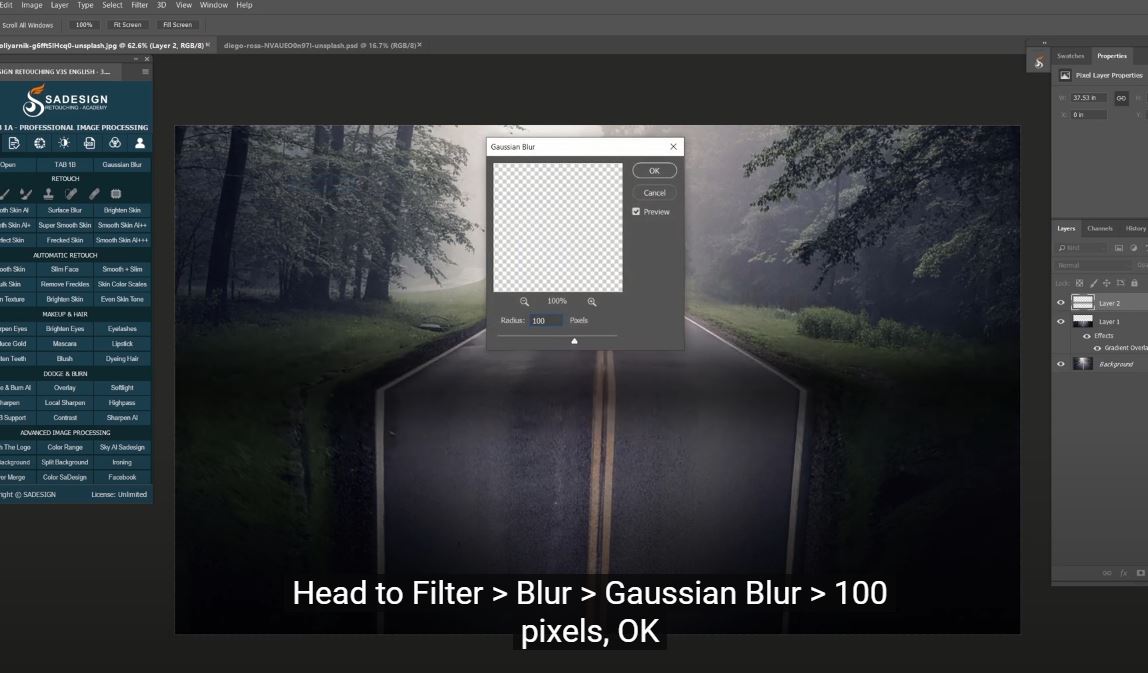
Create a new layer, Use Rectangular tool to make the selection at the corner of the cube. Fill the selection in black with shortcut ALT or OPTION + Delete. Before that, make sure foreground color is black. Head to Filter > Blur > Gaussian Blur > 100 pixels, OK Create another new layer, this time we will draw a super thin line at the edge of the road.
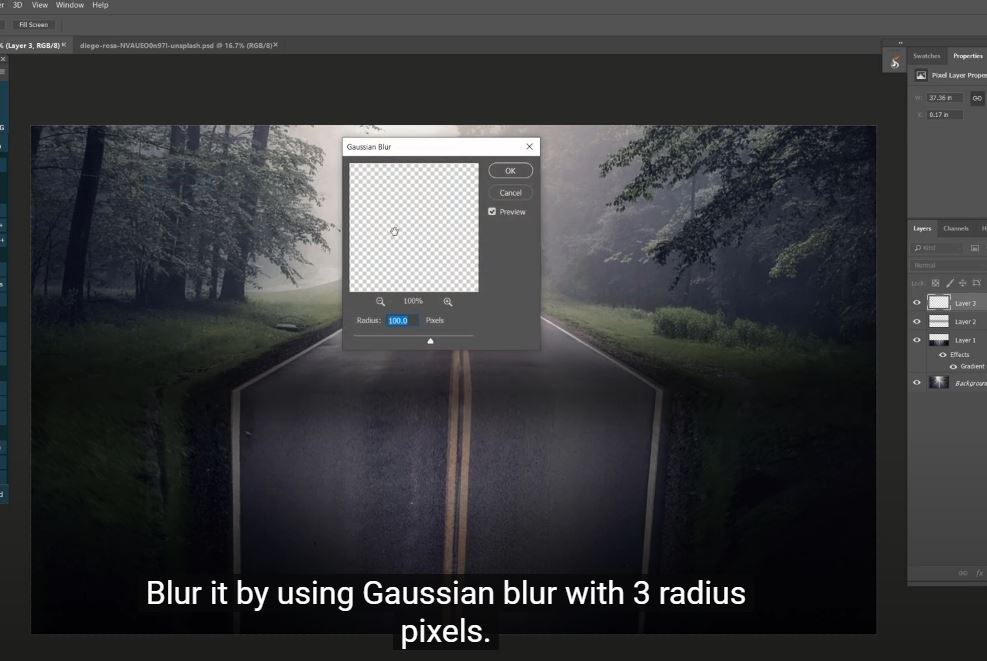
CTRL+Delete to fill white to it. Blur it by using Gaussian blur with 3 radius pixels. Reduce the opacity to around 20% It’s not really at the edge so I’ll use Move tool and move it down a little bit just right in the position that I want it to be.
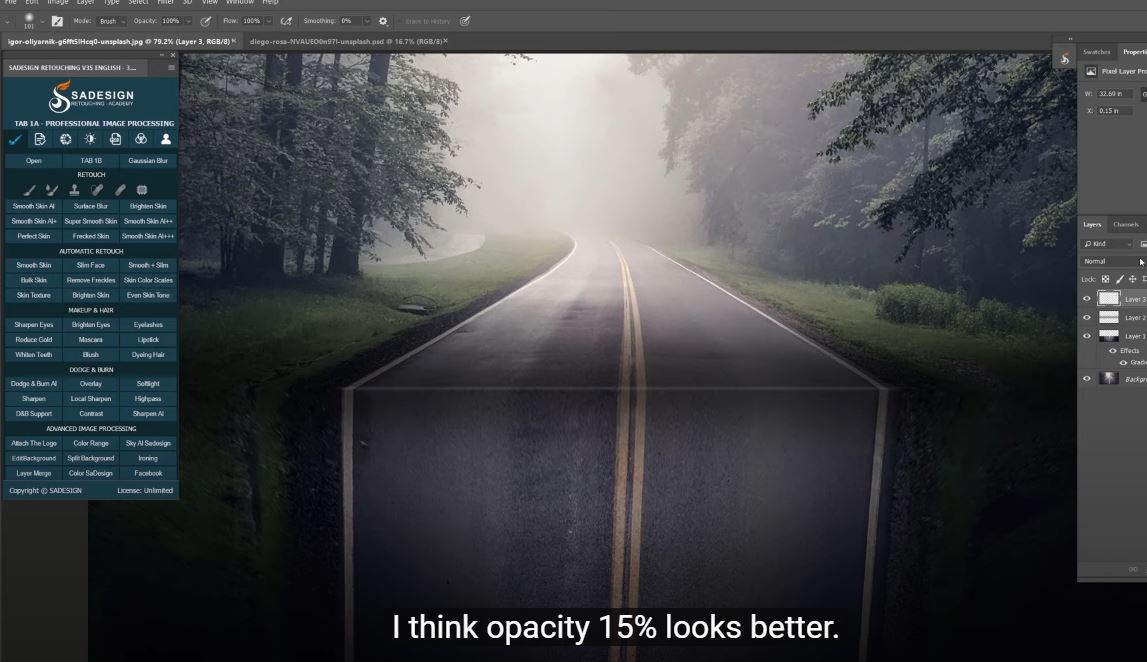
Take Eraser tool to remove the line on the grass on both sides along the road. I think opacity 15% looks better.
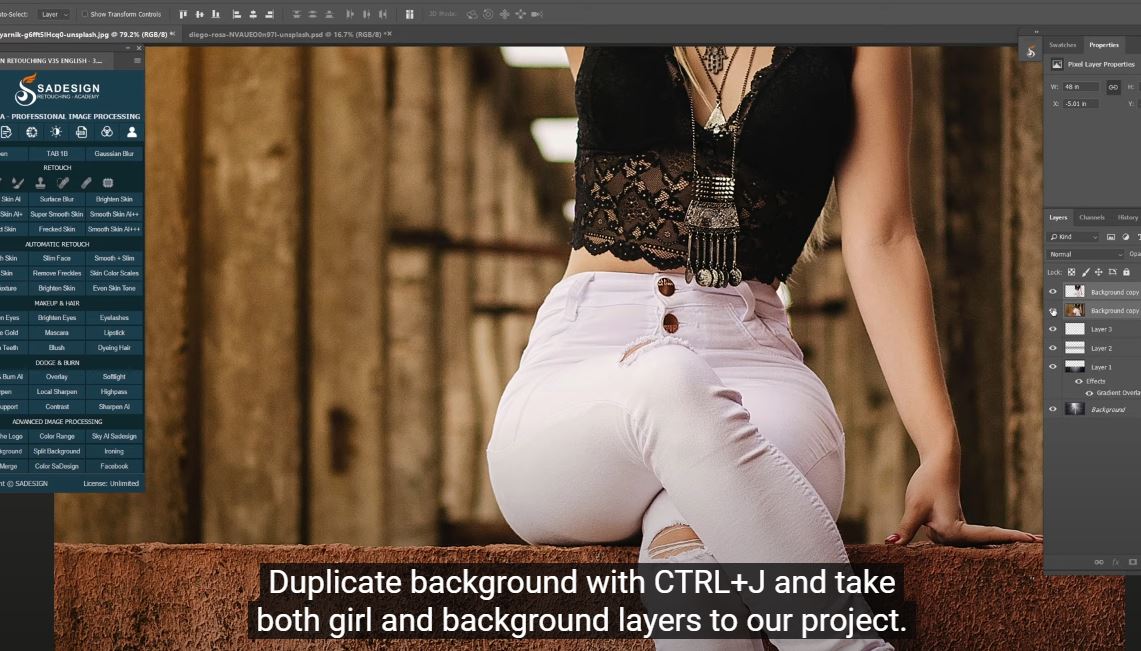
Now, we will bring this girl to sit on the edge of the road. I already separated subject from the background. As usual, I leave stocks in the link on the description for you to download.
Duplicate background with CTRL+J and take both girl and background layers to our project.
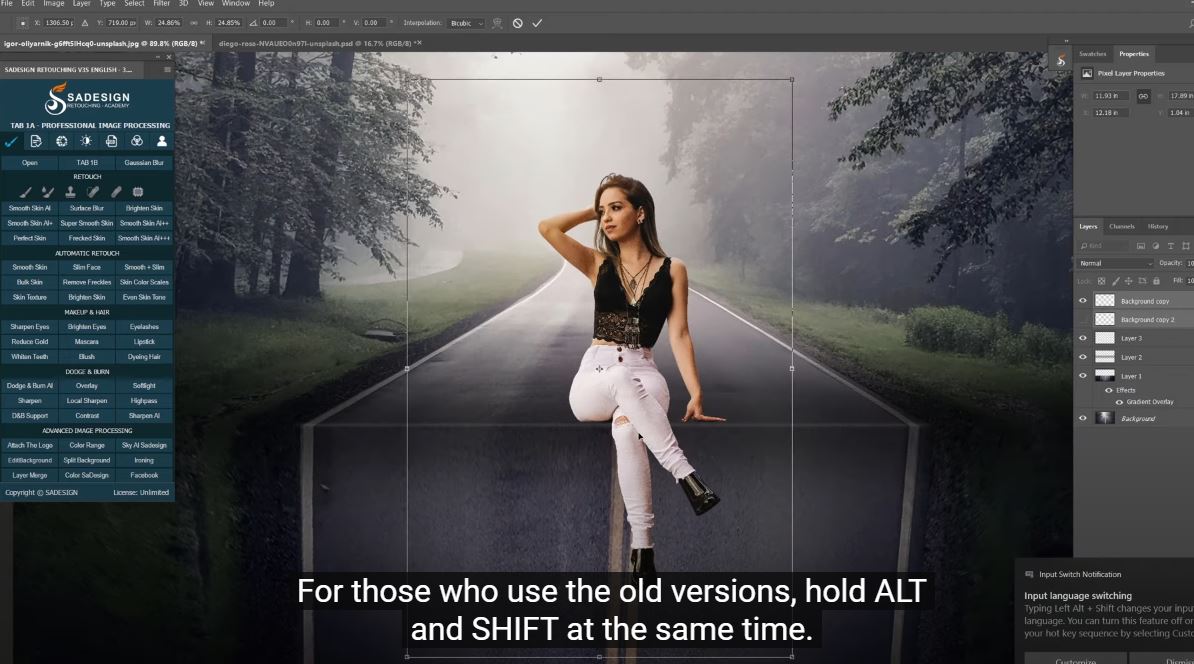
Zoom out, press CTRL+T, hold ALT and scale down the subject from the center. This applies in Photoshop 2021. For those who use the old versions, hold ALT and SHIFT at the same time. Move her to sit on the edge of the road.
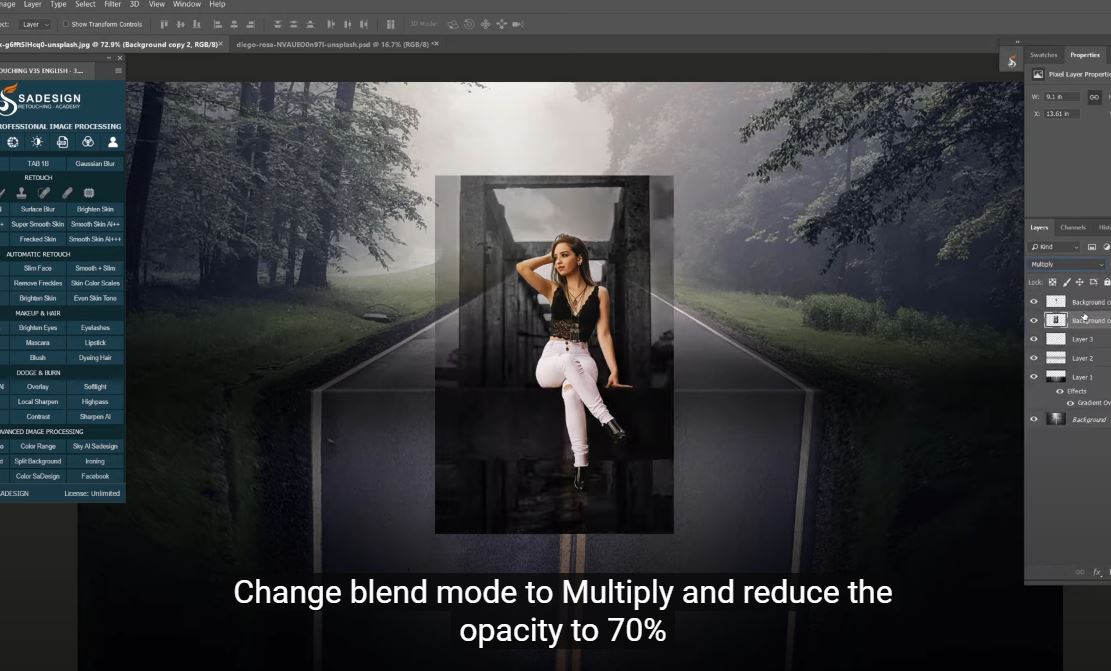
Next, we will add the shadow to the subject, remember the background that we brought together with the subject? It’s in the second layer, press CTRL+SHIFT+U for Win or CMD+ SHIFT+U for MAC to remove colors. Change blend mode to Multiply and reduce the opacity to 70%
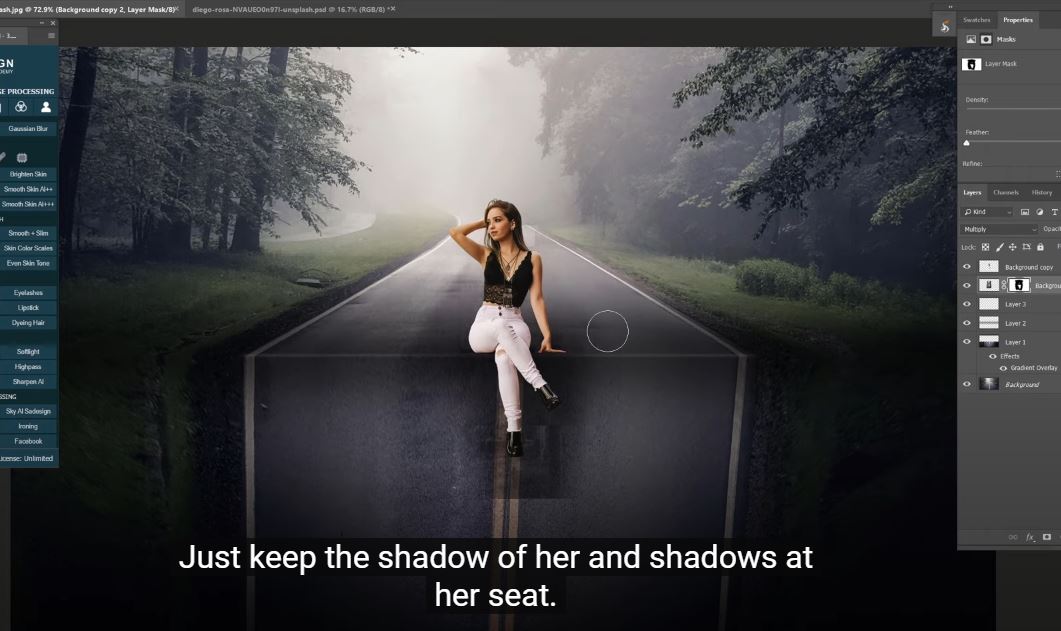
Create a layer mask to it with this icon, use eraser tool, white in foreground and remove the background. Just keep the shadow of her and shadows at her seat. There you go!
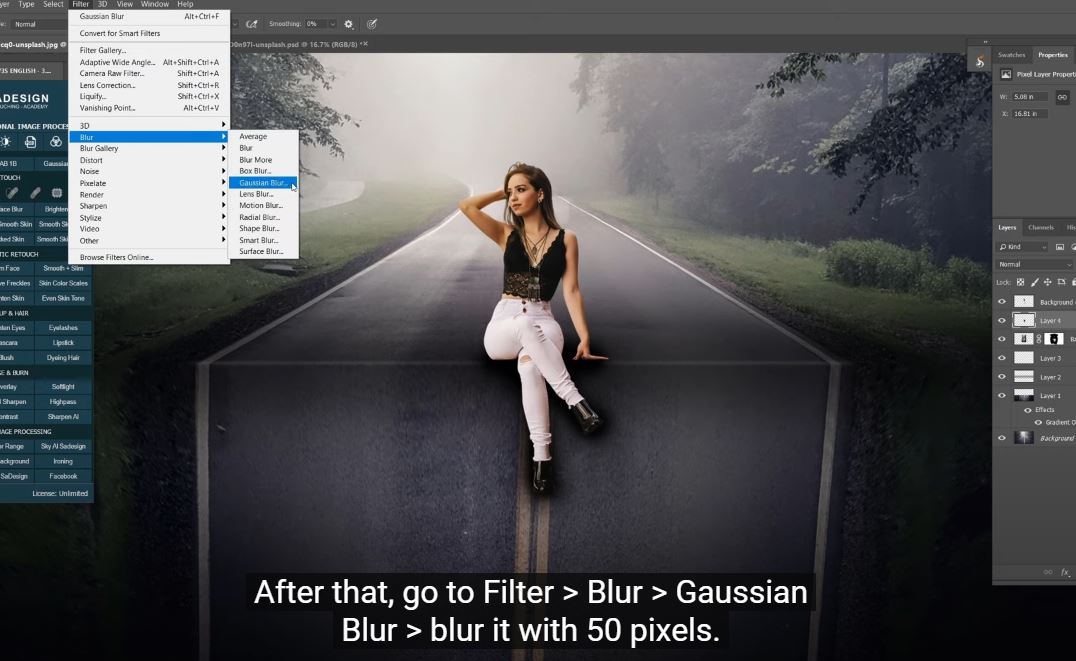
In case you want to add more shadow, create new layer, pick up brush tool, use black in foreground and paint slightly to add darkness to the areas that you want. After that, go to Filter > Blur > Gaussian Blur > blur it with 50 pixels. OK
Adjust the opacity if needed. Back to subject layer, use Burn tool, to add a little bit of shadow to the subject, on her legs, thighs so it will look realistic.
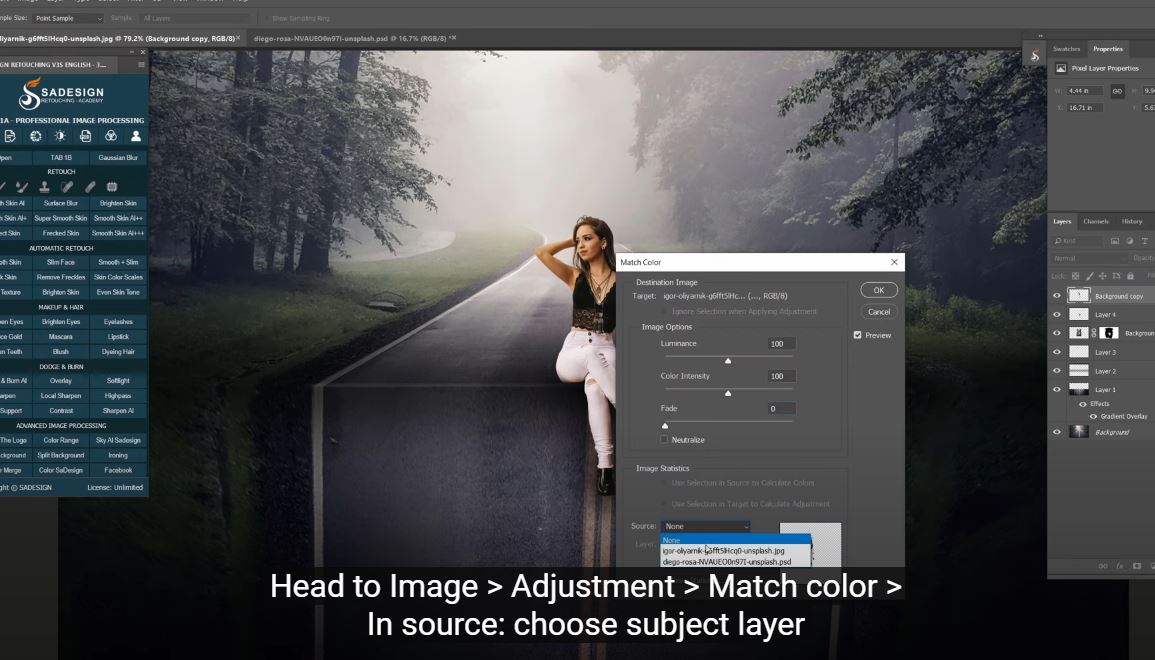
Now, I will match the color of the subject and the background of the road. Head to Image > Adjustment > Match color > In source: choose subject layer In layer: choose the background Make sure to check “Neutralize” box Increase Fade to the point that you see the color really matching to each other.
Watch the video here:
REGISTER FOR FREE PHOTOSHOP LEARNING
============================
The most powerful Retouch tool processor
DOWNLOAD:
✅ SADESIGN PANEL ENGLISH: https://sadesign.ai/retouching/
✅ SADESIGN PANEL VIETNAM: https://www.retouching.vn/


VIP Products


Best Selling Products
Upgrade Genuine Office 365
49 USD
Capcut Pro 1 Year
39 USD
Genuine Adobe Illustrator account
99 USD
MidJourney Account
29 USD
Genuine Cheap Canva Pro
39 USD
Windows 10 & 11 Pro Key
36 USD
Upgrade Duolingo Super
29 USD
Autodesk All App Account Copyright
120 USD
Plugin Retouch4me
69 USD
Upgrade genuine Capture One account
120 USD
Adobe Photoshop Copyright - Full App
120 USD
Freepik Premium Account
59 USD
Adobe Premiere Pro Account
99 USD
ChatGPT Plus Account (GPT-4)
16 USD
Copyright Adobe Lightroom Account
59 USD