Best Selling Products
How to Create a Greeting Card Template in Photoshop SIMPLE
Nội dung
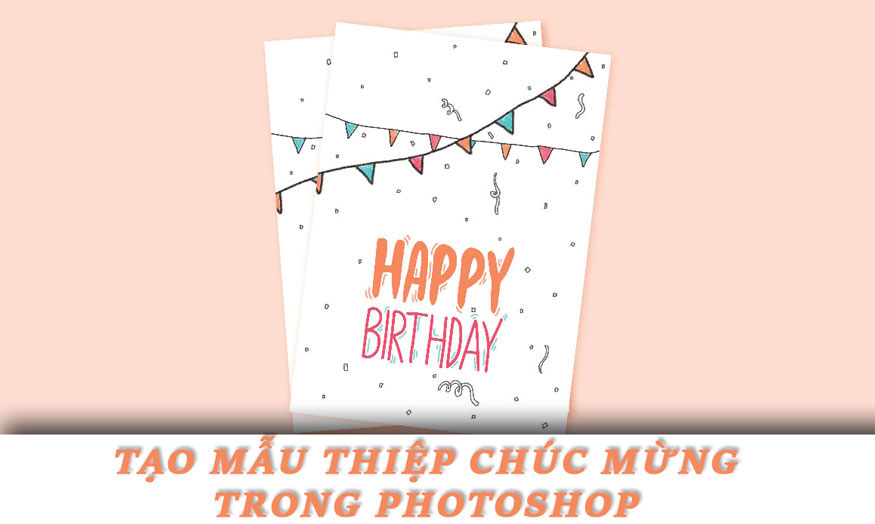
Instead of handwriting, you can completely create a greeting card template in Photoshop that is extremely simple, yet super sparkling and beautiful. Printing in large quantities also becomes simpler with this design. Join SaDesign to refer to the steps to create cards in Adobe Photoshop through the following shares.

1. Choose canvas and print settings for your greeting card
First, we need to create a canvas to create a card. Create a new document, on the menu bar, select File => Print… => select A4 paper size. Then rename the file to Birthday Card Template Inside. Adjust the parameters as follows:
Use of Artboards: Bỏ chọn Artboard
Page Orientation: Landscape
Optimal Printing Resolution: 300 PPI (Pixels Per Inch)
Color Mode: CMYK
Color Bit: 16 Bit
(1).jpg)
2. Set up the canvas for the outer page
Step 1: On the menu bar, select Window => Workspace => Essentials. This will give you all the tools you need alongside the drawing to create the card.
.jpg)
Step 2: Press Ctrl+R to open your ruler. Change the measurement system to centimeters by right-clicking on the ruler (or choose the unit of measurement that suits you best).
.jpg)
Step 3: Use the ruler to drag and drop guidelines on the drawing to create margins. Drag the ruler to the following dimensions:
Left outer margin: 1.5 cm
Right outer margin: 1.5 cm
Top margin: 2 cm
Bottom margin: 2cm
Inside center margin: 3 cm
.jpg)
Step 4: To add a border, on the menu bar select Image => Canvas Size. In New Size add 0.3 cm to Width and Height. This will give your document 0.15 cm extra on all sides. The margin gives the printer some space to ensure that after printing, no edges are left out.
.jpg)
3. How to save a printable greeting card file
Step 1: Save this greeting card format with default settings (Format: Photoshop) to your computer by going to File => Save As (Ctrl+Shift+S).
.jpg)
Step 2: Save another copy of this greeting card template file with default settings (Format: Photoshop) to your computer. This time rename the file to Birthday Card Template Outside.
.jpg)
4. Steps to create a greeting card template in Photoshop
Step 1: First we need to choose the color and font for your greeting card. In this design we will use doodle style with cool colors such as:
Teal: #45C2C9
White: #FFFFFF
Kem: #FDEADE
Orange: #F6895F
Pink: #EA5370
Choose color and font for greeting card
Step 2: In this design, we used the Chamberline and Doodle fonts because they suit the scribble style. You can use other fonts.
Step 3: Now let's create some fun decorative elements for our card. Create a new layer (Ctrl+Shift+N) and name it "Happy". On the toolbar select the Horizontal Type Tool (T), write "Happy" on the right side of the card with a suitable font size. Pick a color from your palette using the Eyedropper Tool (I).
Create a new Layer (Ctrl+Shift+N) and name it
Step 4: Press Ctrl+T to transform and while maintaining the aspect ratio, increase the width of the layer to 7.5 cm.
Step 5: Create a new Layer and name it "Birthday". Write "Birthday" right below "Happy" with appropriate font size and color.
Create a new Layer and name it
Transform the layer while maintaining the aspect ratio and increase the width of the layer to 7.5 cm.
Step 6: On the toolbar select Brush Tool, choose the Kyle Ultimate Pencil Hard brush to create interesting details.
.jpg)
Step 7: Create a new layer and name it “Typography Decor”. Use a brush to create squiggly lines around the letters. Use a 20 pt brush to outline each word with squiggly lines. And then hide all layers to create the rest of the design.
Step 8: Create a new Layer and name it "Bunting Small Outline". Draw Bunting 1 with a 10 pt brush with hex #000000.
Step 9: Create a new Layer and name it "Bunting Big Outline". Draw Bunting 2 using a 20 pt brush with hex #000000.
Step 10: Create a new layer and name it "Bunting Small Fill". Using a 20 pt brush, fill the bunting with multiple colors from the color palette.
Step 11: Create a new layer and name it "Bunting Big Fill". Using a 20 pt brush, fill the bunting with multiple colors.
Step 12: Create a new layer and name it "Confetti". Draw confetti all over the card using a 10 pt brush. Don't color the confetti. Now unhide all the layers except the palette layer to save the file.
Step 13: Now open the Birthday Card Template Inside file and create a new layer, name it "Confetti Outline". Draw confetti on the left side of the card using a 10 pt brush.
.jpg)
5. How to Save Your Print File in Photoshop
Step 1: Now save the files as PDF in the same location. Press CtrL+Shift+S and save the file with the same name in Photoshop PDF format.
.jpg)
Step 2: Select High-Quality Print and uncheck Preserve Photoshop Editing Capabilities.
(1).jpg)
Step 3: Go to Compression, change the compression option to Do Not Downsample and Save the file. Now save both files after selecting these presets.
.jpg)
And you have completed creating a greeting card template in Photoshop. Here is the final Photoshop template for your birthday card!
.jpg)
Above is a summary of how to create greeting card templates in Photoshop. You can completely change it as you like to create the most beautiful and lovely card for yourself.


