Best Selling Products
How to create rain effect in Photoshop
Nội dung
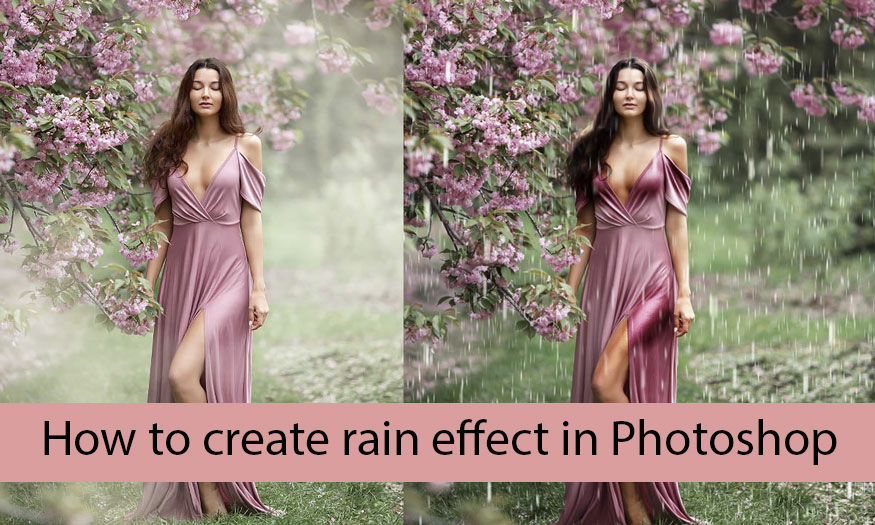
How, even on sunny days, you can still have a great rain photo with the tools in Adobe Photoshop. The rain with water drops added to the photo looks real, extremely natural, making the photo more impressive. Join SaDesign to learn about how to create rain effects in Photoshop through the following shares.
1. Steps to create rain effect in Photoshop
Raindrops will help your photo look more chill and deeper. With just a few steps in Photoshop, you have a beautiful rain photo. Follow the detailed instructions below.
Step 1: First, let's open the photo you want to create a rain effect in Photoshop.
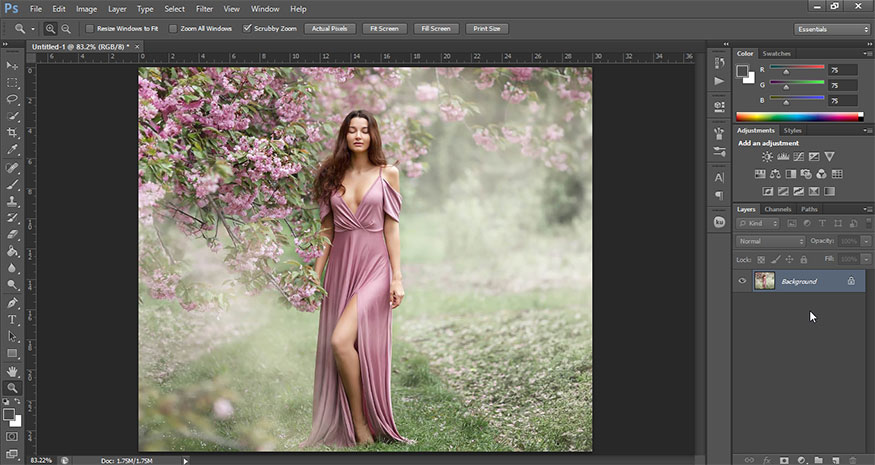
Step 2: Next create a new layer, then fill it with black and name it Rain.
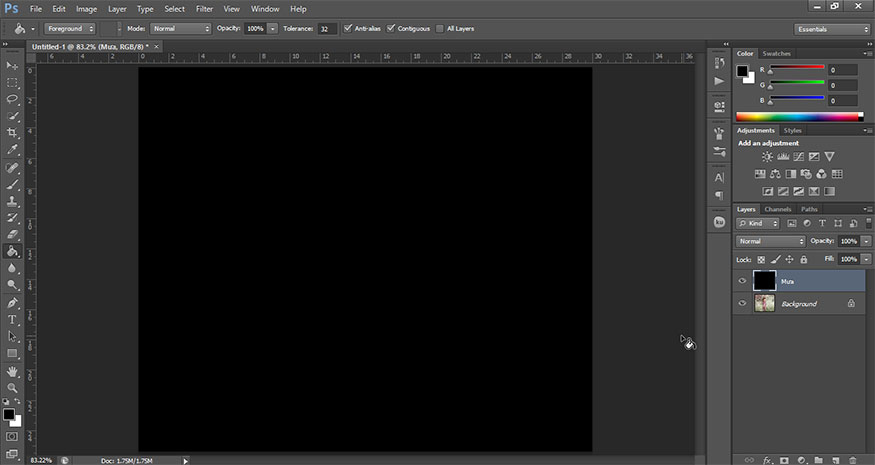
On the menu bar, select Filter => Pixelate => Mezzotint, then set Type to Coarse Dots.
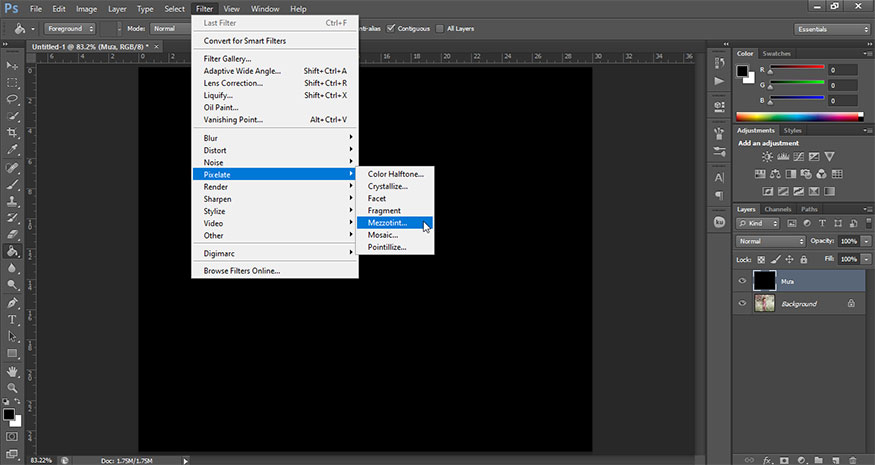
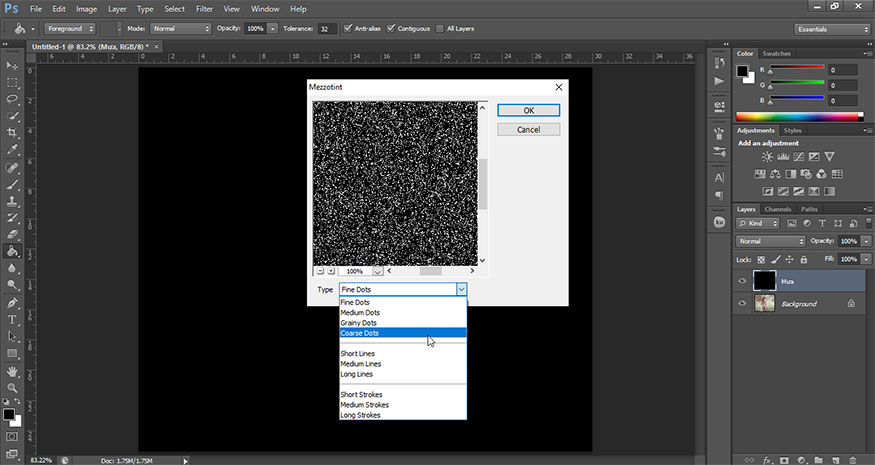
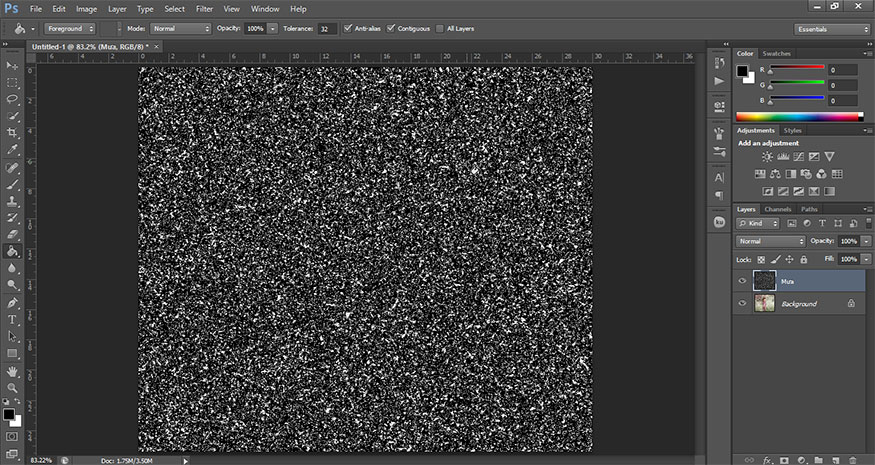
Now we will get the result like the image below.
Step 3: Now Zoom (Z) to zoom in, close up the white dots. Then on the menu bar go to Select => Color Range.
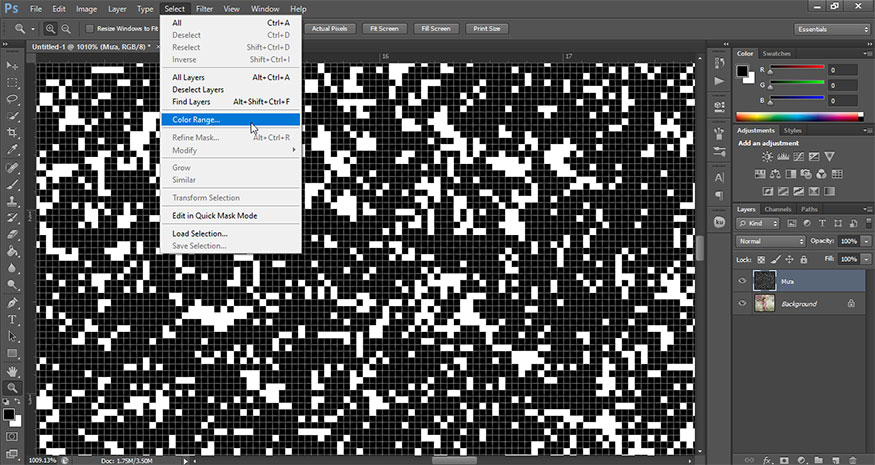
Here we will click on a white dot and set the Fuzziness to 200. Press OK.
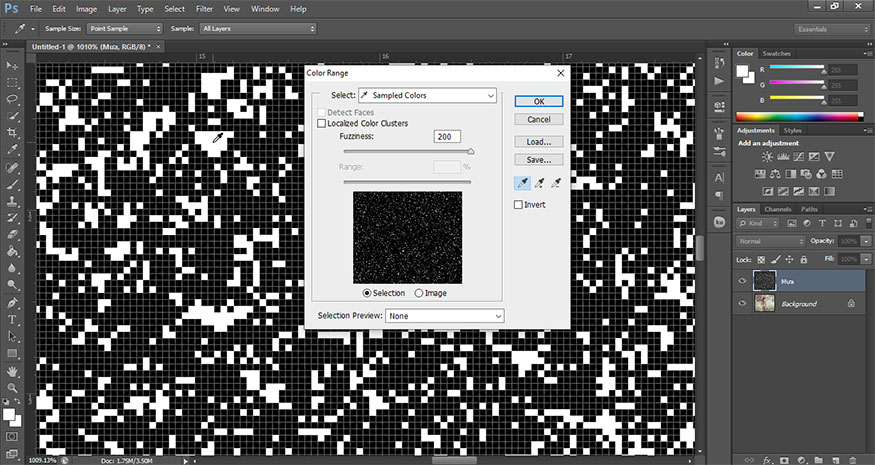
This will select all the white dots as shown in the image.
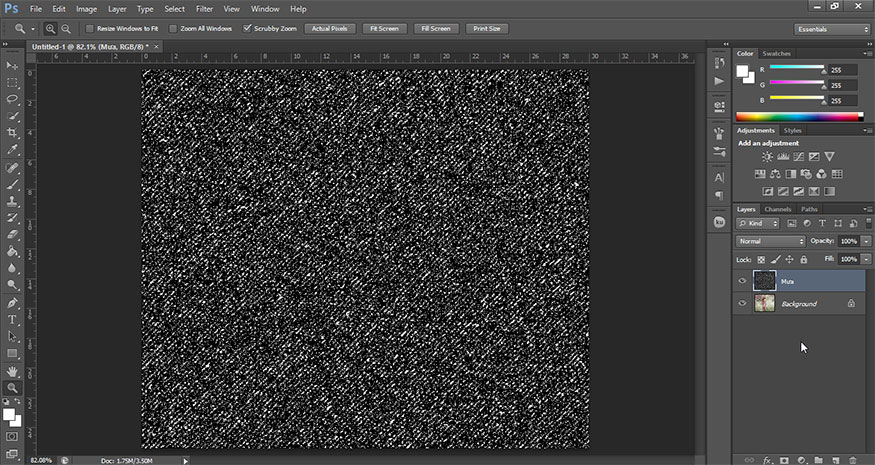
Step 4: Select Add Layer Mask in the bottom right corner of the screen in the Layer panel to add a mask to it.
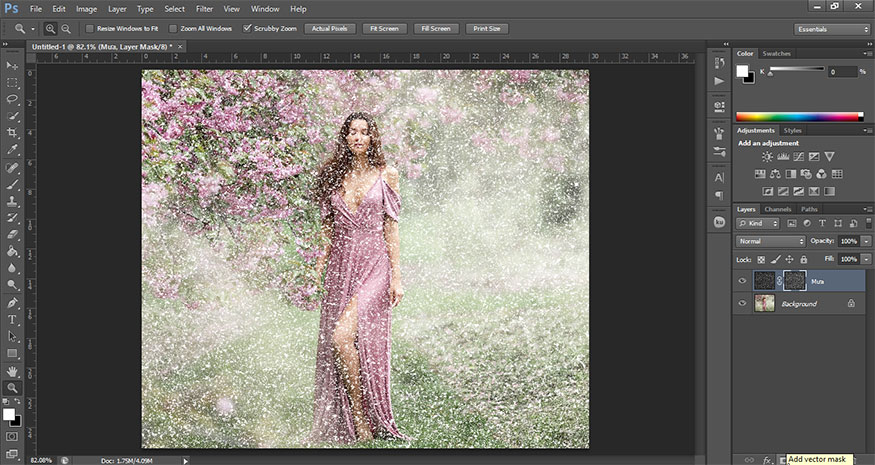
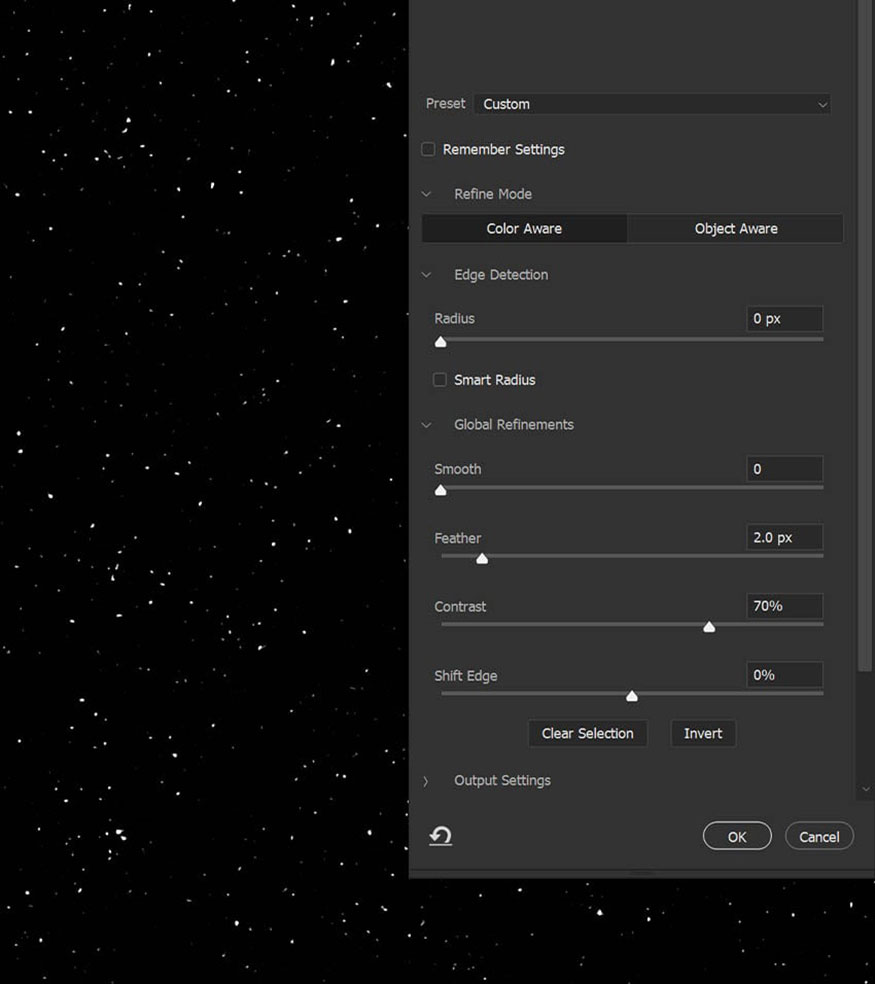
Step 5: In the Properties panel with the selection tool active, choose Select and Mask. Under Global Refinements, set the Feather to 2 px and the Contrast to 50% and press OK. This will thin out the white dots that represent the raindrops. The more visible the dots, the heavier the rain will be, so feel free to experiment with these settings.
Step 6: We will duplicate the Rain layer twice by using the Ctrl+J combination twice to have a total of three rain layers.
Select all the rain layers and right-click => Merge Layers. This will make the rain dots appear darker and more defined.
Since we're working with a portrait, I'll increase the size of the dots using the Transform tool.
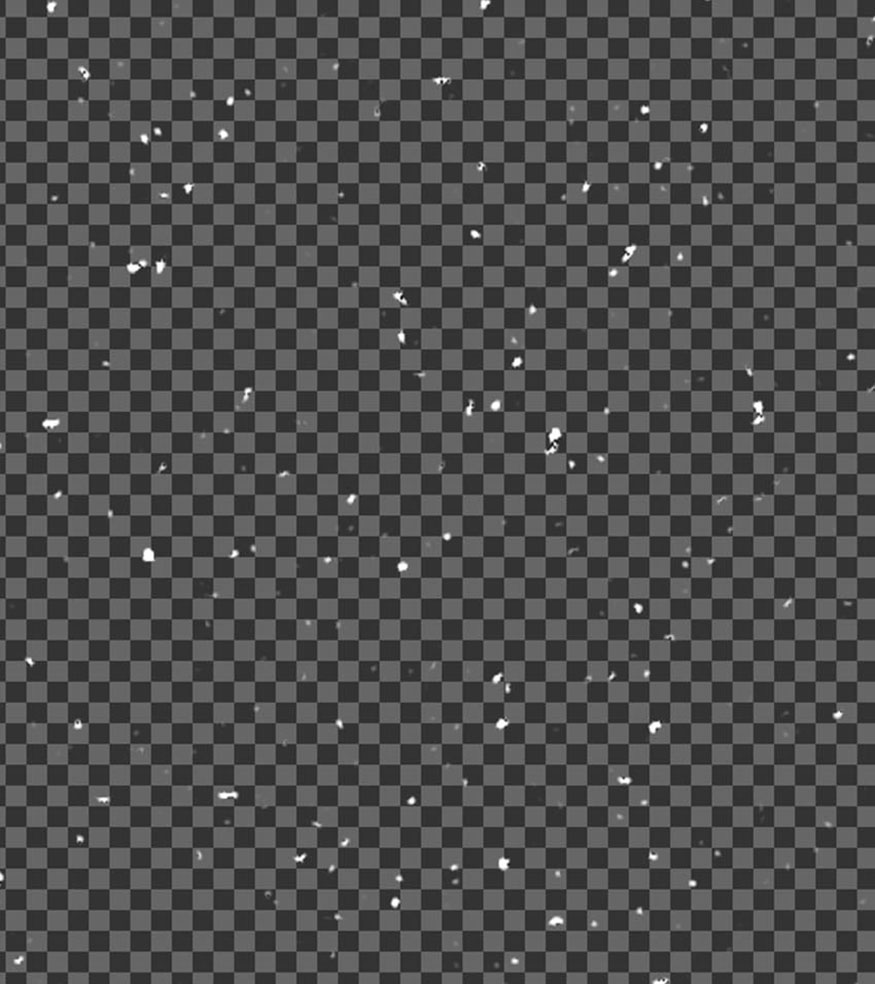
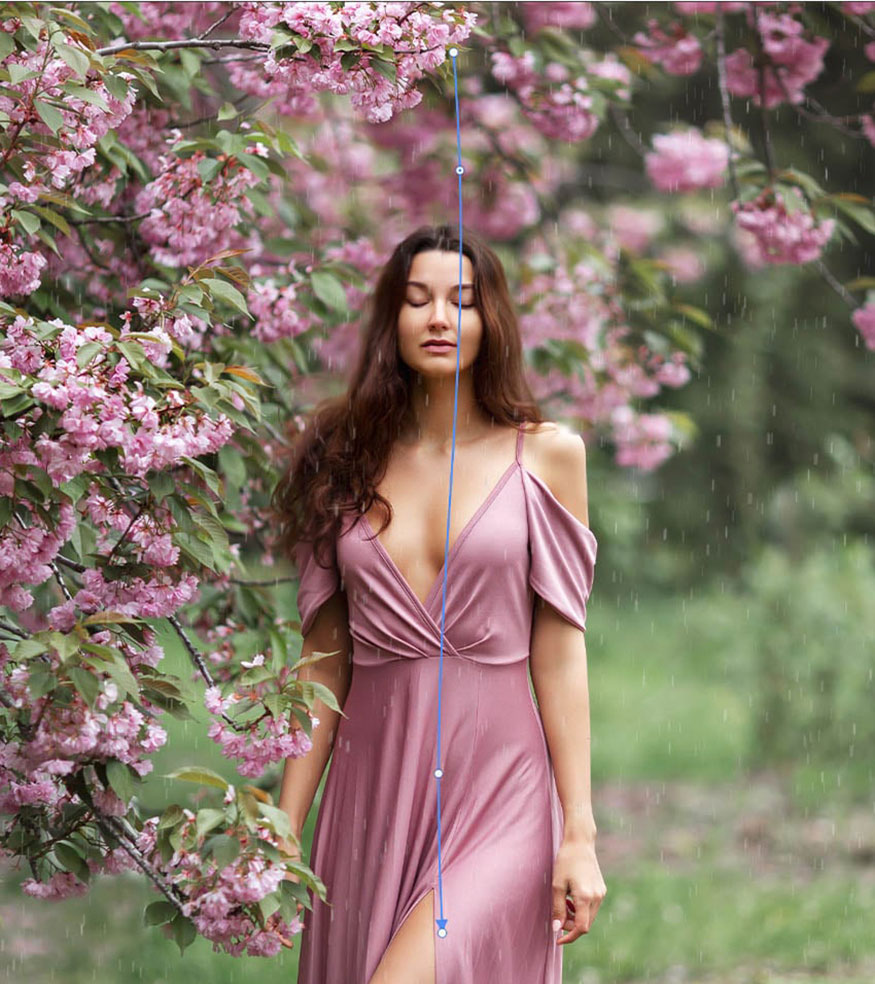
Step 7: On the toolbar, select Filter => Blur Gallery => Path Blur. Extend the blue blur that appears to hold the document vertically.
Next, we can create variation in the rain motion by placing two points on the path and dragging them in opposite directions.
You always want your rain to travel in multiple directions, even if it's very small. Ultimately, we want the rain to be vertical, but adding a slight wave will give us a more organic effect.
Go to Movement Speed. If we want a heavy rain, 50–75% is suitable. Here we want a gentle rain so reduce the Movement Speed to 20–25% and press OK
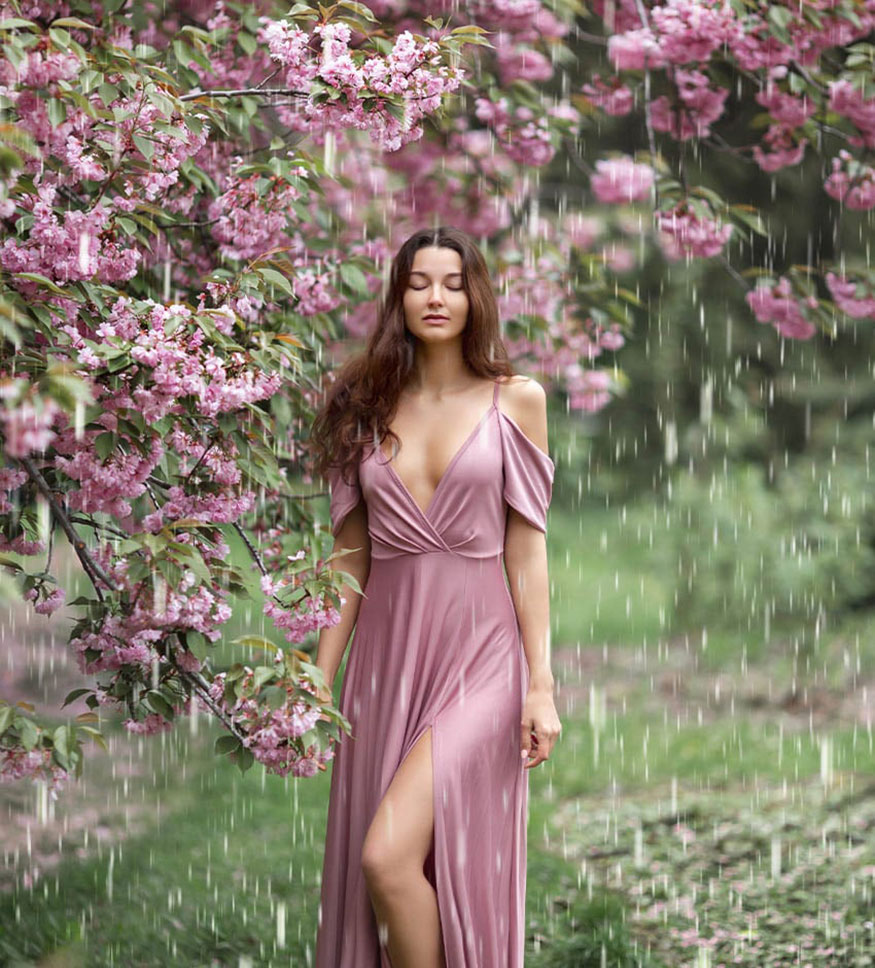
Step 8: Continue duplicating this rain texture a few more times to make it look darker, the raindrops bigger and then merge these layers again using Merge Layers.
This will be our rain effect texture in Photoshop.

Step 9: You can adjust the brightness, size and color of the rain if needed.
Let’s look at how to adjust the color. The simplest option is to go to Image => Adjustments => Hue/Saturation in the menu bar and select Colorize. Here you can use Hue and Lightness to adjust the color of the rain. Below, I’ve added a bit of green.
We can also change the Layer Modes. I like to experiment with combinations of layer modes like Overlay, Soft Light, Color Dodge, and Screen.
2. Wet the character to make the rain effect in Photoshop more realistic
If you stand bareheaded in the rain, you will get wet. Therefore, to make your photo as realistic and vivid as possible, you need to add a wet effect to people's hair and clothes.
Step 1: First, start with the hair. Extract your subject using your preferred method; here I used Select Subject and a Layer Mask.
Use the Smudge tool to smudge the hair. We want the hair to look heavy and wet, not bouncy. Try to get rid of any flyaways.
Create a Brightness/Contrast layer on the subject, set it to Contrast 100. Use a Layer Mask to remove the Brightness/Contrast layer from everywhere except the hair.

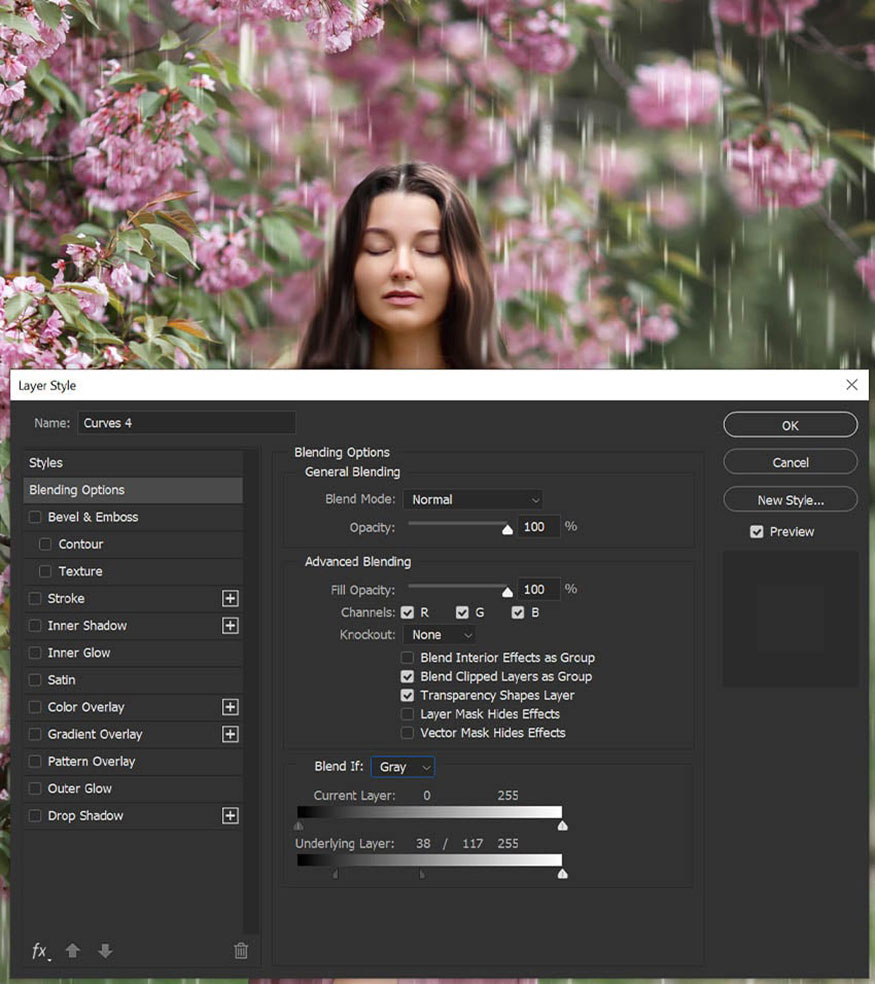
Step 2: Next, create a Curves layer above the Brightness/Contrast layer, bringing out the highlights. Double-click to open the Layer Style, using Blend If to target the highlights of the hair.
Use a Layer Mask to remove the Curves layer from everywhere except the hair. This will bring out the highlights in the hair, making the hair look wet.
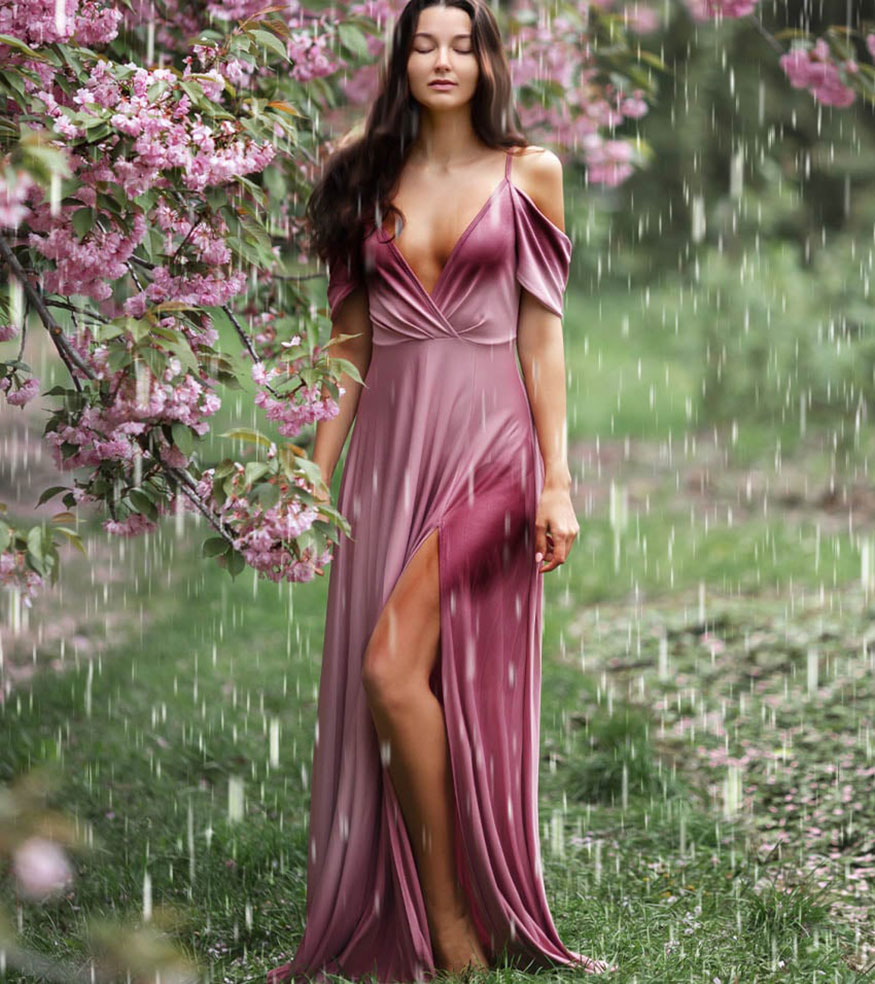
Step 3: Create and clip a new layer to the subject, setting it to Soft Light. Use a semi-soft round brush with Wet selected in the Brush settings to paint wet spots on the upper parts of the garment—in this case, the bust and skirt.
Use multiple layers to slowly build up the wet look. Adjust the Opacity of the layers as needed.
Step 4: Continue creating and clipping another curve layer above all the current layers in the subject. Increase the highlights and double-click to open the Layer Style, using Blend If to target the highlights in the image.
Invert the Layer Mask with Ctrl+I, turning the layer mask to black. Create a curved layer that covers the wet parts of the subject—in this case, her legs and chest.
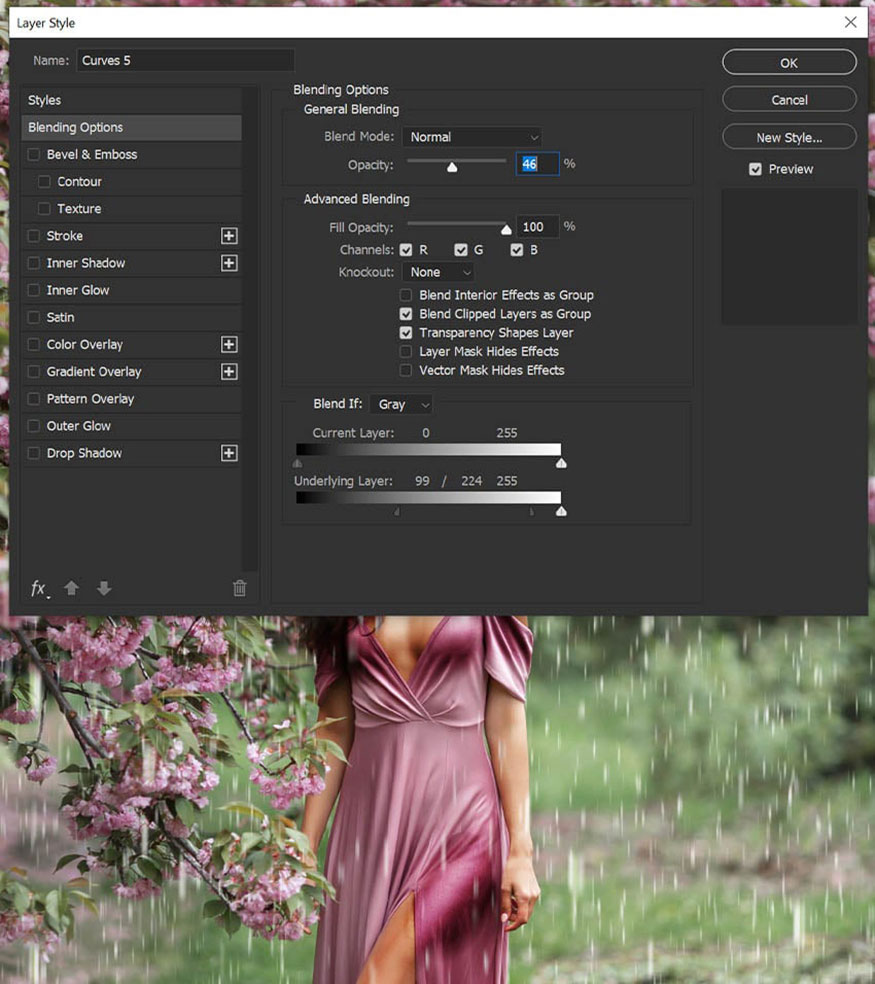
Step 5: Repeat the above step until you get a bright light on the subject.
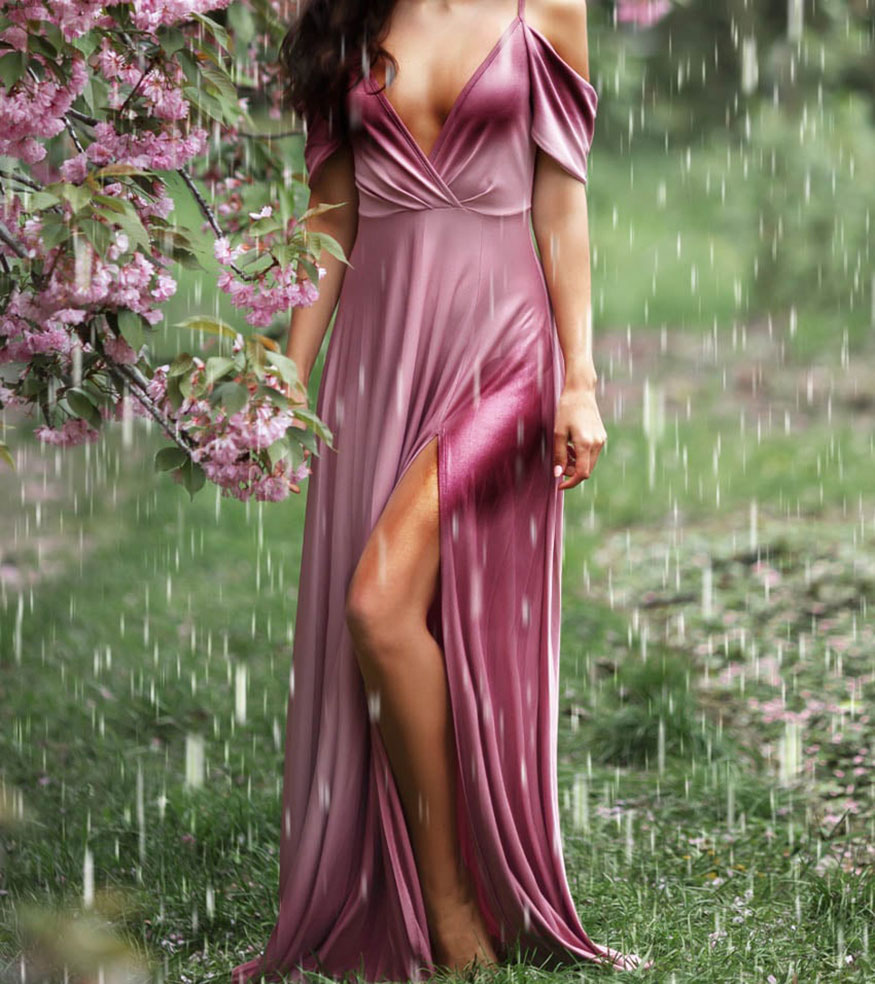
You have completed how to create a rain effect in Photoshop. A stunning photo of a girl in the rain appears.

Above is a summary of how to create rain effects in Photoshop. The method is not too complicated, so try it now.
Installation and support contact information:
🏡 SADESIGN Software Company Limited
📨 Email: phamvansa@gmail.com
🌍 Website: https://sadesign.ai


.png)


