Best Selling Products

Genuine Cheap Canva Pro
39 USD

Autodesk All App Account Copyright
120 USD

Upgrade Genuine Office 365
49 USD

Freepik Premium Account
59 USD

Capcut Pro 1 Year
39 USD

Genuine Adobe Illustrator account
99 USD

MidJourney Account
29 USD

Adobe Photoshop Copyright - Full App
120 USD

ChatGPT Plus Account (GPT-4)
16 USD

Windows 10 & 11 Pro Key
36 USD

Plugin Retouch4me
69 USD

Upgrade Duolingo Super
29 USD

Copyright Adobe Lightroom Account
59 USD

Adobe Premiere Pro Account
99 USD

Upgrade genuine Capture One account
120 USD
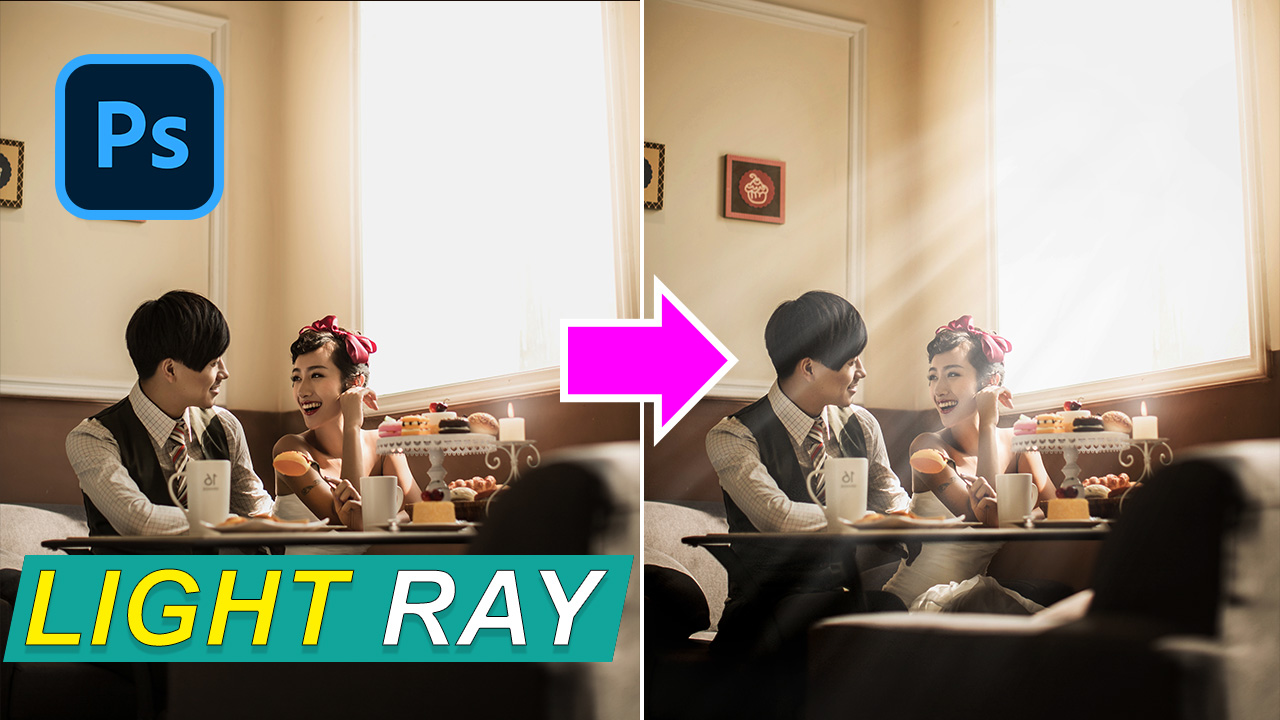
How to Create Rays Easily in Photoshop | SaDesign

Hi guys, today I’ll share with you how to make light rays with just a few minutes. Stay tuned!
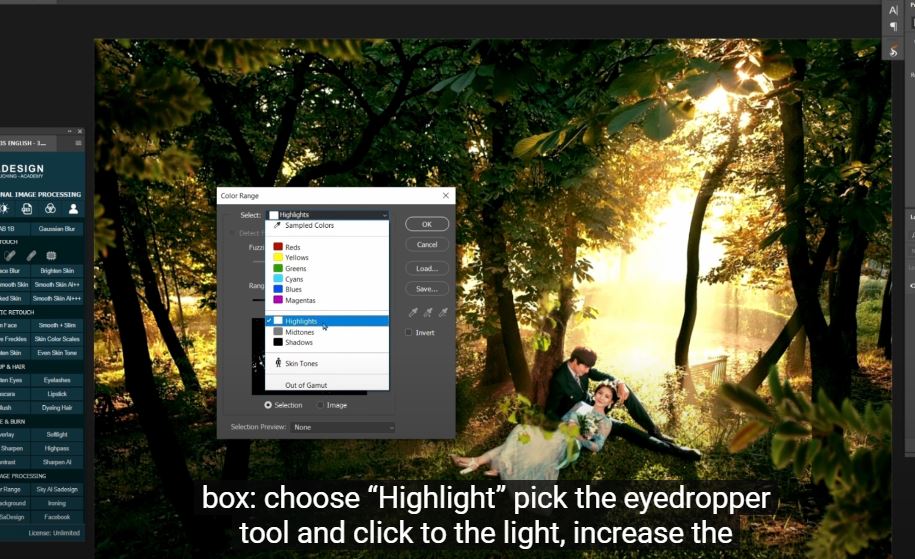
(1). At first, we will make the selection of light by going to Select > Color Range > in select box: choose “Highlight” pick the eyedropper tool and click to the light, increase the fuzziness till all the sun light is selected. Put the selection into a new layer with CTRL or CMD + J. When I turn off background, you can see what we have just selected.
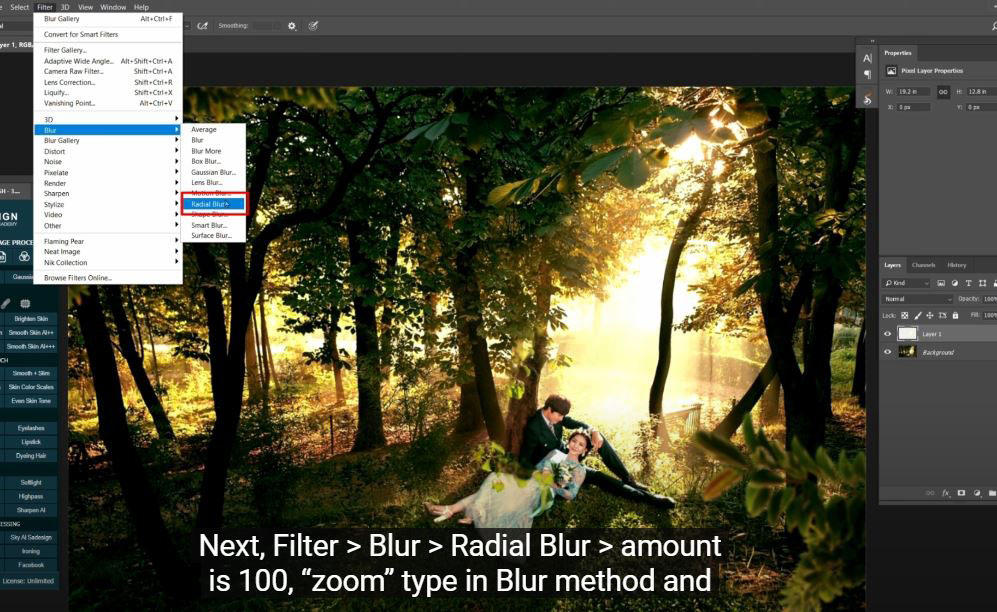
(2). Next, Filter > Blur > Radial Blur > amount is 100, “zoom” type in Blur method and “Good” quality > OK. Use Eraser tool with E shortcut to remove the light on the subject.
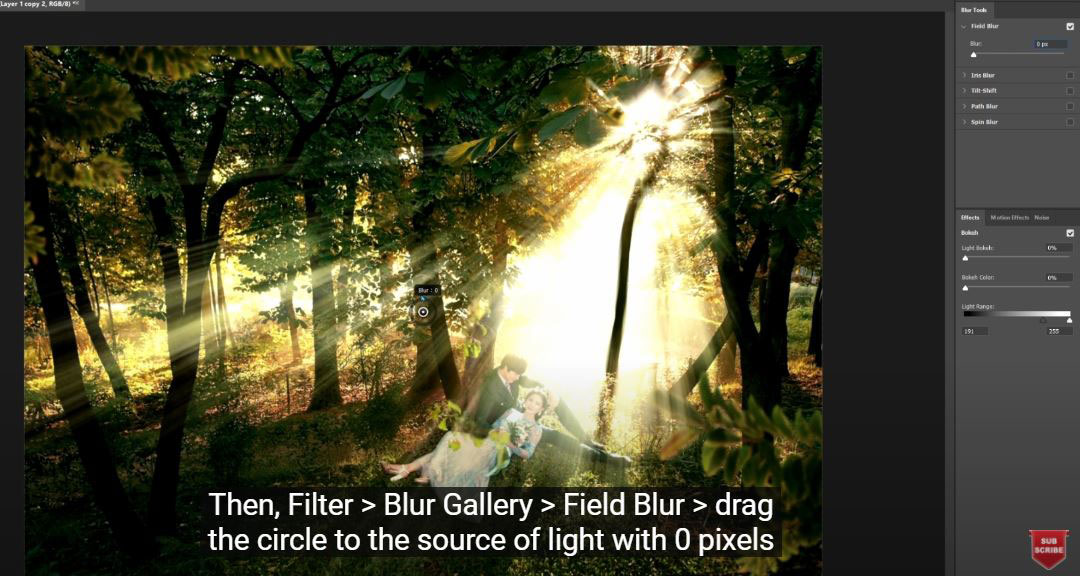
(3). Press CTRL or CMD + J three times to make the light rays even more obvious. Select these three layers and choose convert to smart object. Change blending mode from normal to screen. Then, Filter > Blur Gallery > Field Blur > drag the circle to the source of light with 0 pixels of blur, then click at other spots to create others circles. We made this because in the real life, the source of light is supposed to be strong and harsh and the light that far away from the source will be soft and blur. That’s why others circle that far from the source would be increase the blur. Make sure the more light that far from the source the more blur it should be.
(4).Create a layer mask to it and using eraser tool to remove the light that fall on the subject.
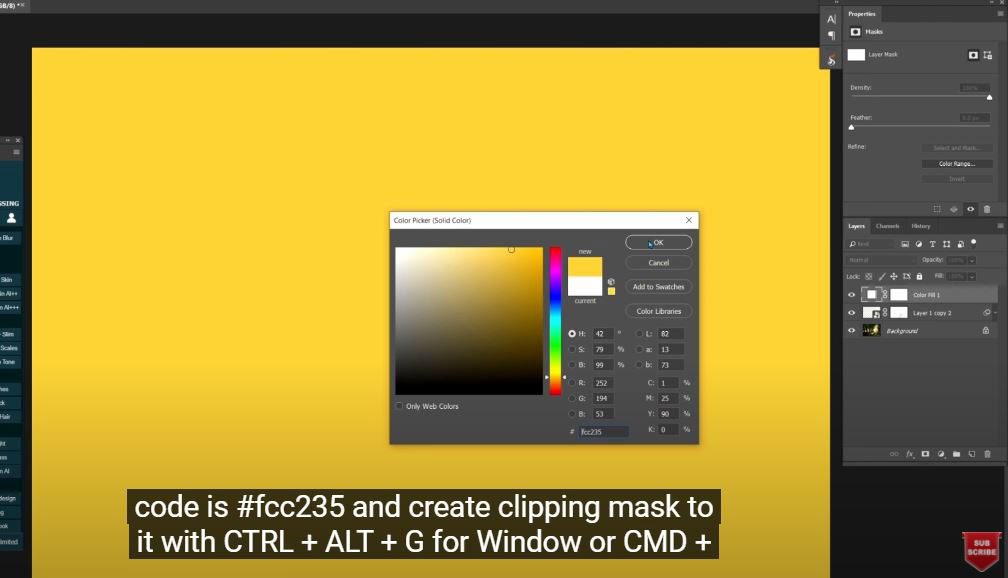
Next, right click to the adjustment icon and choose “Solid color”, choose the color code is #fcc235 and create clipping mask to it with CTRL + ALT + G for Window or CMD + OPTION + G for MAC.
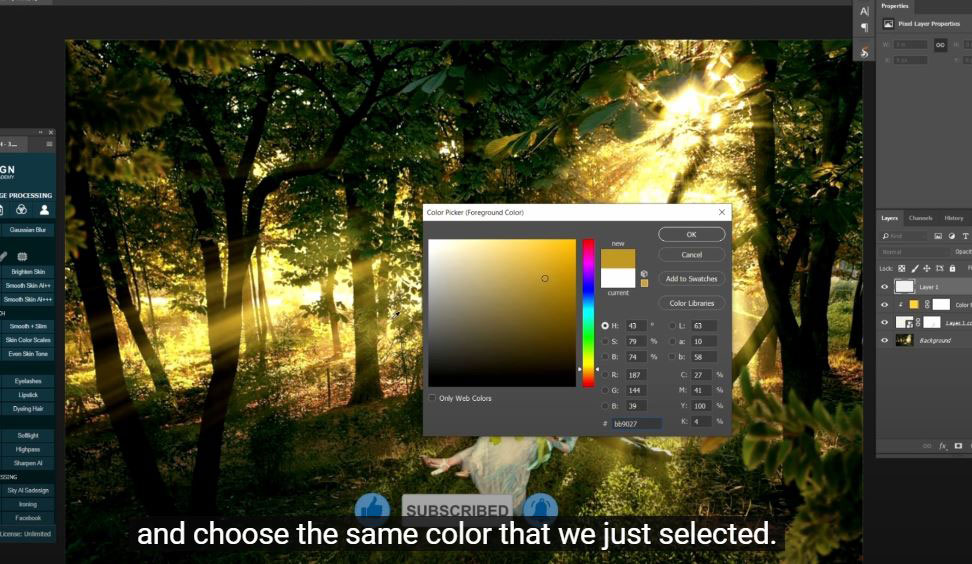
(5).Create a new layer, using brush tool with 100% opacity, double click to foreground layer and choose the same color that we just selected. We now paint on the ground to add more light from the source. I know it looks weird but don’t worry. Change blending mode to color dodge and open blending option. In underlying layer, hold ALT lick and drag half black triangle to the right till you see the brush that you paint looks like natural light rays. Again, use eraser tool to remove light rays that is too harsh.
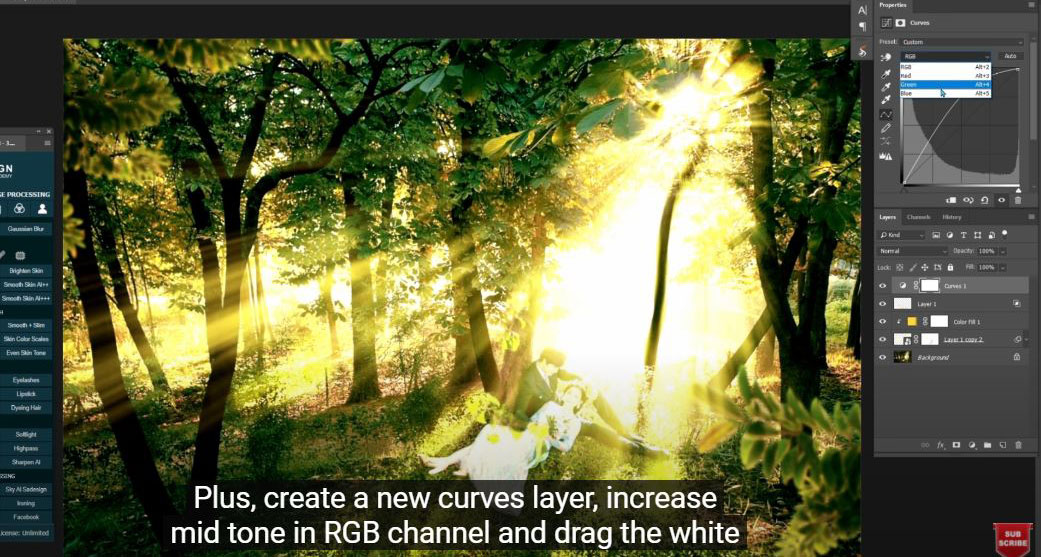
(6). Plus, create a new curves layer, increase mid tone in RGB channel and drag the white point down in blue channel. Click to the mask of curves layer and press CTRL or CMD + I to change it to black, use brush with low opacity and paint in the middle of each light rays.
In layer 1, press CTRL or CMD + U and change the color of light to something that warmer. Group all layers and enjoy!
If you like Photoshop and Photograph just like SaDesign and you want to get more and more tips, techniques, experience from us. Make sure to subscribe our channel by simply clicking the subscribe button and you will get tons of free tutorials that SaDesign share about Photoshop technique on a daily basic. If you have any ideas, don’t hesitate to leave comments right below the video. We look forward to see your thoughts. Thanks so much for following and supporting SaDesign. See you guys in the following tutorials. Bye Bye!
REGISTER FOR FREE PHOTOSHOP LEARNING
============================
The most powerful Retouch tool processor
? DOWNLOADS Practical pictures: https://drive.google.com/file/d/1IC88Mg_eanaZYOqOMl0unGN9jttda9jQ/view
REGISTER FOR FREE PHOTOSHOP LEARNING


VIP Products


Best Selling Products
Genuine Cheap Canva Pro
39 USD
Autodesk All App Account Copyright
120 USD
Upgrade Genuine Office 365
49 USD
Freepik Premium Account
59 USD
Capcut Pro 1 Year
39 USD
Genuine Adobe Illustrator account
99 USD
MidJourney Account
29 USD
Adobe Photoshop Copyright - Full App
120 USD
ChatGPT Plus Account (GPT-4)
16 USD
Windows 10 & 11 Pro Key
36 USD
Plugin Retouch4me
69 USD
Upgrade Duolingo Super
29 USD
Copyright Adobe Lightroom Account
59 USD
Adobe Premiere Pro Account
99 USD
Upgrade genuine Capture One account
120 USD