Best Selling Products
How to create Star Wars text effect like movie poster using Photoshop
Nội dung
- 1. Create a background for Star Wars text effect like a movie poster using Photoshop
- 2. Create text for Star Wars text effect like Movie Poster using Photoshop
- 3. Create Layer Style for the original Shape Layer
- 4. Create Layer Style for the first copy Text Layer
- 5. Create Layer Style for the 2nd copy of Text Layer
- 6. Add light effects behind the layer
- 7. Add Flares effect to text
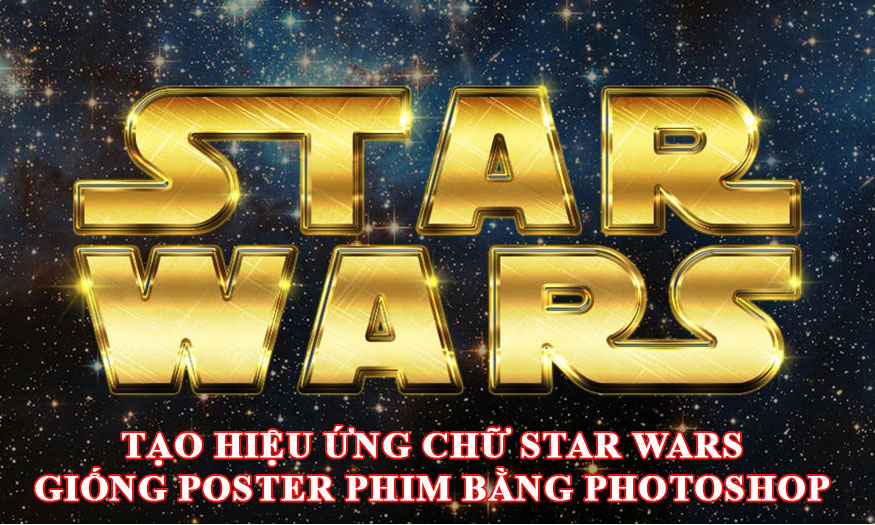
The Star Wars text stands out with its unique font and shimmering effects like the Milky Way, extremely beautiful. Now you can create your own Star Wars text effect like a movie poster in Photoshop with just a combination of different tools. Join SaDesign to learn how to create this effect through the following shares.

1. Create a background for Star Wars text effect like a movie poster using Photoshop
The text in the Star Wars movie poster stands out against the shimmering galaxy background. Let's create the background for your effect by following the steps below.
Step 1: Download a background image of a galaxy to your computer. Open Photoshop and create a document with the size of 950 x 950 px. Then open the galaxy image, edit and resize if necessary to make a Background Layer.
.jpg)
Step 2: Double-click on the newly created layer in the layer panel to open Layer Style. Select Color Overlay, change Blend Mode to Multiply, and change the Color code to #a6a6a6.
.jpg)
Step 3: To darken the photo a bit, click on the Create new fill or adjustment layer icon at the bottom of the Layer Panel and select Solid Color.
.jpg)
In the color picker, select the color code #fced82. Then set the Blend Mode of the Layer to Multiply, reduce the Opacity to 25%. We get the result as shown.
.jpg)
2. Create text for Star Wars text effect like Movie Poster using Photoshop
Step 1: Select the font SF Distant Galaxy. Capitalize the first letters S and T.
Open the Character Panel (Window => Character) to change some settings:
The color code is #f2ece6
Size: 200 pt
Leading: 155 pt
Set Tracking to 50
.jpg)
Step 2: Adjust the Kerning value for some characters. Click in the middle of 2 characters and enter the value you want.
create-star-wars-poster-like-movie-effect-with-photoshop-6
The values used in the illustration above are:
ST: - 100
AR (in both characters): 50
RS: - 100
Step 3: Now we will proceed to adjust the text. On the menu bar, select Type => Convert to Shape.
.jpg)
On the toolbar, select the Direct Selection Tool, then hold and drag the mouse to show anchor points, select the 2 anchor points at the end of the letter R.
.jpg)
Hold the mouse and drag to the right so that it aligns with the S at the bottom. You can zoom in to see clearly and drag more precisely.
.jpg)
Do the same with the first S tail. Drag it to the left so that the S margin is equal to the bottom W. You should have the result as shown.
.jpg)
Duplicate the Shape Layer by pressing Ctrl+J, then change the Fill value of the copy layer to 0 and duplicate the layer again.
.jpg)
3. Create Layer Style for the original Shape Layer
Double-click on the original Shape Layer to add a Layer Style with the following settings:
Step 1: Select Bevel and Emboss and set the parameters as follows:
Style: Stroke Emboss
Size: 3
Gloss Contour: Gaussian - Inverse
Check the Anti-aliased box
Highlight Mode: Vivid Light
.jpg)
Step 2: Select Contour and set the parameters as follows:
Contour: Rolling Slope - Descending
Check the Anti-aliased box
.jpg)
Step 3: Select Stroke and set the parameters as follows:
Size: 10
Position: Center
Fill Type: Gradient
Style: Reflected
Angle: 35
Use Golden Dial Top X11 to fill the Gradient, then click on the Gradient box to edit.
Double-click each Color Stop, and use the color code #e1ca71 instead of #f5e5a6.
.jpg)
Step 4: Select Inner Shadow and set the parameters as follows:
Opacity: 50%
Distance: 0
Size: 1
.jpg)
Step 5: Select Gradient Overlay and set the parameters as follows:
Click the Gradient box to create a Gradient.
.jpg)
You can click below the Gradient bar to add Color Stops, each Color Stop you click to change the Color and Location values. Or you can also click on the Opacity Stop above the Gradient bar to adjust the Opacity and Location values.
The values used in this Color - Location are:
#ede1b1: - 5%
#ecd98f: - 75%
#e1ca71: - 88%
#be8936: - 100%
Finally, change the Location value of the Opacity Stop to 5%.
.jpg)
After completion, we get the result as shown.
.jpg)
4. Create Layer Style for the first copy Text Layer
Now let's double-click on the first copy of Layer Shape to add a Layer Style and set the parameters as follows:
Step 1: Select Stroke and set the parameters as follows:
Size: 10
Position: Center
Blend Mode: Overlay
Fill Type: Gradient
Style: Reflected
Angle: 90
Use faucet 110 to fill Gradient
.jpg)
Step 2: Select Gradient Overlay and set according to the following parameters:
Blend Mode: Hard Light
Check the Reverse box
Use Gold Dial Tops X7 - angled to fill Gradient
You can click and drag inside the Gradient box to reposition the text as you want.
.jpg)
Step 3: Select Pattern Overlay and set the parameters as follows:
Blend Mode: Overlay
Pattern: metal_6-512px.jpg
.jpg)
After completion, we will have the image below:
.jpg)
5. Create Layer Style for the 2nd copy of Text Layer
We will proceed with the second copy layer, double click on the copy Layer Shape copy 2 to add Layer Style and set the parameters as follows:
Step 1: Select Bevel and Emboss and set the parameters as follows:
Style: Stroke Emboss
Size: 3
Gloss Contour: Ring
Check the Anti-aliased box
Highlight Mode: Vivid Light
.jpg)
Step 2: Select Contour and set the parameters as follows:
Contour: Cove - Deep
Check the Anti-aliased box
.jpg)
Step 3: Select Stroke and set the parameters as follows:
Size: 10
Position: Center
Blend Mode: Overlay
Fill Type: Gradient
Style: Reflected
Angle: 5
.jpg)
After creating the Layer Style for the second copy of the Text Layer, we can see that the Layer color effect looks more vivid.
.jpg)
6. Add light effects behind the layer
Basically, you have created a Star Wars text effect like a movie poster in Photoshop. However, we need to add a little light to make the design more sparkling. We can proceed with the following basic steps:
Step 1: Press Ctrl+J to duplicate the second copy of Layer Shape, then right-click and select Rasterize Layer Style.
Rename the Rasterize Layer Style to Glow and change the Fill value to 0.
.jpg)
Step 2: Double-click on Layer Glow to open the Layer Style panel. Select Outer Glow to add a light effect behind the layer and set the following parameters:
Blend Mode: Linear Light
Color: #e7bf2a
Size: 3
.jpg)
The Star Wars Text part after adding the Outer Glow effect will look more sparkling as shown below.
.jpg)
7. Add Flares effect to text
Continue adding Flares effects to make the design more impressive.
Step 1: On the toolbar set Foreground color to #ead994, then select Brush Tool, then select S&F-12 in Stars and Flares Brush Set.
.jpg)
Step 2: Open the Brush panel by selecting Window => Brush. Change the settings at the bottom of the Shape Dynamics tab as shown below:
.jpg)
Step 3: Reduce the Brush Size to the value you want. Create a new layer above all the layers you created in the previous steps and name it Flares. Change the Blend Mode to Linear Light.
Then start clicking on the document to add glows around the text edges.
.jpg)
So you have completed creating Star Wars text effect like Movie Poster in Photoshop. The text looks really attractive and unique, right?
.jpg)
Above is a summary of the steps to create a Star Wars text effect like a movie poster using Photoshop. In fact, the implementation is not simple, it requires a combination of many tools. Therefore, you should be meticulous, do not do it many times a day to get the most satisfactory results.


