Best Selling Products
How To Create Text Portrait Effect Easily in Photoshop
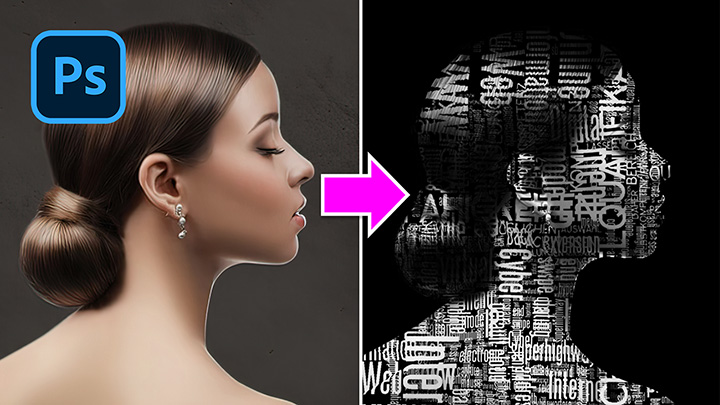
Hi, in this video I will share with you how to create vertical text effect in Photoshop.
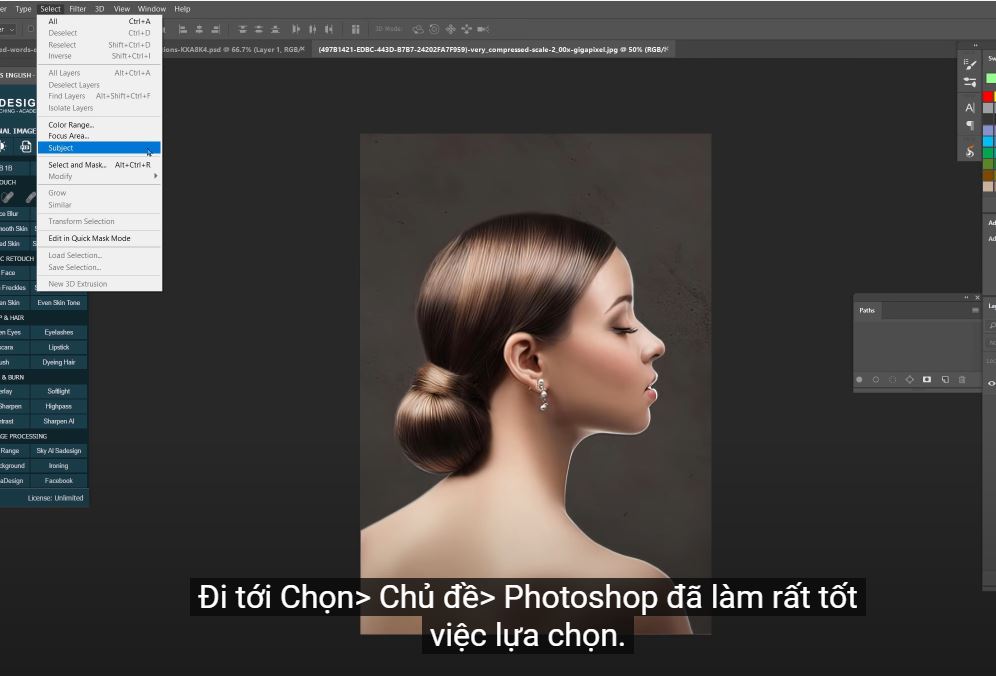
(1).Here I have this beautiful image, we are going to cut the subject out of the background. Going to Select > Theme > Photoshop did a great job of making the selection. However, we had to make a little modification on her hair.
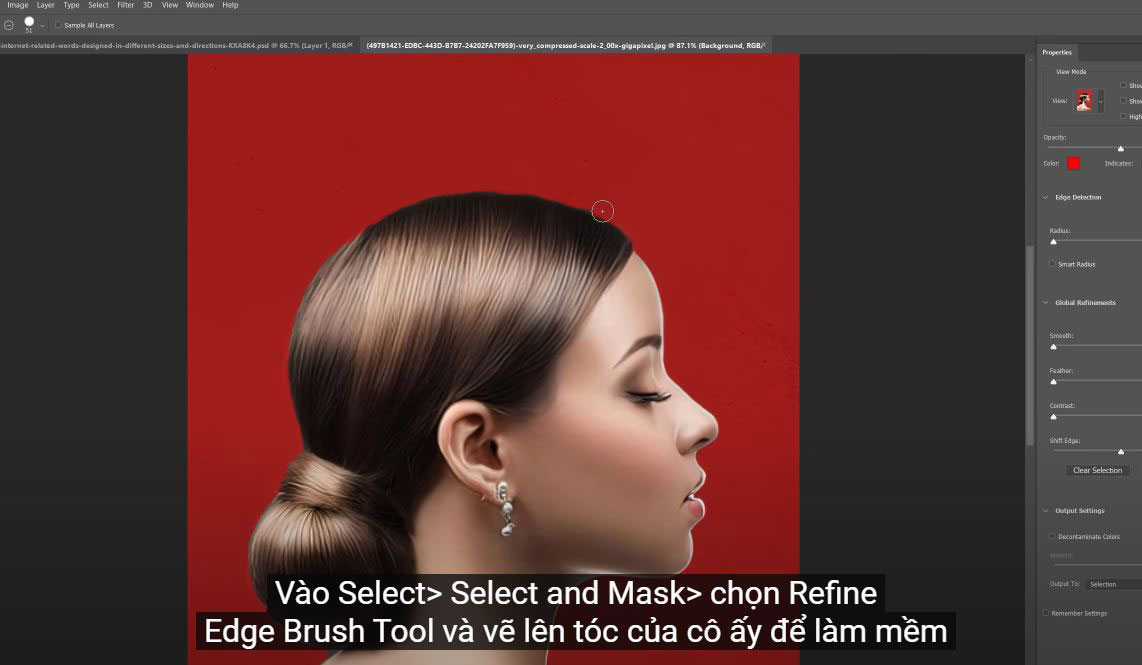
(2). Go to Select > Select and Mask > select the Refine Edge Brush Tool and paint over her hair to soften the selection, then OK
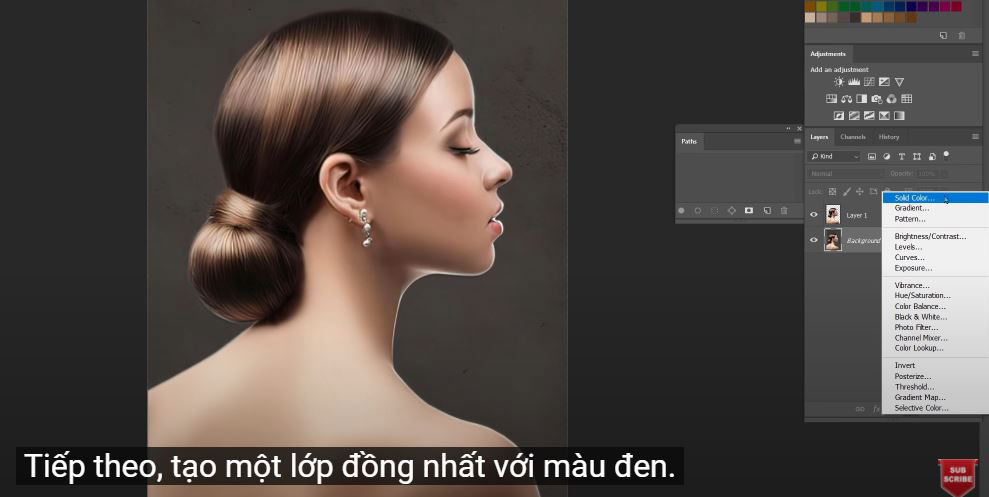
(3). Press CTRL or CMD + J to bring the selection to the new layer
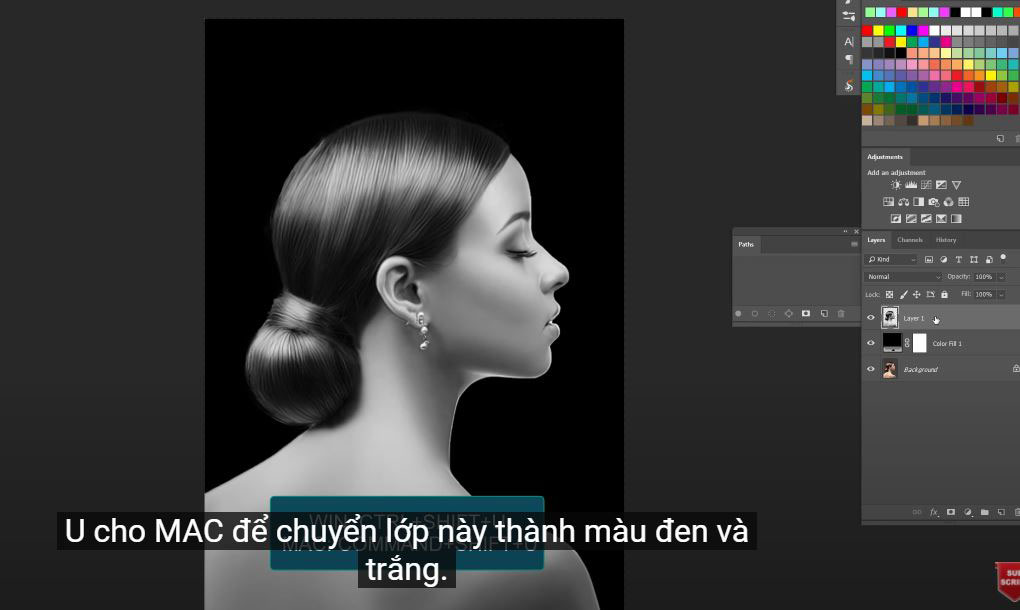
(4). Remove all the color of the object by pressing CTRL + SHIFT + U for Win or CMD + SHIFT + U for MAC to convert the layer to black and white.
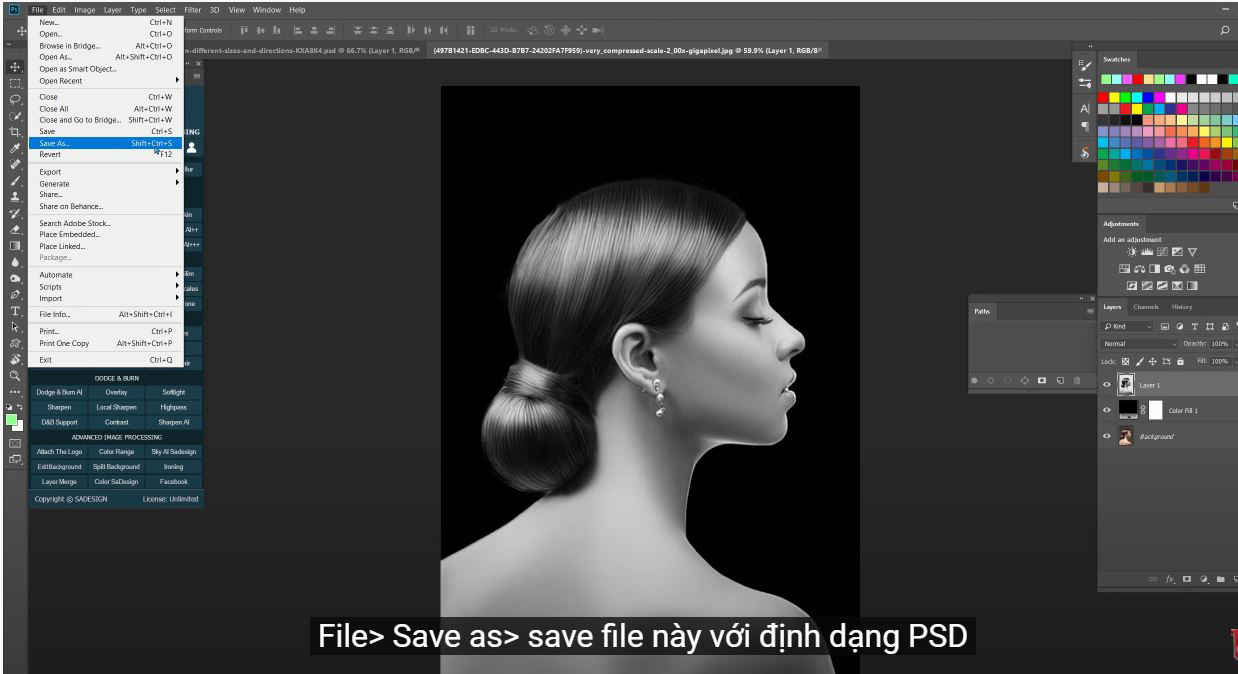
(5). File > Save As > save this file as PSD
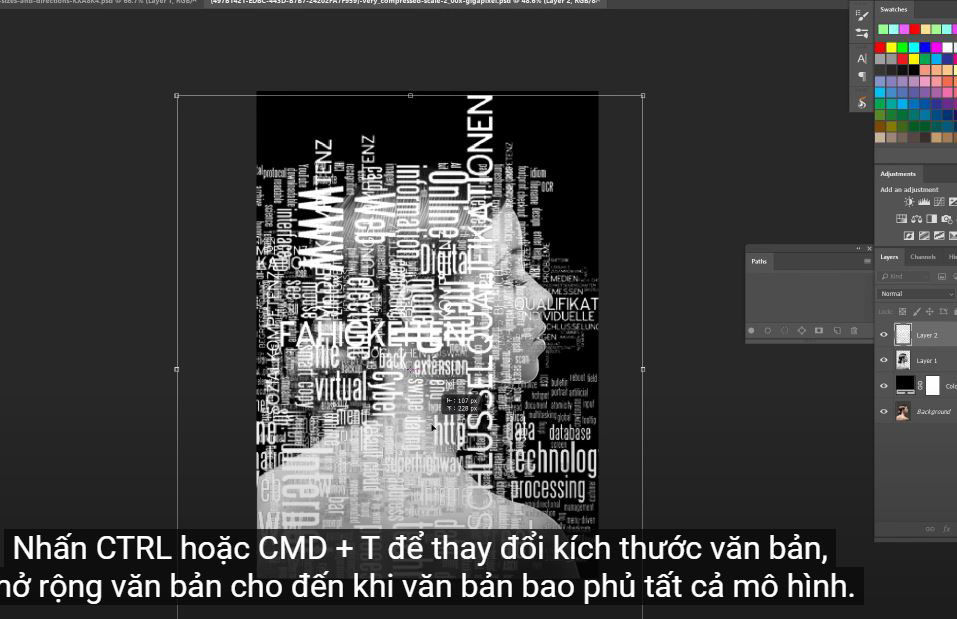
(6). Get the text image to apply to the theme. Press CTRL or CMD + T to resize the text, expanding the text until the text covers all the model.
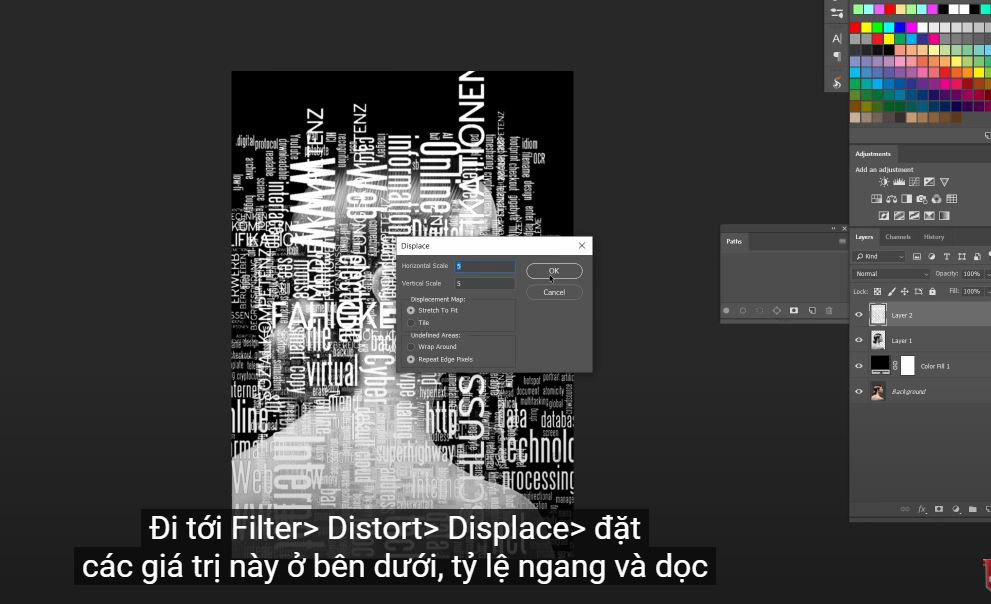
(7). Go to Filter > Distort > Displace > set these values below, horizontal and vertical scale: 5, Displacement map: stretch to fit and undefined areas: repeat edge pixels. Then confirm. Load the PSD file you just saved.
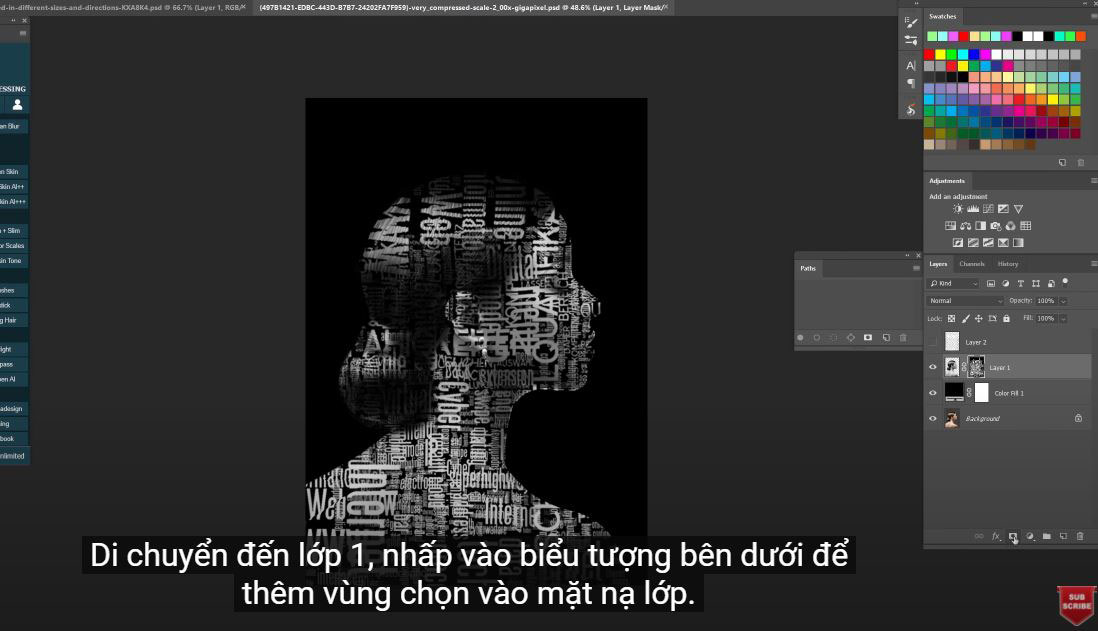
(8). Hold CTRL or CMD and click to select the text, turning off its layer.
(9). Move to layer 1, click the icon below to add a selection to the layer mask. Boom! Here you are.
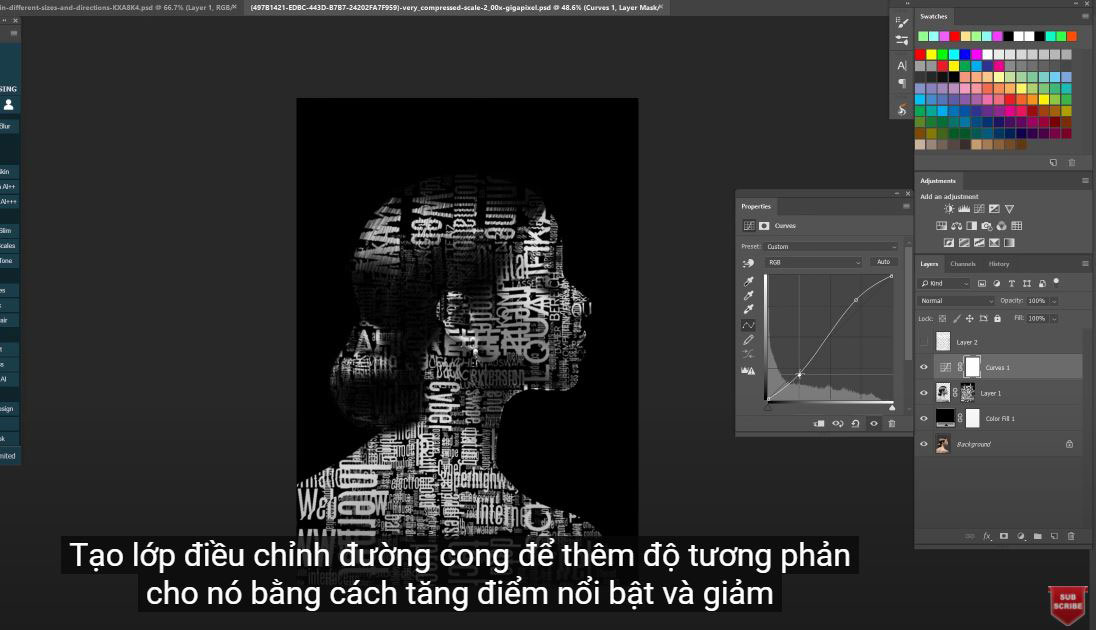
Now we just add some tweaks to make it look stunning.
Create a curve adjustment layer to add contrast to it by increasing highlights and reducing shadows.
Put all the layers into the group. Alright! Any questions please leave a comment below and I will help you right away. Please like and subscribe for more instructions. Bye!*-
REGISTER FOR FREE PHOTOSHOP LEARNING
============================
The most powerful Retouch tool processor
DOWNLOAD:
✅ SADESIGN PANEL ENGLISH: https://sadesign.ai/retouching/
✅ SADESIGN PANEL VIETNAM: https://www.retouching.vn/


