Best Selling Products

Genuine Adobe Illustrator account
99 USD

Capcut Pro 1 Year
39 USD

Upgrade Duolingo Super
29 USD

Adobe Premiere Pro Account
99 USD

Upgrade genuine Capture One account
120 USD

Copyright Adobe Lightroom Account
59 USD

MidJourney Account
29 USD

Plugin Retouch4me
69 USD

ChatGPT Plus Account (GPT-4)
16 USD

Adobe Photoshop Copyright - Full App
120 USD

Upgrade Genuine Office 365
49 USD

Genuine Cheap Canva Pro
39 USD

Autodesk All App Account Copyright
120 USD

Freepik Premium Account
59 USD

Windows 10 & 11 Pro Key
36 USD
How to Create Watercolor Portrait Effect in Photoshop
Nội dung
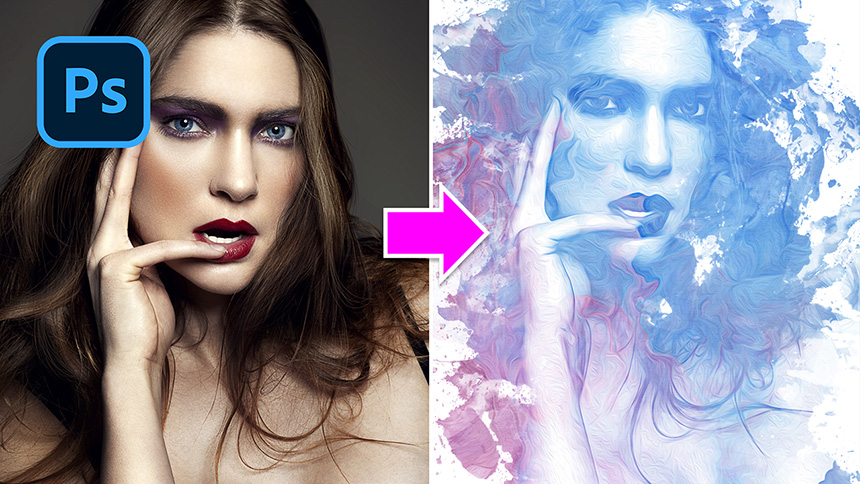
Hi there, in this tutorial, I’ll show you how to create a beautiful watercolor portrait effect in Photoshop. Stay tuned!
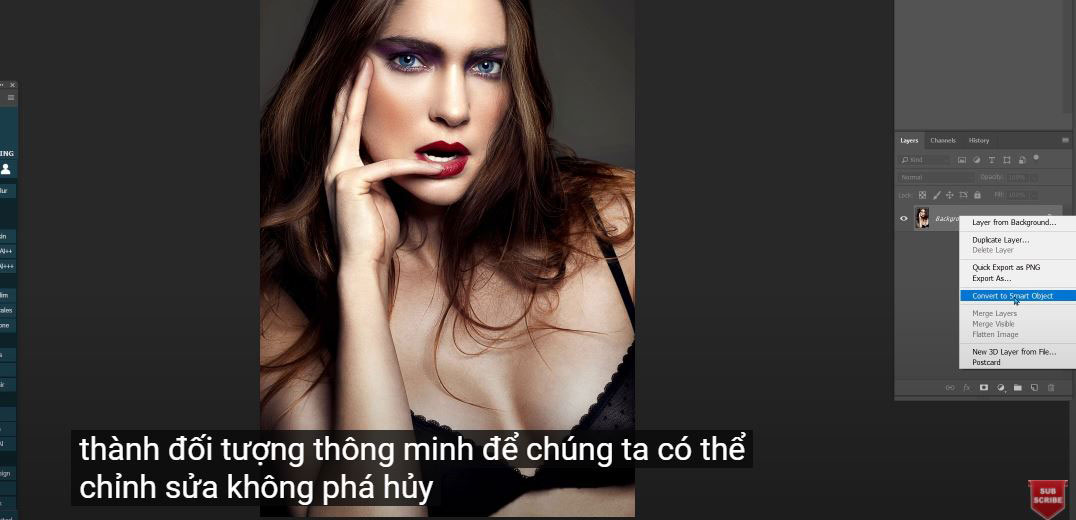
(1). At first, Convert the background layer to Smart Obejct so that we can be non-destructive editing, duplicate our background layer (CTRL + J) and remove the color of it by using Black and White with CTRL + ALT + SHIFT + B for Win or CMD + OPTION + SHIFT + B for MAC. Then, using Curves by pressing shortcut CTRL or CMD + M and increase black and white by dragging white triangle to the left and black triangle to the right. This way, you can see the photo is having lots of contrast. Next, make sure your foreground is black, background is white. Head up to Filter > Filter Gallery. Select Watercolor, in the Artistic folder with Brush Detail: 14, Shadow Intensity: 0, Texture:1.
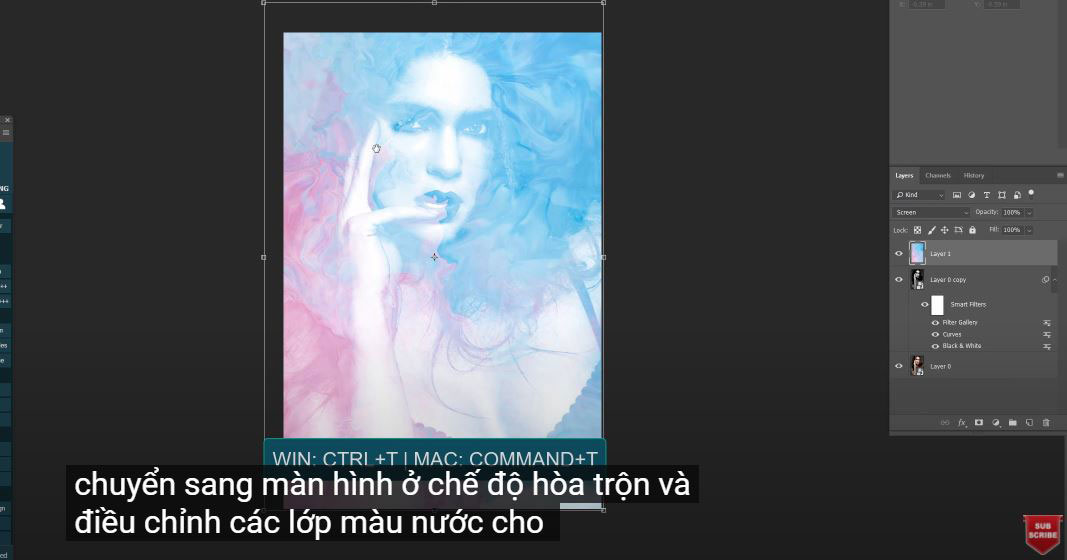
(3). Now, I will add the watercolor texture. Moving to watercolor photo, select it (CTRL or CMD + A) and copy it (CTRL or CMD + C). Paste it onto our project, then use CTRL + T to resize, rotate and move it to cover the subject. Change to screen in blending mode and adjust the watercolor layer until it’s perfectly matching with model. I think it’s now quite bright so I’ll reduce the brightness with Curves, Open curves layer, reduce a bit of highlight and shadow.
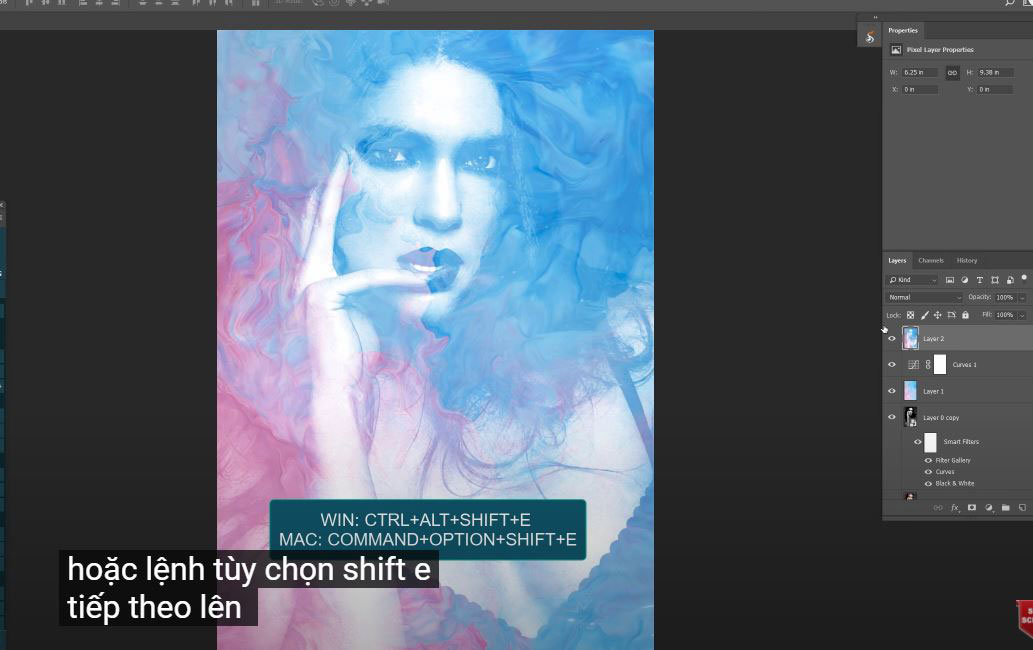
(4). After that, create a stamp visible layer by CTRL + ALT + SHIFT + E or CMD + OPTION + SHIFT + E.
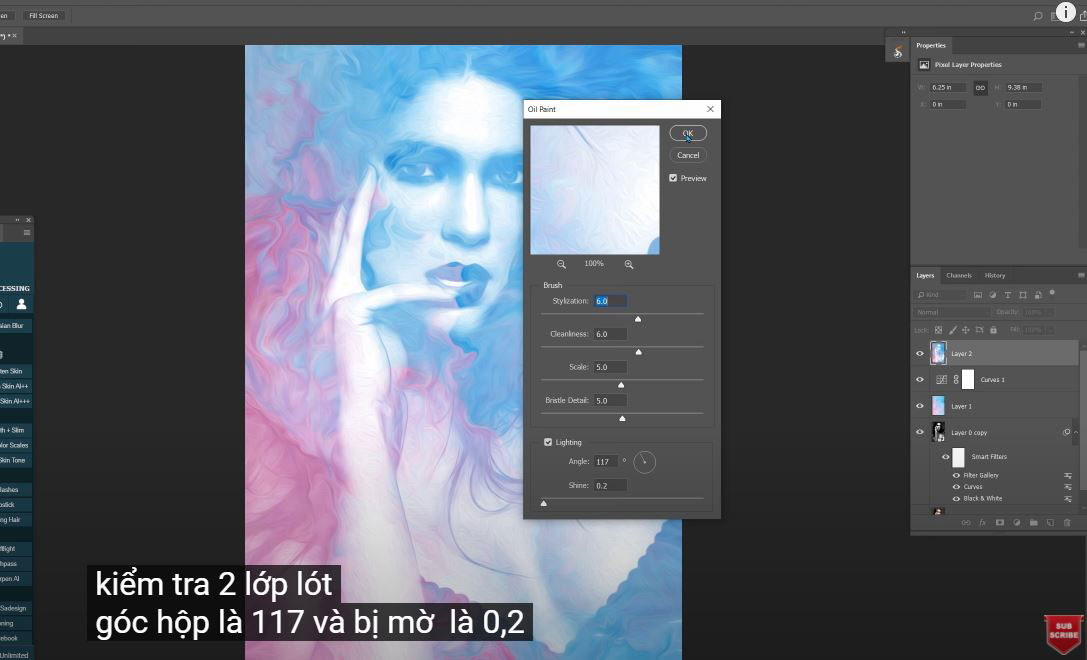
(5). Next, head up to Filter > Stylize > Oil Paint. Fill the amount of these options as below - Stylization: 6, Cleanliness: 6, Scale: 5, Bristle: 5, check to Lighting box, Angle is 117 and Shine is 0.2. Then hit OK.
(6). It looks pretty good right now, duplicate the stamp visible layer with CTRL + J. Change blending mode from normal to overlay and go to Filter > Other > Highpass with radius at 8 pixels. Now we get more details to the photo. 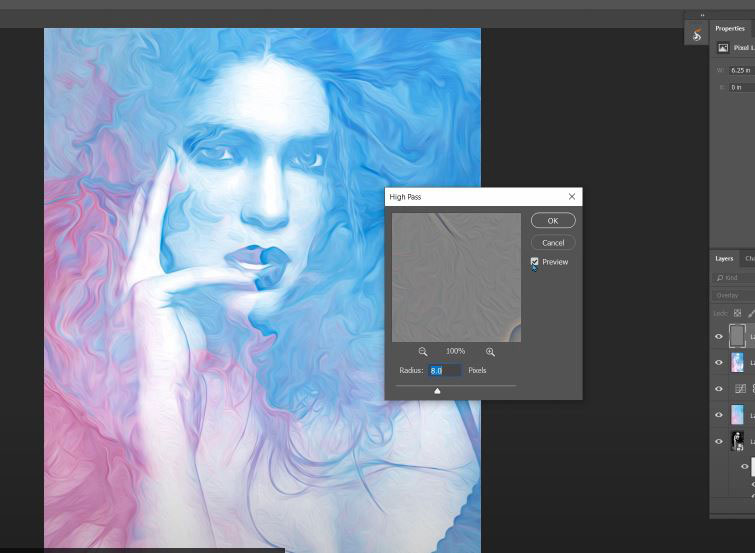
(7). Create a new stamp visible layer again, hold CTRL or CMD and click to choose a new layer, and press CTRL or CMD + Delete to fill the new layer with white in background.
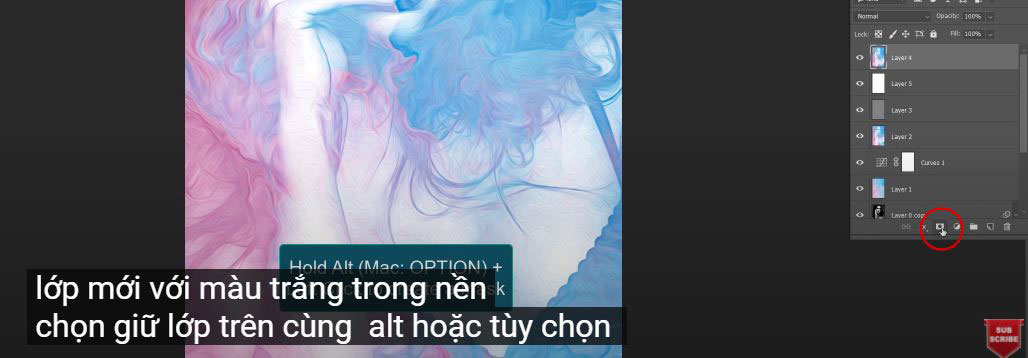
(8). Select top layer, hold ALT or OPTION and click to layer mask to create a layer mask to top layer with black.
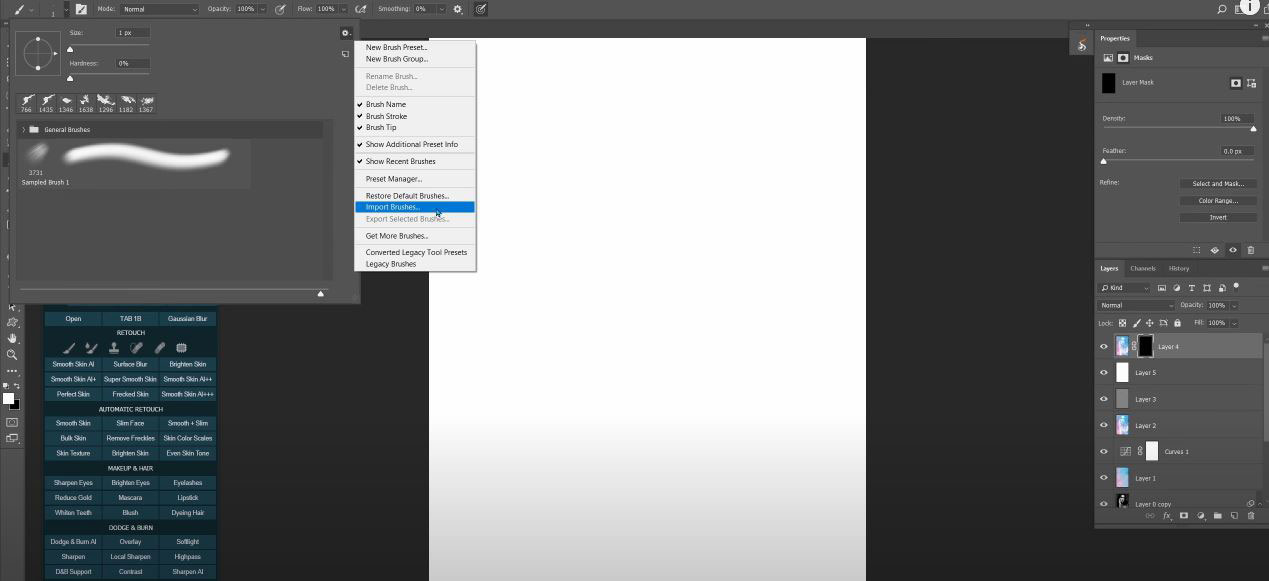
(9). Next, we will import watercolor brush (B shortcut). If you already have it on Photoshop, please skip this step. If not, I’ll leave the brush file in the description for you to download and import. Click to the small down arrow next the brush’s size, choose the wheel icon and select import brushes. Choose the location of watercolor brushes and load it. Now, drop down watercolor brushes folder and choose the brush that you prefer, I’ll take the dried blood splatters
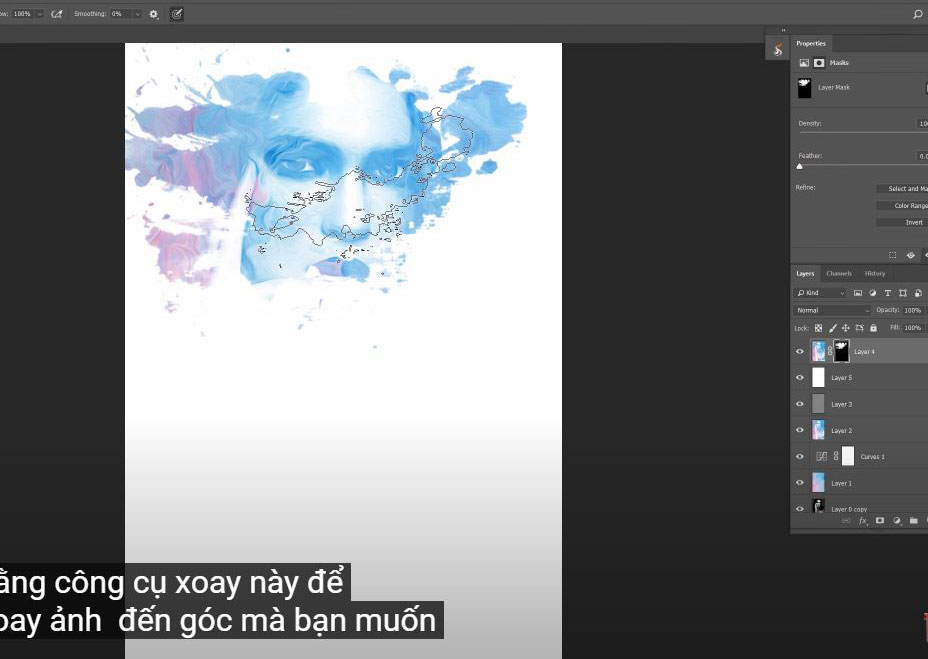
(10). Let’s me try some... Oh it looks nice to reveal her eyes. Make sure the opacity and flow are both 100%. Now just paint on the place you want to show the painting below You can hold R shortcut which is rotate tool to rotate the photo to the angle that you want to apply the effect.
(11).
Use bracket {} while your painting to increase or decrease the brush size, this is the tip to make your workflow faster. Change other brushes to paint on the photo to create your own unique watercolor painting.
Just keep changing different brushes to paint.
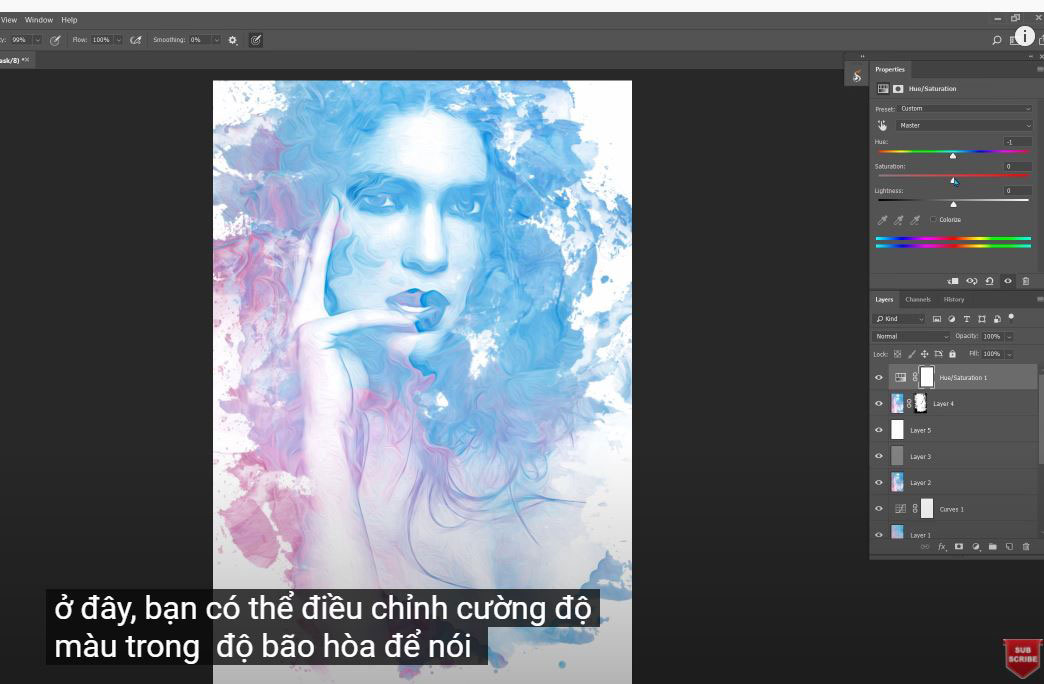
Once, you are done, open “Hue/saturation” layer, in here, you can adjust the intensity of color in saturation to 12.
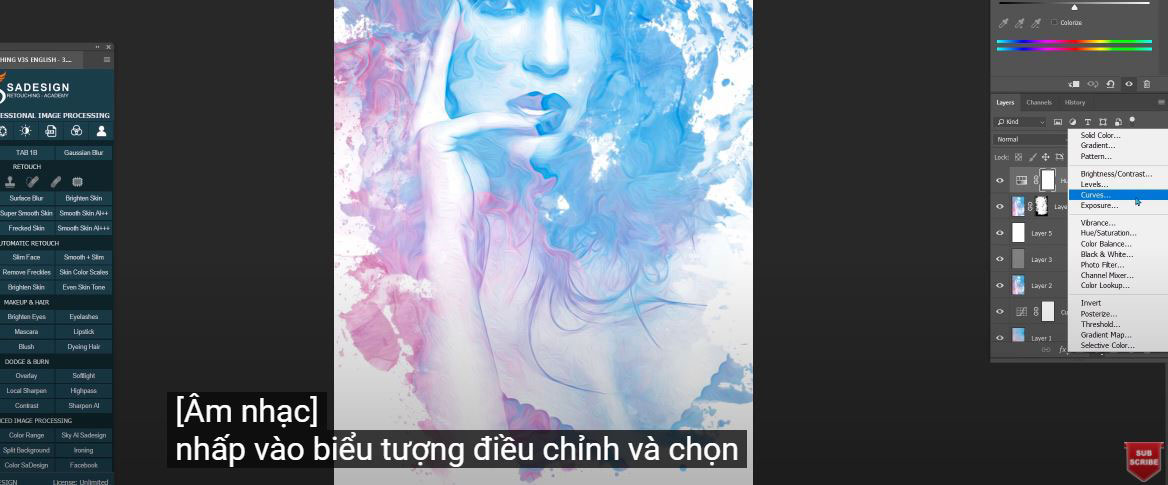
(12). Click to the adjustment icon and choose Curves to reduce a bit of brightness which is decrease the highlight and shadow.
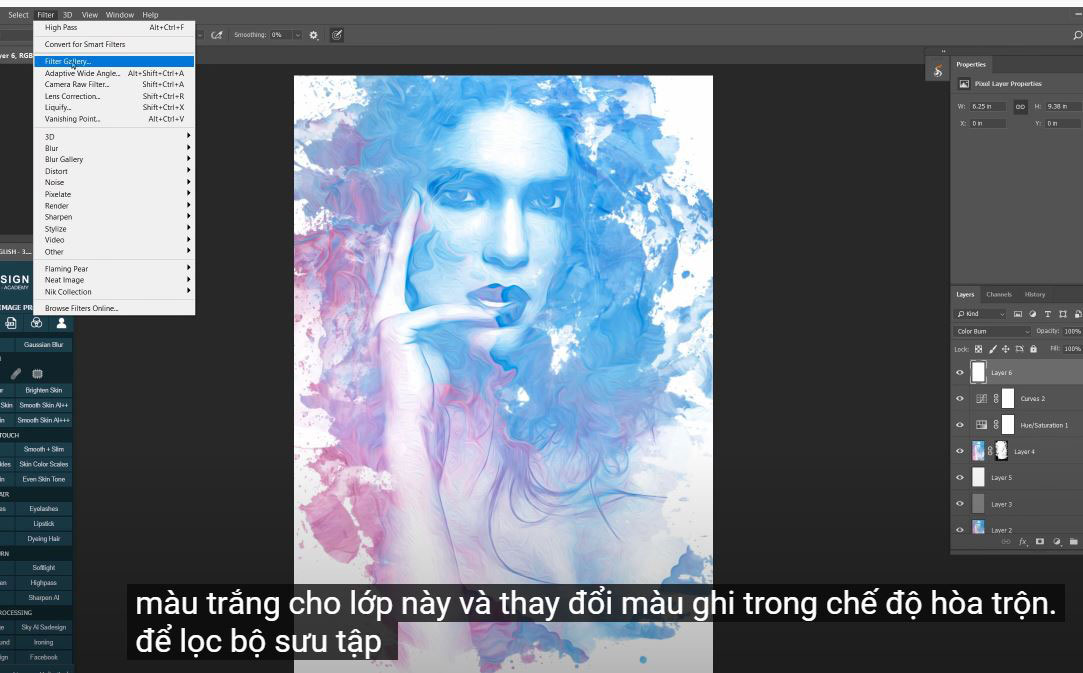
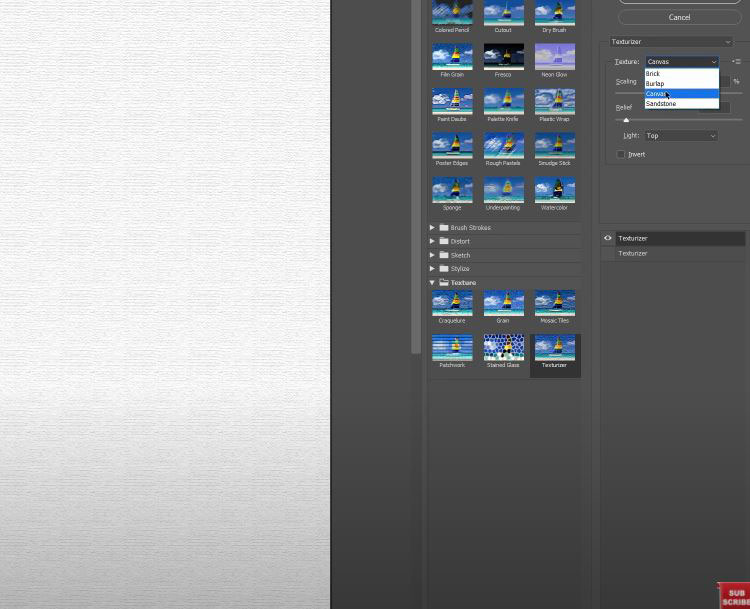
(13).Create a new layer and press CTRL or CMD + Delete to fill this new layer with white and change to “Color burn” in blending mode. Go to Filter > Filter Gallery > in Texture folder, select Texturizer in “canvas”, scaling at 100% and relief at 4.
Now, let’s check the before and after to see the result that we’ve made.
If you find this tutorial is helpful, please hit like and subscribe buttons and you can enjoy our tutorials about Photoshop technique, tips while learning. Free tutorials are launch day by day so it will satisfy your needs in case you are interested in Photoshop. Please leave comments right below the video in case you have any questions. Thank you and See ya!
Watch the video here:
REGISTER FOR FREE PHOTOSHOP LEARNING
============================
The most powerful Retouch tool processor
DOWNLOAD:
✅ SADESIGN PANEL ENGLISH: https://sadesign.ai/retouching/
✅ SADESIGN PANEL VIETNAM: https://www.retouching.vn/


VIP Products


Best Selling Products
Genuine Adobe Illustrator account
99 USD
Capcut Pro 1 Year
39 USD
Upgrade Duolingo Super
29 USD
Adobe Premiere Pro Account
99 USD
Upgrade genuine Capture One account
120 USD
Copyright Adobe Lightroom Account
59 USD
MidJourney Account
29 USD
Plugin Retouch4me
69 USD
ChatGPT Plus Account (GPT-4)
16 USD
Adobe Photoshop Copyright - Full App
120 USD
Upgrade Genuine Office 365
49 USD
Genuine Cheap Canva Pro
39 USD
Autodesk All App Account Copyright
120 USD
Freepik Premium Account
59 USD
Windows 10 & 11 Pro Key
36 USD