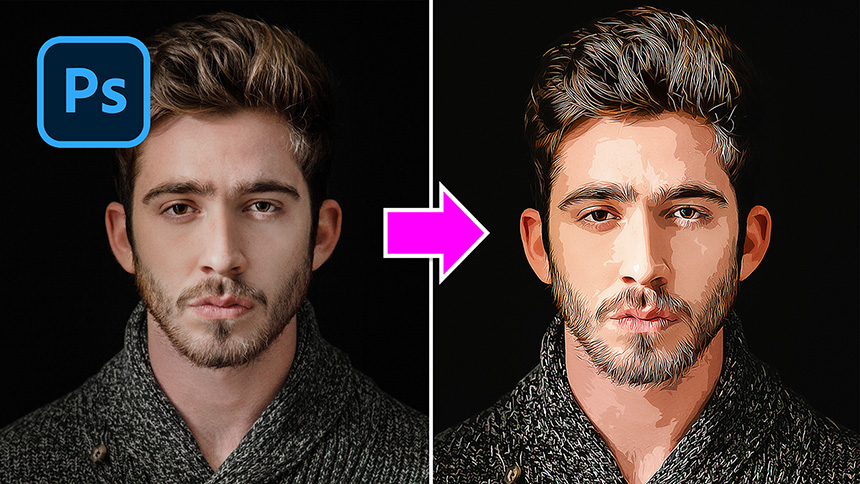
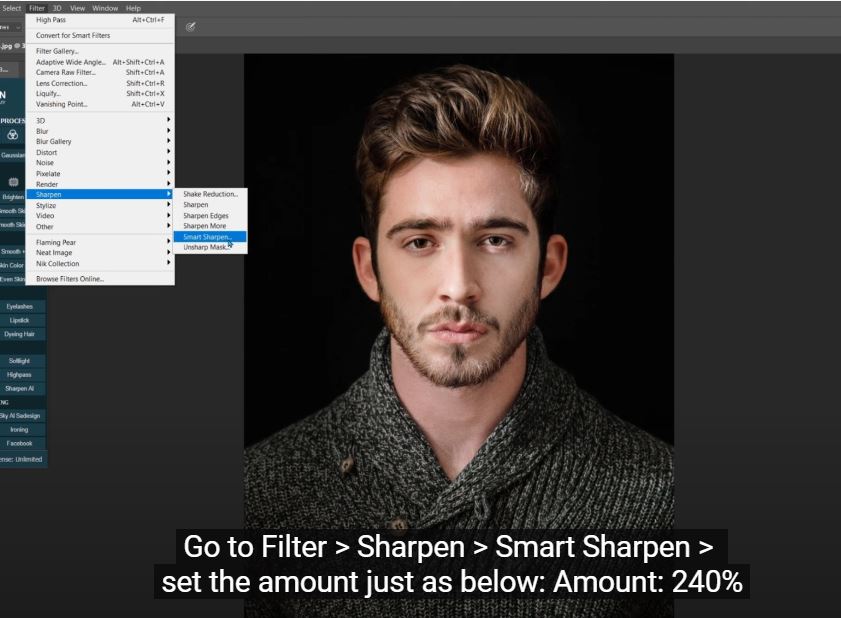
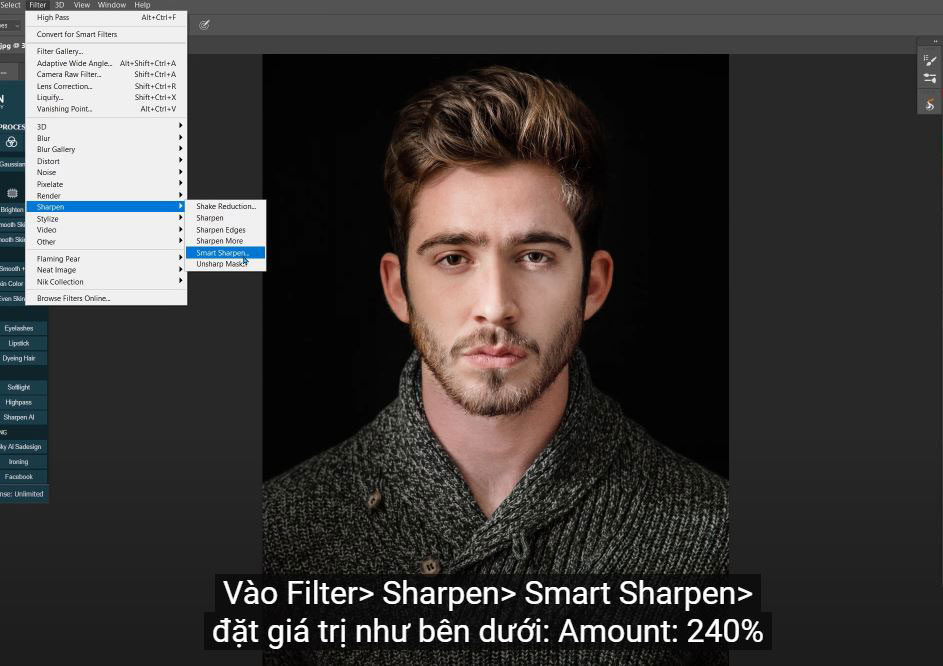
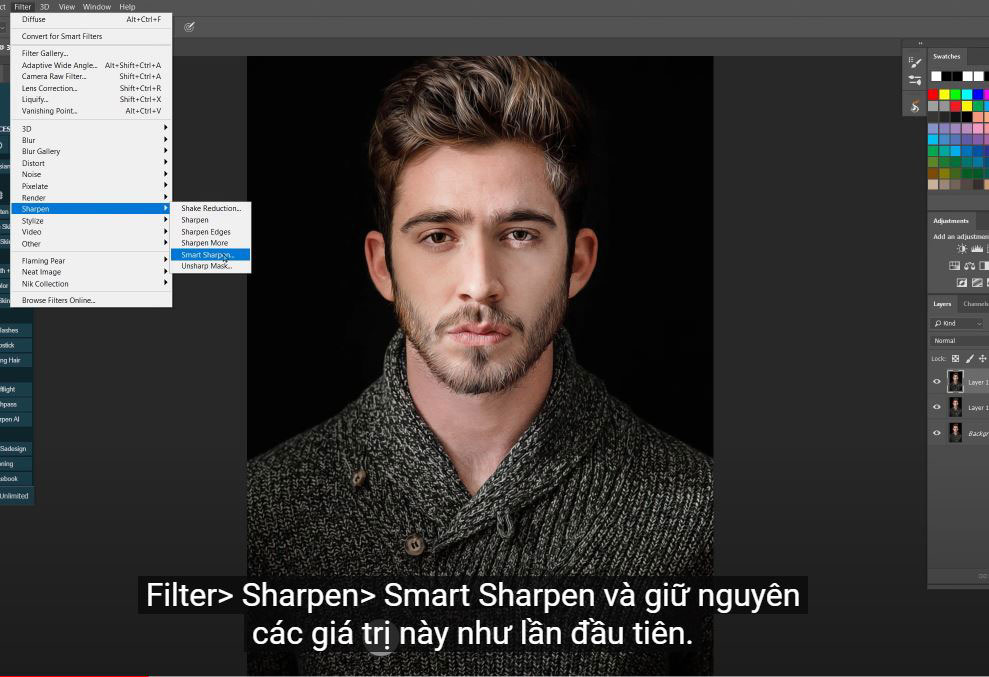
(1). Hi guys, in this video, you’ll learn how to make quick vector art in Photoshop. After open your image, duplicate it twice by pressing CTRL or CMD + J 2 times. Go to Filter > Sharpen > Smart Sharpen > set the amount just as below: Amount: 240% , Radius: 3 pixels and Reduce noise: 30% and make sure Gaussian blur in Remove box, click OK.
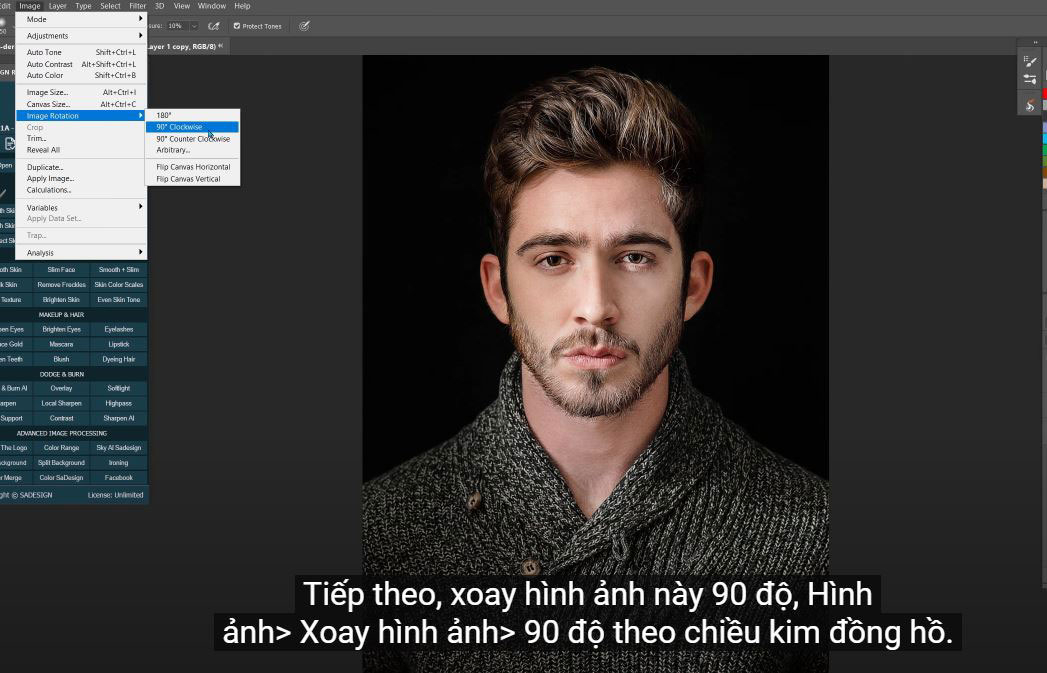
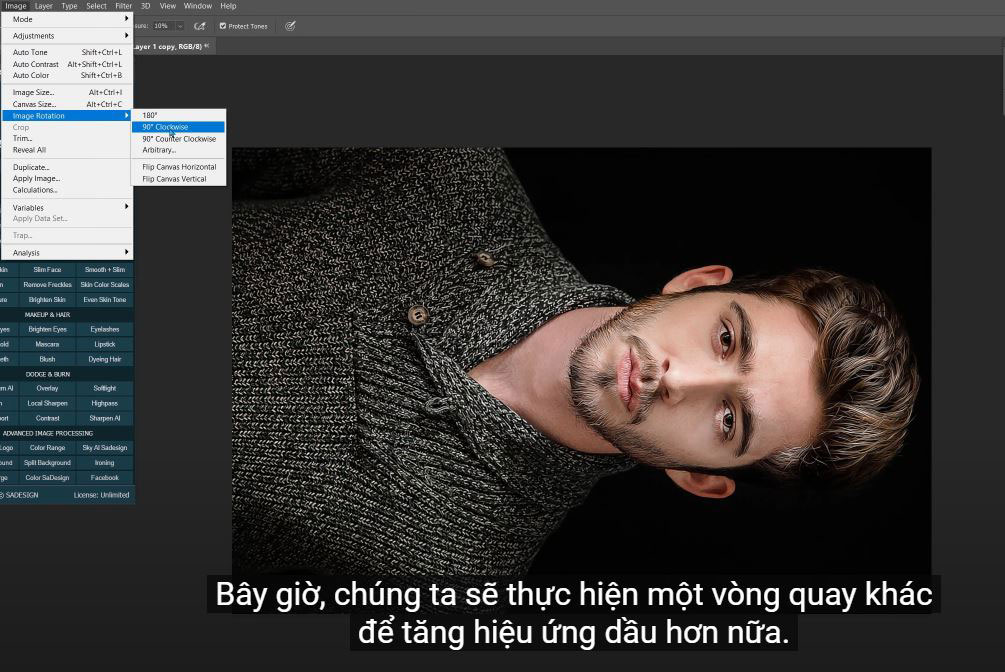
(2). Filter > Stylize > Diffuse > check to Anisotropic, then OK. Next, rotate this image to 90 degrees, Image > Image Rotation > 90 degree clockwise. Apply the Diffuse filter again by going to Filter > Diffuse. Rotate another 90 degree and apply the filter again with shortcut CTRL or CMD + F.
(3). Keep rotate and add filter to it until the rotation is completed. These steps to apply the oil effect to your image. After you make a complete rotation, we will sharpen it. Filter > Sharpen > Smart Sharpen and leave these values the same as the first time.
(4). Now, we will make another one of rotation to increase the oil effect even more. You can see the changes slightly increase. Sharpen your image again, once you are done with the rotation round. Just leave the value as they are. Let’s see the before and after. It’s great! We don’t need to use layer 1 so just delete it.
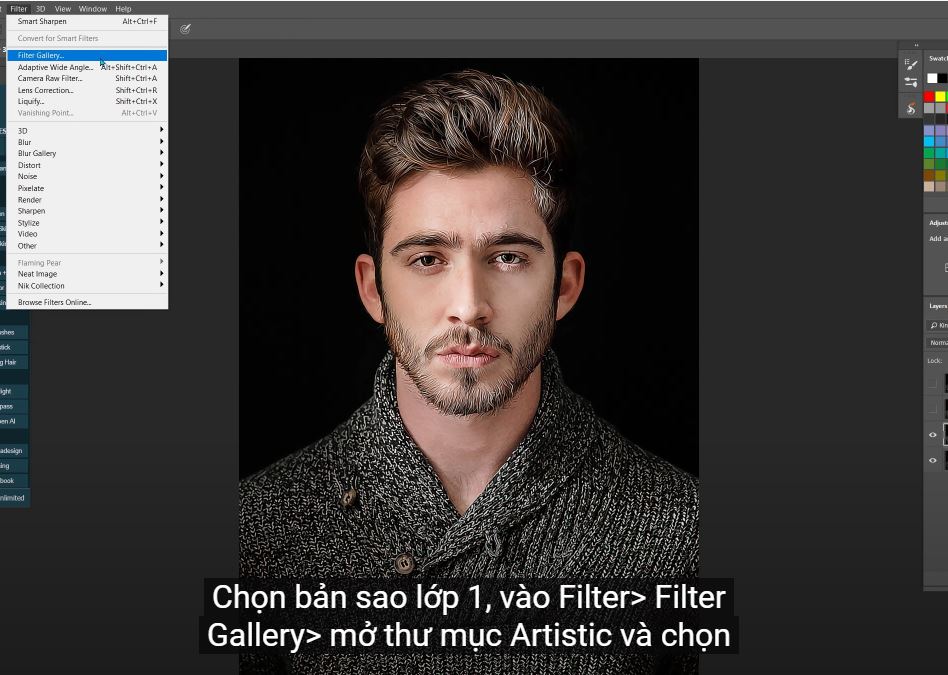
(5). Right click to layer 1 copy and choose convert to smart object so we can modify non-destructively. Duplicate it twice with shortcut CTRL or CMD + J 2 times. Turn off 2 first layers. Select layer 1 copy, go to Filter > Filter Gallery > open Artistic folder and select cutout filter. Set number of levels to 8, edge of simplicity to 5 and Edge Fidelity to, 1 then OK
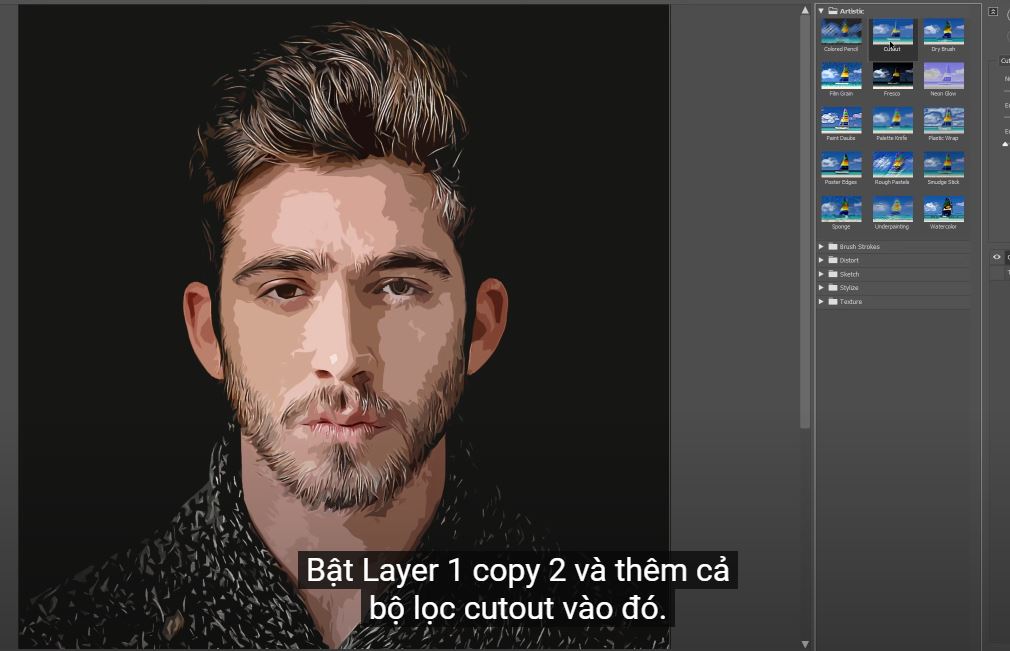
(6). Turn on Layer 1 copy 2 and add the cutout filter to it as well. Change the opacity of this filter to 30% or 40% by simply double click to the icon next to “filter gallery” Add cutout filter again, this time, we will increase the edge fidelity to 2. Then, adjust the opacity of this filter to 40%.Use Unsharp Mask to sharpen it with the value as they are. Adjust the opacity of this layer to 50%.
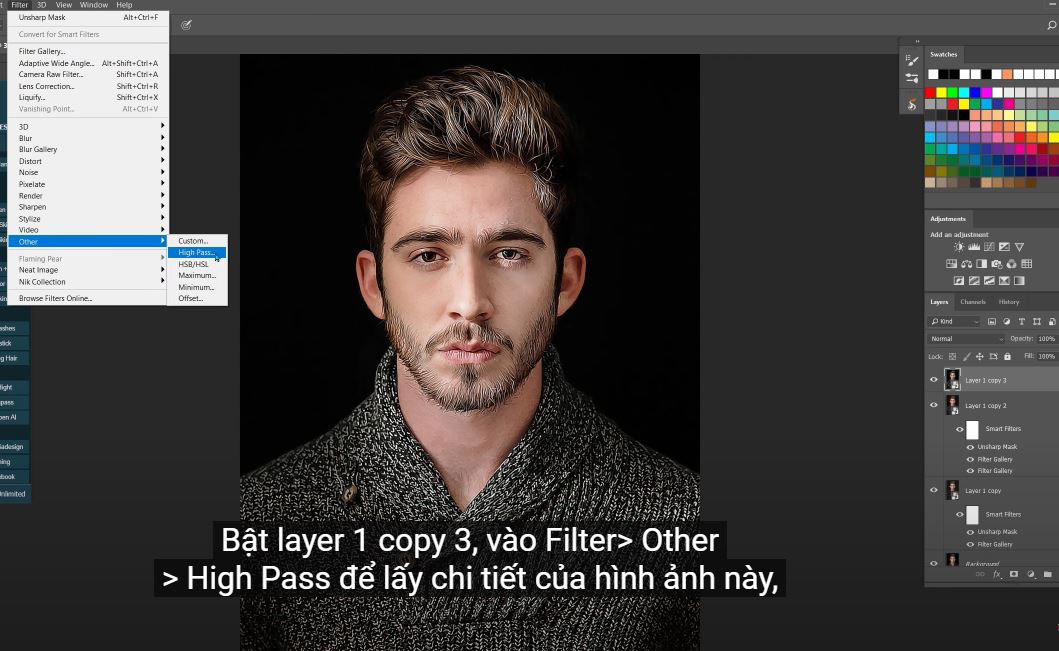
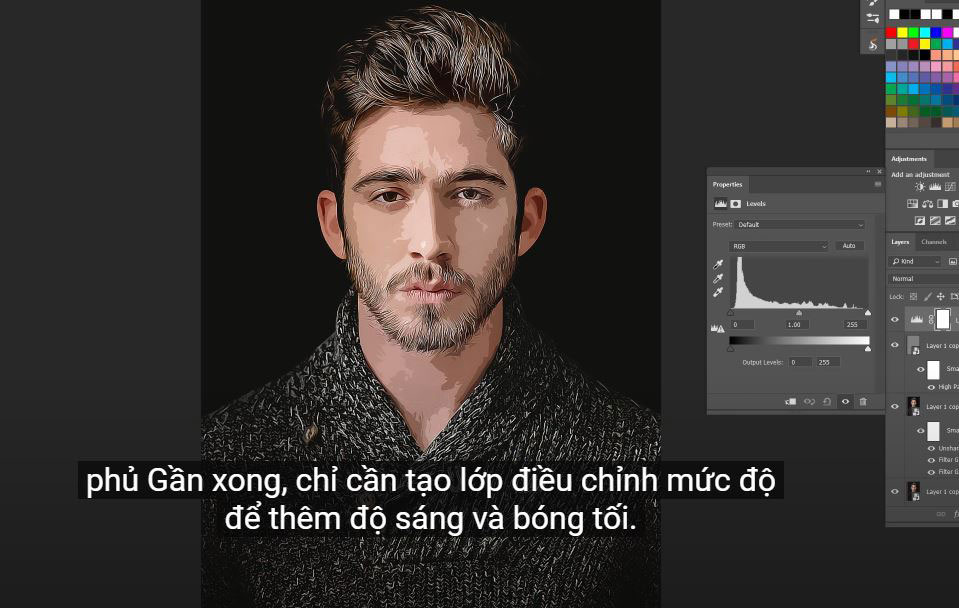
(7). Turn on the layer 1 copy 3, go to Filter > Other > High Pass to take details of this image, set radius at 2 pixels. Change blend mode from normal to overlay It’s nearly done, just create levels adjustment layer to add brightness and darkness.
(8). Create vibrance adjustment layer to enhance the color even more. Vibrance: 41 and saturation: 8. Use color balance to increase red to 12, green to 7 and blue to 8 in midtones, for highlight, red to 3, green to –2 and blue to –7,
(9). Add a bit of contrast to image with curves by increasing highlight and decreasing shadow in RGB and Red channels. Now, just group all layers into one and enjoy your work! If you find this tutorial is helpful, please hit like and subscribe buttons and you can enjoy our tutorials about Photoshop technique, tips while learning. Free tutorials are launch day by day so it will satisfy your needs in case you are interested in Photoshop. Please leave comments right below the video in case you have any questions. Thank you and See ya!