Best Selling Products

Autodesk All App Account Copyright
120 USD

Upgrade genuine Capture One account
120 USD

Upgrade Genuine Office 365
49 USD

Windows 10 & 11 Pro Key
36 USD

Plugin Retouch4me
69 USD

Capcut Pro 1 Year
39 USD

Adobe Photoshop Copyright - Full App
120 USD

Genuine Cheap Canva Pro
39 USD

ChatGPT Plus Account (GPT-4)
16 USD

Copyright Adobe Lightroom Account
59 USD

Genuine Adobe Illustrator account
99 USD

Adobe Premiere Pro Account
99 USD

Freepik Premium Account
59 USD

MidJourney Account
29 USD

Upgrade Duolingo Super
29 USD
How To Blur Backgrounds FAST EASY in Photoshop
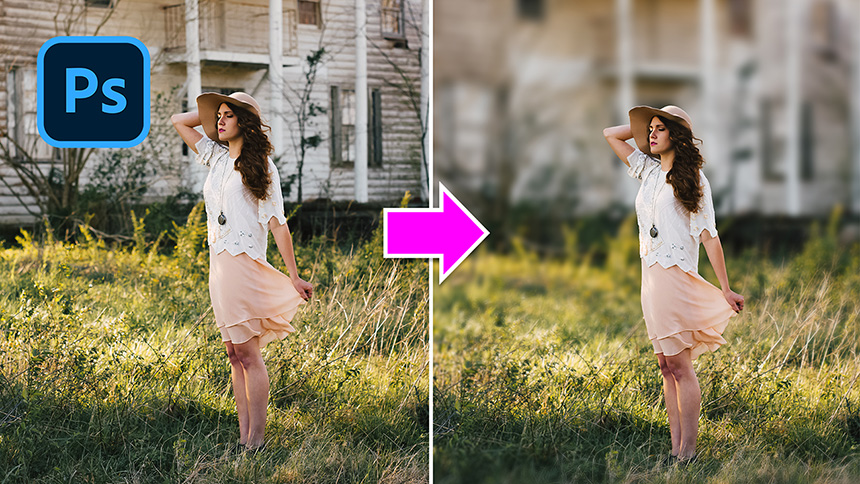
Hi guys, today I’ll share with you the way to blur background in just minutes.
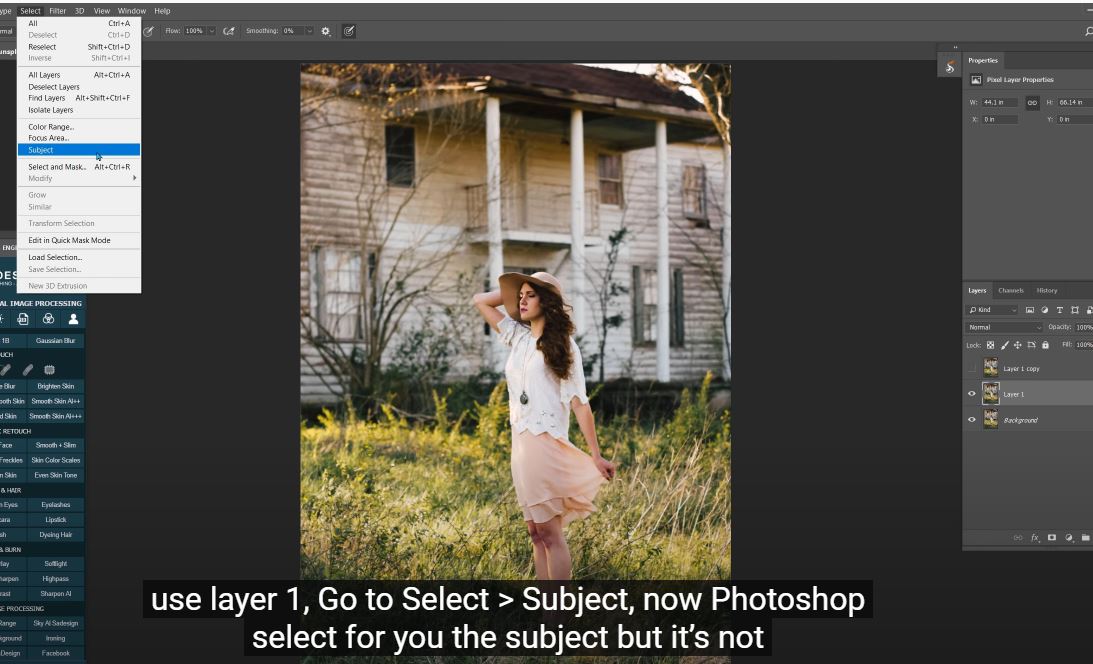
(1). The key point for blurring the background, you have to separate the subject and the background. First, duplicate the background 2 times with CTRL or CMD + J. Turn of layer 1 copy and use layer 1, Go to Select > Subject, now Photoshop select for you the subject but it’s not good enough in this case so you have to remove the unwanted selection and adding the subject if it’s not selected yet. To do that, use “Quick selection tool”, hold SHIFT to add the selection of subject. By contrast, hold ALT to remove the select of the background. For some minor's selection, use pen tool (P shortcut), click carefully to the selection you want to add or remove, when the selection is selected, hold CTRL + SHIFT + Enter to add the selection. Or CTRL + ALT + Enter to remove the selection.
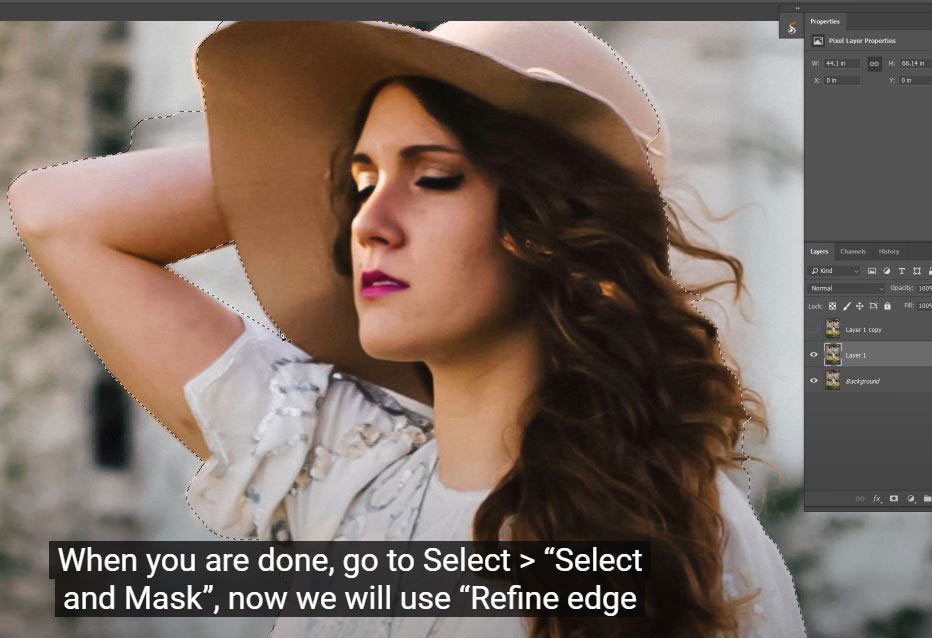
(2). When you are done, go to Select > “Select and Mask”, now we will use “Refine edge brush tool” and paint slightly to the edge of her hair so that Photoshop automatically select on hair and exclude the background. This method I use most of the time when it comes to subject selection.
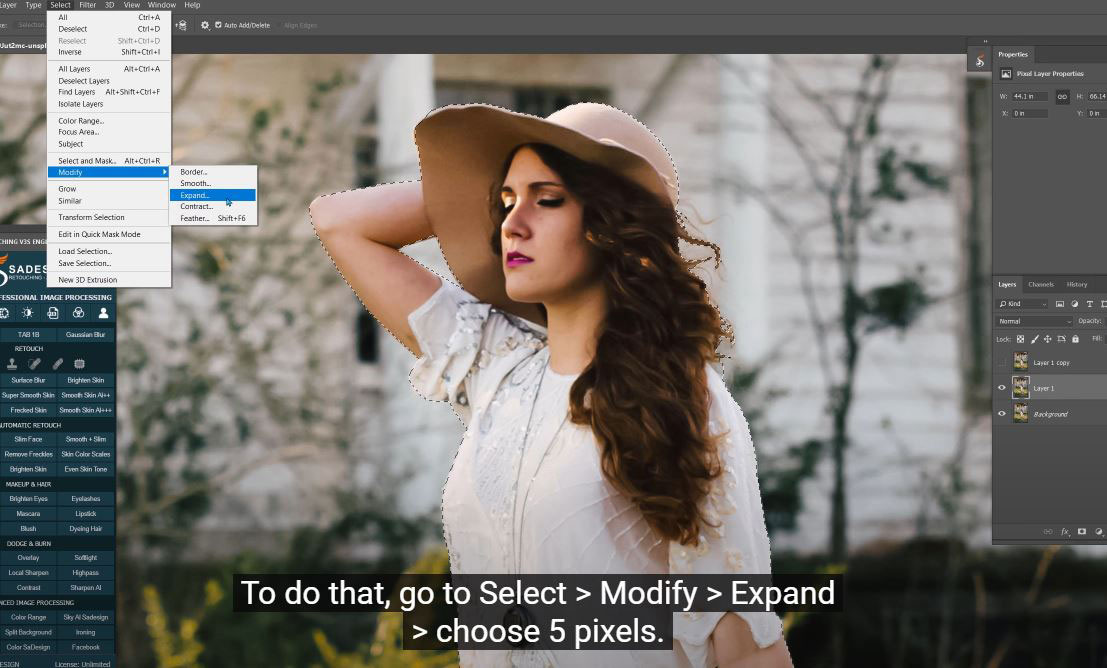
(3). Next, we will expand the selection to make sure we cover all the subject. To do that, go to Select > Modify > Expand > choose 5 pixels. Then, Edit > Fill, we will choose the content-aware to fill the subject with background but do keep in mind that we will have the selection of the subject. Now, turn on back the layer 1 copy and add layer mask to it which is automatically separate the subject with background.
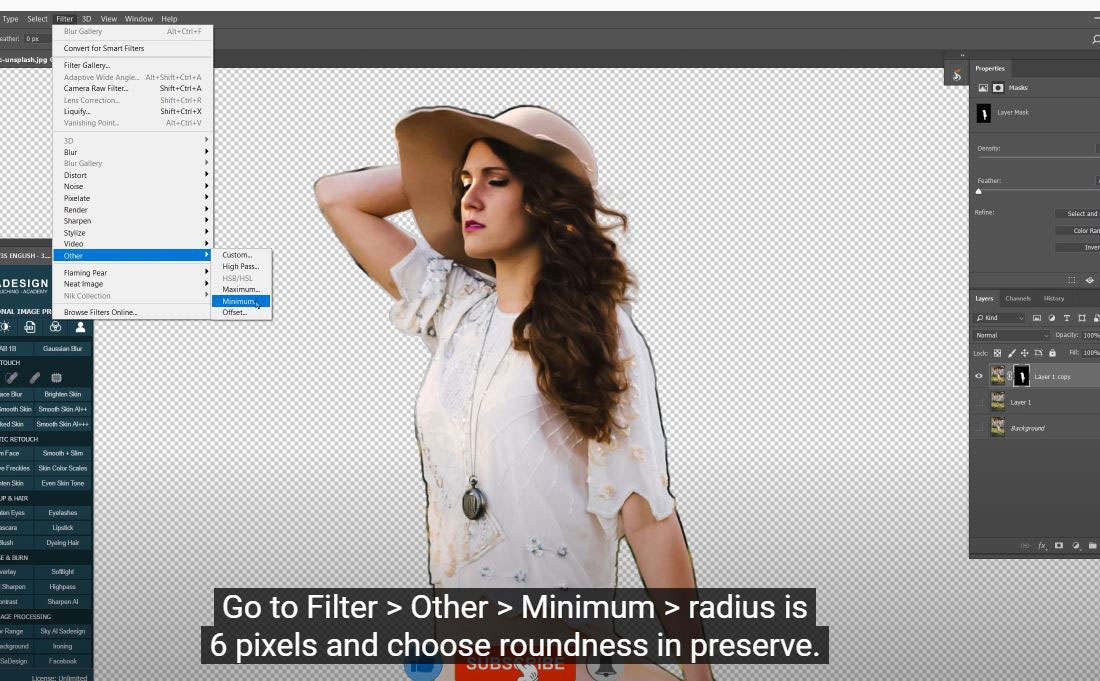
(4).To see it, turn off both below layers, don’t worry about the edges of subject. We will deal with it right away. Go to Filter > Other > Minimum > radius is 6 pixels and choose roundness in preserve. Now, the border of subject is removed.
(5). We already separate subject with background. Next, we will blur the background, Filter > Blur Gallery > Tilt-shift. There are 4 lines and a circle in the middle, the areas outside of 2 dashed lines which are the top and the bottom will be blur by this filter. The center still in focus, let me increase the blur with the circle in the middle so you can see what’s this filter can do. For the 2 solid line next to the circle, everything inside of them will remain intact, but not the outside. It will blur.

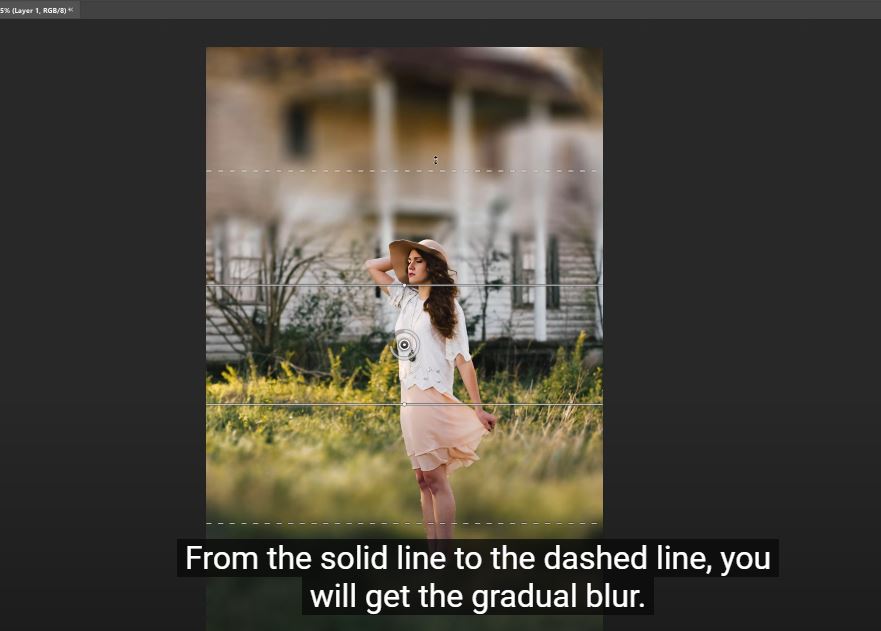
(6). From the solid line to the dashed line, you will get the gradual blur. When you pass the dashed lines, it will be full blur with the pixel that you set in the circle or on the right-hand side. So you can control to create the blur effect which is the depth of field with these lines.
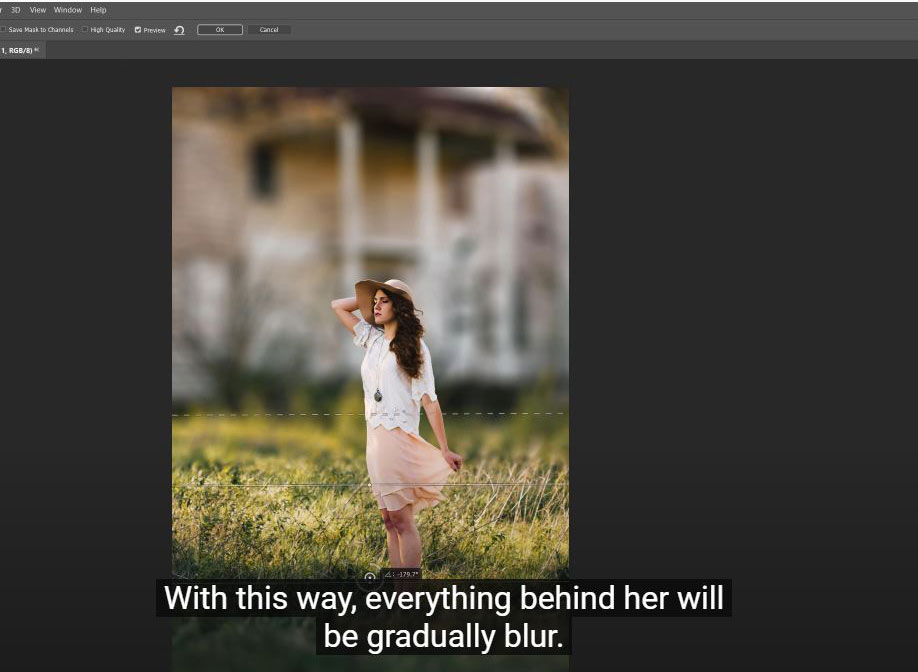
(7).In the real photo, the model will be in focus, to do that, pull down the focus area to the place where she’s standing. With this way, everything behind her will be gradually blur. Reduce the opacity to get the better blur effect.
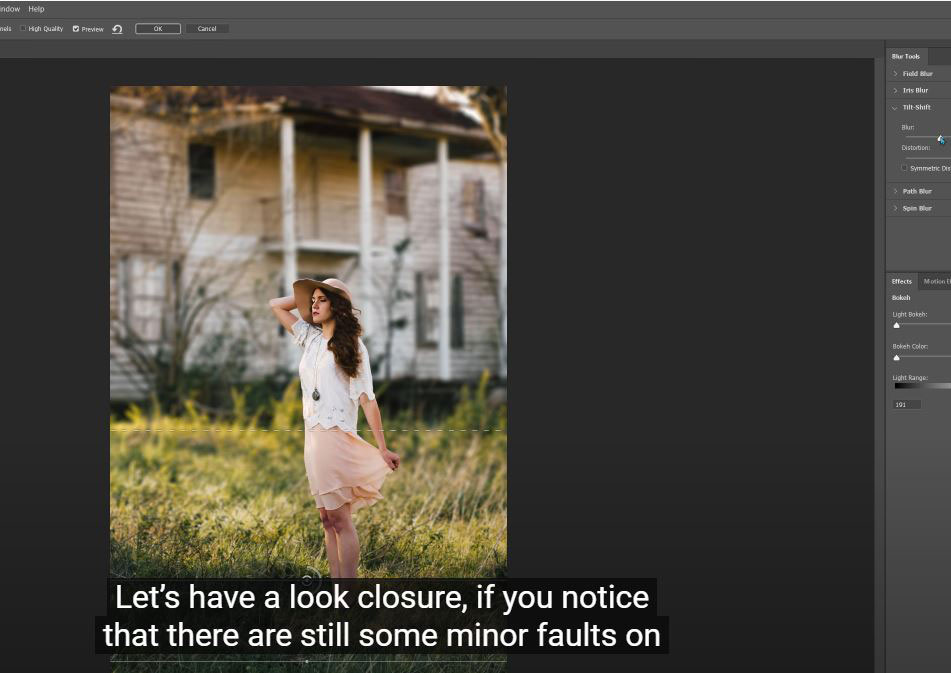
(8). Let’s have a look closure, if you notice that there are still some minor faults on the model. Choose the model layer mask, use brush with black in foreground and paint over it to remove. In case you accidentally paint too much on the model, to bring the subject back, reverse the foreground from black to white and paint again those areas.
That’s it! If you think this video is helpful, hit like, subscribe and ring the bell for any guide videos later on. See ya!
Watch the video right here:
Watch the video here:
REGISTER FOR FREE PHOTOSHOP LEARNING
============================
The most powerful Retouch tool processor
DOWNLOAD:
✅ SADESIGN PANEL ENGLISH: https://sadesign.ai/retouching/
✅ SADESIGN PANEL VIETNAM: https://www.retouching.vn/


VIP Products


Best Selling Products
Autodesk All App Account Copyright
120 USD
Upgrade genuine Capture One account
120 USD
Upgrade Genuine Office 365
49 USD
Windows 10 & 11 Pro Key
36 USD
Plugin Retouch4me
69 USD
Capcut Pro 1 Year
39 USD
Adobe Photoshop Copyright - Full App
120 USD
Genuine Cheap Canva Pro
39 USD
ChatGPT Plus Account (GPT-4)
16 USD
Copyright Adobe Lightroom Account
59 USD
Genuine Adobe Illustrator account
99 USD
Adobe Premiere Pro Account
99 USD
Freepik Premium Account
59 USD
MidJourney Account
29 USD
Upgrade Duolingo Super
29 USD