Best Selling Products

Adobe Photoshop Copyright - Full App
120 USD

Windows 10 & 11 Pro Key
36 USD

Freepik Premium Account
59 USD

Genuine Cheap Canva Pro
39 USD

Copyright Adobe Lightroom Account
59 USD

ChatGPT Plus Account (GPT-4)
16 USD

Upgrade Genuine Office 365
49 USD

Upgrade genuine Capture One account
120 USD

Upgrade Duolingo Super
29 USD

Genuine Adobe Illustrator account
99 USD

Adobe Premiere Pro Account
99 USD

MidJourney Account
29 USD

Autodesk All App Account Copyright
120 USD

Plugin Retouch4me
69 USD

Capcut Pro 1 Year
39 USD
How To Create a Super Speed Effect in Photoshop
Nội dung
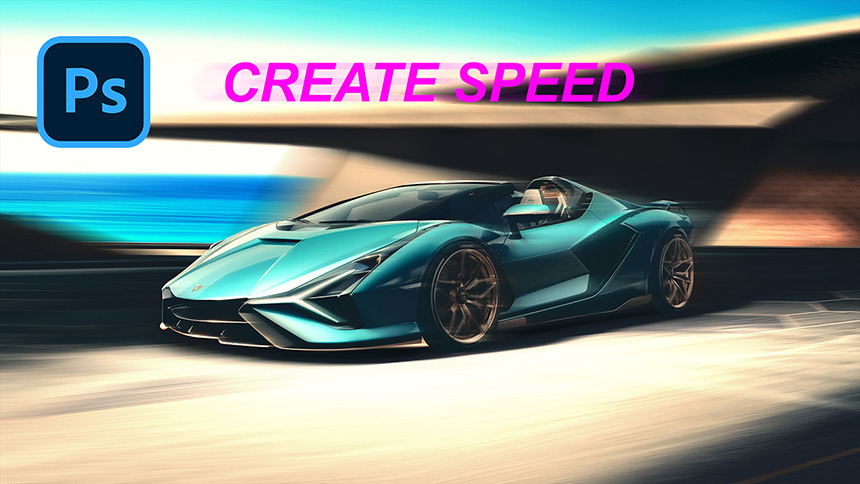
Hi there, this is SaDesign and today I'm going to show you how to create speed motion effect in Photoshop.
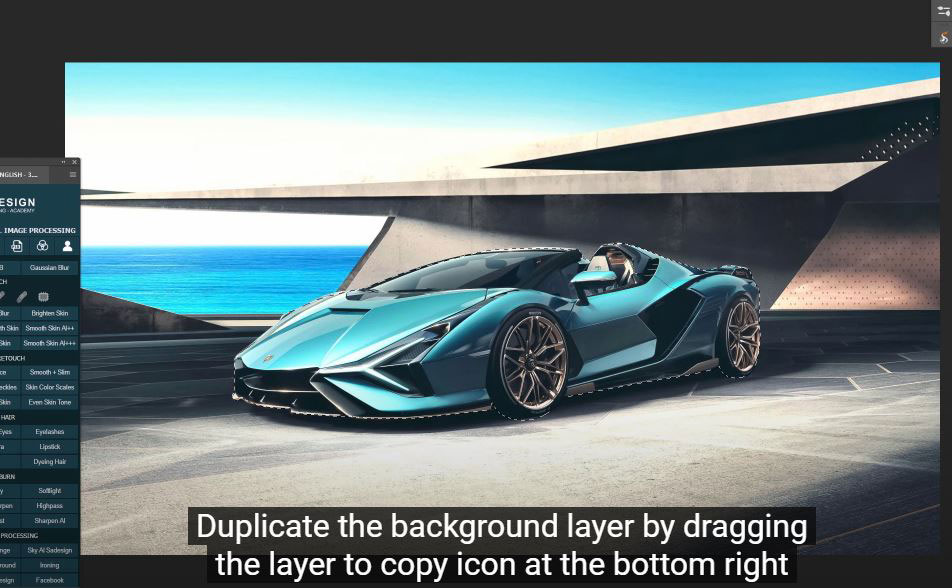
(1). First, we have to make the selection of the subject which is the nice cool car over here. To do that, select pen tool (P shortcut), to use pen tool and carefully pick the right points to select all the car. Then, press CTRL or CMD + Enter to change the path to selection. Duplicate the background layer by dragging the layer to copy icon at the bottom right corner or you can use shortcut on the keyboard CTRL or CMD + J. Take the selection to layer mask by simply choosing the layer mask button.
(2). Duplicate the background layer again. Take the selection of car again by hold CTRL or CMD and click to the layer mask. Turn off top layer, go to Select > Modify > Expand > set 15 pixels and OK.

(3). In background copy 2 layer, we will remove the car. Go to Edit > Fill > choose content-aware in contents box and OK.

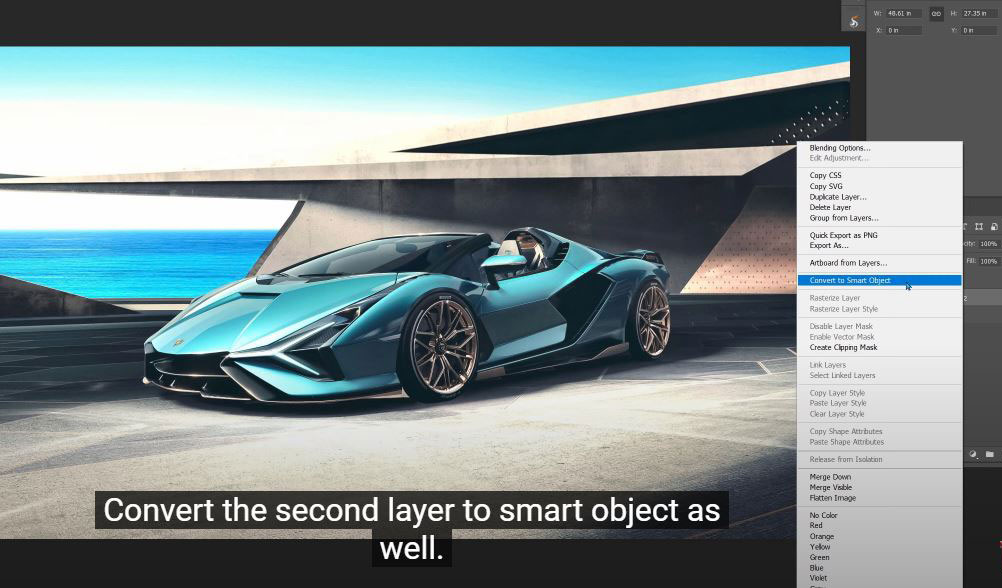
(4). Turn back on the top layer and convert it to smart object so we can modify non-destructively. Convert the second layer to smart object as well.
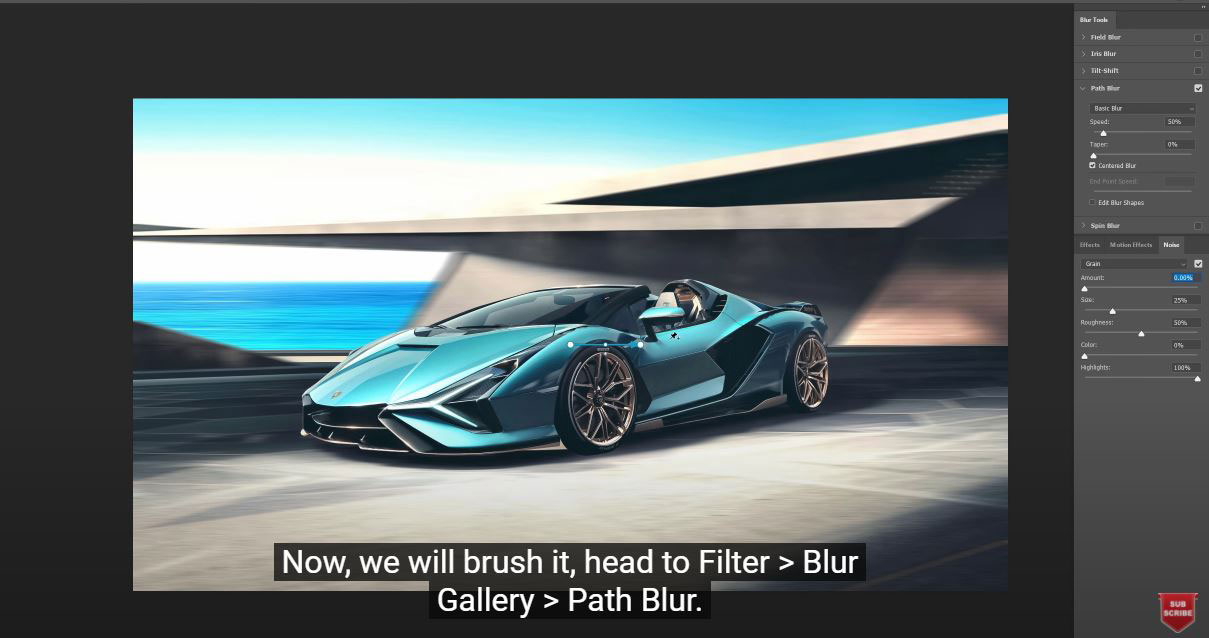
(5). Now, we will brush it, head to Filter > Blur Gallery > Path Blur. Just a long the perspective, we draw a path from right to left, follow the way of the car movement.
(6). Draw as many paths as possible, the more paths the more accuracy of the result you will get. Check to “edit blur shapes”, this will help you control the speed of each point of path.

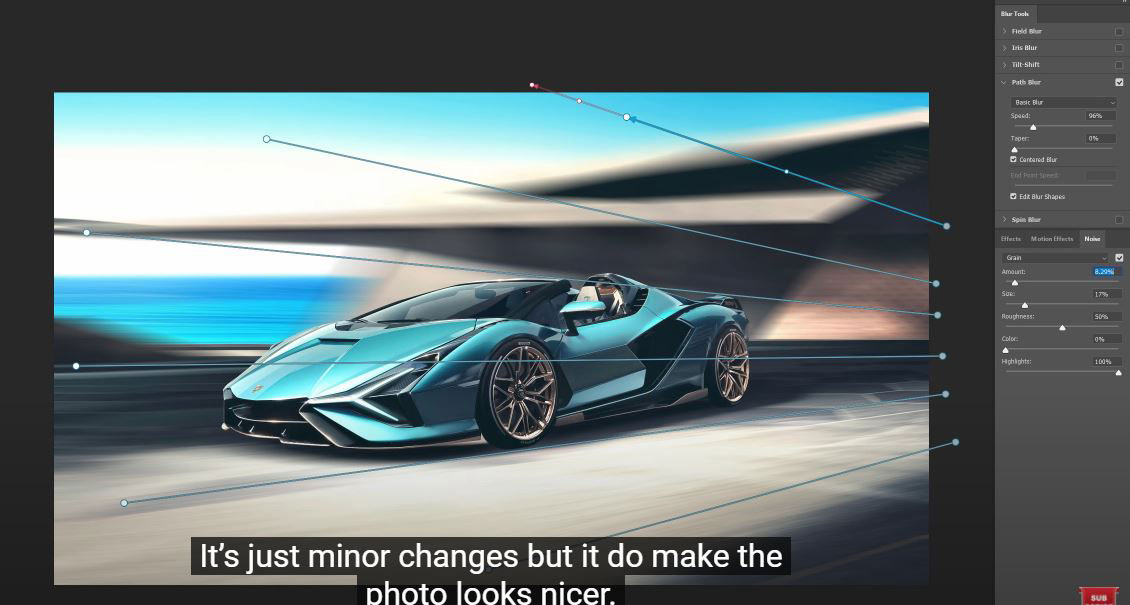
(7). The speed of beginning point will be different to the speed of the end point base on the “end point speed” pixels you choose. To do that, after you check to the box of “edit blur shapes” there are 2 others red path on the original blur path, select the red path at the start point and put the number to 0 to remove the speed, this mean there will be no speed at this point. By contrast, the red path at the end point, increase speed by choosing to 400 pixels in end point speed. Similarly, you have to repeat these steps for each path to make the same perspective motion. Once, you are done, increase the speed to 96% and see the changes.

(8). It looks good already, however, if you want to go back to the blur tool window, double click to the blur gallery. That’s why we have to convert the layer into smart object. Let’s try to increase the amount of grain to 8% and reduce size to 17%. It’s just minor changes but it do make the photo looks nicer.
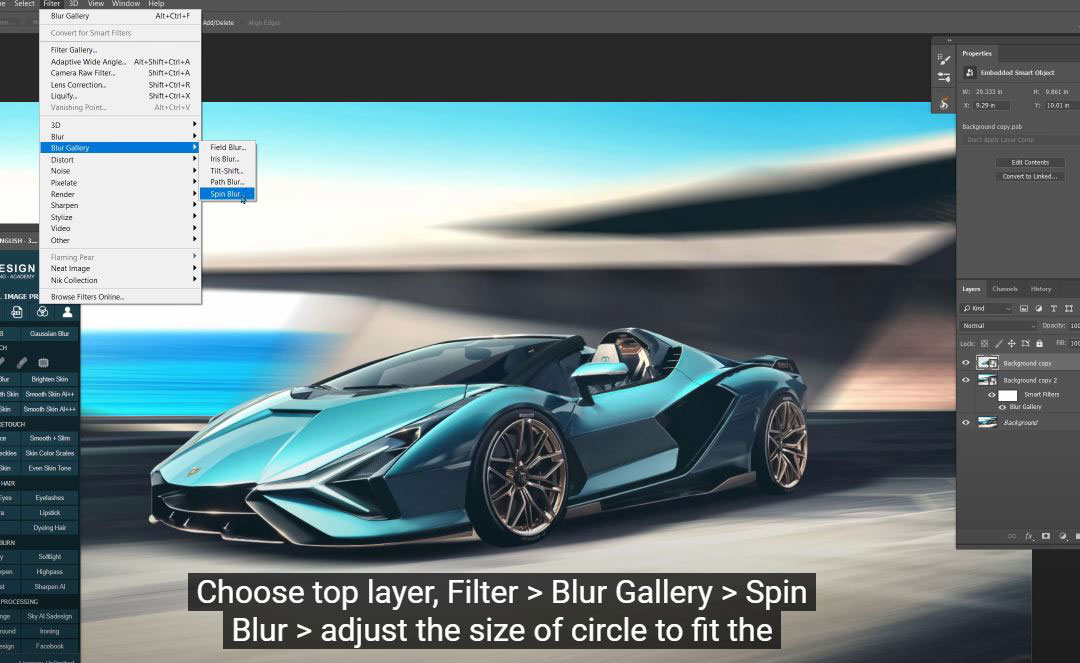
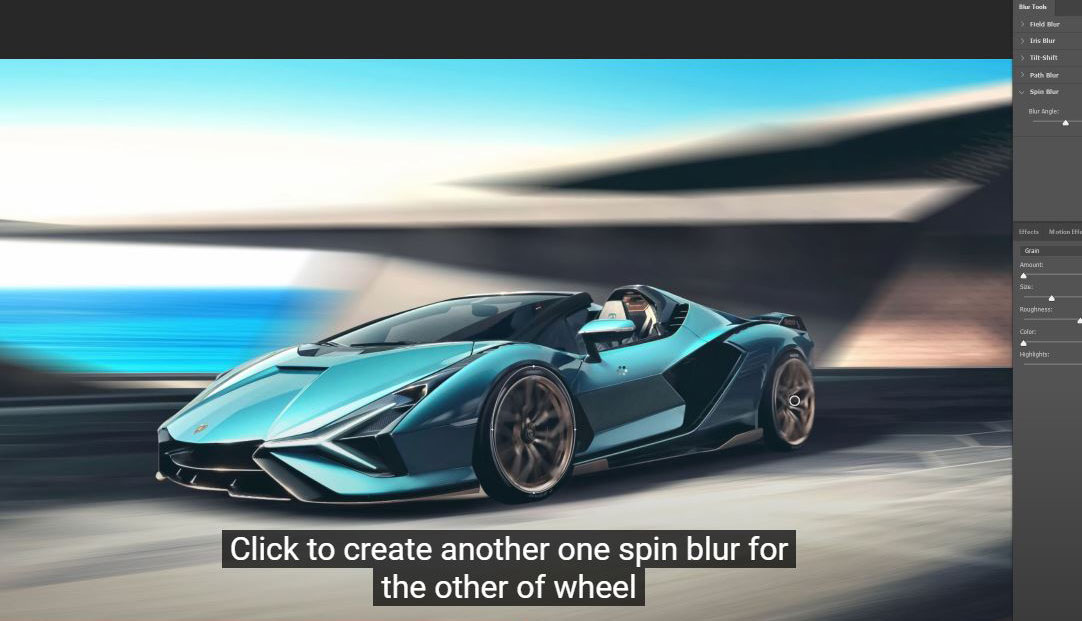
(9). Next, we will create motion in wheels’ car. Choose top layer, Filter > Blur Gallery > Spin Blur > adjust the size of circle to fit the wheel and choose the blur angle. Click to create another one spin blur for the other of wheel
(10).Another way to make the car motion even cooler, I’ll show you now. Let’s delete smart filter first
(11). Go to Filter > Blur gallery > path blur > now, we will draw 3 opposite paths to the way of car movement. This way will make the motion looks like in the real life. Remember to check to the Edit Blur Shapes box, the start point will be 0 and the end point number depends on your style.

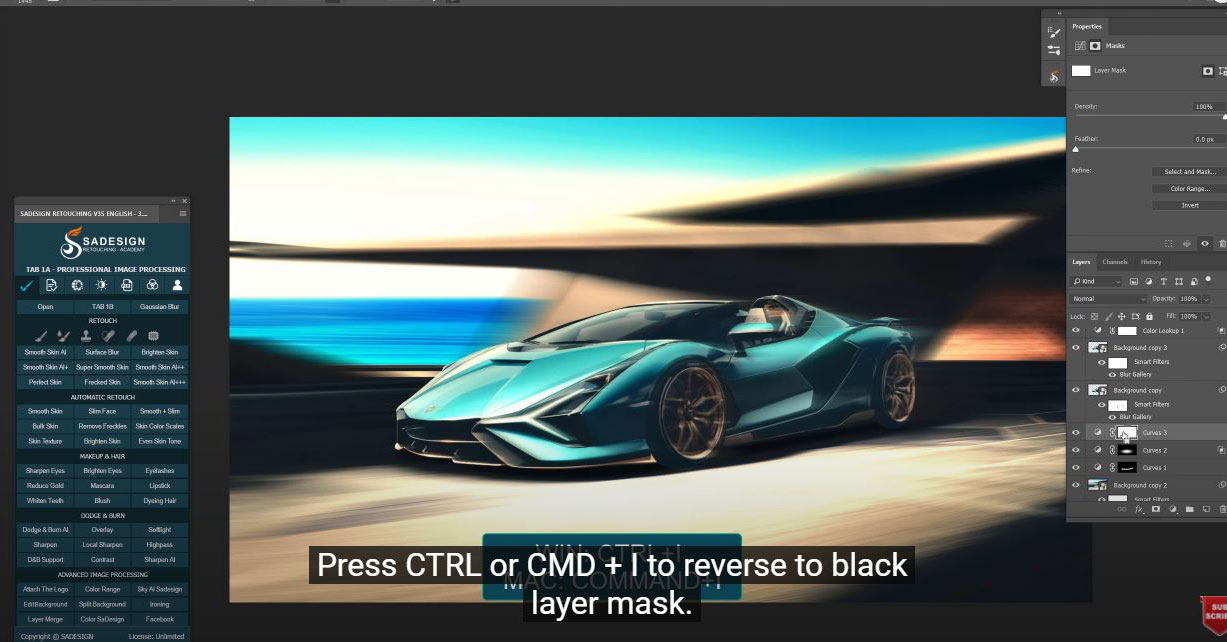
(12).Create Curves below background copy, pull down the mid tone to reduce brightness. Reverse layer mask from white to black with CTRL or CMD + I and use brush tool with white in foreground to paint on shadow of the car. 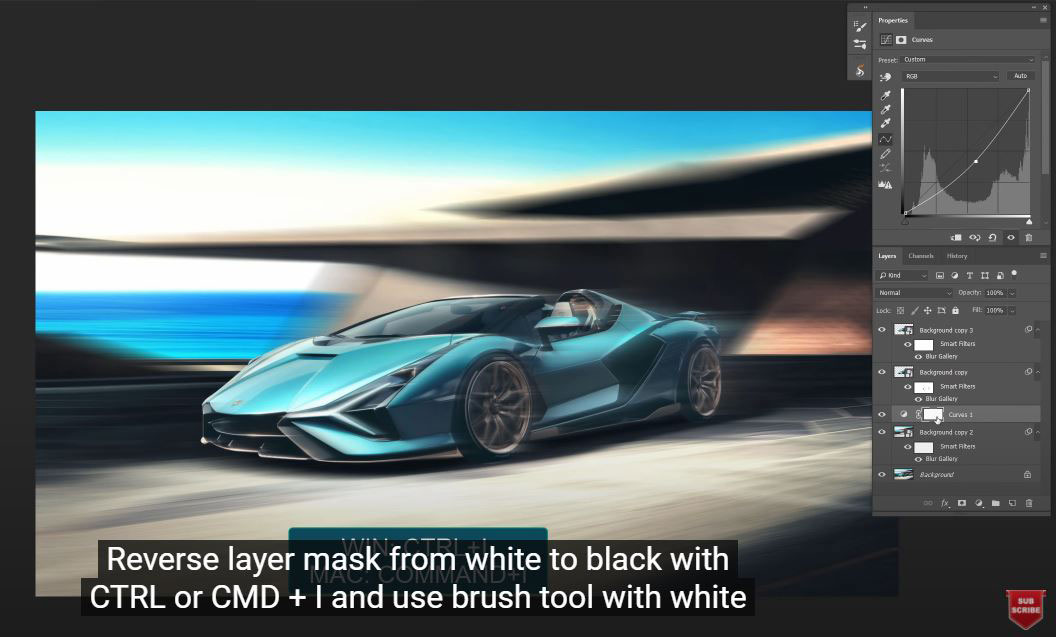
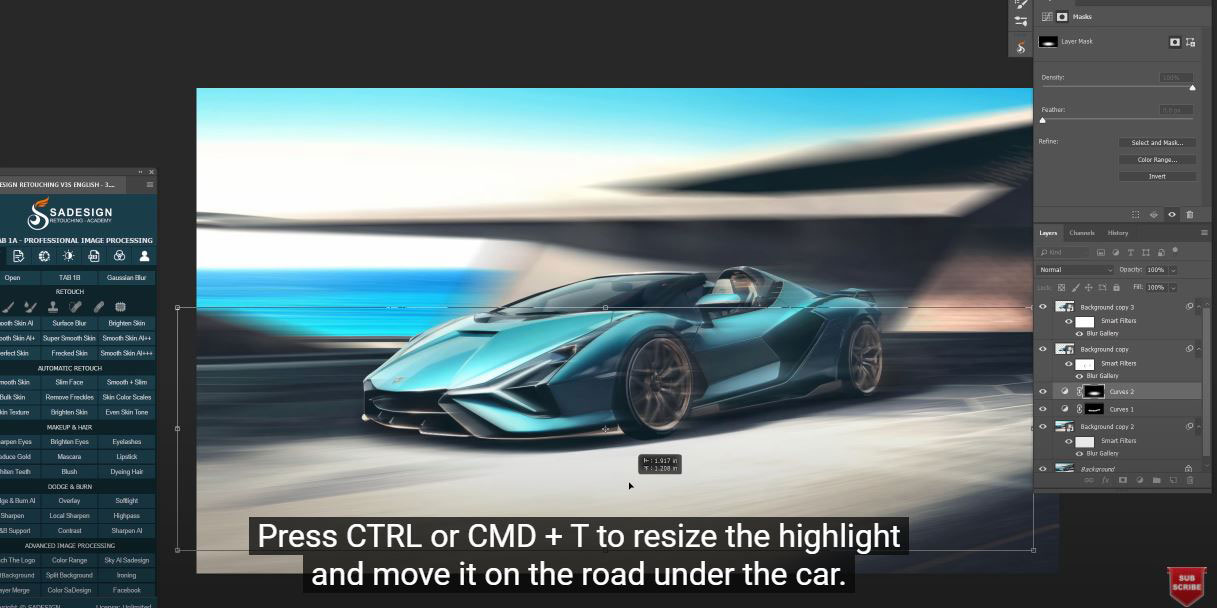
(13). Next, we will add a little bit of highlight to the road, create another curves adjustment layer, take the right slider which is the white point to the left. Hold Alt or Option while dragging it, so you can see the area that lose details. Stop at the point when the road lose the details. Select the mask, press CTRL or CMD + I, use brush with soft round brush, make sure the foreground is white, increase the size and dab right in the middle. Press CTRL or CMD + T to resize the highlight and move it on the road under the car.
(14). Since we just want the effect apply on the bright areas, click the adjustment icon, choose Blending Options, now we will take the dark away by hold ALT and click to the black triangle and drag to the right.

(15). Now, we will add color to the photo, create color lookup adjustment layer, drop down the menu of 3DLUT file and select the color preset that you prefer. Adjust the opacity to the point that you see fit.
Open Blending Options and reduce the dark of underlying layer.
We are nearly done, next, since the sky are too bright so we will darken it. Create another curves adjustment layer, pull down the mid tone. Press CTRL or CMD + I to reverse to black layer mask. Choose gradient tool, select the first preset “foreground to background” and draw a line from the sky to the road to create gradient effect. This will darken the sky gradually. Place all layers into group and enjoy your work.
If you think this video is helpful, hit like, subscribe and ring the bell for any guide videos later on. See ya!
Watch the video right here:
Watch the video here:
REGISTER FOR FREE PHOTOSHOP LEARNING
============================
The most powerful Retouch tool processor
DOWNLOAD:
✅ SADESIGN PANEL ENGLISH: https://sadesign.ai/retouching/
✅ SADESIGN PANEL VIETNAM: https://www.retouching.vn/


VIP Products


Best Selling Products
Adobe Photoshop Copyright - Full App
120 USD
Windows 10 & 11 Pro Key
36 USD
Freepik Premium Account
59 USD
Genuine Cheap Canva Pro
39 USD
Copyright Adobe Lightroom Account
59 USD
ChatGPT Plus Account (GPT-4)
16 USD
Upgrade Genuine Office 365
49 USD
Upgrade genuine Capture One account
120 USD
Upgrade Duolingo Super
29 USD
Genuine Adobe Illustrator account
99 USD
Adobe Premiere Pro Account
99 USD
MidJourney Account
29 USD
Autodesk All App Account Copyright
120 USD
Plugin Retouch4me
69 USD
Capcut Pro 1 Year
39 USD