Best Selling Products

Upgrade Genuine Office 365
49 USD

Adobe Photoshop Copyright - Full App
120 USD

Upgrade Duolingo Super
29 USD

Windows 10 & 11 Pro Key
36 USD

Adobe Premiere Pro Account
99 USD

Genuine Cheap Canva Pro
39 USD

MidJourney Account
29 USD

Upgrade genuine Capture One account
120 USD

Capcut Pro 1 Year
39 USD

Copyright Adobe Lightroom Account
59 USD

Plugin Retouch4me
69 USD

Autodesk All App Account Copyright
120 USD

Freepik Premium Account
59 USD

ChatGPT Plus Account (GPT-4)
16 USD

Genuine Adobe Illustrator account
99 USD
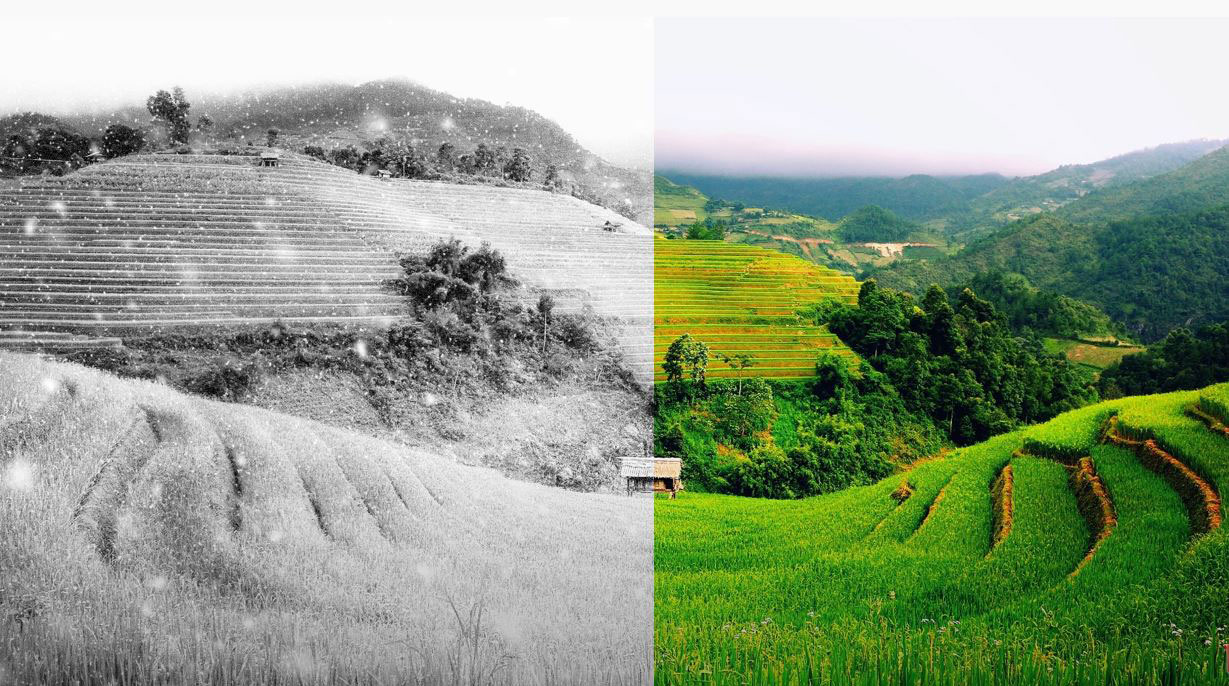
Summer to Winter Snow Photo Transformation in Photoshop
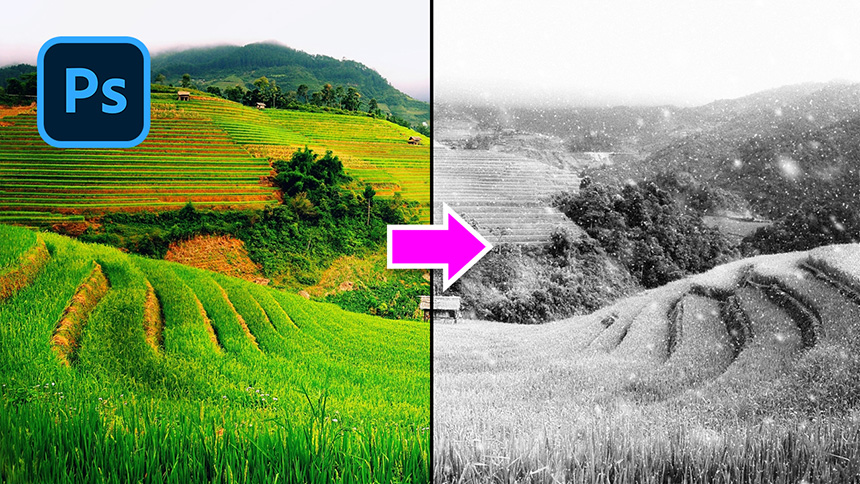
Hi everyone, today I’ll share with you how to turn summer photo to the one you capture it in winter. Stay tuned!
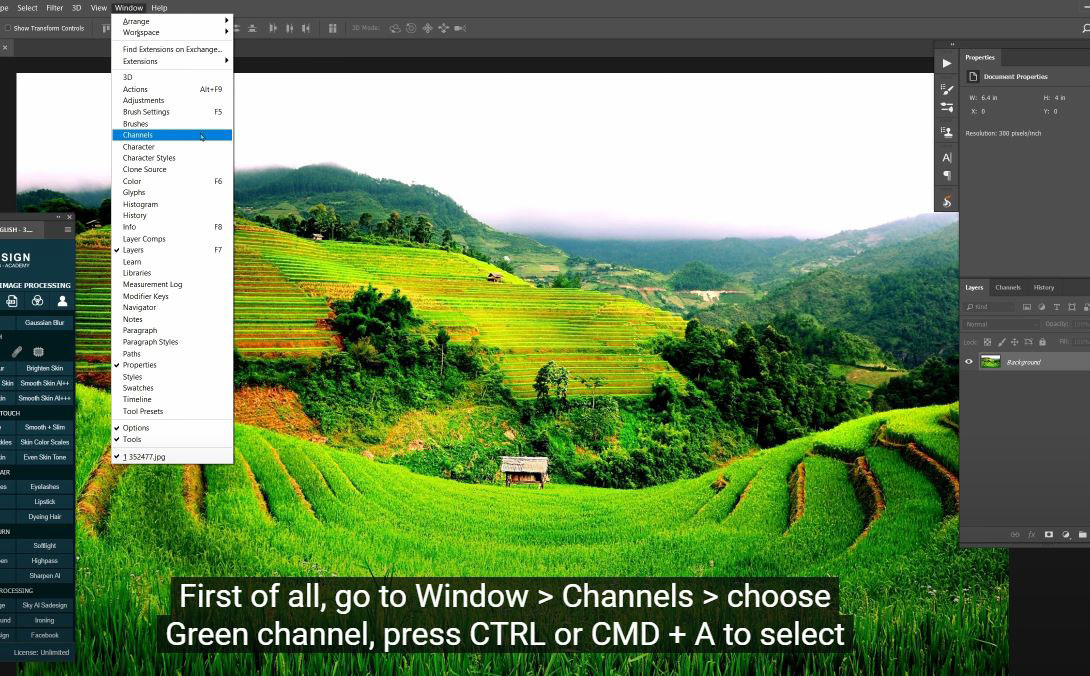
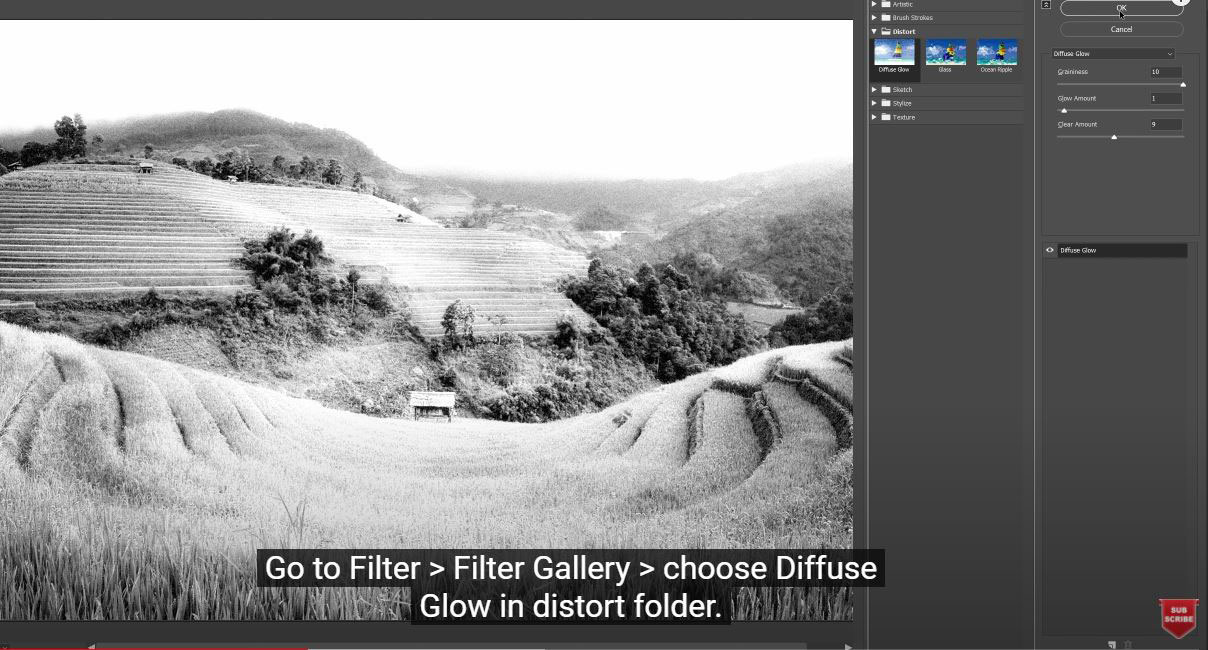
(1). First of all, go to Window > Channels > choose Green channel, press CTRL or CMD + A to select the whole image and copy it with CTRL + C. Move back to layers tab, create a new layer and paste it. Go to Filter > Filter Gallery > choose Diffuse Glow in distort folder. Create a solid color with black, go to Filter > Noise > Add noise > Rasterize > amount 100% and OK. Now, we will blur it with gaussian blur around 1 pixel, change blending mode to screen. Use “Levels” shortcut CTRL or CMD + L to increase black to 140 and decrease white to 142.
(2). Go to Filter > Blur > Gaussian Blur > OK, duplicate it with CTRL or CMD + J. Edit > Transform > Rotate 180 degree, duplicate it more one time and resize it with CTRL or CMD + T, adjust W to 500, make sure to check chain icon.
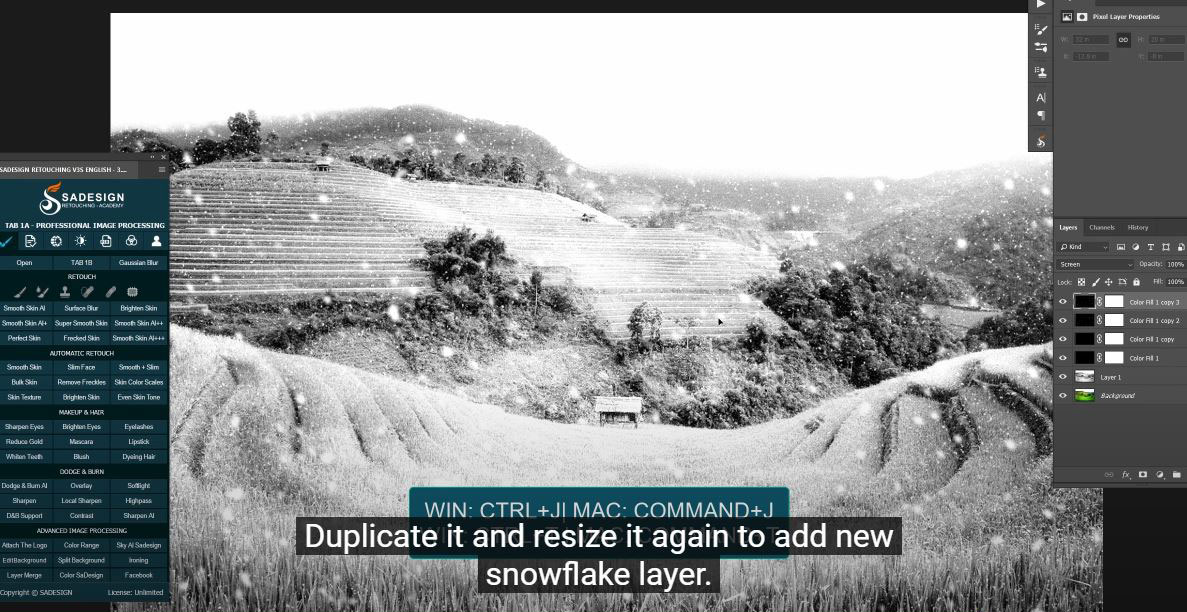
(3). Filter > Blur > Motion Blur > angle –48 and distance is 11 pixels. Duplicate it and resize it again to add new snowflake layer. Put all layers into group. That’s all for this tutorial. If you think this video is helpful, hit like, subscribe and ring the bell for any guide videos later on. See ya!
Watch the video here:
REGISTER FOR FREE PHOTOSHOP LEARNING
============================
The most powerful Retouch tool processor
DOWNLOAD:
✅ SADESIGN PANEL ENGLISH: https://sadesign.ai/retouching/
✅ SADESIGN PANEL VIETNAM: https://www.retouching.vn/


VIP Products


Best Selling Products
Upgrade Genuine Office 365
49 USD
Adobe Photoshop Copyright - Full App
120 USD
Upgrade Duolingo Super
29 USD
Windows 10 & 11 Pro Key
36 USD
Adobe Premiere Pro Account
99 USD
Genuine Cheap Canva Pro
39 USD
MidJourney Account
29 USD
Upgrade genuine Capture One account
120 USD
Capcut Pro 1 Year
39 USD
Copyright Adobe Lightroom Account
59 USD
Plugin Retouch4me
69 USD
Autodesk All App Account Copyright
120 USD
Freepik Premium Account
59 USD
ChatGPT Plus Account (GPT-4)
16 USD
Genuine Adobe Illustrator account
99 USD