Best Selling Products
Create Simple Water Surface Waves With Tools in Photoshop
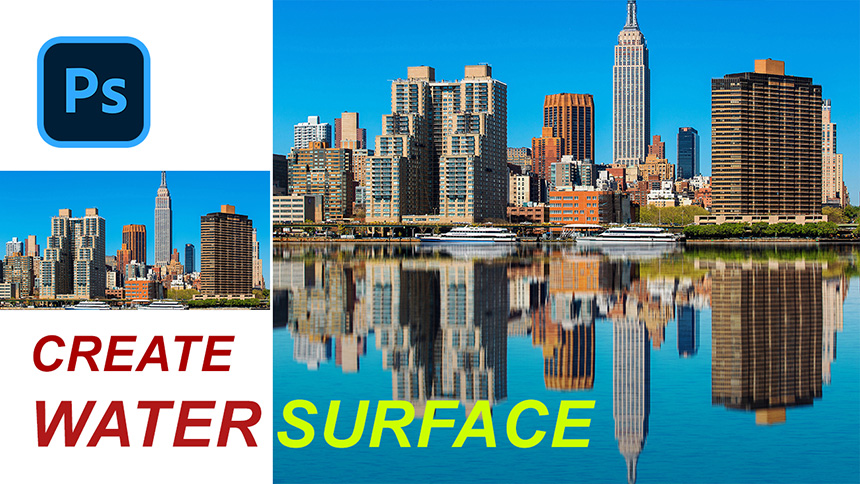
Hi guys, this is SaDesign channel and today I’ll gonna show you how to create water reflection in Photoshop.
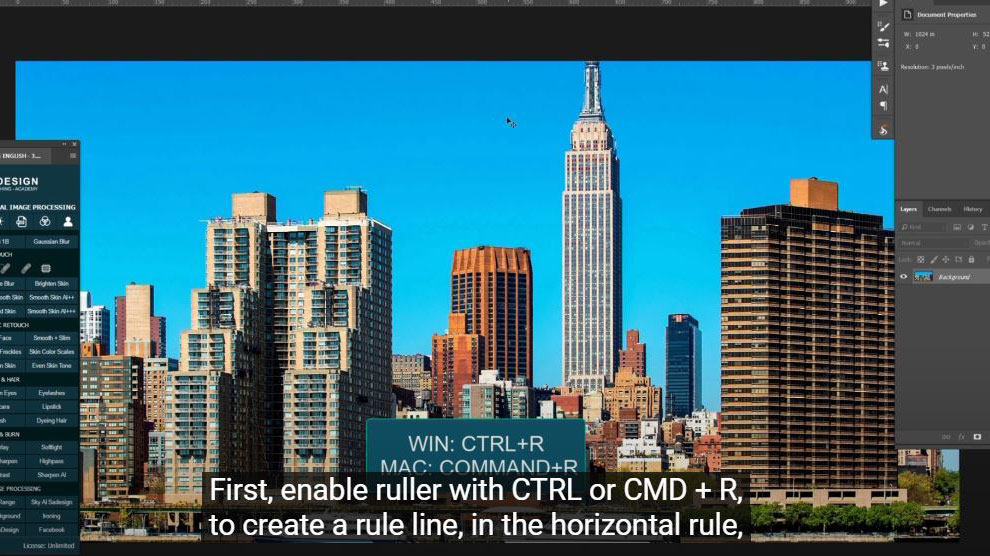
(1). First, enable ruller with CTRL or CMD + R, to create a rule line, in the horizontal rule, click and drag to the bottom of photo, then turn of the ruler.
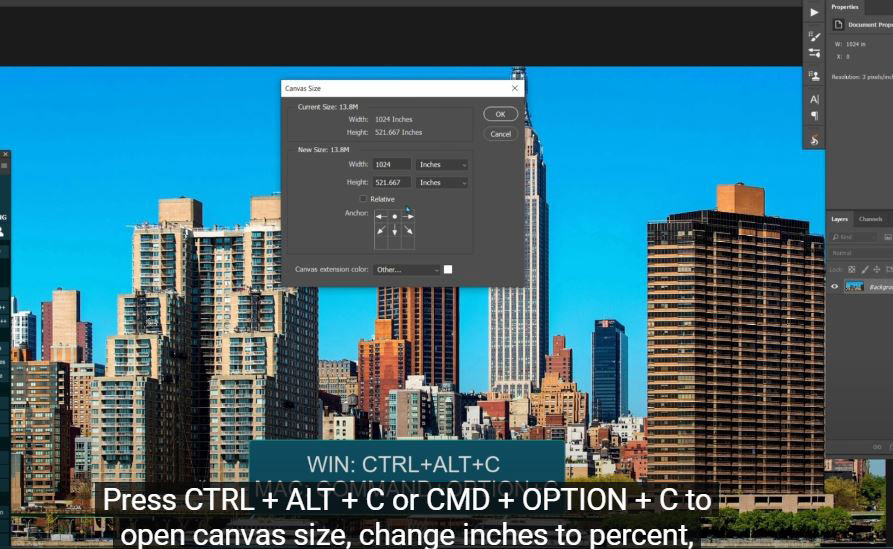
(2). Press CTRL + ALT + C or CMD + OPTION + C to open canvas size, change inches to percent, then expand height to 200.
(3). Use “rectangular marquee tool” to select the photo and press CTRL or CMD + J twice
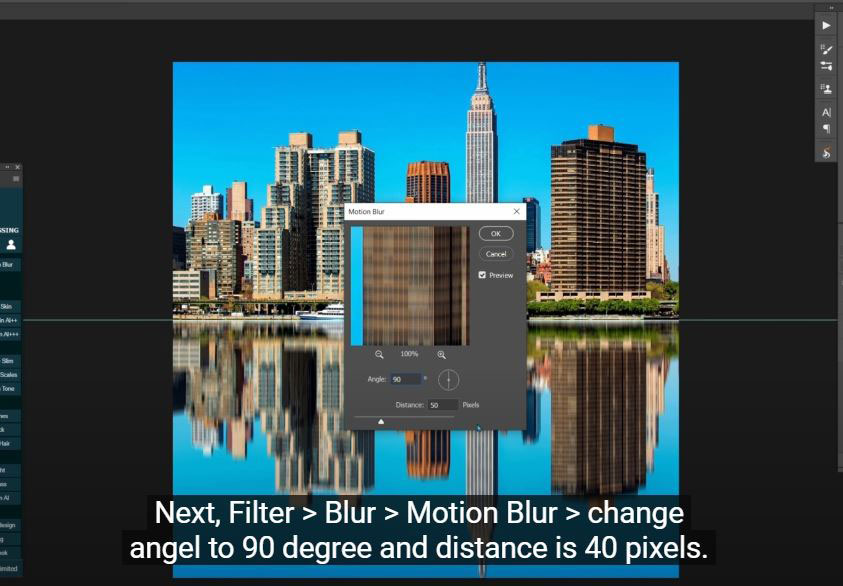
(4). In layer 1, press CTRL + T, click to the top of the photo and drag all the way down to the bottom to flip it. Next, Filter > Blur > Motion Blur > change angel to 90 degree and distance is 40 pixels.
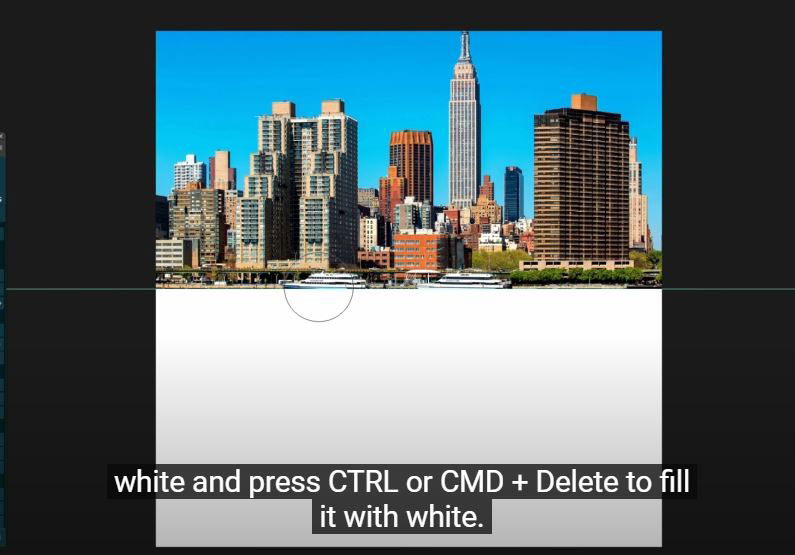
(5). Use “Smudge tool” to push the towers’ reflections to the right, just like it’s in the water surface. Create a new layer to create waves on the surface of water, make sure background is white and press CTRL or CMD + Delete to fill it with white. Go to Filter > Noise > Add noise > 400% of the amount and OK.
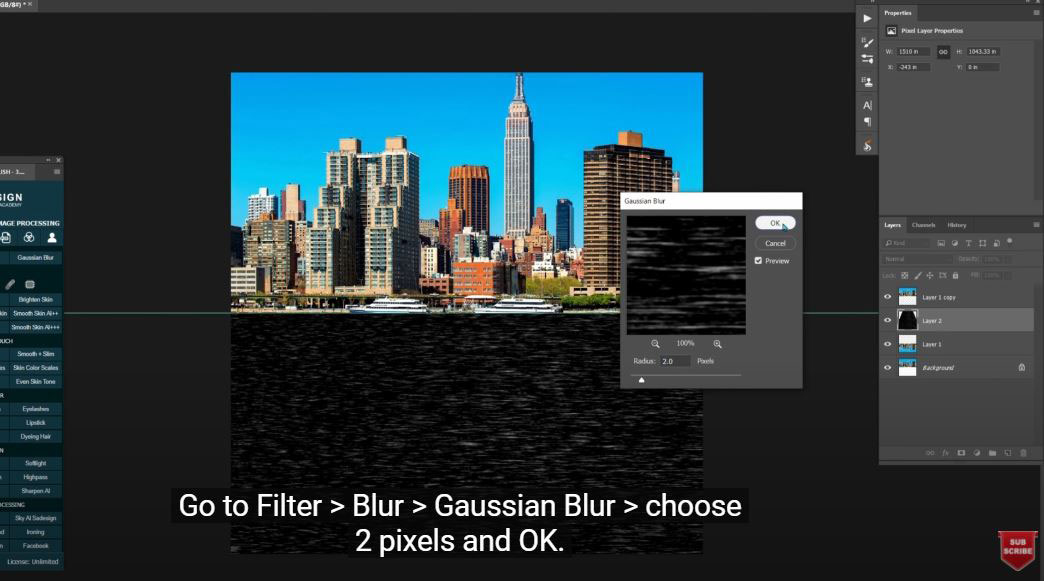
(6). Go to Filter > Blur > Gaussian Blur > choose 2 pixels and OK. Reduce the opacity to 30%, duplicate it with CTRL or CMD + J. In layer 2, change blending mode from normal to “soft light” . In layer 2 copy, press CTRL + I and change blending mode to “Overlay”
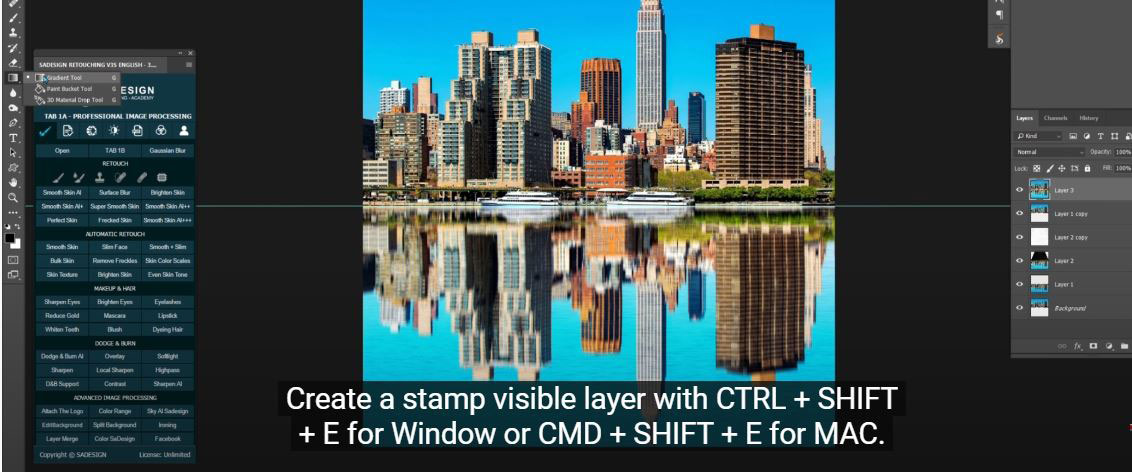
(7). Use blur tool to blur the reflection. Create a stamp visible layer with CTRL + SHIFT + E for Window or CMD + SHIFT + E for MAC.
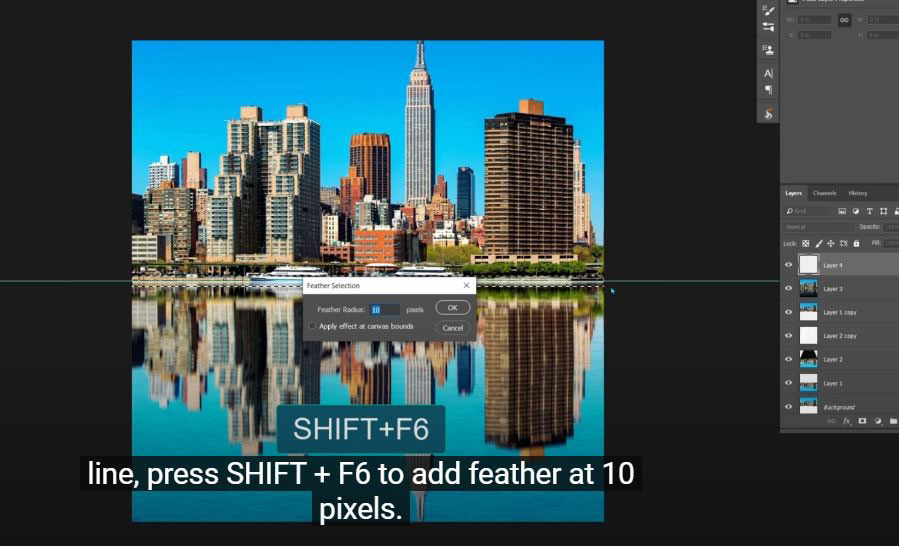
(8). Use gradient tool with black and transparent preset, click at the bottom and drag to create a gradient, reduce the opacity to 34%. Create a new layer, use rectangular marquee tool to select the middle area which is the line, press SHIFT + F6 to add feather at 10 pixels. Press ALT or OPTION + Delete to fill the selection with black in foreground. Change blending mode to soft light. That’s all for this tutorial. Have fun!
If you like Photoshop and Photograph just like SaDesign and you want to get more and more tips, techniques, experience from us. Make sure to subscribe our channel by simply clicking the subscribe button and you will get tons of free tutorials that SaDesign share about Photoshop technique on a daily basic. If you have any ideas, don’t hesitate to leave comments right below the video. We look forward to see your thoughts. Thanks so much for following and supporting SaDesign. See you guys in the following tutorials. Bye Bye!
Watch the video here:
REGISTER FOR FREE PHOTOSHOP LEARNING
============================
The most powerful Retouch tool processor
DOWNLOAD:
✅ SADESIGN PANEL ENGLISH: https://sadesign.ai/retouching/
✅ SADESIGN PANEL VIETNAM: https://www.retouching.vn/


