Best Selling Products

Adobe Photoshop Copyright - Full App
120 USD

Upgrade Duolingo Super
29 USD

Capcut Pro 1 Year
39 USD

MidJourney Account
29 USD

Copyright Adobe Lightroom Account
59 USD

ChatGPT Plus Account (GPT-4)
16 USD

Upgrade Genuine Office 365
49 USD

Genuine Adobe Illustrator account
99 USD

Windows 10 & 11 Pro Key
36 USD

Plugin Retouch4me
69 USD

Autodesk All App Account Copyright
120 USD

Upgrade genuine Capture One account
120 USD

Adobe Premiere Pro Account
99 USD

Genuine Cheap Canva Pro
39 USD

Freepik Premium Account
59 USD
Create a wonderful Cracked Skin Effect in Photoshop
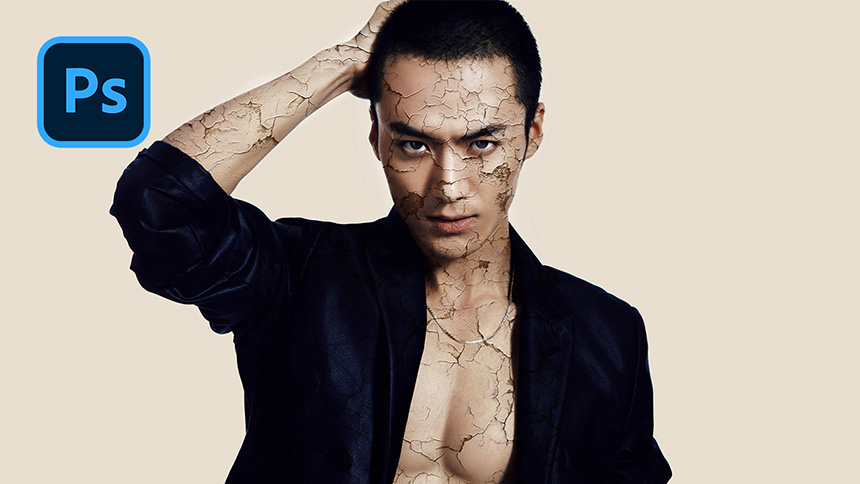
Hi everyone, in this video, I – SaDeisgn will show you how to create cracked skin in Photoshop.
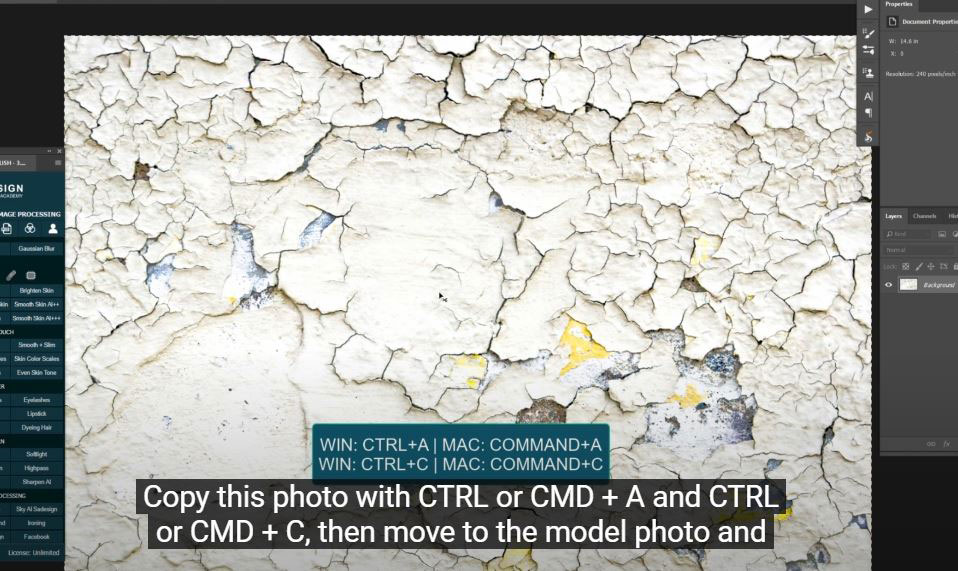
(1). First of all, you should have cracked material photo, if not, I’ll put this file in the description so you can download for trying this technique. Copy this photo with CTRL or CMD + A and CTRL or CMD + C, then move to the model photo and press CTRL or CMD + V to paste it.
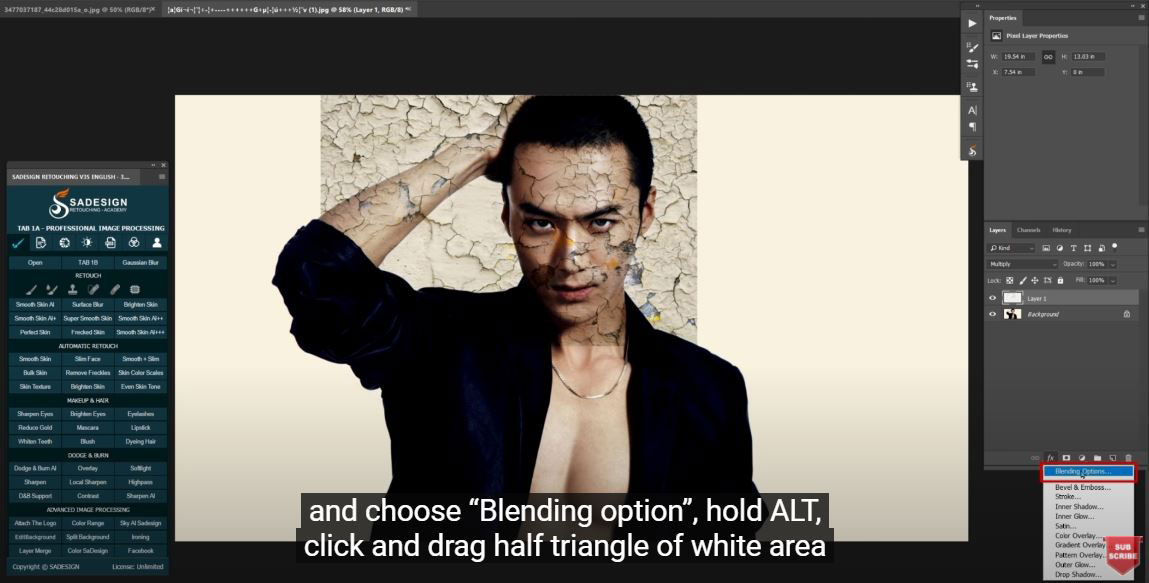
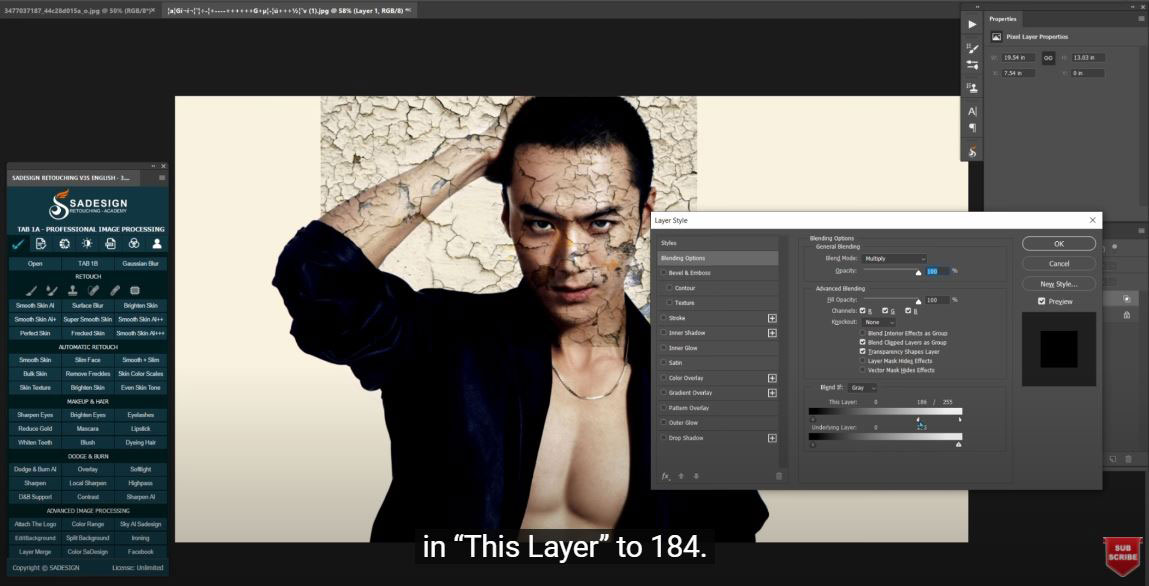
(2). Use CTRL + T or CMD + T to resize the cracked image and move it to cover models’ hand and face. Next, change blending mode from normal to “Multiply”, right click to the fx icon and choose “Blending option”, hold ALT, click and drag half triangle of white area in “This Layer” to 184. After that, press CTRL + SHIFT + X or CMD + SHIFT + X to open “Liquify”, choose “Forward Warp Tool” W shortcut to push the crack to fit on his face and arms then OK.
(3). Take another cracked image by CTRL or CMD + V and resize it, right click and choose “Rotate 90 counter clockwise” to cover his body. Repeat previous steps, change blending mode to “Multiply”, open “Blending Options”, reduce the half white to 184. Now we use “Eraser tool” to remove the crack that is not on his body in layer 1 and 2. Merge both layers with CTRL or CMD + E. Change blending mode to “Multiply”, go to Select > Subject > and press “delete” to remove the crack that is still left on background.
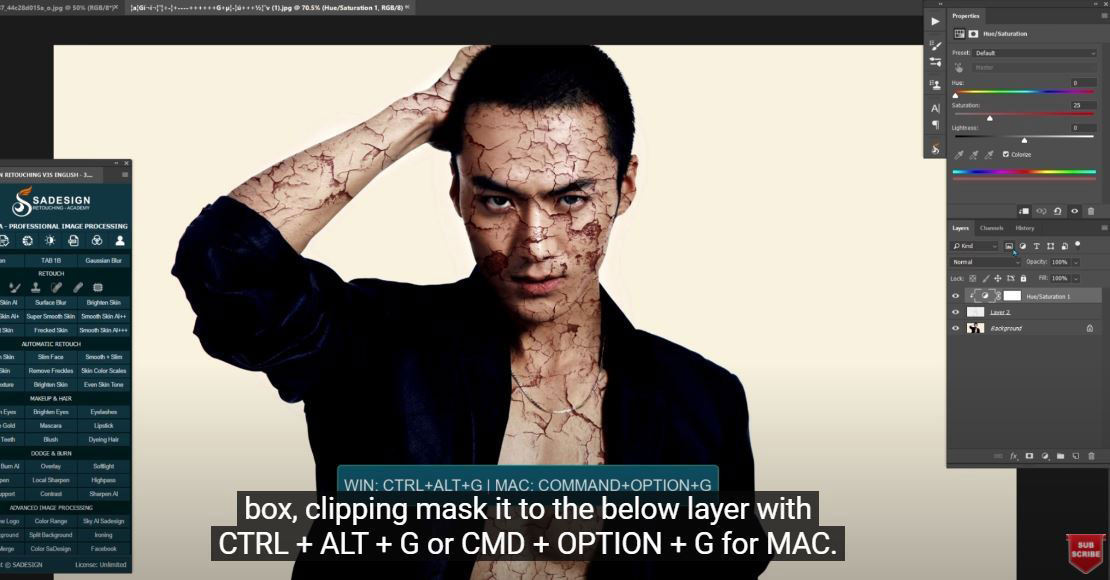
(4). Right click to the adjustment icon and choose “Hue/Saturation”, check on the “Colorize” box, clipping mask it to the below layer with CTRL + ALT + G or CMD + OPTION + G for MAC. Adjust the hue channel to the color that you prefer. Add layer mask to layer 2. Use Eraser tool and remove the crack on his lips, eyes or somewhere else that you want to eliminate. Duplicate the layer 2 by CTRL or CMD + J and move it on top of all layers. Choose “Hue/Saturation” layer and clipping mask it. Put them into a group, change blending mode of Layer 2 copy from Multiply to Screen and press CTRL or CMD + I. Go to “Blending Options”. We will separate the black triangle into half in “underlying layer” this time from 0 to 178 and the other one move to 87. This step is for removing dark cracks on his cloths. Use move tool to move a little bit. Create a new layer with soft light in blending mode, choose brush tool (B shortcut) with white in foreground. Take Lasso tool (L shortcut) and make the selection of cracked areas that you want to remove the dark on his skin by using brush to paint after the selections are done. Reduce the opacity to 65%
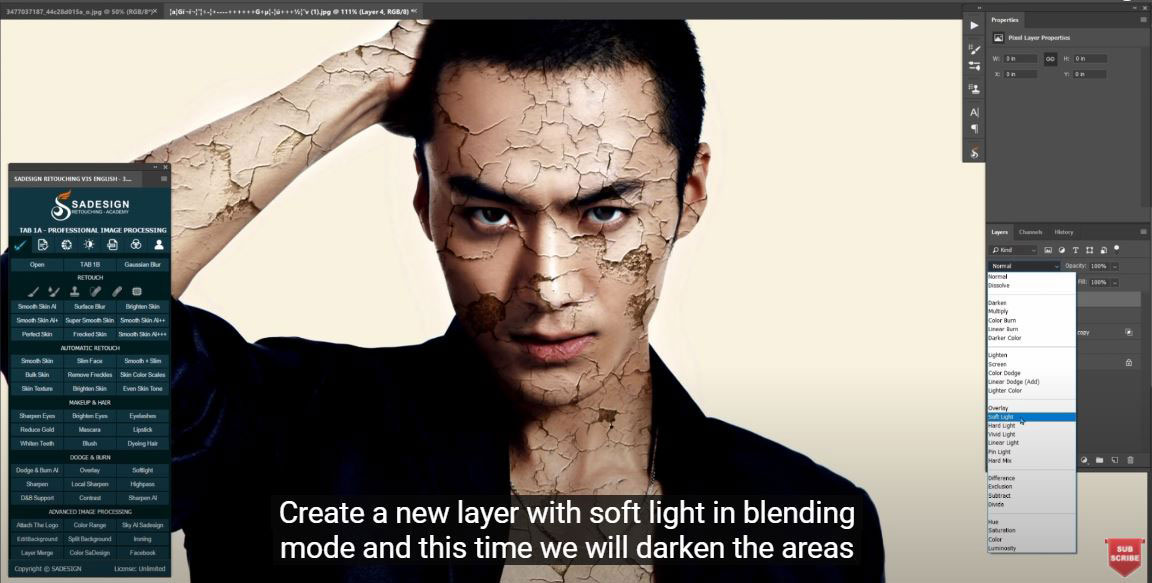
(5). Create a new layer with soft light in blending mode and this time we will darken the areas where it should be dark. Put both layers into group and adjust the opacity till it looks natural
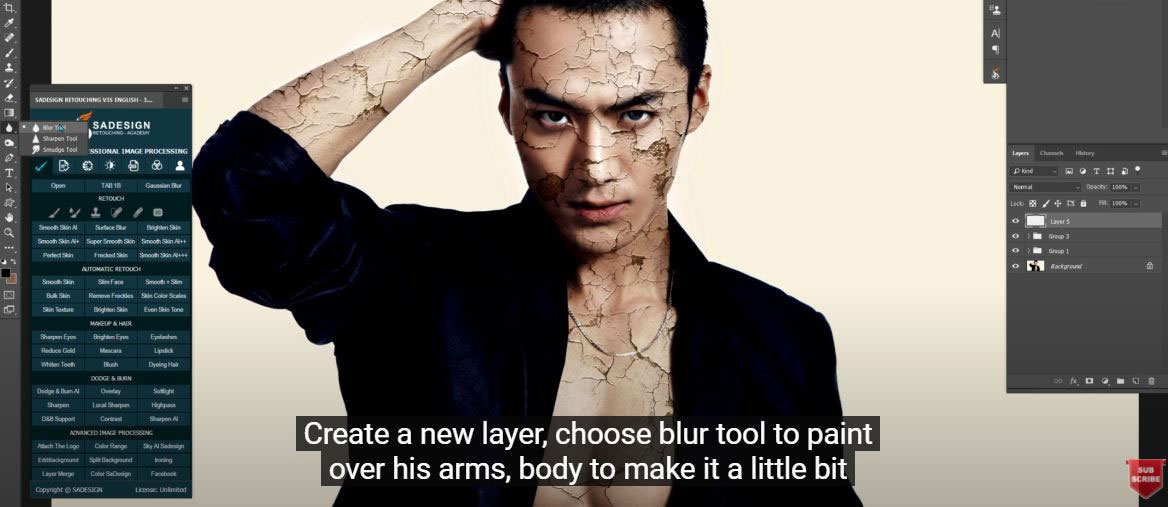
(6). Create a new layer, choose blur tool to paint over his arms, body to make it a little bit blur, only focus on his face. That’s all for this tutorial.
Watch the video here:
REGISTER FOR FREE PHOTOSHOP LEARNING
============================
The most powerful Retouch tool processor
DOWNLOAD:
✅ SADESIGN PANEL ENGLISH: https://sadesign.ai/retouching/
✅ SADESIGN PANEL VIETNAM: https://www.retouching.vn/


VIP Products


Best Selling Products
Adobe Photoshop Copyright - Full App
120 USD
Upgrade Duolingo Super
29 USD
Capcut Pro 1 Year
39 USD
MidJourney Account
29 USD
Copyright Adobe Lightroom Account
59 USD
ChatGPT Plus Account (GPT-4)
16 USD
Upgrade Genuine Office 365
49 USD
Genuine Adobe Illustrator account
99 USD
Windows 10 & 11 Pro Key
36 USD
Plugin Retouch4me
69 USD
Autodesk All App Account Copyright
120 USD
Upgrade genuine Capture One account
120 USD
Adobe Premiere Pro Account
99 USD
Genuine Cheap Canva Pro
39 USD
Freepik Premium Account
59 USD