Best Selling Products
How to smooth background in Photoshop
You have a photo with a beautiful subject but the background is not perfect with folds and wrinkles. Don't worry, we can smooth the background in Photoshop very simply with just a few steps. Let's learn about the steps to smooth the background in Photoshop right after Sadesign.

1. Steps to smooth the background in Photoshop
Backgrounds with wrinkles and folds will make the overall image look untidy. To smooth the background in Photoshop, we need to remove those wrinkles. This work will be carried out through the following specific steps:
Step 1: First we need to load the photo that needs to be smoothed in Photoshop. To load the photo, on the menu bar, go to File => Open => select the appropriate photo => Open. Or you can use the shortcut key Ctrl + O then select the appropriate photo and press Open.
Step 2: On the toolbar, use the Magic Wand Tool (W) then click Select Subject in the options bar at the top.
![]()
At this time, the subject, the girl in the photo, will be automatically selected by Photoshop as shown in the image below.

Step 3: If you find that the selection isn’t precise enough, especially in the curly hair area, you can click Select and Mask in the top options bar to make adjustments. Experiment with the available brushes on the left and the sliders on the right to make sure everything is selected correctly. When you’re done, set the Output to Selection and click OK.
![]()

Step 4: Press Ctrl+J to copy the selection to a new layer. Now hold down Ctrl and click on the selection thumbnail to bring the selection back.
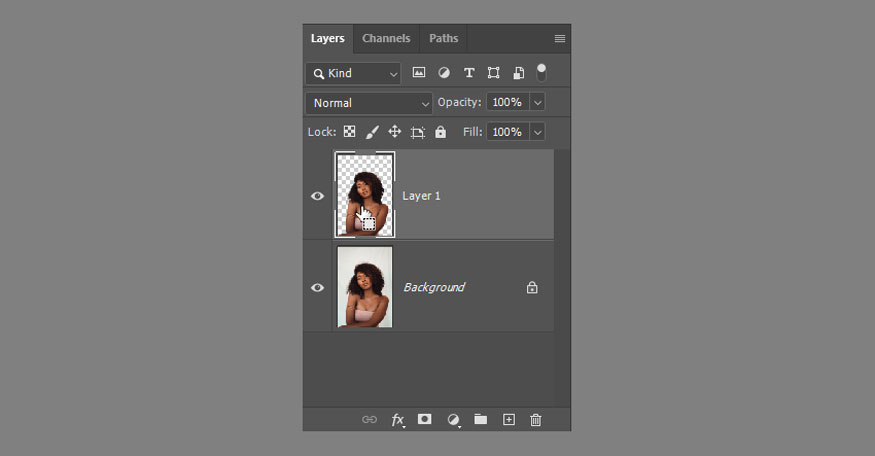
Step 5: Go back to the background layer, on the menu bar go to Select => Modify => Expand. Add a few pixels to make sure the selection does not contain any pixels of the model.

Step 6: Press Q and paint white around the hair to completely remove it from the selection. Then press Q again to exit Quick Mask Mode.

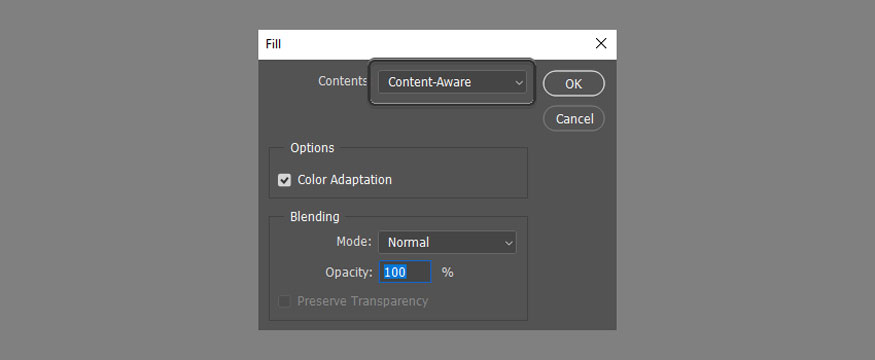
Step 7: Hide the clone by clicking on the eye icon next to it. Then on the menu bar and go to Edit => Fill. Set it to Content-Aware. This will remove the model from the image, leaving only the wrinkled background. The effect doesn't have to be perfect, we just want to make sure the background only contains its own color.

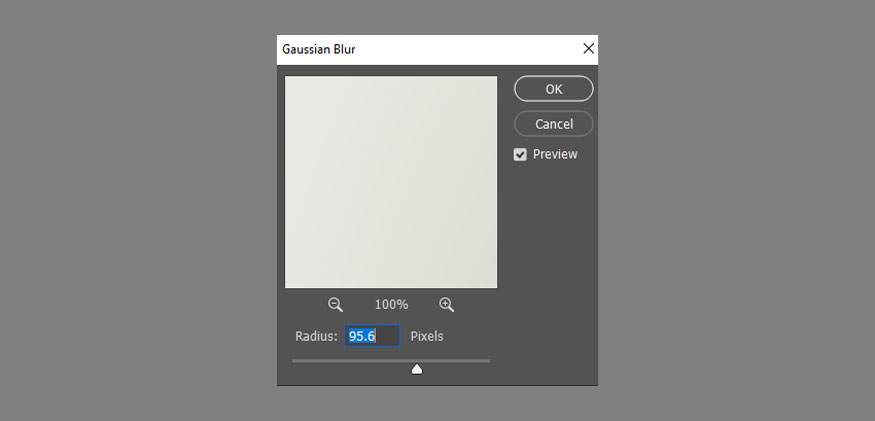
Step 8: Right-click on the Background layer and select Convert to Smart Object. Then, click on the hidden eye icon to reveal the copy again and go to Filter > Blur > Gaussian Blur. Increase the Radius until the creases disappear, but don’t increase it too much, we don’t want to accidentally erase the subtle gradients of the background. Making the background too soft can also result in a glowing effect, so see if you can retain a bit of the original background detail.

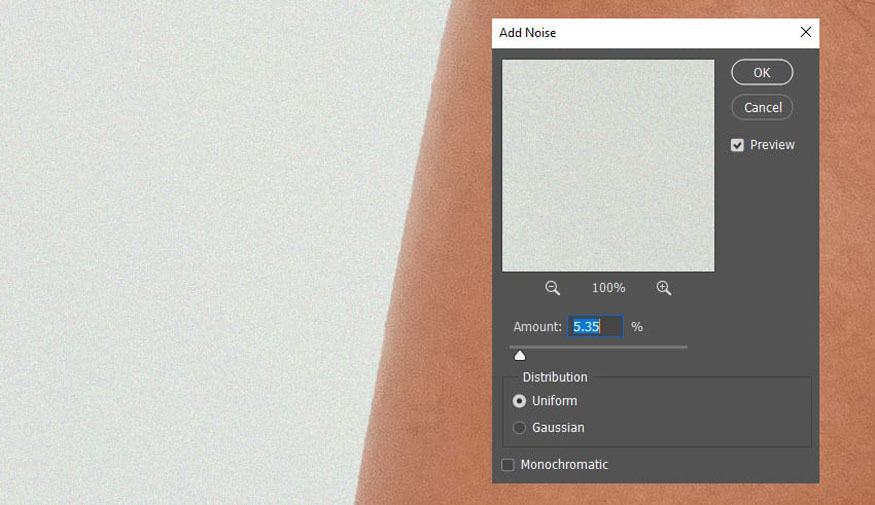
Step 9: On the menu bar go to Filter => Noise => Add Noise. Adjust the Amount to match the level of noise in the unedited part of the photo. A completely smooth background can look weird if the rest of the photo isn't as smooth!

So you have completed the steps to smooth the background in Photoshop. The background has been softened quickly, the photo becomes much more delicate and neat.
2. Conclusion
Above is a summary of the steps to smooth the background in Photoshop. We can see that this implementation is not complicated, it only includes some tools combined. Try doing it many times to get the most satisfactory results.
Note, this method of smoothing the background in Photoshop is only suitable for simple, not too complicated backgrounds. For more detailed backgrounds, you need to refer to other smoothing methods. Hopefully, the above sharing of Sadesign can help you have the most impressive designs.

Installation and support contact information:
🏡 SADESIGN Software Company Limited
📨 Email: phamvansa@gmail.com
🌍 Website: https://sadesign.ai


.png)


