Best Selling Products

Upgrade Duolingo Super
29 USD

Adobe Premiere Pro Account
99 USD

MidJourney Account
29 USD

Upgrade genuine Capture One account
120 USD

Copyright Adobe Lightroom Account
59 USD

ChatGPT Plus Account (GPT-4)
16 USD

Upgrade Genuine Office 365
49 USD

Capcut Pro 1 Year
39 USD

Adobe Photoshop Copyright - Full App
120 USD

Freepik Premium Account
59 USD

Autodesk All App Account Copyright
120 USD

Plugin Retouch4me
69 USD

Windows 10 & 11 Pro Key
36 USD

Genuine Adobe Illustrator account
99 USD

Genuine Cheap Canva Pro
39 USD
How to use Auto Captions on CapCut PC to create subtitles for videos.
Nội dung
- 1. Introduction to the automatic subtitle generation feature on CapCut PC
- 2. Benefits of using automatic subtitles on CapCut
- 3. Features of Auto Captions on CapCut PC
- 4. Instructions on how to create automatic subtitles for videos using CapCut on PC
- Step 1: Upload the video to the project.
- Step 2: Create automatic subtitles using AI.
- Step 3: Export the completed video
- 5. How to edit subtitles after AI has finished generating them.
- 6. Tips for making subtitles look better and easier to read.
- 7. When should I use CapCut's Auto Captions?
- 8. Conclusion
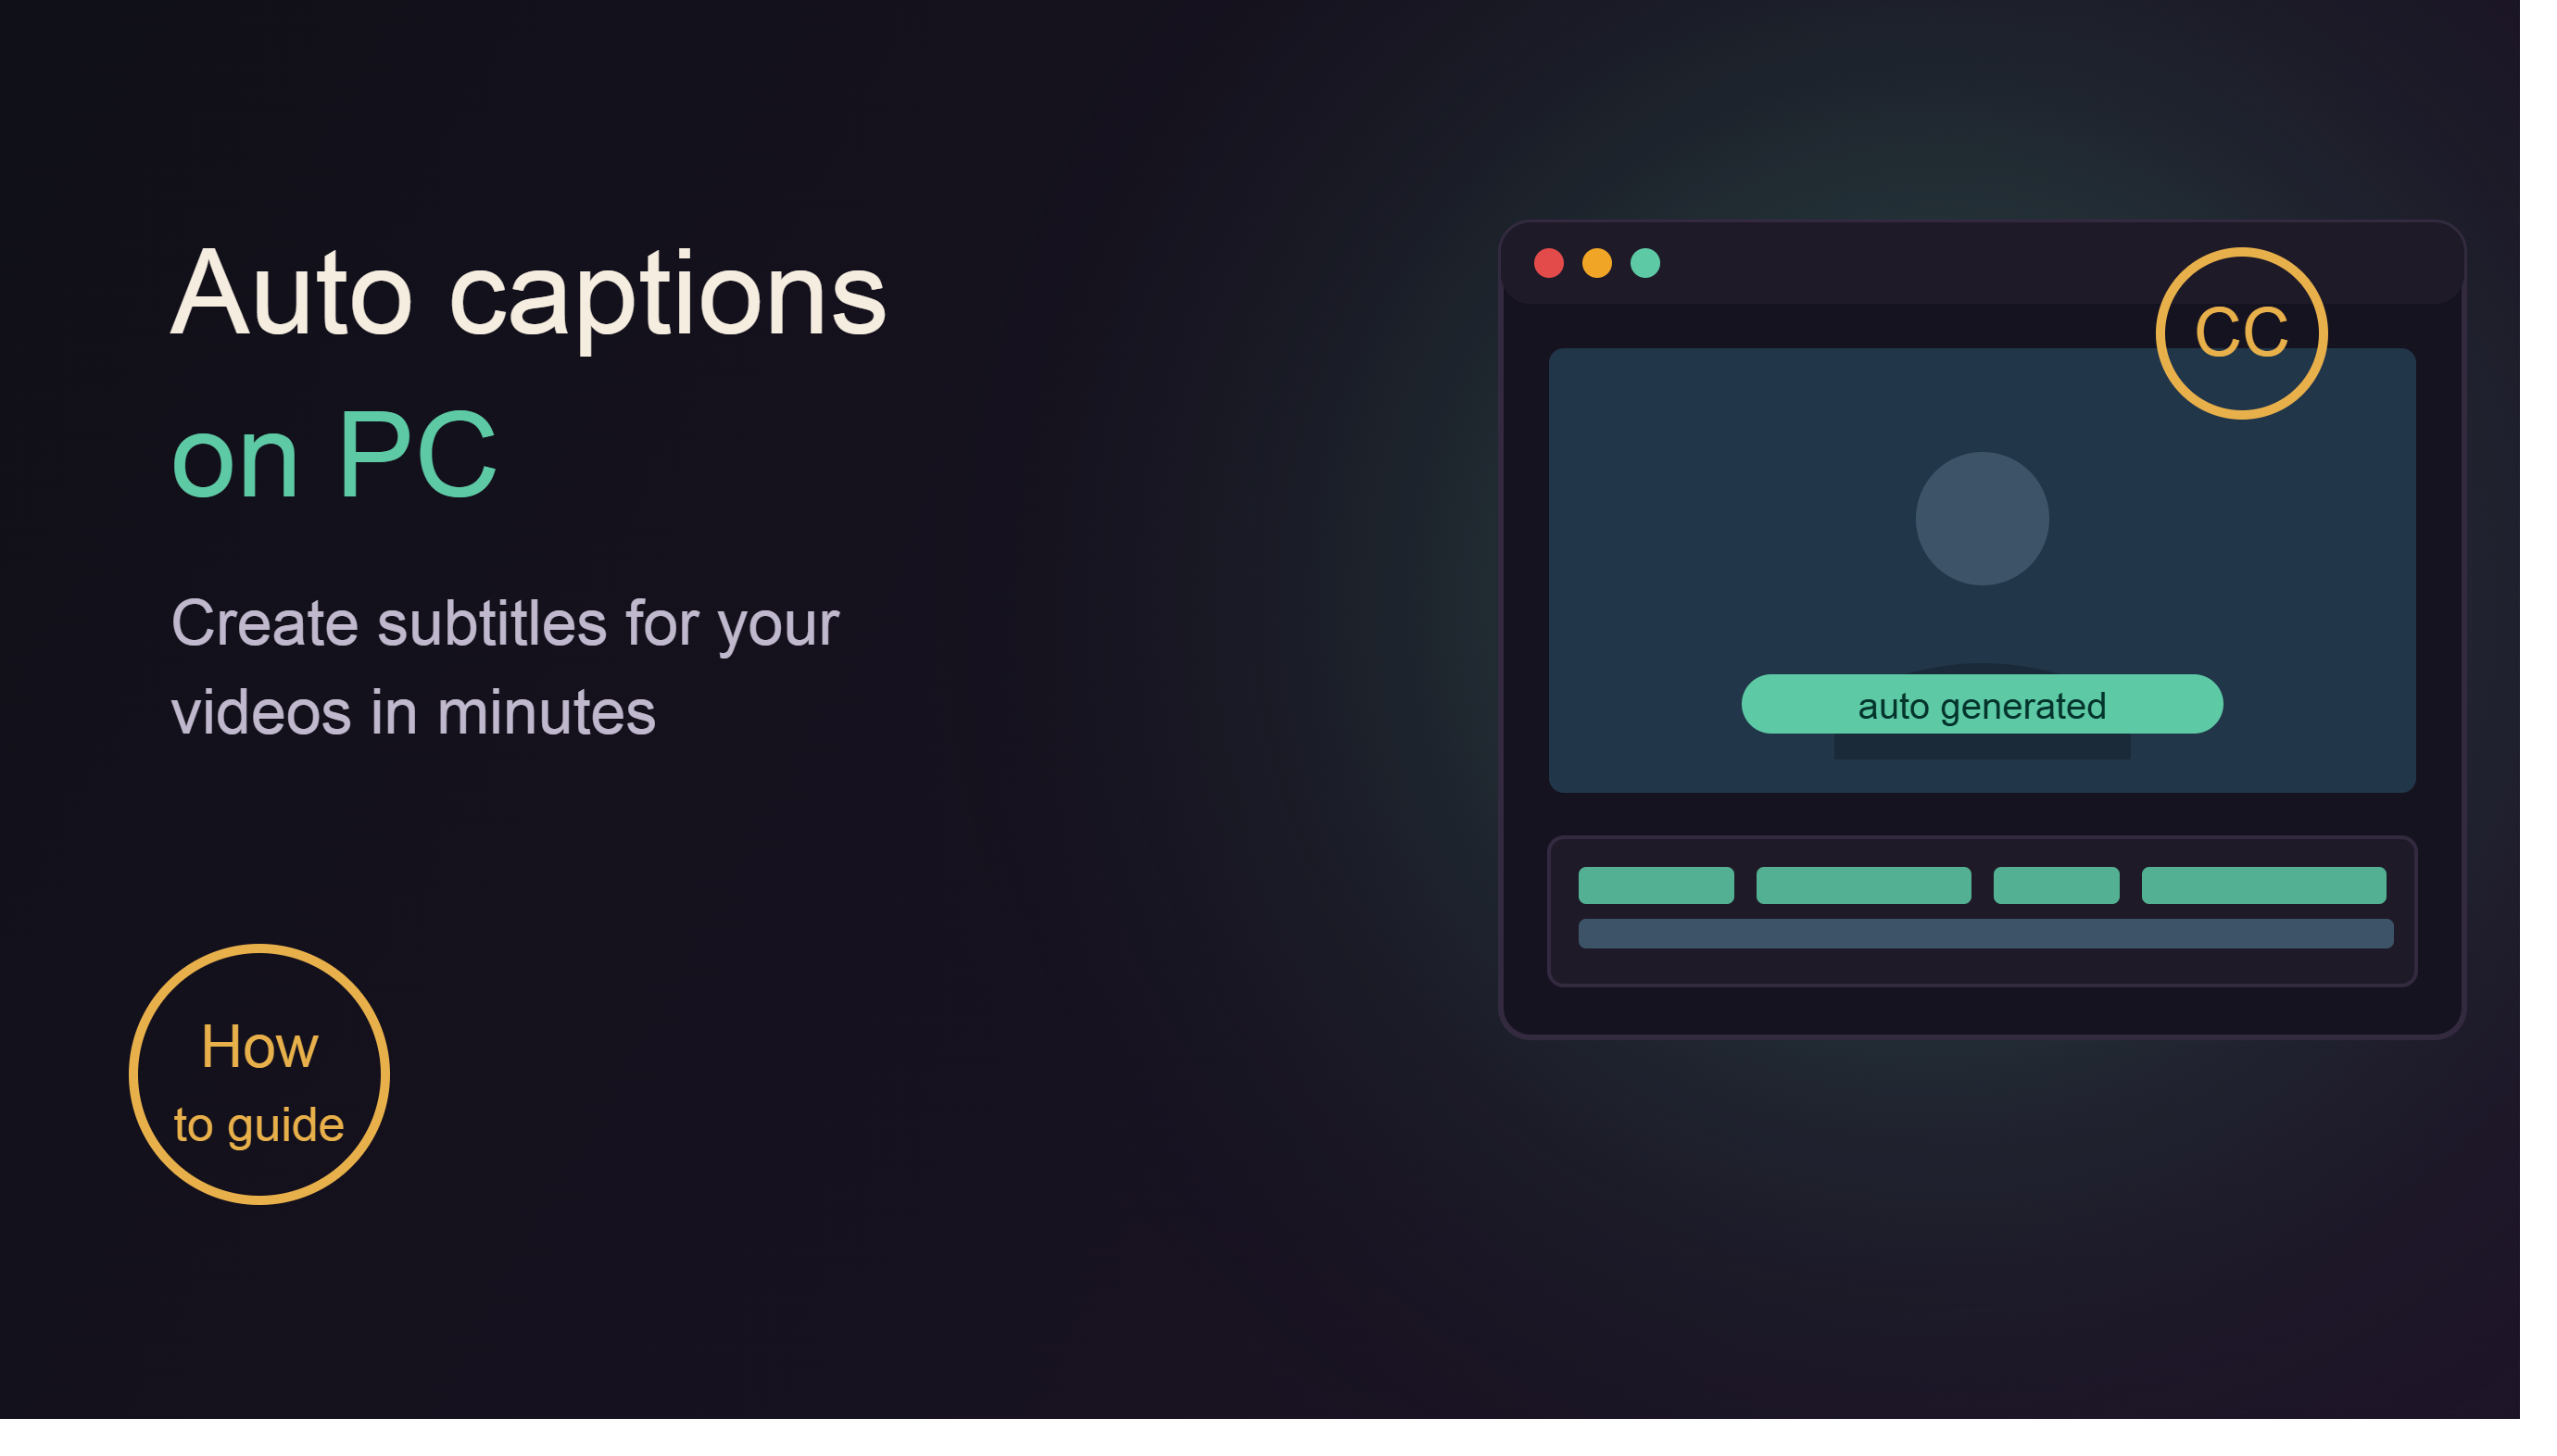
CapCut on PC offers an Auto Captions feature that uses artificial intelligence (AI) to recognize speech and convert it into text in just minutes.
1. Introduction to the automatic subtitle generation feature on CapCut PC
Instead of manually typing each line of dialogue, CapCut on PC offers an Auto Captions feature that uses artificial intelligence (AI) to recognize speech and convert it into text in just minutes. This tool significantly saves editing time and supports the creation of highly accurate subtitles in multiple languages.
CapCut Desktop not only automatically generates subtitles but also allows users to edit the content, change font styles, colors, effects, display positions, and the timing of each sentence. This makes it easy for users to create professional videos without needing additional specialized software.
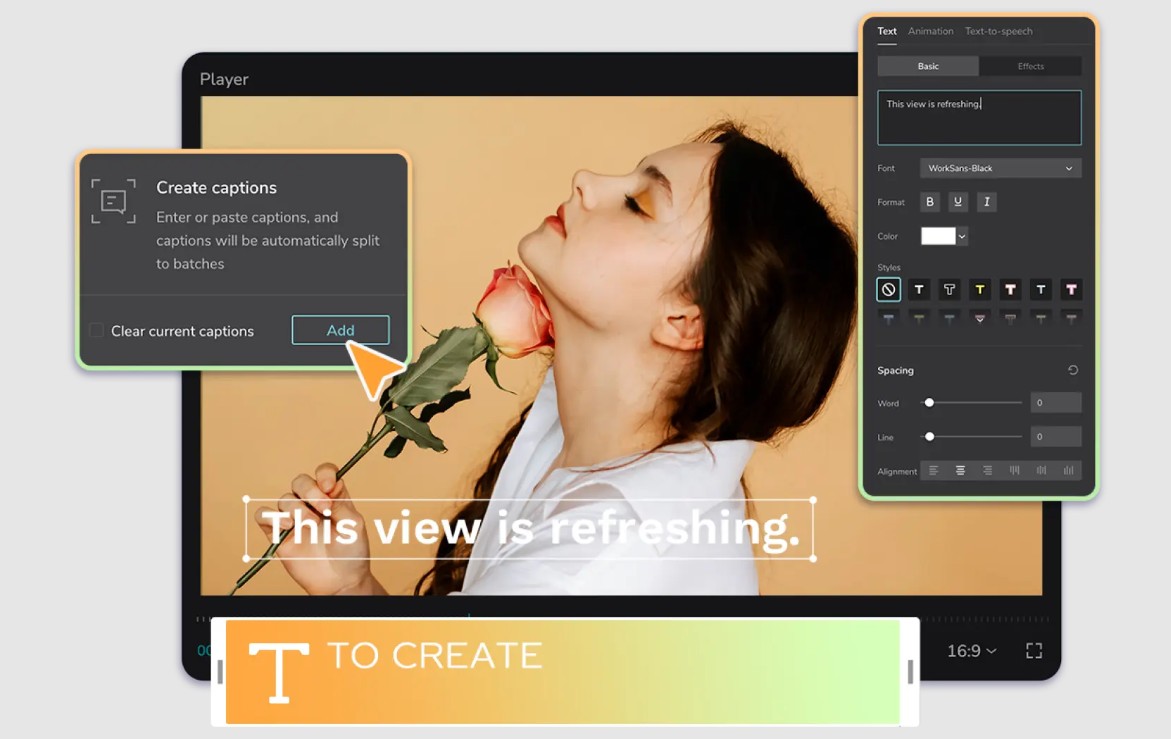
Another notable advantage is that subtitles are created directly on the project's timeline, making it easy to synchronize them with the video's images and audio. If the AI incorrectly identifies some words, you can quickly edit them directly on the interface without having to recreate the entire subtitle.
For content creators, businesses, teachers, and marketers, Auto Captions is a powerful tool to improve video quality, enhance professionalism, and optimize the viewer experience. It's also one of the most frequently used AI features on CapCut due to its ability to save time and improve work efficiency.
2. Benefits of using automatic subtitles on CapCut
First, AI helps to quickly recognize speech and create subtitles, significantly shortening editing time. Instead of spending hours typing each line of dialogue, users only need a few clicks to complete most of the work, then correct inaccurate words if necessary.
Subtitles also make videos more accessible to the hearing impaired or viewers in environments where sound cannot be turned on. At the same time, subtitled content tends to keep viewers engaged longer, increasing watch time and improving engagement rates on platforms like TikTok, YouTube, and Facebook.
CapCut also supports flexible subtitle editing. You can change the font, color, size, display position, add motion effects, background text, or adjust the appearance time to match the style of each video and brand identity.
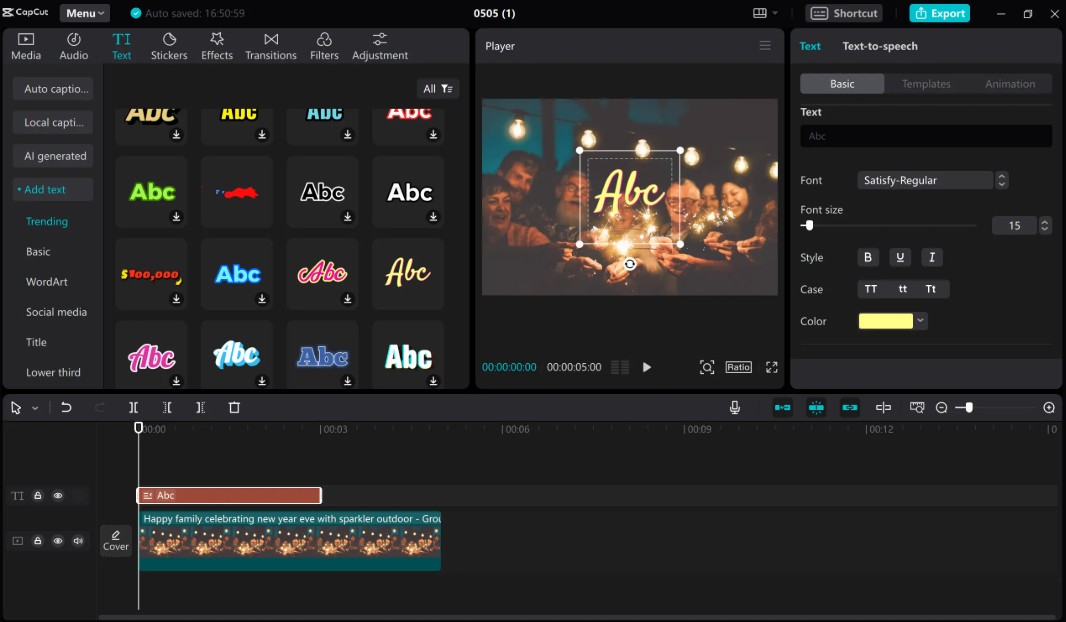
For training videos, tutorials, sales videos, product reviews, or advertisements, subtitles help viewers follow the content more easily, remember information better, and avoid missing important messages. This also contributes to making the video more professional and engaging.
3. Features of Auto Captions on CapCut PC
CapCut's Auto Captions doesn't simply convert speech to text; it also integrates many intelligent features to optimize the video editing process.
The AI tool can automatically recognize dialogue in videos and generate subtitles sentence by sentence with fairly accurate timing. Once completed, users can directly edit the content, duration, or position of each subtitle segment on the Timeline without having to recreate them from scratch.
CapCut also offers a variety of font styles, display styles, animations, and colors to make subtitles stand out on screen. You can also add text backgrounds, borders, shadows, or adjust line spacing to improve readability in scenes with complex colors.
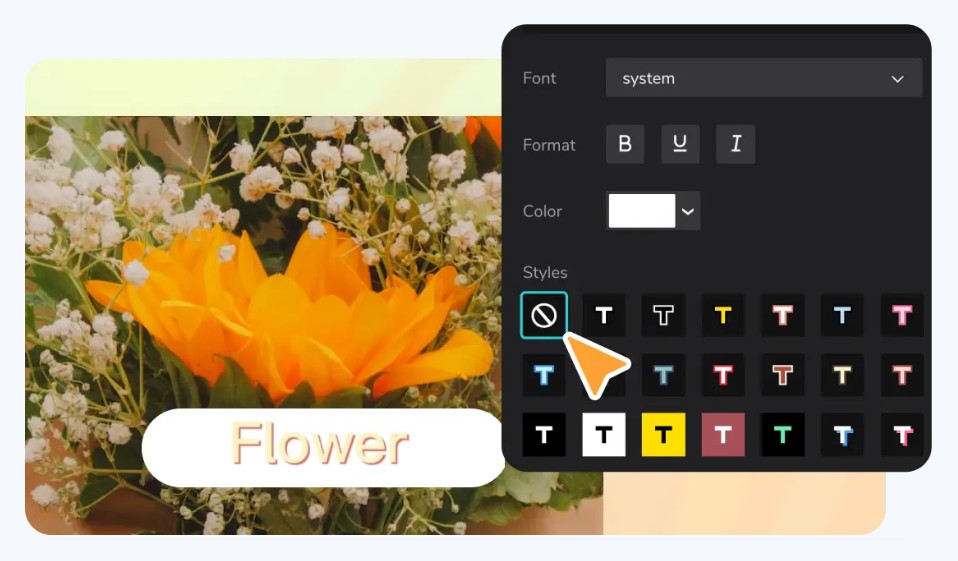
Furthermore, Auto Captions supports multiple languages and is continuously improved through AI updates. Some versions even integrate subtitle translation into various languages, making videos more accessible to international audiences.
In addition, CapCut allows you to apply the same formatting style to all subtitles with just a few steps, saving editing time and ensuring consistency throughout the video. This is a particularly useful feature for content creators who frequently produce large quantities of videos or build brand awareness on social media platforms.
4. Instructions on how to create automatic subtitles for videos using CapCut on PC
After understanding the Auto Captions feature, you can follow the steps below to create automatic subtitles for your videos.
Step 1: Upload the video to the project.
Open the CapCut Desktop application on your computer.
On the main interface, click New Project to create a new project.
Next, click the Import button in the top left corner to open the file library on your computer.
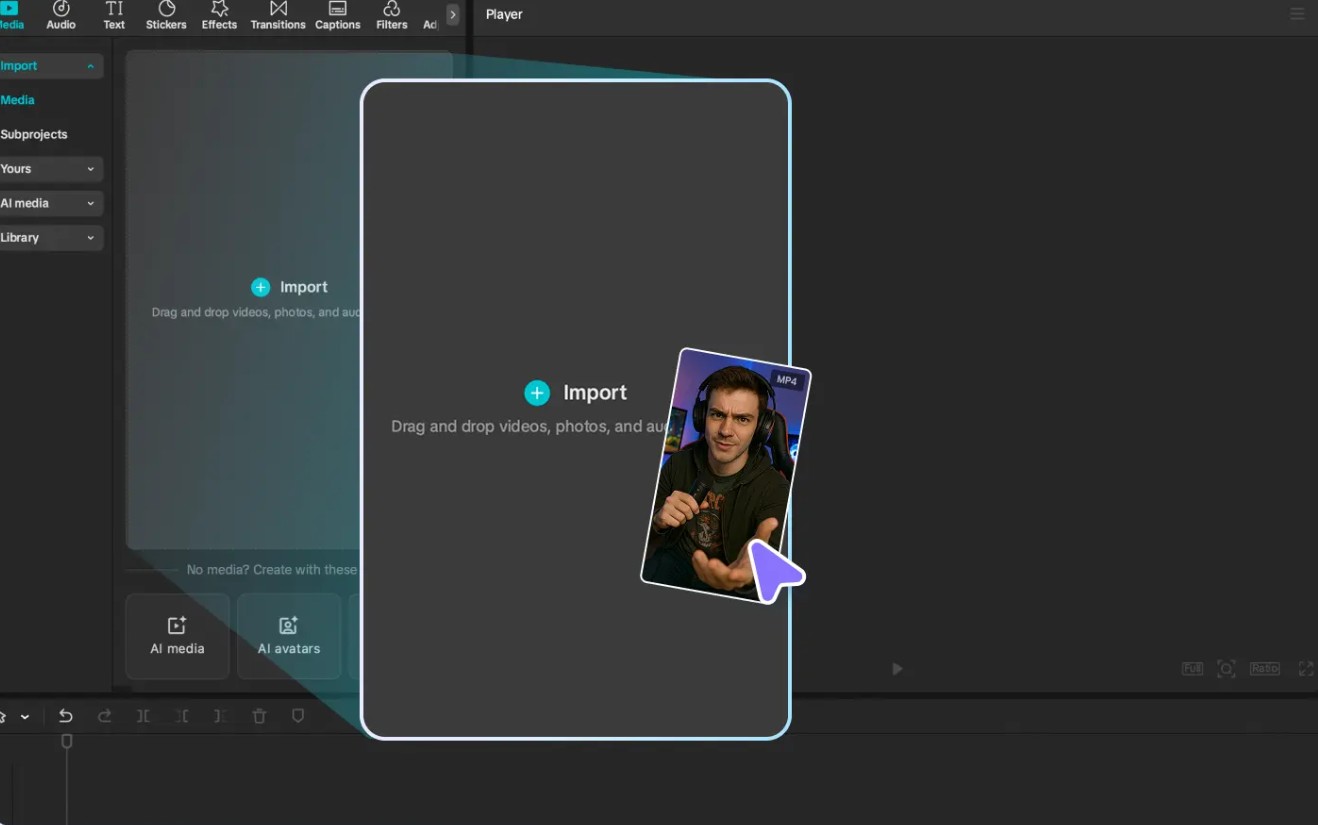
Select the video you want to add subtitles to, then click Open .
After the video appears in the project library, drag and drop it onto the Timeline at the bottom of the screen.
This is an important step because Auto Captions only work once the video has been added to the Timeline.
Step 2: Create automatic subtitles using AI.
Once the video is on your Timeline, click on the Text option in the toolbar at the top.
In the left sidebar, select Auto Captions or Auto-Subtitles depending on the version of CapCut you are using.
CapCut will ask you to select the language of the speech in the video . Choose the correct language for more accurate AI recognition.
After making your selections, click Create or Generate .
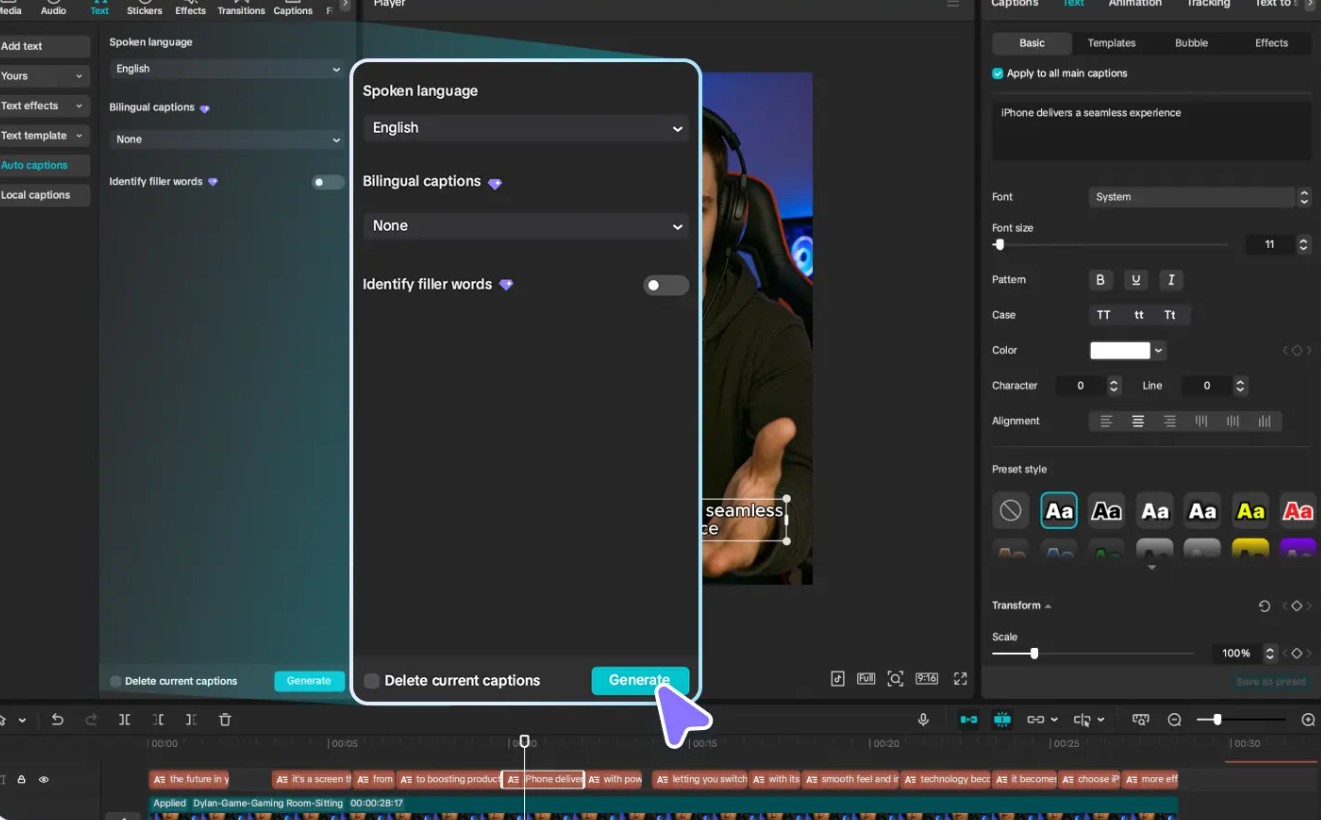
At this point, CapCut will automatically analyze all the audio in the video, identify the dialogue, and create a new subtitle track on the Timeline.
The processing time will depend on the video length and your computer's configuration. Once complete, all subtitles will appear for you to view and edit.
If you find any inaccuracies in the wording, simply click directly on the subtitle to edit the content, change the display time, or split the sentence as desired.
Then, you can customize the font, size, color, position, effects, or apply pre-made text templates to make your subtitles look more beautiful and professional.
Step 3: Export the completed video
After reviewing all the subtitles, click the green Export button in the upper right corner of the interface.
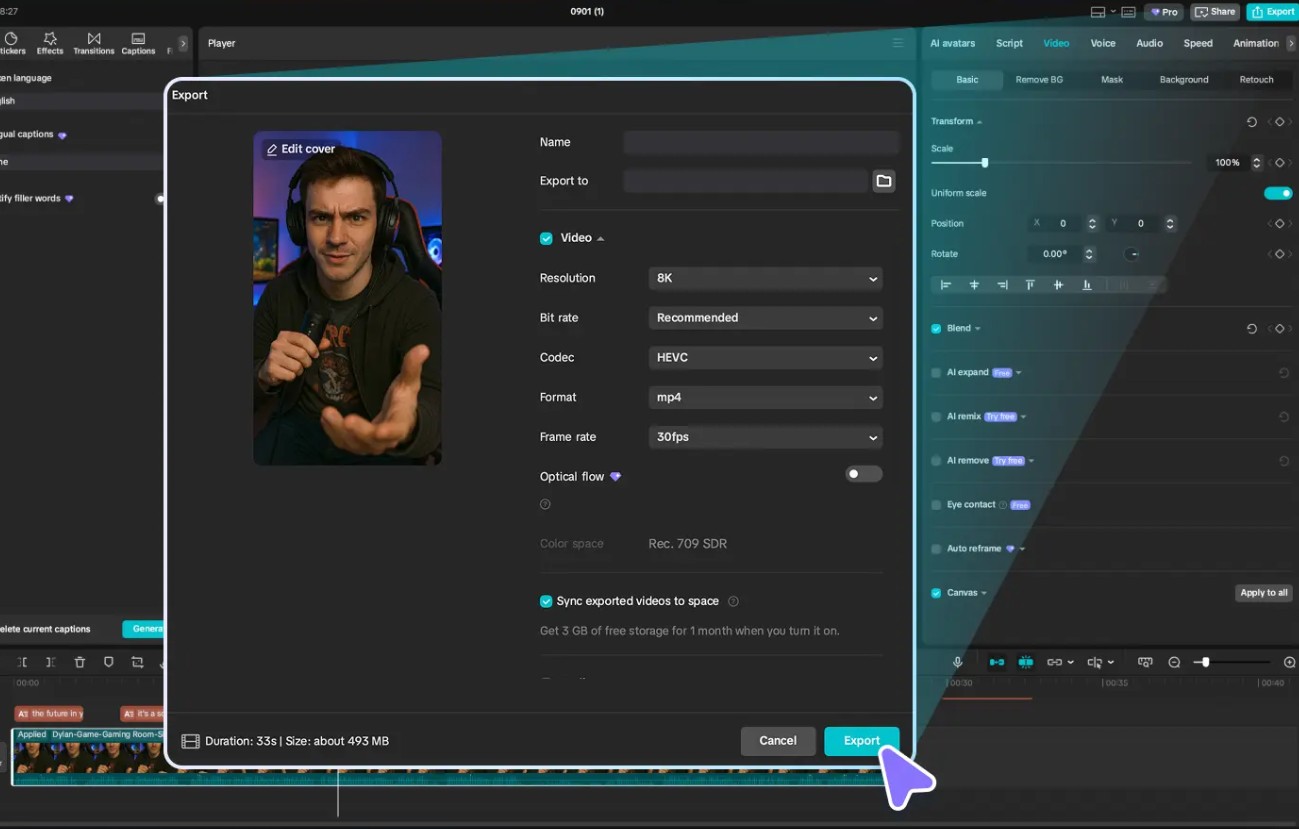
Next, set the video output parameters such as file name, save location, resolution, frame rate, or codec to suit your needs.
Make sure the Export Video option is enabled so that the video is exported along with the edited subtitles.
Finally, press Export again.
CapCut will process and save the completed video to your computer's hard drive. Once finished, you can share it directly to TikTok, YouTube, Facebook, or other platforms.
5. How to edit subtitles after AI has finished generating them.
Although CapCut's AI is quite accurate, you should still double-check all the subtitles before exporting the video.
Review each sentence carefully to identify any errors caused by rapid pronunciation, background noise, or jargon. Manual editing will help make the content more accurate and professional.
You can also change the font, size, color, line spacing, or add appearance effects to make the subtitles stand out more. If the video has many speakers, you should break down each sentence and adjust the display time accordingly so that viewers can easily follow along.
Additionally, ensure that subtitles do not obscure faces, products, or important details within the frame. Placing subtitles in a logical position will enhance the viewing experience and maintain a balanced video composition.
6. Tips for making subtitles look better and easier to read.
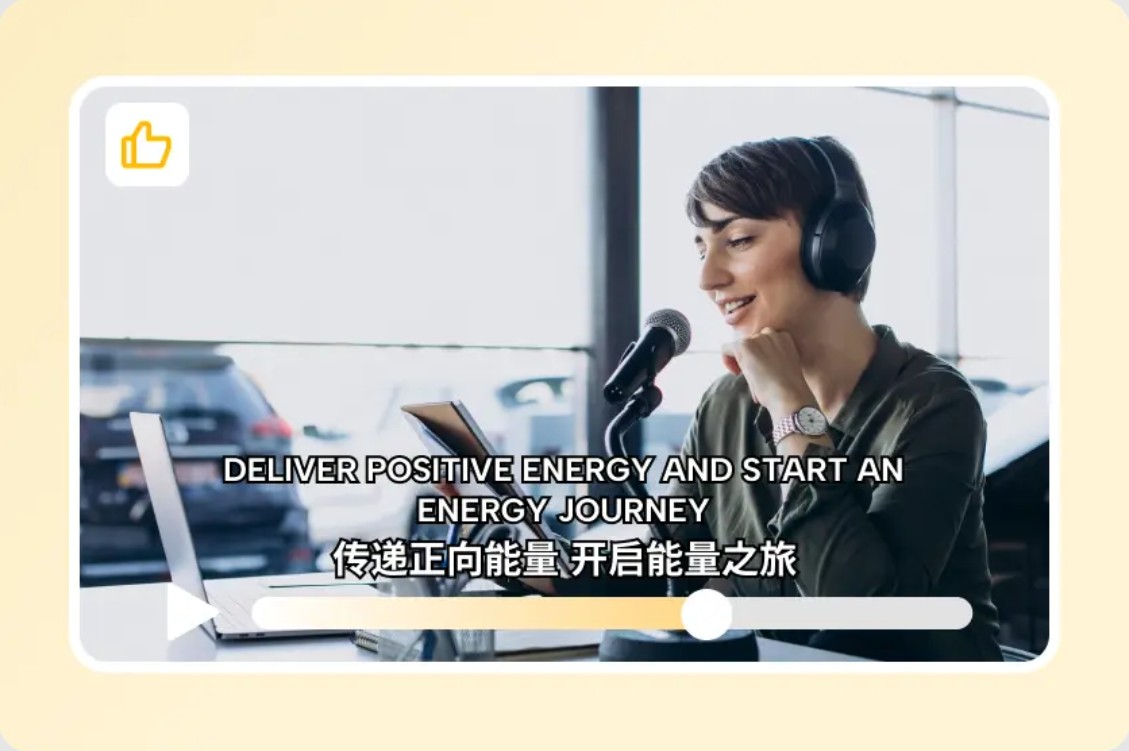
To maximize the effectiveness of your subtitles, you should use a simple, easy-to-read font and a size that fits your phone screen. White combined with a black border or shadow is often a popular choice as it helps subtitles stand out against most video backgrounds.
Avoid displaying too much text in a single line. Each sentence should be divided into short paragraphs so that viewers have enough time to read while still following the visual content.
If the video is being uploaded to TikTok or YouTube Shorts, place the subtitles in the center at the bottom of the screen to avoid them being obscured by the platform's function buttons. Additionally, accurate synchronization between speech and subtitles will make the video look more professional and natural.

7. When should I use CapCut's Auto Captions?
The automatic subtitle generation feature is particularly suitable for a wide range of content types such as tutorial videos, training videos, video podcasts, vlogs, product review videos, sales videos, interview videos, or knowledge-sharing content.
For businesses and content creators, using auto-captions not only saves time but also enhances viewer reach across multiple platforms. Subtitles also contribute to higher video watch times, improved engagement, and help viewers easily remember the message you want to convey.
8. Conclusion
In just three steps—uploading your video to your project, creating automatic subtitles, and exporting the video—you can have a professional product that's accessible to viewers and aligns with current content trends. Don't forget to take the time to double-check the subtitles, fine-tune the display style, and synchronize the timing before publishing to ensure the video is of the highest quality.





















VIP Products








Best Selling Products
Upgrade Duolingo Super
29 USD
Adobe Premiere Pro Account
99 USD
MidJourney Account
29 USD
Upgrade genuine Capture One account
120 USD
Copyright Adobe Lightroom Account
59 USD
ChatGPT Plus Account (GPT-4)
16 USD
Upgrade Genuine Office 365
49 USD
Capcut Pro 1 Year
39 USD
Adobe Photoshop Copyright - Full App
120 USD
Freepik Premium Account
59 USD
Autodesk All App Account Copyright
120 USD
Plugin Retouch4me
69 USD
Windows 10 & 11 Pro Key
36 USD
Genuine Adobe Illustrator account
99 USD
Genuine Cheap Canva Pro
39 USD