Best Selling Products
How to use the Color Replacement tool in Photoshop
Nội dung
Although it is not the only tool that can change the color in an image, the Color Replacement tool is used by many people because of its convenience, ease of use, and still gives beautiful, eye-catching effects. Let's learn more about how to use the Color Replacement tool in Photoshop through the article below with SaDesign.

Although it is not the only tool that can change the color in an image, the Color Replacement tool is used by many people because of its convenience, ease of use, and still gives beautiful, eye-catching effects. Let's learn more about how to use the Color Replacement tool in Photoshop through the article below with SaDesign.

1. Where is the Color Replacement tool in Photoshop?
Step 1
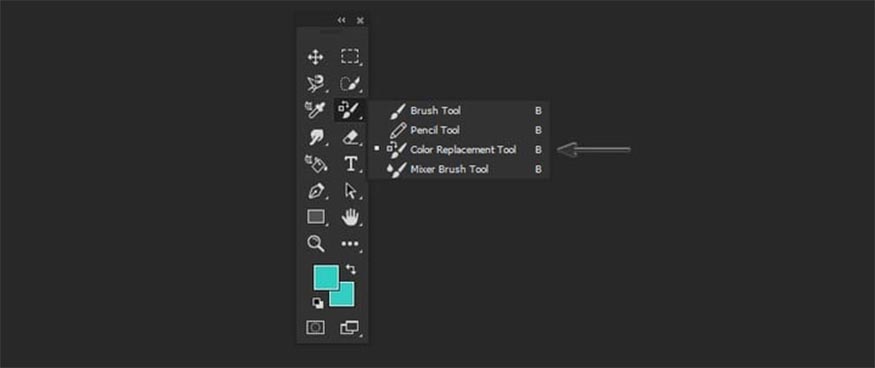
Step 2

2.Setting up the Color Replacement tool in Photoshop
Step 1
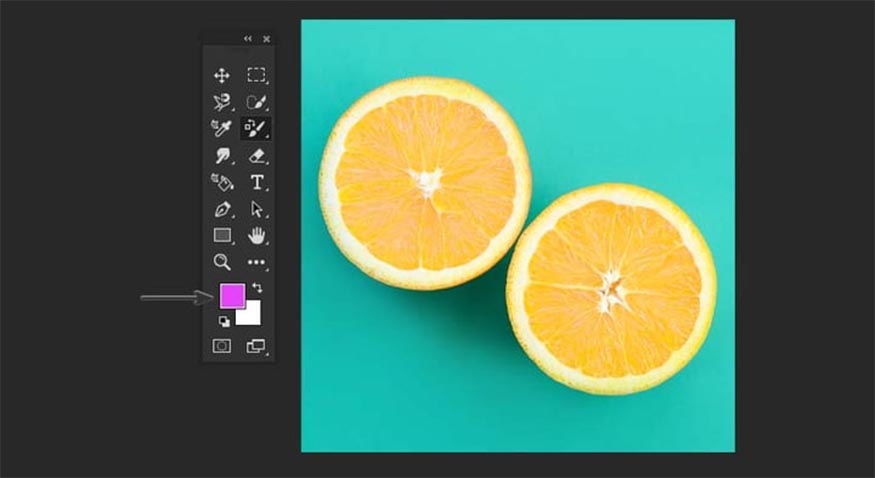
Step 2
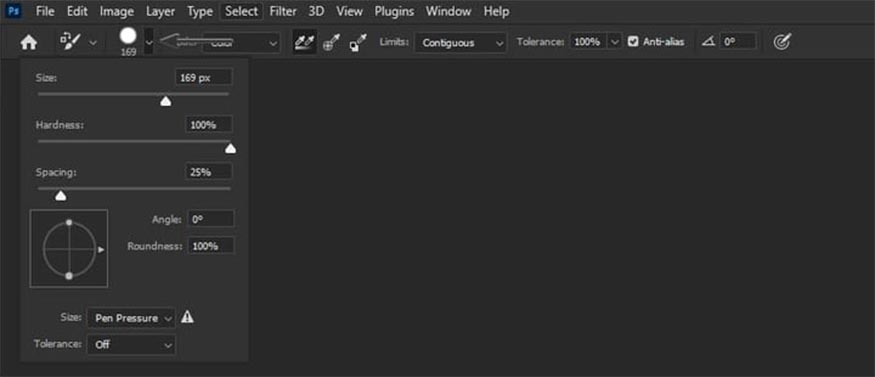
Step 3
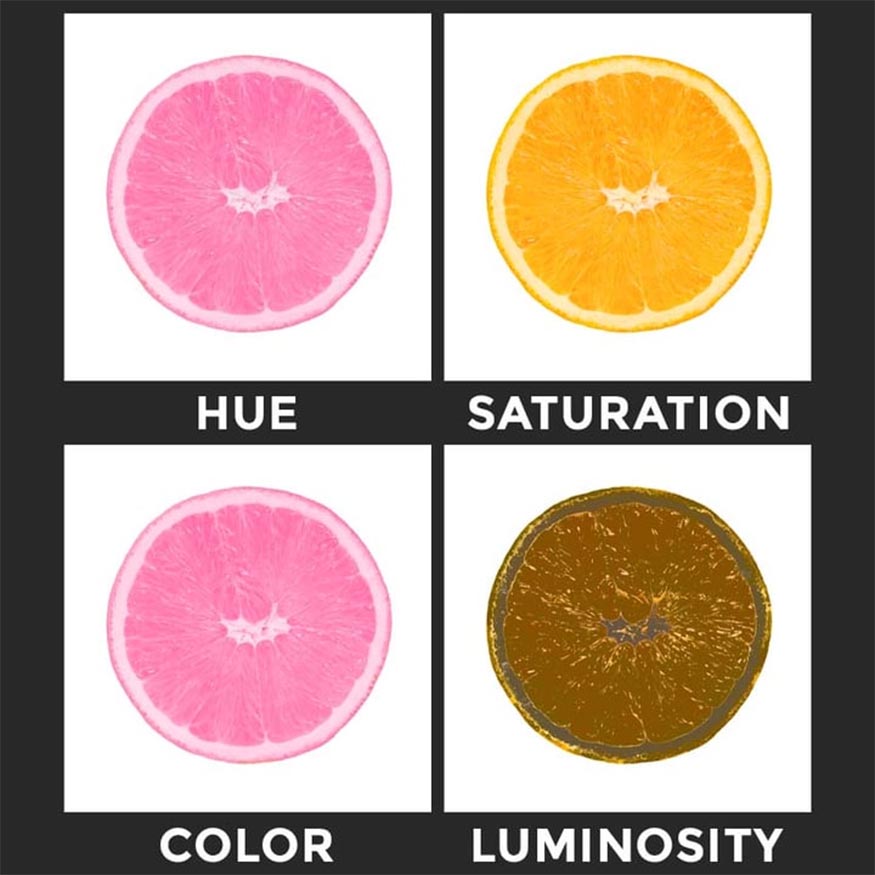
You can then choose one of the Blending Modes: Color, Hue, Saturation, or Luminosity. The Color mode is the default setting that will change both the hue and saturation. Setting the Hue mode will only affect the hue, Saturation will only affect the saturation, and Luminosity will only match the brightness of the original color to the brightness of the new color, while hue and saturation will not be affected.
If you want to use Photoshop to replace one color with another, you should choose Color, and in most cases, this will be your best choice.

Here are some examples of how to change colors in Photoshop. Take a look at the examples below to see more clearly how to use Photoshop to replace colors using brush blending modes:
Step 4
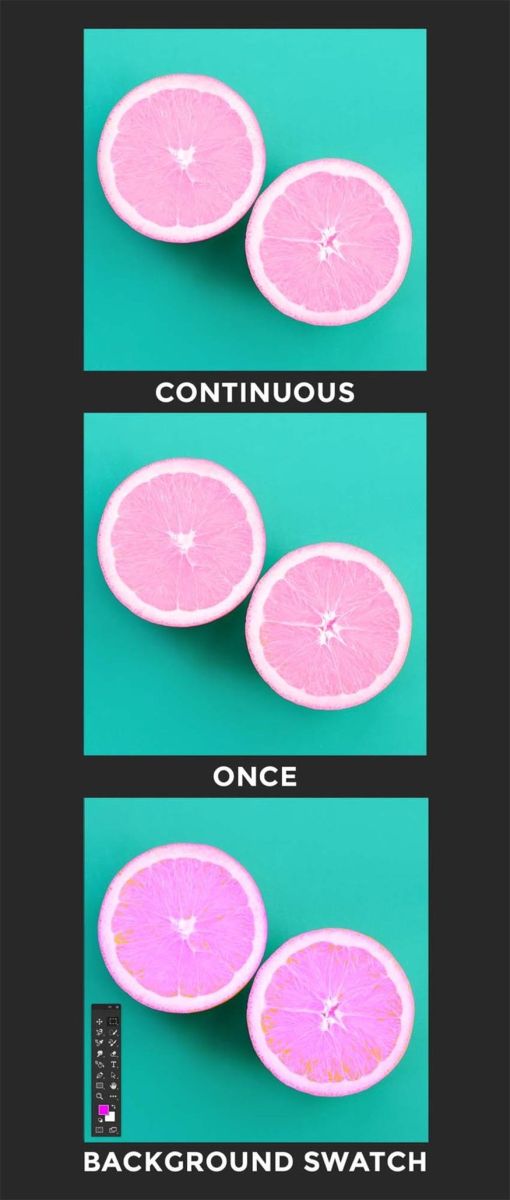
You continue to select Sampling and you can choose one of the following 3 options: Continuous, Once and Background Swatch.
Continuous Sampling will help you find the color you are painting on, Once Sampling will take the color from the original point of the brush, and Background Swatch will only paint on areas that match your background color.
Step 5
Set Limits to control the "spread" of the color. This option helps you set the boundaries of the areas where it can affect the color.
Contiguous will only affect the sampled pixel area where the crosshair of the brush you are using is located. It will not change the color of adjacent areas that match the same color.
Discontiguous will change the color of adjacent areas to the appropriate sampled color up to the spread of the crosshair boundary.
Find Edges will find edges in your image and will stop when it gets close to that edge. The color change will only affect the edges.
In SaDesign's experience, in most cases, Contiguous will be the best option you can choose to use.

Step 6
This is the tool used to select all the areas with the color you want to select, the color range will usually fluctuate between 0 - 255. Choose the Tolerance setting to be able to control the similarity of the color to your sampled color.

3.How to use Brush in Color Replacement
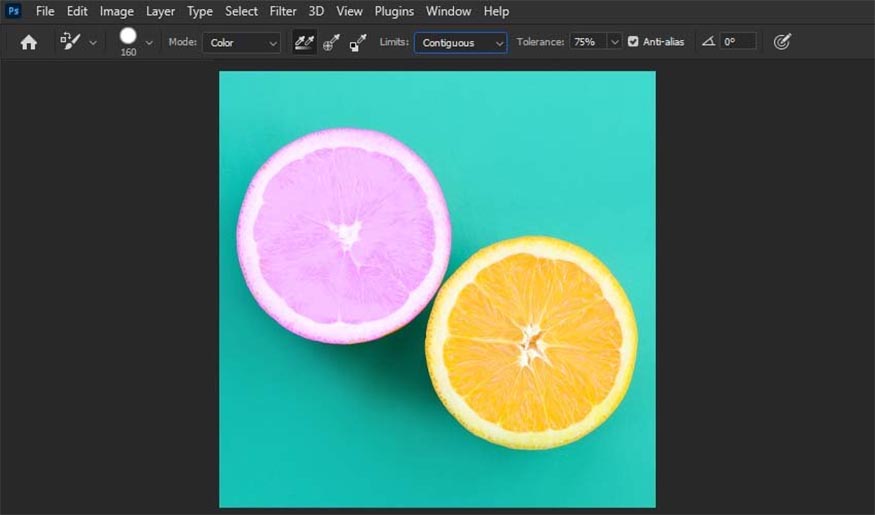
To replace one color with another in Photoshop, you need to set the following settings:
Brush Size: 160
Mode: Color
Sampling: Continuous
Limits: Contiguous
Tolerance: 75%
Then you will just need to paint on the areas where you want to change the color of the image you want.
Above are the details on how to use the Color Replacement tool in Photoshop that SaDesign wants to share with readers. Try out different settings on your photos to better understand which settings will be suitable for your photos. Hopefully, this article will help readers create unique and attractive photos.

Installation and support contact information:
🏡 SADESIGN Software Company Limited
📨 Email: phamvansa@gmail.com
🌍 Website: https://sadesign.ai


.png)


