Best Selling Products

Adobe Photoshop Copyright - Full App
120 USD

Copyright Adobe Lightroom Account
59 USD

Capcut Pro 1 Year
39 USD

Upgrade Genuine Office 365
49 USD

Adobe Premiere Pro Account
99 USD

ChatGPT Plus Account (GPT-4)
16 USD

Upgrade genuine Capture One account
120 USD

Genuine Adobe Illustrator account
99 USD

Genuine Cheap Canva Pro
39 USD

Autodesk All App Account Copyright
120 USD

Freepik Premium Account
59 USD

MidJourney Account
29 USD

Upgrade Duolingo Super
29 USD

Plugin Retouch4me
69 USD

Windows 10 & 11 Pro Key
36 USD
How to Improve Colors Using Camera Calibration Profiles in Lightroom
Nội dung
Color Profiles in Lightroom
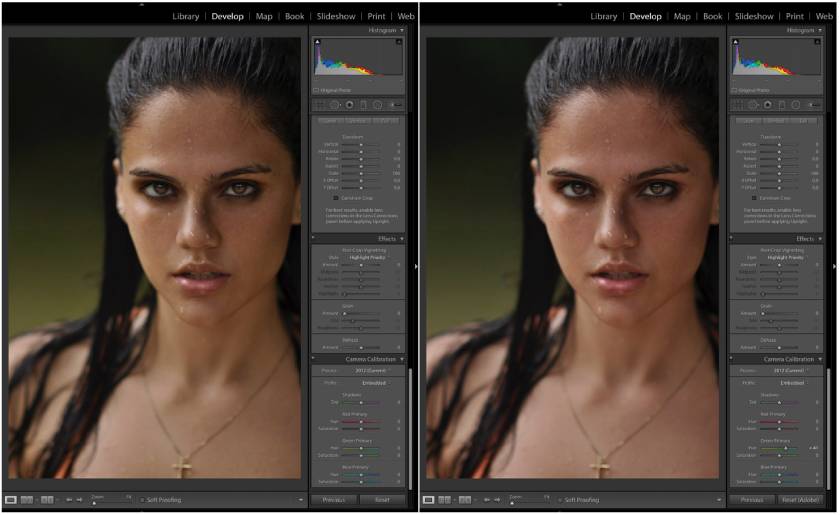
If you go to the Camera Calibration panel in Lightroom and look at the Profile menu, you'll find a list of your camera's available palettes. The options you have seen properties of the camera used to take the picture. White black configured is only available for newer cameras. This is the option shown in Lightroom for taking pictures with Canon EOS cameras. The profiles in the red square simulate the Camera Style photo collaboratively. The other profiles are Adobe Standard (available for all cameras) and these come with a set of VSCO presets that I purchased.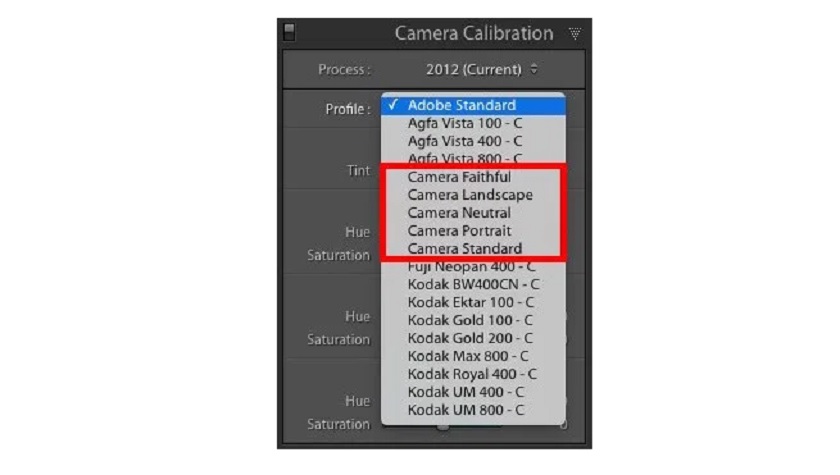 Some people work on end-to-end proposals in the Lightroom development module. That is, you start at the same in the Basics panel and work your way down to Camera Calibration. The only problem is that the Color Profile is one of the most important settings in Lightroom. I suggest you go to the Camera Calibration panel before you do anything else and select the profile you want to use first. To see why, select portrait in Lightroom, go to the Camera Calibration panel, and select the Portrait profile (Fujifilm users can use the Camera Pro Neg. Hi setting). Take a look at the digital color skin. Now change the profile to Landscape (or Velvia for Fujifilm). See the difference generated tones? Which one looks more natural? This is why it is important to set up the profile initially.
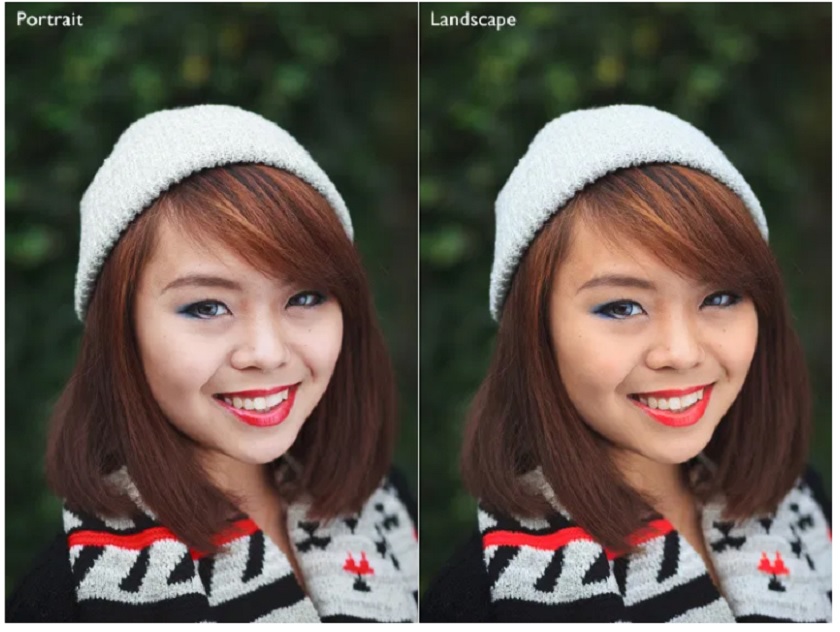
Monochrome color profiles
Most cameras come in some black and white (or monochrome) configuration. Again, they're designed for JPEG shooters and aren't of much practical use to Raw users. The best way to convert a photo to black and white in Lightroom is to go to the Basic Control Panel and set the Treatment to Black & White.Color Profiles and White Balance
Color profiles work in conjunction with your camera's White Balance settings to control the colors in your photos. For example, if you're shooting portraits, you can configure them to Portrait and White Balance to Cloudy to give your portraits a pleasantly warm color gamut. Just like the color profile, if you use the Raw format, you can set the White Balance in Lightroom. This allows you to decide how exciting or warm you want your photos to be in their infancy.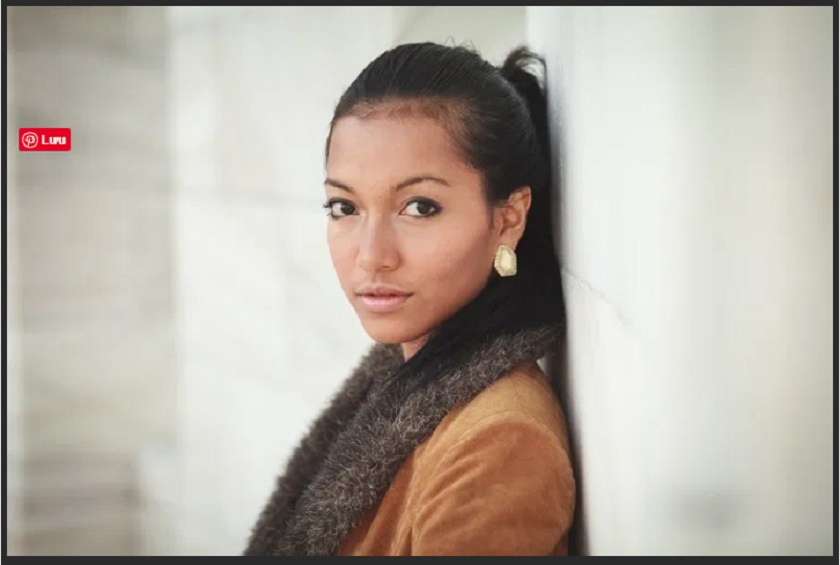
Color Profiles and Develop Presets Lightroom
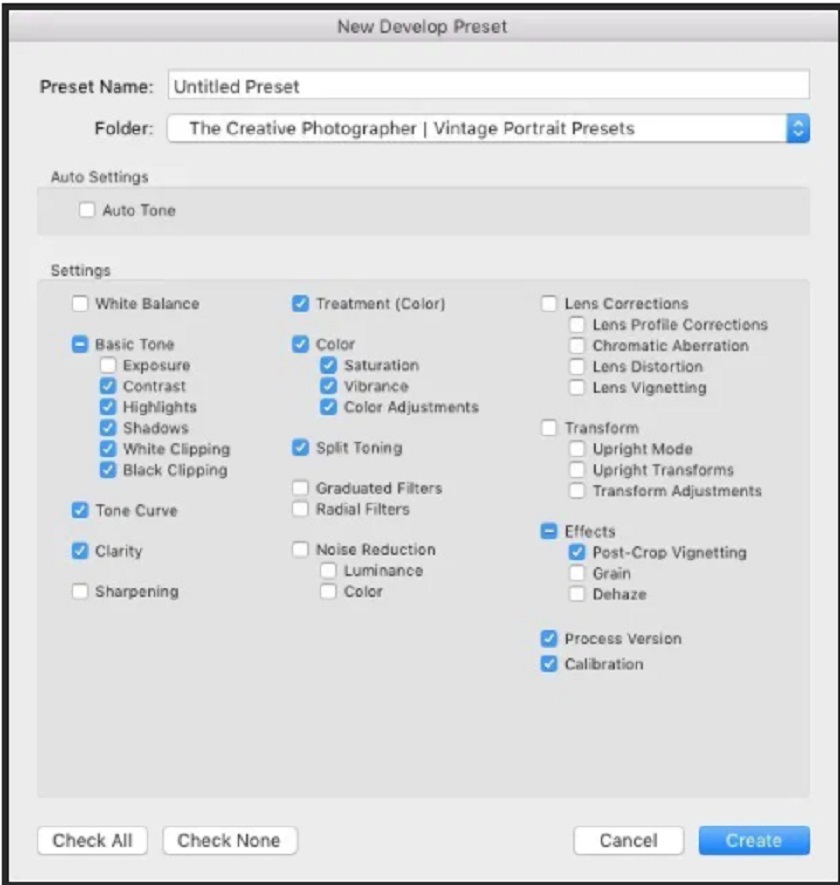
Most cameras have less than ten color profiles. This doesn't seem like much, especially compared to the variety of films made available to photographers 20 years ago. But you can create your own custom color profiles using Lightroom. The way to do this is to create a Develop Preset. Let's say you like your camera's Portrait color profile but want less saturated colors. In this case, you can create portraits in Lightroom, using Vibrance or Saturation settings to reduce the intensity of the colors. You can also adjust the saturation setting in the HSL / Color / B&W panel. Then create a new Develop Preset to save those settings and call it Portrait Preset.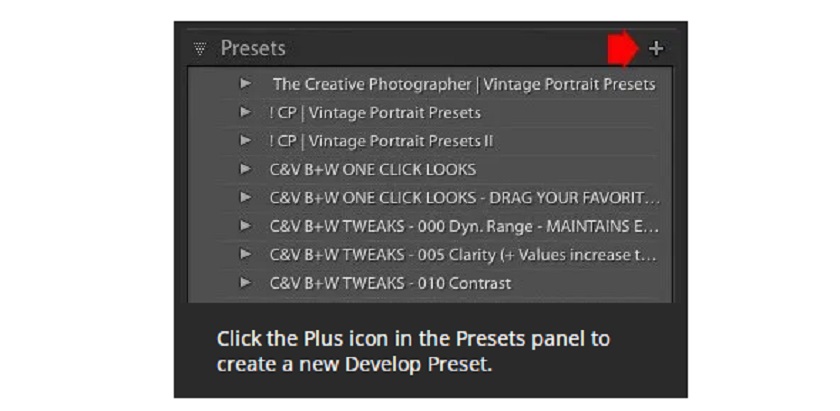
 You can now apply the preset to any image you like by going to the Presets panel available in the Develop module and clicking on it. For example, I developed the following portrait by adjusting the HSL / Color / B&W panel and the Tone Curve panel.
 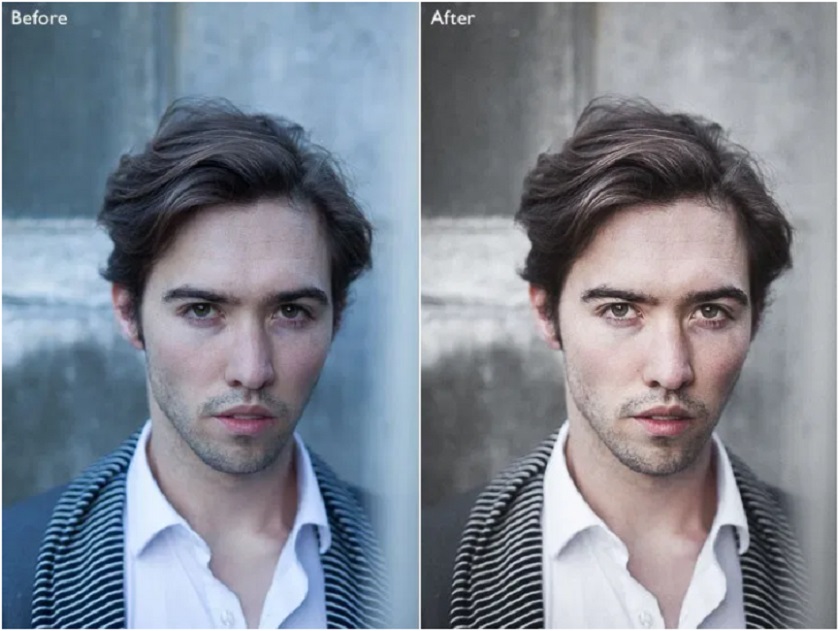 Once you get the hang of using Lightroom's Tone Curve and the HSL/Color/B&W panel to control the colors, you can create some very nice presets that you can use on your photos. In addition, you can leverage the knowledge of other photographers and purchase Development Presets that others have created. To better understand how to use the camera calibration configuration in Lightroom, you can immediately refer to the video tutorial by Anita Sadowska, a Dublin-based fashion photographer below. She shares her workflow for getting the most out of the camera's colors. Topics covered in this video include: Camera Correction Tool, Lens Correction, Profile Correction, Curve Adjustment, as well as duplicating layers in Photoshop to compare results. https://www.youtube.com/watch?v=kxMSU8QLtNQ Anita demonstrates how changing color profiles can have a dramatic effect on the tone of a photo, while shedding light on what Edit Profiles can be used to correct distortion or vignetting. As an experienced photographer using both Nikon and Canon bodies, Anita explains which settings produce the best results for her. You can be judged on the owner of the Color Profile depends a lot on your work personally. If you use the JPEG format, both the profile color and the White Balance setting determine how the colors in your image appear. So it's really important to have both settings as soon as you take the picture. But if you're like most photographers and you shoot Raw, you can leave that decision up to post-processing. You can even go further, using Lightroom's color checker tools to change the colors in your photos. If you have any questions asked about any of these, feel free to let me know in the comments section below.


VIP Products


Best Selling Products
Adobe Photoshop Copyright - Full App
120 USD
Copyright Adobe Lightroom Account
59 USD
Capcut Pro 1 Year
39 USD
Upgrade Genuine Office 365
49 USD
Adobe Premiere Pro Account
99 USD
ChatGPT Plus Account (GPT-4)
16 USD
Upgrade genuine Capture One account
120 USD
Genuine Adobe Illustrator account
99 USD
Genuine Cheap Canva Pro
39 USD
Autodesk All App Account Copyright
120 USD
Freepik Premium Account
59 USD
MidJourney Account
29 USD
Upgrade Duolingo Super
29 USD
Plugin Retouch4me
69 USD
Windows 10 & 11 Pro Key
36 USD