Best Selling Products
Instructions on how to use Quick Selection Tool in Photoshop for beginners
Nội dung
- 1. Introduction to Quick Selection Tool
- 2. Compare Quick Selection Tool with similar tools
- 3. The simplest way to use Quick Selection Tool
- 3.1 Select the Quick Selection Tool
- 3.2 Create a selection with the Quick Selection Tool
- 3.3 Add selection
- 3.4 Reduce selection
- 3.5 Customize brush stroke size
- 4. Tips for using Quick Selection Tool effectively
- 4.1 Choose high contrast photos
- 4.2 Use a simple background
- 4.3 Fine-tune settings
- 4.4 Combine with other tools
- 4.5 Adjust the cursor size
- 4.6 Adding and subtracting selections
If you are a designer, you may have heard of the term "Quick Selection Tool" in Photoshop. This is a tool that helps you quickly select parts of an image without having to be meticulous about every detail. With the ability to automatically determine the boundaries of objects, the Quick Selection Tool becomes an indispensable companion for designers. In this article, Sadesign will help you learn how to use the Quick Selection Tool simply for beginners.

If you are a designer, you may have heard of the term "Quick Selection Tool" in Photoshop. This is a tool that helps you quickly select parts of an image without having to be meticulous about every detail. With the ability to automatically determine the boundaries of objects, the Quick Selection Tool becomes an indispensable companion for designers. In this article, Sadesign will help you learn how to use the Quick Selection Tool simply for beginners.
1. Introduction to Quick Selection Tool
The Quick Selection Tool is one of the standout features of Adobe Photoshop. It helps users create selections quickly and efficiently, using a scanning mode to detect the edges and borders of objects in an image.
The Quick Selection Tool works by recognizing color and texture, allowing you to simply click and drag your mouse to "draw" over the area you want to select. This makes it easy to select complex objects without having to use traditional selection tools like the Lasso Tool or Pen Tool.

2. Compare Quick Selection Tool with similar tools
In Photoshop, there are many different tools for creating selections, each with its own advantages and disadvantages. Let's compare these tools right now.
3. The simplest way to use Quick Selection Tool
The Quick Selection Tool helps you quickly create precise selections with just a few clicks. Here is a detailed and easy-to-understand guide to help you use this tool most effectively.
3.1 Select the Quick Selection Tool
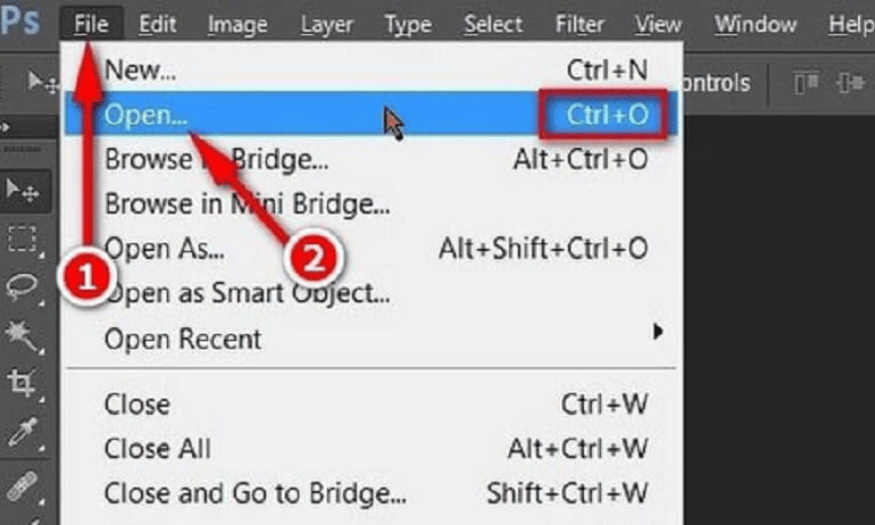
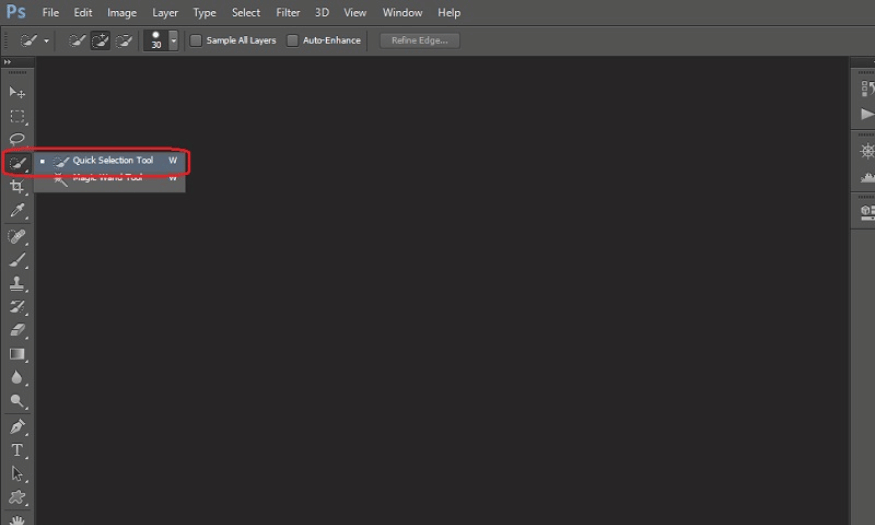
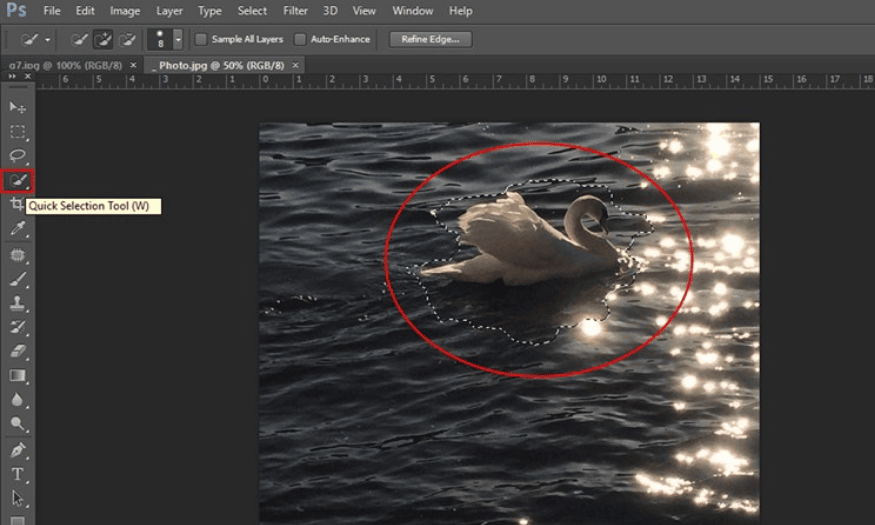
First, to get started, you’ll need to open an image in Photoshop. Once you’ve opened your image, find the Quick Selection Tool on the toolbar – it’s usually the fourth one from the top.
You can click on the tool's icon or quickly use the shortcut W to select it. Immediately, your mouse cursor will turn into a circle with a plus sign in the middle, ready to make a selection.
3.2 Create a selection with the Quick Selection Tool
There are two main ways to use the Quick Selection Tool:
Method 1: Click on the area you want to select, just like when using the Magic Wand Tool. However, this method does not take full advantage of the Quick Selection Tool's capabilities.
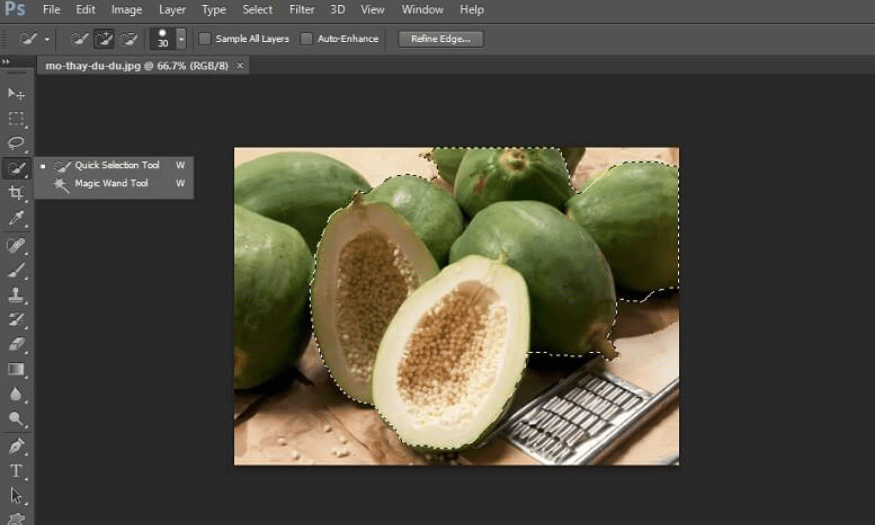
Method 2: Hold down the mouse and drag over the area you want to select. This is similar to painting, allowing Photoshop to automatically recognize and select areas based on color and texture. This is the most effective way to take advantage of the tool's power.
3.3 Add selection
By default, the Quick Selection Tool is in add selection mode. The mouse pointer will appear as a circle with a plus sign. If you want to switch to add selection mode when the tool is not in this state, simply hold down the Shift key while dragging the mouse.
3.4 Reduce selection
To delete part of a selection, hold down the Alt (Windows) or Option (Mac) key. This will cause your cursor to display a minus sign. Simply click or drag over the unwanted area to delete the selection. When you're done, switch your cursor back to add selection mode if necessary.
3.5 Customize brush stroke size
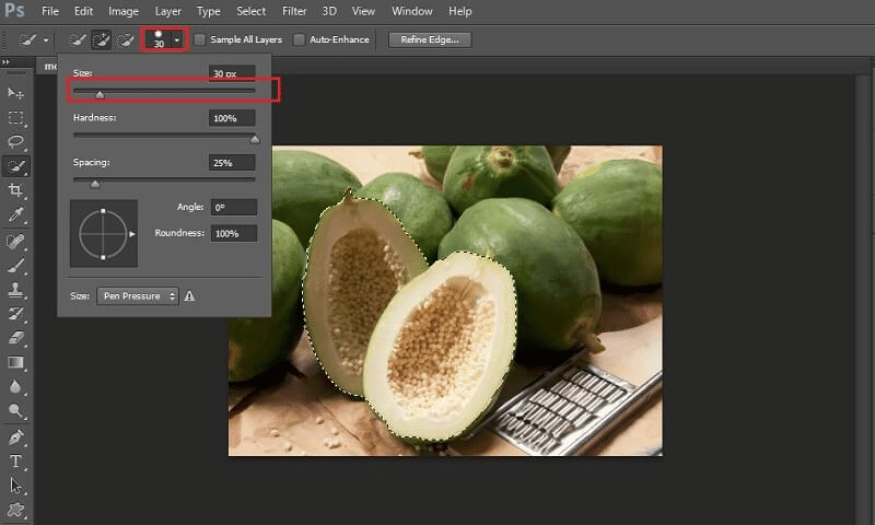
While using the Quick Selection Tool, you may need to adjust the brush size to fit the area you want to select. There are two ways to do this:
Click the small icon on the Options bar to open the adjustment dialog and change the brush size.
Use shortcuts: press [ to zoom out and ] to zoom in on the brush size.
For areas with a lot of detail, using small brush strokes will help you achieve more precision.
4. Tips for using Quick Selection Tool effectively
Applying some tips when using can help you optimize your selection and achieve the most accurate results. Below are the necessary notes for you to master this tool:
4.1 Choose high contrast photos
The Quick Selection Tool works best on objects that have a strong contrast to their background. Making sure the color of the object is more prominent than the background will help the tool recognize the edges more easily. If your image has low contrast, consider adjusting the brightness and contrast before you begin.
4.2 Use a simple background
When editing images with complex backgrounds, it can be difficult to determine the selection area. To overcome this, you can try masking the background by creating a solid color layer. This not only makes it easier for the tool to recognize the object, but also improves the accuracy of the selection.
4.3 Fine-tune settings
In the Options panel, the Quick Selection Tool offers a variety of settings that allow you to adjust the sensitivity and brush size. Experiment with different options to find the best settings for your particular photo. This will help you make more precise selections for your editing needs.
4.4 Combine with other tools
While the Quick Selection Tool is useful, it isn’t always perfect. Sometimes you’ll need to use other selection tools like the Magic Wand Tool or the Lasso Tool to complete your selection. This combination will help you handle more complex situations and ensure you get the results you want.
4.5 Adjust the cursor size
The Quick Selection Tool allows you to resize the mouse pointer to fit the selection area. You can press the [ key to zoom out and ] to zoom in. This will make it easier for you to select large or small areas depending on your needs.
4.6 Adding and subtracting selections
To enhance your selection, you can hold Shift and click to add to your current selection, or hold Alt (Windows) or Option (Mac) and click to subtract from unwanted areas. This technique is useful when working with complex details.
Quick Selection Tool is a useful tool for beginners in Photoshop. When you understand how to use this tool, you can improve your photo editing skills. Let's create great publications with Quick Selection Tool and don't forget to follow Sadesign to discover more useful information!


