Best Selling Products
Make a Bootleg Vintage T-shirt in Photoshop
Designing T-shirts with software is quite familiar today, you can completely design a T-shirt for yourself very simply with a few steps. The following article SaDesign will introduce to readers ways to make classic Bootleg T-shirts in Photoshop extremely quickly in a few minutes!

First, you need to go to Photoshop, then set up the canvas, for the t-shirt design you should use a size of 10 x 12 inches with a resolution of 300. Then add the text using two fonts Handstood Ultra Black and Rising Star.
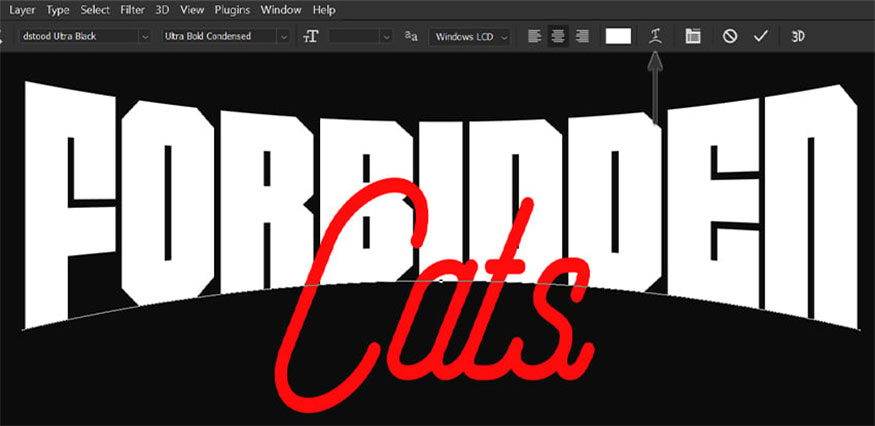
Add a curve to the top font using the Warp Text settings found in the Text tool right in the top options bar. As shown below we set it to Style Bulge with Bend -13%.
2. Step 2
In this step, we will add a gradient effect to both paragraphs. First, we need to add a setting called “Forbidden”, you can see this setting in the gallery below:
.jpg)
3. Step 3
Next, let's add a chrome effect to "Cats". Then go to the gallery to see the settings:
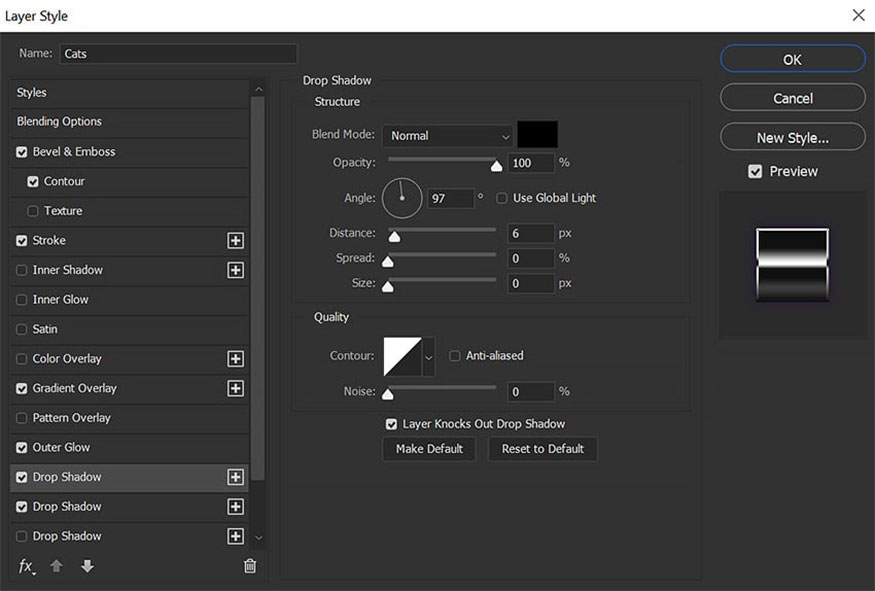
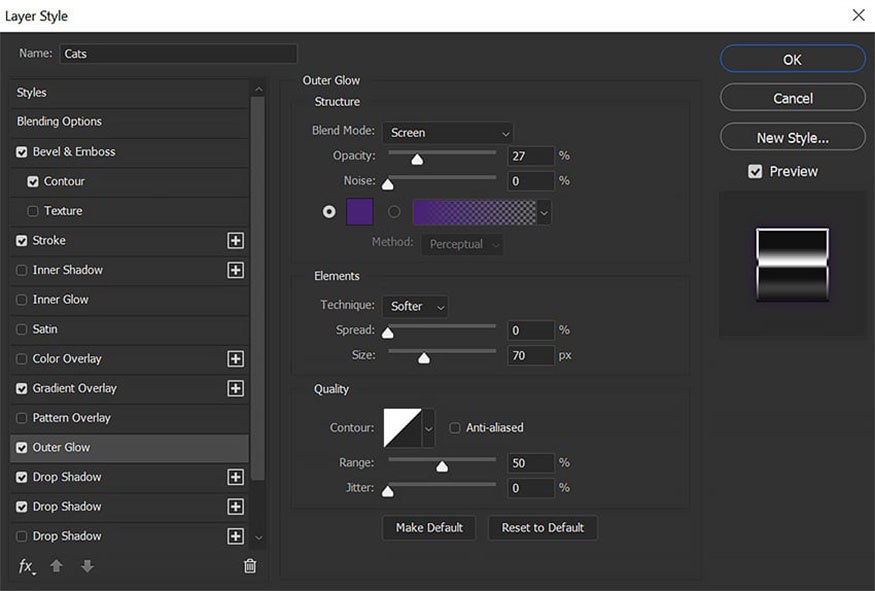
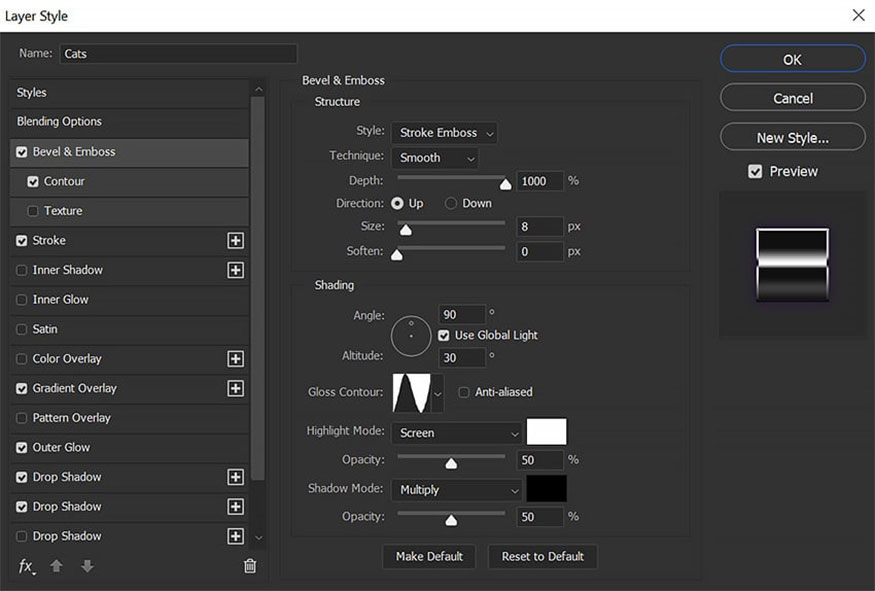
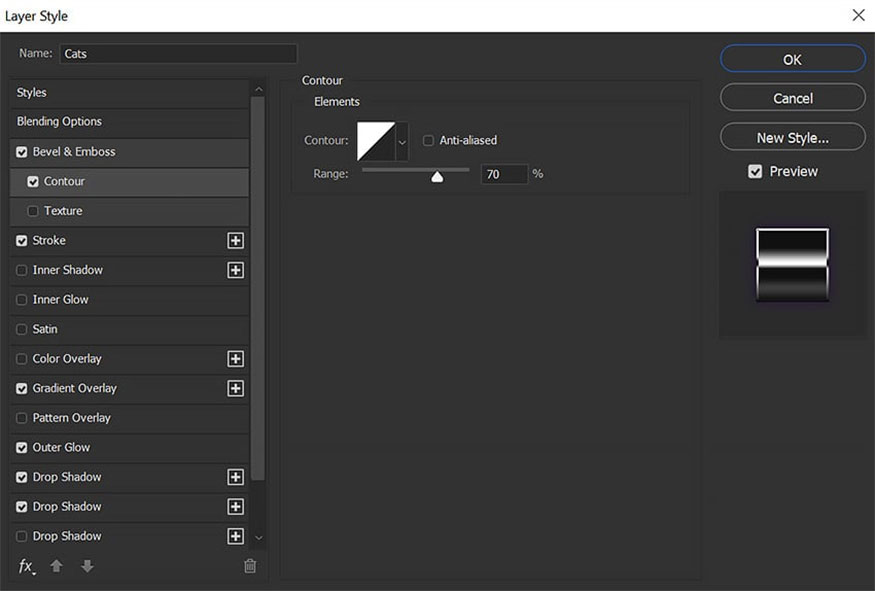
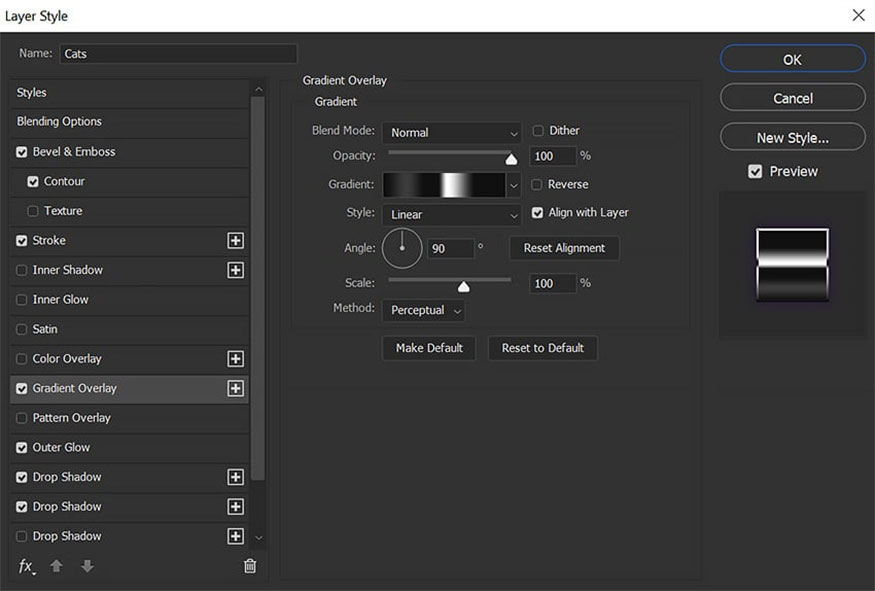
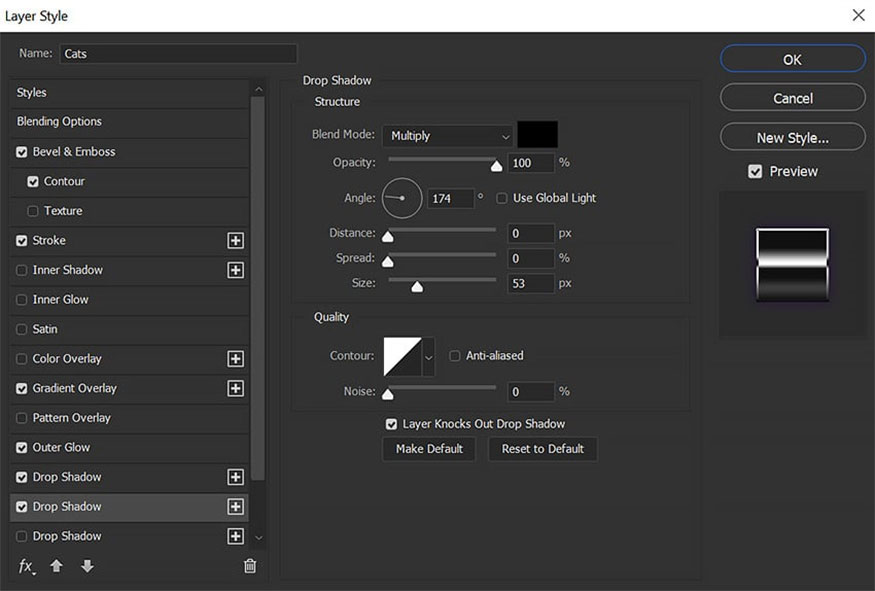

4. Step 4
Start by extracting, then placing objects onto the shirt using the Select Subject tool and Layer Masks. Start with the largest subject, which in this example is the panda. Try placing other objects around it, hiding the cut edges behind other images.
.jpg)
Add a purple Outer Glow layer style to all the objects with the color code #492276. Then group all the objects together, each with a Color Balance layer set to Green -100 and Blue +100 in the group. This should give all the images a purple tint.
5. Step 5
Create a New Layer below all current layers. Set the Foreground Color to purple #382763 and the Background Color to black. Go to Filter => Render => Clouds.
.jpg)
Add a Layer Mask and mask out the clouds from the edges of the canvas, leaving them just behind the subject.
6. Step 6
Add some lightning bolt graphics behind the objects. Note that these should be PNG images to simply place them in the design. Lightning bolts are a common motif on retro 90s shirts.
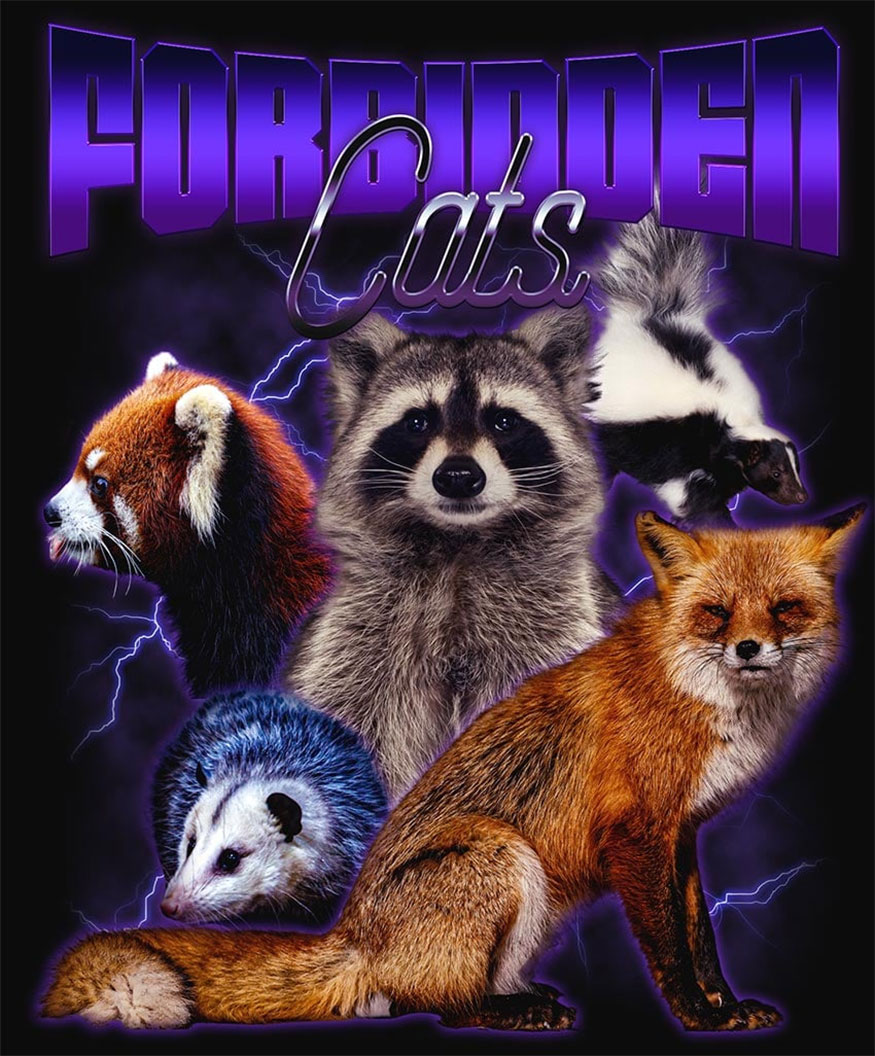
7. Step 7
To adjust the color and contrast of your design, right-click and go to Merge Visible => Filter => Camera Raw.
You can make overall brightness and contrast adjustments in Light, add a vignette in Effects, and use Calibration to create a two-tone blue and orange effect like the example.
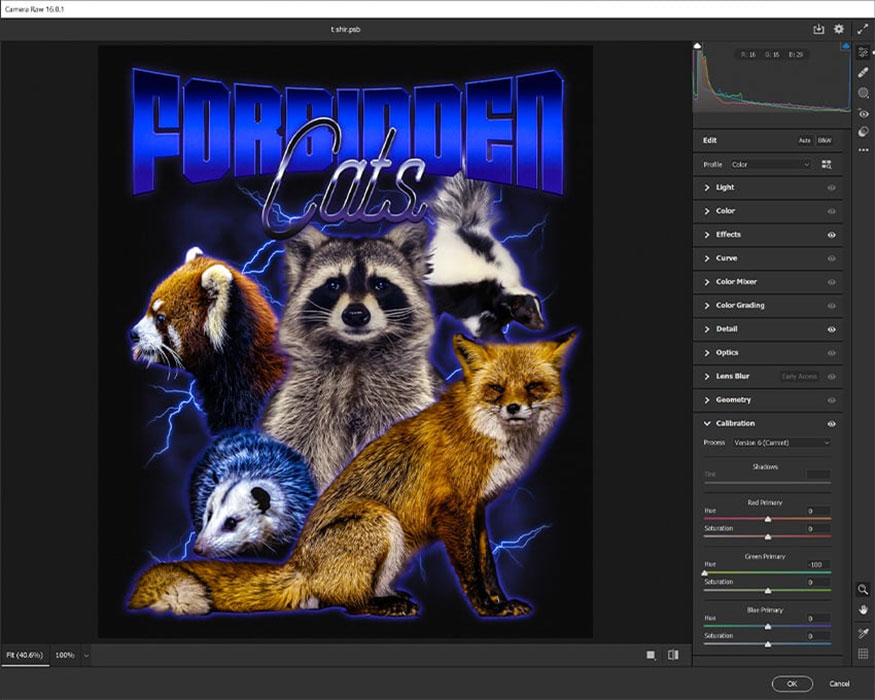
This works to simplify the colors, while also helping to give the t-shirt a 90s feel.
Below, set the Blue Primary Hue to -100.
So with just a few simple steps, we have completed creating a classic t-shirt design. And this is the result we get, very beautiful and retro right?
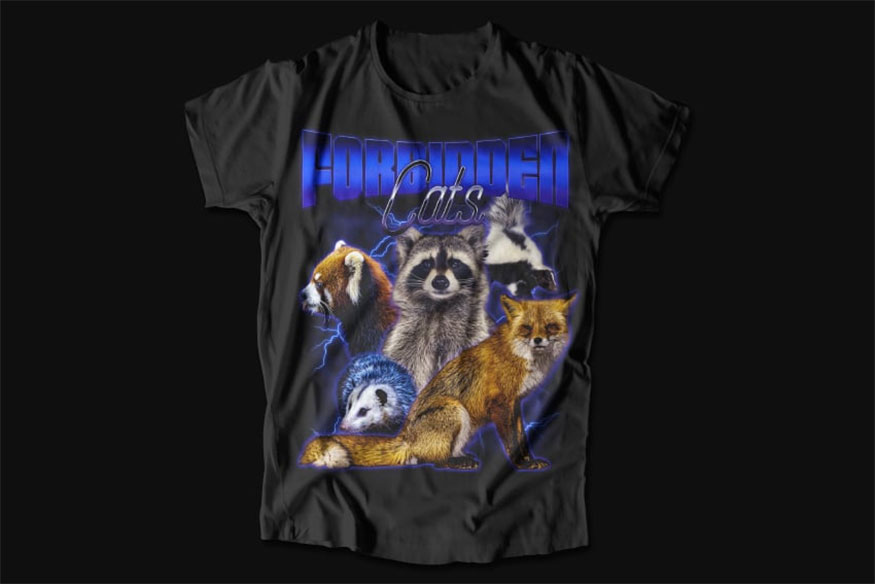
What are you waiting for? Start designing a classic retro t-shirt to refresh your wardrobe. Wish you success with the instructions on how to make a classic Bootleg t-shirt in Photoshop that SaDesign introduced above. Don't forget to follow us to continuously update useful tips and ways to work effectively with Photoshop software!
-----------------------------------------------------------------------------
Installation and support contact information:
🏡 SADESIGN Software Company Limited
📨 Email: phamvansa@gmail.com
🌍 Website: https://sadesign.ai


.png)
.jpg)


