Best Selling Products

Upgrade Genuine Office 365
49 USD

Plugin Retouch4me
69 USD

Adobe Photoshop Copyright - Full App
120 USD

Autodesk All App Account Copyright
120 USD

Windows 10 & 11 Pro Key
36 USD

Upgrade genuine Capture One account
120 USD

Genuine Cheap Canva Pro
39 USD

Copyright Adobe Lightroom Account
59 USD

Upgrade Duolingo Super
29 USD

Adobe Premiere Pro Account
99 USD

Freepik Premium Account
59 USD

Genuine Adobe Illustrator account
99 USD

MidJourney Account
29 USD

Capcut Pro 1 Year
39 USD

ChatGPT Plus Account (GPT-4)
16 USD
Photoshop Background Removal Tips: Keep Every Photo Sharp
Nội dung
- 1. Tools and Support Features in Photoshop
- 1.1. Main Background Separator Tool
- 1.2. New Support Features In The New Version
- 1.3. Advantages and Disadvantages of Each Tool
- 2. Things to note when choosing photos to separate the background and the quality of the photo after separating the background
- 3. Steps to separate the background with the Lasso Tool
- 4. Steps to separate the background with the smart tools Object Selection Tool and Quick Selection Tool
- 5. Some Common Errors and How to Fix Them
- 5.1. Bad Border and Noise Error
- 5.2. Missing Necessary Details
- 5.3. Color Error After Background Separation
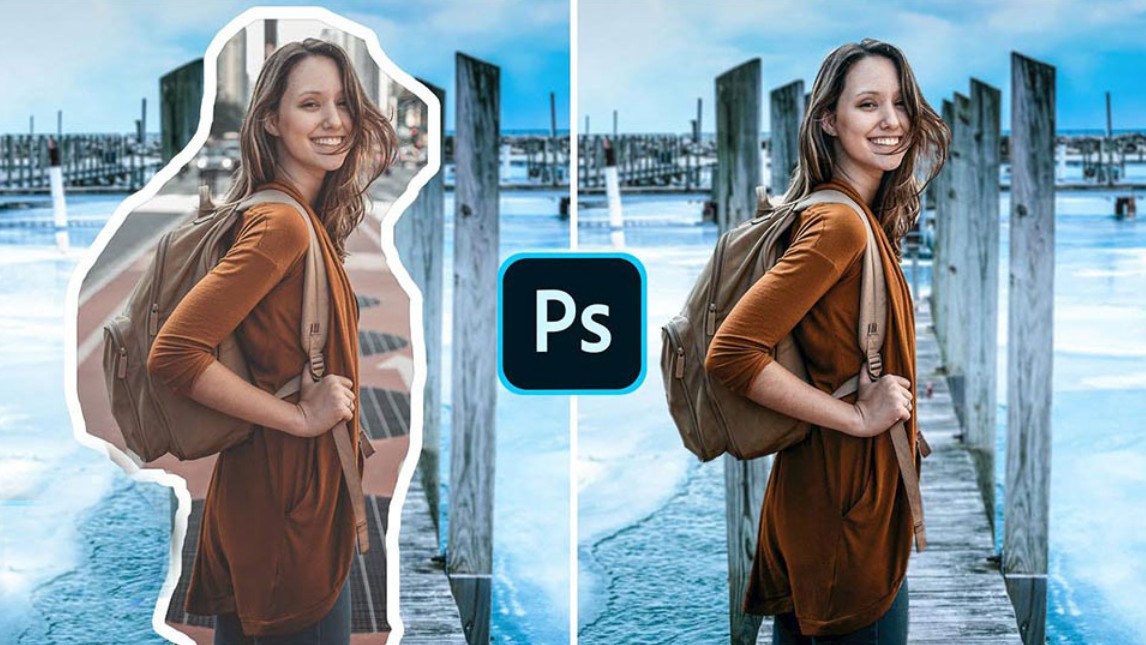
Discover the in-depth secrets that will help you accurately remove backgrounds in Photoshop while keeping the image sharp. This article shares detailed practical steps that will help you achieve perfect results for every design work.

Photoshop – Adobe’s leading photo editing software has been asserting its position thanks to countless superior tools supporting the process of editing and processing photos. One of the popular and important operations is background separation. Background separation not only helps create professional photos, but also opens up many creative possibilities in design such as combining with other backgrounds, creating lighting effects or creating unique designs for advertising purposes, websites and many other fields. This article will guide you in detail on how to separate the background in Photoshop and point out important notes to ensure the best quality of photos after separation.
1. Tools and Support Features in Photoshop
To begin the process of background separation, the first thing you need to do is understand the tools available in Photoshop and how they support the process of selecting the object to be separated. Each tool has its own advantages and disadvantages and will be suitable for different types of images and different background complexity.
1.1. Main Background Separator Tool
Magic Wand Tool: This tool helps select areas of similar color with just one click. However, it is prone to distortion when the image has many shades, the color gradually changes from the background to the object.
Quick Selection Tool: This tool allows you to “draw” selections more naturally thanks to its ability to automatically recognize the outlines of objects. The Quick Selection Tool is often used for images with clear contrast between the object and the background.
.png)
Pen Tool: If you need precise and detailed selections, especially with complex curves, the Pen Tool is the ideal choice. It requires skill and patience, but the results are smooth and professional.
Lasso Tool: The Lasso Tool and its variants (Polygonal Lasso, Magnetic Lasso) are useful for selecting irregular areas. This tool allows you to freely draw arbitrary shapes, but requires manual dexterity and precision.
1.2. New Support Features In The New Version
With the development of technology, Adobe constantly improves Photoshop with smart features that support background separation such as:
Select Subject: This feature automatically identifies the main subject in the photo with just one click, saving time and reducing manual selection effort.
Select and Mask: An advanced interface that combines selection and edge manipulation tools. This feature allows you to adjust selection edges smoothly, fade in, and naturally.
Refine Edge: Especially useful for objects with fine details like hair and fur, this feature helps sharpen edges after creating an initial selection.
.png)
1.3. Advantages and Disadvantages of Each Tool
Each tool has its own strengths:
The Magic Wand Tool is great for photos with monochrome backgrounds, but can be difficult when the colors are varied.
The Quick Selection Tool is ideal for high-contrast photos, saving time compared to hand-drawn tools.
Pen Tool ensures high precision but requires users to have thorough drawing experience.
The Lasso Tool allows flexibility in creating selections of arbitrary shapes, but can be time consuming if not mastered.
2. Things to note when choosing photos to separate the background and the quality of the photo after separating the background
Before learning how to separate the background in Photoshop, you need to understand the notes to choose the image to help the background separation tool most effectively, avoiding smudging the edges. Besides, it also ensures the best quality of the subject after separating the background, avoiding being too blurry, leading to a decrease in design quality.
First, to ensure that the background removal tool is effective and can be used with the quick object selection features, you should look for images with a contrasting background color that is clearly separate from the subject. If the color of the object is light, the background should be dark and vice versa. This is because Photoshop's tools work on the basis of the color difference between adjacent pixels to determine the subject to select. Therefore, if the subject and the background are similar in color, the effectiveness of the tool will not be good. In these cases, you will almost certainly have to remove the image background manually.
.png)
In addition, if the quality of the image for background separation is too low, the number of pixels is too low, which also leads to less effective background separation. Not only that, low image quality also leads to relatively low image quality after background separation, affecting the quality of the output design.
To fix this problem, if you use Google image search mode, select the tool button located near the search bar. In there, select the large image size so that Google only displays high-resolution images for you to choose from. However, if your design is used for a large media campaign, consider that your images may be copyrighted, leading to disputes and lawsuits.
Another way to get high-quality, copyright-free photos is to buy them from paid photo sites. These are all high-quality photos with popular layouts and themes used in design. In addition, after purchasing all of these photos, you will not need to worry about copyright issues because they have been certified by the seller. Shutterstock is currently the most popular photo selling website used by designers today.
.png)
3. Steps to separate the background with the Lasso Tool
The Lasso Tool is the simplest tool you can use to create a selection of a subject and separate the background. With 3 options of the tool, it will be suitable for many different background separation goals. The steps to use the Lasso Tool are:
Step 1: Open Photoshop and select File > Open. The file selection window will appear and you find the folder where the downloaded image is saved, select the image you want to remove the background from and press Open.
Step 2: After opening the selected image, select the noose-shaped icon on the toolbar. This is the Lasso Tool, you can quickly call it with the shortcut key L. You can consider choosing 1 of 3 types of features of this tool including:
Lasso tool: This tool is like a pen, you just need to hold the mouse and move along the edge of the subject.
Polygonal Lasso Tool: With this tool, you can create selections with straight lines. All you have to do is click to create vertex positions, then the tool will connect them together, very suitable for geometric subjects.
Magnetic Lasso Tool: This tool is like a magnet that automatically sticks to the edge of the subject. You just need to click close to the edge of the subject, then move the mouse until the selection covers the entire subject.
.png)
Step 3: After having the selection area, you look down below the Layer display area and select the square icon with a dot inside. This is the tool that helps create a mask for the photo. Your photo will now only have the subject and lose the background. On the photo layer section, there will be an image displayed with a black and white icon next to it, you double-click on that icon to bring up the Radius tool panel. You drag the Radius parameter to remove the excess edges and you're done.
.png)
4. Steps to separate the background with the smart tools Object Selection Tool and Quick Selection Tool
With the above selection method, instead of using the Lasso Tool in step 2, you can use 1 of the 3 tools below to help create smarter selections.
Object Selection Tool
This is a feature only available from Photoshop 2020. With this tool, with just one drag to circle the subject, the tool will automatically select the subject in the selected area. With this tool, creating a subject selection is very fast and convenient.
Quick Selection Tool
The Quick Selection Tool is a little different, instead of selecting the area, you will move the mouse over the subject so that the software can automatically recognize it based on the difference in pixel color. After using the appropriate tool to successfully create a selection, you can do the same steps as above.
5. Some Common Errors and How to Fix Them
During the process of background separation, you may encounter some common errors. Recognizing and handling these errors early will help you shorten editing time and achieve perfect results.
.png)
5.1. Bad Border and Noise Error
Jagged edges: When using tools that are not precise or not well-tuned, you may experience “jagged edges” on the edges of objects. In this case, use the feather feature in Select and Mask again or refine the edges with the Brush tool on the layer mask.
Noise in gradient background areas: If the background has complex details, the initial selection may be noisy, resulting in some areas not being selected correctly. Using the “Subtract from selection” tool or redrawing the faulty areas will help to handle this.
5.2. Missing Necessary Details
Losing small details: Some background removal operations can accidentally lose delicate details such as hair strands, clothing outlines, etc. To fix this, use the “decontaminate colors” feature and carefully adjust with the Brush tool on the mask.
Use the Undo tool: Don't hesitate to use the Undo function (Ctrl + Z) if you notice a mistake. The editing process may require several tries to achieve optimal results.
5.3. Color Error After Background Separation
Possible unwanted color fringing: After background removal, some objects may appear with different color fringing due to the strong contrast between the original image and the removed background. Use the “Refine Edge” tool to minimize this phenomenon.
Adjust the colors: When the subject is combined with a new background and the colors are not harmonious, try using adjustment layers to balance the light and color. This is an important step to ensure that the subject looks natural and does not “look out of place” in the new scene.
Through this blog, I hope you have grasped the process of separating the background in Photoshop in the most detailed and clear way. Practice regularly and constantly improve your skills to achieve more and more great results.


VIP Products


Best Selling Products
Upgrade Genuine Office 365
49 USD
Plugin Retouch4me
69 USD
Adobe Photoshop Copyright - Full App
120 USD
Autodesk All App Account Copyright
120 USD
Windows 10 & 11 Pro Key
36 USD
Upgrade genuine Capture One account
120 USD
Genuine Cheap Canva Pro
39 USD
Copyright Adobe Lightroom Account
59 USD
Upgrade Duolingo Super
29 USD
Adobe Premiere Pro Account
99 USD
Freepik Premium Account
59 USD
Genuine Adobe Illustrator account
99 USD
MidJourney Account
29 USD
Capcut Pro 1 Year
39 USD
ChatGPT Plus Account (GPT-4)
16 USD