Best Selling Products

Freepik Premium Account
59 USD

Windows 10 & 11 Pro Key
36 USD

Upgrade Duolingo Super
29 USD

MidJourney Account
29 USD

Genuine Adobe Illustrator account
99 USD

Capcut Pro 1 Year
39 USD

ChatGPT Plus Account (GPT-4)
16 USD

Adobe Photoshop Copyright - Full App
120 USD

Genuine Cheap Canva Pro
39 USD

Adobe Premiere Pro Account
99 USD

Plugin Retouch4me
69 USD

Upgrade genuine Capture One account
120 USD

Copyright Adobe Lightroom Account
59 USD

Upgrade Genuine Office 365
49 USD

Autodesk All App Account Copyright
120 USD
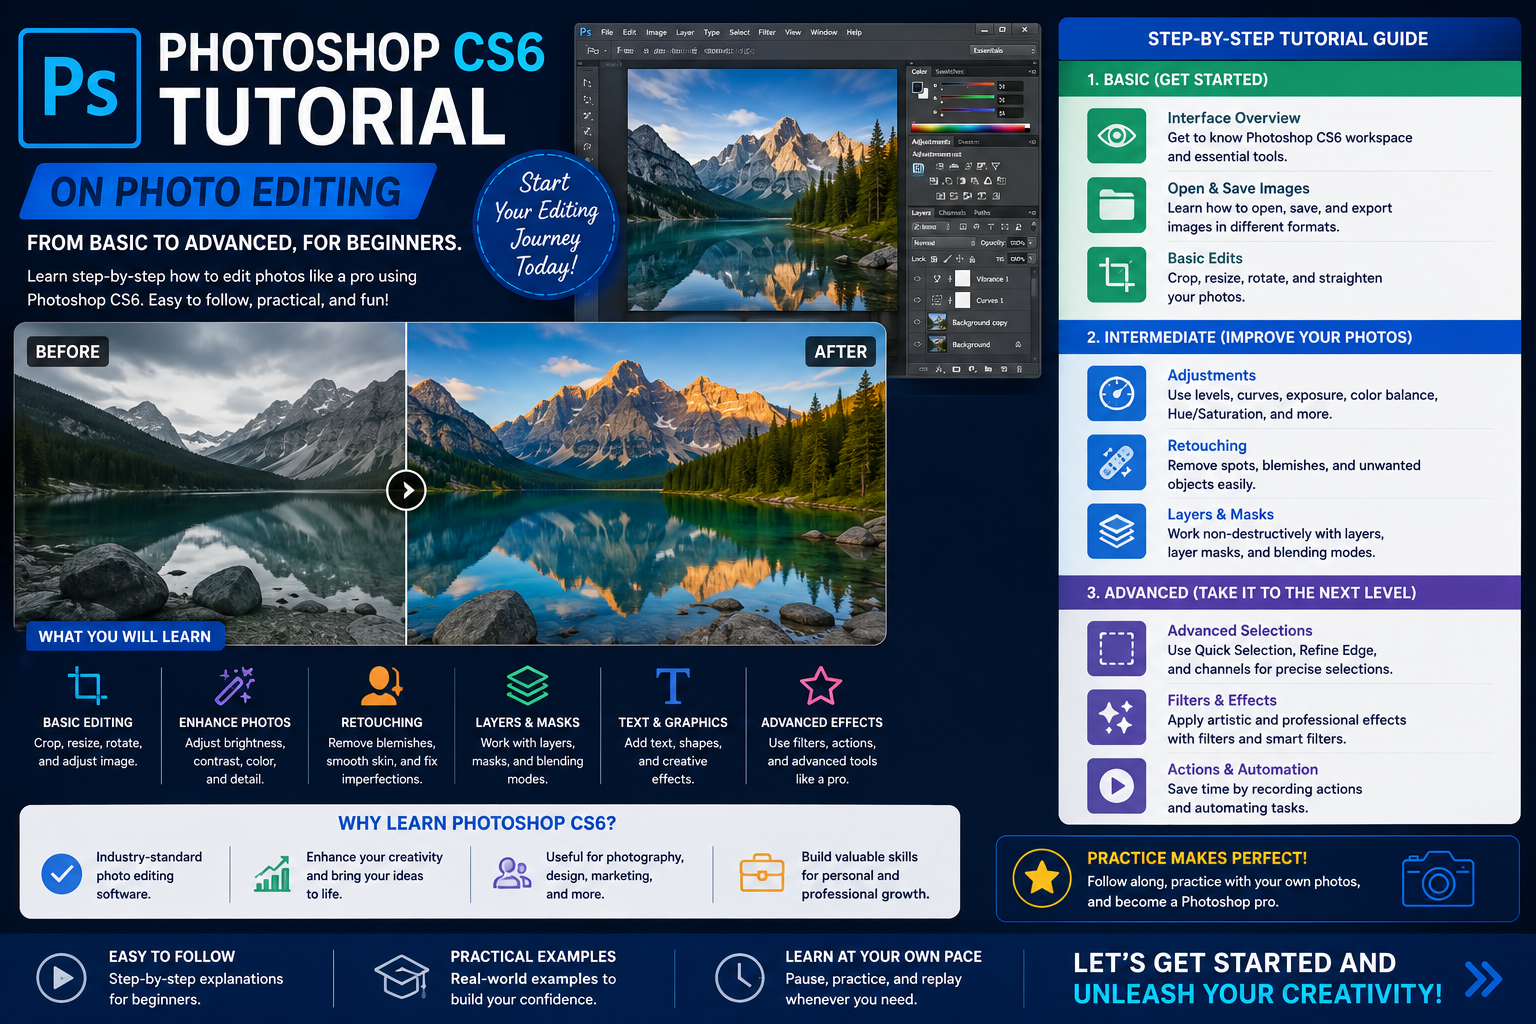
Photoshop CS6 tutorial on photo editing, from basic to advanced, for beginners.
Nội dung
- 1. Overview of the interface and initial setup in Photoshop CS6
- 1.1. Exploring the software's standard workspace
- 1.2. How to create a new image editing project
- 2. Basic data selection and merging tools
- 2.1. Mastering the Move Tool and the Crop Tool
- 2.2. Techniques for creating selections with the Marquee Tool and Lasso Tool
- 2.3. The groundbreaking power of the Magic Wand Tool and Quick Selection Tool
- 3. Intelligent management of image layers and filters.
- 3.1. Concept and Importance of Layers
- 3.2. Applying the unique Blend Mode blending modes
- 3.3. Using Layer Masks to Hide and Show Details
- 4. Instructions on using Photoshop CS6 for professional portrait photo editing.
- 4.1. Techniques for removing skin imperfections using the Healing Brush Tool
- 4.2. Naturally smooth skin without losing texture with Blur filter.
- 4.3. Reshaping facial contours using the Liquify tool
- 5. Methods for mastering lighting and color correction in photography.
- 5.1. Adjust contrast and highlights/dark areas using Curves and Levels
- 5.2. Managing color saturation through Hue/Saturation
- 5.3. Artistic Color Touch Techniques with Color Balance and Photo Filters
- 6. Appvip.ai - A reputable platform for software downloads and graphic resource optimization.
- 7. CONCLUSION
Discover the most detailed Photoshop CS6 tutorial for photo editing. Master professional cropping, restoration, and color matching tools for beginners.
1. Overview of the interface and initial setup in Photoshop CS6
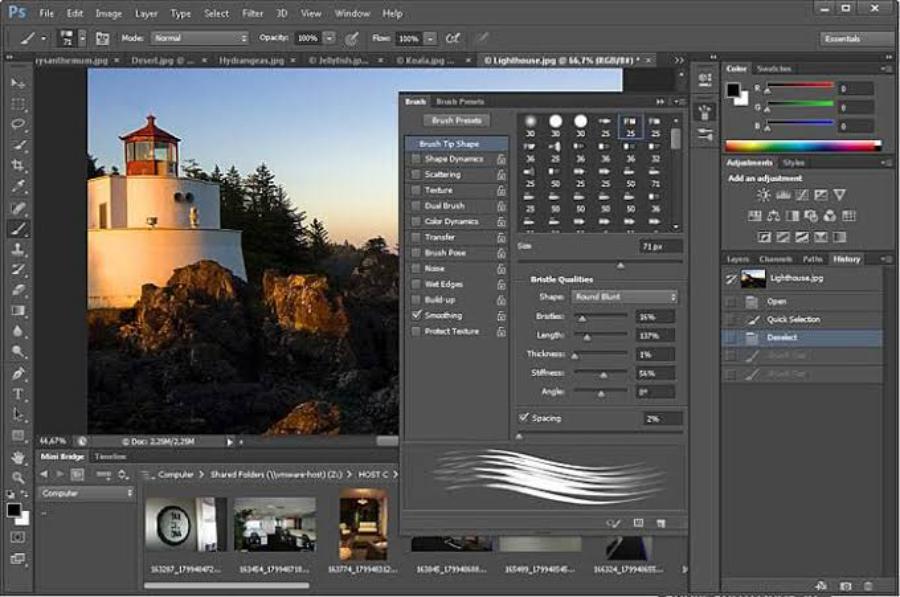
1.1. Exploring the software's standard workspace
The software's main workspace is divided into four core functional areas in a very organized manner. The Menu Bar is located at the top, containing all navigation and file management commands. Immediately below is the Options Bar, which displays detailed parameters that change depending on the currently active tool. The Toolbar on the left side of the screen contains editing icons, while the Panels such as Layer, Color, and History are neatly arranged on the right.
1.2. How to create a new image editing project
Setting up the source file is fundamental to the entire post-processing process. Users need to access the File menu and select the New command to open the system configuration dialog box. In this interface, parameters such as width, height, and resolution need to be set based on the intended use. For images displayed on digital platforms, the standard resolution is 72 pixels per inch, while printed publications require a resolution of 300 pixels per inch to avoid pixelation.
2. Basic data selection and merging tools
2.1. Mastering the Move Tool and the Crop Tool
Element movement is performed using the Move Tool with the classic shortcut key V. This tool allows for flexible movement of objects located on different layers. Additionally, the Crop Tool (shortcut key C) helps remove unwanted edges and readjust the overall composition according to the rule of thirds. Mastering these two tools allows users to quickly establish the basic framework for their image.
2.2. Techniques for creating selections with the Marquee Tool and Lasso Tool
Selections are a core concept that helps limit the editing space without affecting surrounding details. The Marquee Tool supports creating selections with basic geometric shapes such as squares, rectangles, or ellipses. For objects with complex and curved edges, the Lasso Tool, along with its improved Magnetic Lasso Tool, automatically adheres to the object's edges based on color contrast, optimizing background removal time.
2.3. The groundbreaking power of the Magic Wand Tool and Quick Selection Tool
The software's intelligent algorithm allows for extremely rapid isolation of areas with similar colors. The Quick Selection Tool works like a paintbrush; users simply sweep over the areas they want to keep, and the system automatically identifies the boundaries. Meanwhile, the Magic Wand Tool is suitable for photos with smooth, uniform backgrounds, separating the subject from the background with a single click.
3. Intelligent management of image layers and filters.
3.1. Concept and Importance of Layers
Layers are like stacked transparent panes of glass, allowing for independent editing of individual details without interfering with the original image. Users can create, duplicate, delete, or change the display order of these layers in the Layers panel. Clearly naming each data layer helps streamline teamwork or manage complex projects, preventing confusion.
3.2. Applying the unique Blend Mode blending modes
Blending modes determine how color pixels in the upper layer interact with color pixels in the layer immediately below. The Multiply or Darken command groups help to darken images, removing excessively bright areas to create depth. Conversely, the Screen or Lighten command groups brighten dark areas, often used to create vibrant lighting effects. Modes like Overlay or Soft Light enhance contrast and color saturation naturally.
3.3. Using Layer Masks to Hide and Show Details
Layer masks are a highly safe, non-destructive editing solution for images. Instead of using the Erase Tool, which permanently removes pixels, layer masks use two colors—black and white—to hide or show elements. The black in the mask conceals details of that layer, while the white reveals them completely, allowing users to easily correct mistakes at any time.
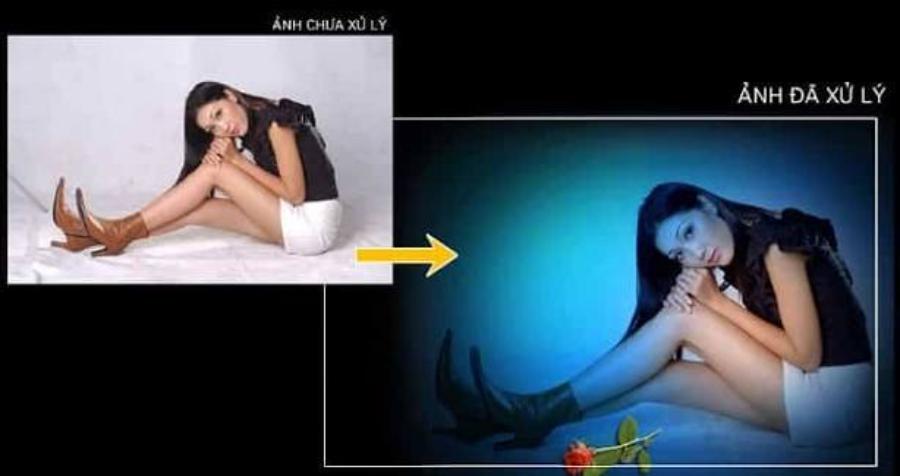
4. Instructions on using Photoshop CS6 for professional portrait photo editing.
4.1. Techniques for removing skin imperfections using the Healing Brush Tool
Addressing skin imperfections is the first step in the portrait retouching process. The Spot Healing Brush Tool automatically samples from surrounding clean skin areas to naturally fill in and remove blemishes, scars, or freckles. For larger imperfections, the Patch Tool allows users to select the flawed area and drag it to a smooth skin area to perform the replacement and blending process evenly.
4.2. Naturally smooth skin without losing texture with Blur filter.
Conventional skin smoothing methods using blurring often make the face look unnatural and obscure natural pores. Professional procedures require a combination of Gaussian Blur and High Pass filters to separate color and surface detail. This technique helps the skin become smooth and radiant while preserving its original texture, resulting in the most realistic appearance for the character.
4.3. Reshaping facial contours using the Liquify tool
The Liquify feature (keyboard shortcut Ctrl + Shift + X) is a powerful tool for adjusting body proportions and facial features. Users can use the Forward Warp Tool to slim the jawline, enhance the nose bridge, or contour the waist. This process requires skill and a large brush with moderate pressure to avoid distorting straight lines or the background behind the subject.
5. Methods for mastering lighting and color correction in photography.
5.1. Adjust contrast and highlights/dark areas using Curves and Levels
The Adjustment Layers system provides deep control over the image's dynamic range. The Levels tool allows you to examine the histogram to balance blacks, whites, and neutral areas. Meanwhile, Curves offers maximum flexibility by allowing users to bend the graph into an S-shape to increase contrast, highlight details, and create depth.
5.2. Managing color saturation through Hue/Saturation
Color has a powerful impact on the viewer's emotions when interacting with a graphic work. The Hue/Saturation tool allows users to completely change the color tone of a specific object (Hue), enhance its vibrancy (Saturation), or adjust the brightness or darkness of that color (Lightness). Mastering this color palette helps define a unique artistic style for each image, from classic warm tones to modern cool tones.
5.3. Artistic Color Touch Techniques with Color Balance and Photo Filters
Creating a unified atmosphere for the photograph is the goal of the in-depth color balancing process. Color Balance allows direct intervention in three light zones—Highlights, Midtones, and Shadows—to add contrasting tones. Combining the available Photo Filters helps simulate natural lighting effects such as warm sunset light or cool blue winter skies, enhancing the aesthetic appeal of the artwork.
6. Appvip.ai - A reputable platform for software downloads and graphic resource optimization.
To ensure a smooth and effective learning process, access to quality graphic design resources is crucial. The website appvip.ai is known as a system providing digital solutions, software installation guides, and a diverse collection of design resources. This site offers the design community stable software installations, along with a wide range of carefully vetted design templates, color presets, and artistic fonts. Utilizing the support tools and abundant learning resources from this platform significantly shortens the learning curve for beginners, allowing them to quickly and professionally improve their photo editing skills.
7. CONCLUSION
Applying Photoshop CS6 tutorials to image editing in practice requires perseverance and continuous practice from the user. Understanding everything from basic interface concepts and layer management to advanced skin retouching and color correction techniques is key to unlocking unlimited creativity. Support from modern technology platforms and a sound design mindset will enable anyone to master this powerful tool, creating a solid foundation for career development in the visual arts industry.





















VIP Products








Best Selling Products
Freepik Premium Account
59 USD
Windows 10 & 11 Pro Key
36 USD
Upgrade Duolingo Super
29 USD
MidJourney Account
29 USD
Genuine Adobe Illustrator account
99 USD
Capcut Pro 1 Year
39 USD
ChatGPT Plus Account (GPT-4)
16 USD
Adobe Photoshop Copyright - Full App
120 USD
Genuine Cheap Canva Pro
39 USD
Adobe Premiere Pro Account
99 USD
Plugin Retouch4me
69 USD
Upgrade genuine Capture One account
120 USD
Copyright Adobe Lightroom Account
59 USD
Upgrade Genuine Office 365
49 USD
Autodesk All App Account Copyright
120 USD